Call of Duty: Black Ops II

Call of Duty: Black Ops II

Not enough ratings
(Nigh) Comprehensive Challenges Guide - "Giant Accomplishment"
By M3L0
A(n almost) comprehensive guide to the Giant Accomplishment achievement, supplemented with video demonstration by TheGrimHimself.
   
Award
Favorite
Favorited
Unfavorite
Introduction
The least completed achievement of the Call of Duty Black Ops 2 single-player campaign, Giant Accomplishment requires the player to complete all 160 challenges. This guide will provide text-based instructions for accomplishing each of these, and will be supplemented by the excellent video demonstrations by TheGrimHimself.

Grim's video guide YouTube Playlist is a definitive entry. It is a masterpiece and I encourage you to give any notions of gratitude for this guide directly to Grim. This guide is dedicated to them, as I, like many others, relied on their direction to complete the exhaustive list of challenges.

There are 16 missions, each with 10 challenges. Unsurprisingly this achievement is a massive time sink. It will likely take you more than 20 or so hours. There are several missions which you must replay as you cannot obtain every challenge in a single run. Additionally, a great portion of challenges require an access kit. These will be marked accordingly.

You should almost always use an access kit, but for some challenges it may be beneficial to use a specialized loadout.

"Giant Accomplishment" is more-so a Fool's Errand, as a good portion of the Challenge pool is composed of the six Strike Force Missions, which most consider to be insufferable. In addition to this, several challenges only give you one opportunity per mission (or even campaign) playthrough, which means you may have to replay a mission ad nauseum just to play a segment that lasts only a minute. This game does not have the feature to revert to your last checkpoint. Therefore, if you do not wish to play any of the optional missions, you can utilize the save file offered in this Steam Guide:
https://sp.zhabite.com/sharedfiles/filedetails/?id=601209830
(NOTE: Backup your files from the Players folder, as your save and configurations will be overwritten)

One of the most entertaining aspects of the Challenges is the puzzle-solving aspect to it. This guide will detract from that aspect in entirety. If you wish to retain this part of the challenges, you can either utilize only the Overview potion, or you can visit TheLogman's Challenges Guide, which simply lists all the Challenges (and Intel locations) of a mission: A quick thank you to Logman for their guide, as it was used in the initial development of this guide. Additionally, this guide is meant to supplement Logman's entry, not replace it, as their guide is much more concise, and therefore, more useful as a quick reference to each challenge.

https://sp.zhabite.com/sharedfiles/filedetails/?id=2484728021
Finally, should you find this guide's instructions to each intel insufficient, please visit my comprehensive Intel guide for a more detailed overview. The guide also contains links to other intel guides.
https://sp.zhabite.com/sharedfiles/filedetails/?id=3407149213
Every main mission will have two loadout recommendations. Many of the loadout recommendations for the second playthrough rely on weapons/perks that can only be unlocked after a full campaign playthrough. The most important unlocks are Storm PSR (complete Cordis Die), Fast Mag (2 challenges, Judgement Day), Resupply (5 challenges, Cordis Die), and Death Machine/Minigun (5 challenges, Judgement Day) For each mission, the challenges will be ordered chronologically. Additionally, each individual challenge will be noted with an access kit requirement, playthrough number, and difficulty recommendation,
Overview - All 160 Challenges
Below is the list of all 160 challenges, as they appear in-game. Copy this list to a text document for easy tracking.

Pyrrhic Victory
1, Eliminate enemy personnel (x15) with machete
2. Destroy all MPLA tanks
3. Eliminate enemy personnel (x5) with one mortar explosion
4. Sink enemy vessels (x5)
5. Dive to prone on an enemy grenade and survive
6. Eliminate enemy personnel (x10) with animal traps
7. Kill (x4) enemies with one mortar primed animal trap
8. Use elevated improvised positions for confirmed sniper kills (x20)
9. Collect intel (x3)
10. 100% survivability rating

Celerium
11. Eliminate the enemy helicopter before it lifts off
12. Destroy the sentry turrets (x2) while disabled
13. Eliminate enemy personnel (x4) with one round from the Titus weapon
14. Eliminate enemy personnel (x10) with heli turret
15. Eliminate enemy personnel (x30) while using optical camo
16. Destroy ASDs (x2) by exploding nitrogen tanks
17. Eliminate enemy personnel (x10) with the Assault Shield
18. Protect ASD resource from destruction
19. Collect intel (x3)
20. 100% survivability rating

Old Wounds
21. Eliminate enemy personnel (x15) with pulwar sword
22. Destroy an enemy helo with a mortar
23. Destroy a tank with anti-tank mine
24. Run down enemy personnel (x10) on horseback
25. Destroy an enemy helo with truck mounted MG
26. Destroy enemy helos (x4) at North Pass
27. Utilize Stinger (without aircraft lock-on) to destroy enemy helo
28. Eliminate enemy personnel (x25) using alternate fire mode on Stinger
29. Collect intel (x3)
30. 100% survivability rating

Time and Fate
31. Eliminate PDF enemies (x7) with shotguns in under 10 seconds
32. Eliminate PDF enemies (x8) with truck mounted MG
33. Rendezvous with Josefina in under 140 seconds
34. Eliminate Cartel enemy personnel with Molotovs (x12)
35. Crash an enemy truck
36. Eliminate Cartel enemy personnel with mortars (x10)
37. Eliminate Cartel enemy personnel with machete (x10)
38. Locate evidence of CIA presence
39. Collect intel (x3)
40. 100% survivability rating

Fallen Angel
41. Avoid damage from large debris in streets
42. Direct CLAWs to eliminate enemy personnel (x8) in the flooded street
43. Record 400TB of data from Menendez surveillance
44. Incinerate enemy personnel (x10) with flamethrower attachment
45. Protect CLAWs (x2) from destruction
46. Deploy SOC-T boost to find alternate routes (x2)
47. Destroy enemy vehicles (x20) with drone missiles
48. Destroy enemy vehicles (x8) with the SOC-T
49. Collect intel (x3)
50. 100% survivability rating

Karma
51. Obtain retina scan in less than 60 seconds
52. Retrieve precious cargo (Ziggy)
53. Kill enemy personnel with headshots (x5) in Club Solar
54. Ensure zero non-combatant casualties
55. Eliminate rappelling enemies (x5)
56. Eliminate enemy personnel (x25) in the outdoor area
57. Incapacitate enemy personnel (x20) with the Combatant Suppression Knuckles
58. Protect ASD resource from destruction
59. Collect intel (x3)
60. 100% survivability rating

Suffer With Me
61. Perform a knife throw at enemy guard post
62. Survive an enemy RPG blast which causes enemy collateral damage
63. Destroy Noriega's private jet
64. Eliminate enemy personnel (x10) with truck mounted MG
65. Destroy enemy ZPU (x1)
66. Distract enemy personnel (x8) with Nightingale grenades at the same time
67. Eliminate enemy personnel (x15) with IR strobe
68. Eliminate enemy personnel (x8) in the clinic
69. Collect intel (x3)
70. 100% survivability rating

Achilles' Veil
71. Destroy enemy quad drones (x20)
72. Eliminate enemy personnel (x20) with sword
73. Melee enemy personnel (x20) while using optical camouflage
74. Destroy enemy quad drones (x8) with turret
75. Eliminate enemy personnel (x5) by exploding vehicles
76. Destroy enemy ASD (x4) while disabled
77. Eliminate enemy personnel (x5) as VTOL gunner
78. Direct quad drones to eliminate enemy personnel (x25)
79. Collect intel (x3)
80. 100% survivability rating

Odyssesus
81. Locate gift in Mason's state room
82. Incapacitate enemy personnel (x20) using Combatant Suppression Knuckles
83. Provide sniper overwatch for SEAL team advance across flight deck
84. Eliminate enemy personnel (x10) with security turret
85. Destroy security turret (x3) while disabled
86. Eliminate airborne enemies (x8) before they land
87. Direct CLAW to eliminate enemy personnel (x5)
88. Get to extraction in under 90 seconds
89. Collect intel (x3)
90. 100% survivability rating

Cordis Die
91. 100% impact ratio with SAM engagement on highway
92. Perform headshot (x10) sniper kills from the upper freeway
93. Direct quad drones to eliminate enemy personnel (x8)
94. Rescue trapped SSA in damaged vehicle
95. Destroy enemy drone (x30) using SAM on roof
96. Protect G20 cougar at the intersection
97. Destroy drones (x3) with one shot
98. Protect all G20 vehicles
99. Collect intel (x3)
100. 100% survivability rating

Judgement Day
101. Avoid ALL anti-air missiles
102. Destroy ALL laser turrets
103. Destroy enemy quad drones (x3) while disabled
104. Perform sniper kills (x10) from more than 40m distance
105. Melee camouflaged enemy personnel (x3)
106. Direct quad drones to eliminate enemy CLAW
107. Eliminate enemy personnel (x5) with one strike of the kinetic projectile weapon
108. Protect ASD resource to the objective location
109. Collect intel (x3)
110. 100% survivability rating

Shipwreck
111. Destroy CLAWS (x2) using only soldier
112. Use only 3 network intruders to complete the mission
113. Complete mission with more than 2:00 min remaining
114. Eliminate enemy personnel (x10) with headshots
115. Melee enemy personnel (x15)
116. Destroy enemy ASD (x3) as a CLAW
117. Eliminate enemy personnel (x15) with explosives
118. Eliminate enemy personnel (x15) while they are stunned
119. Run over enemy personnel (x20) with ASD
120. Complete the mission in "tactical view" only

I.E.D.
121. Eliminate enemy personnel (x3) while they are planting IED
122. Eliminate enemy personnel (x10) on horseback
123. Convoy never stopped by presence of an IED
124. Destroy tanks (x3) with kinetic projectile weapon
125. Destroy helo with kinetic projectile weapon
126. Eliminate enemy personnel (x20) as a quad drone
127. Run over enemy personnel (x10) as ASD
128. Use only ASDs to destroy tanks
129. Keep all vehicles in convoy safe
130. Complete the mission in "tactical view" only

FOB Spectre
131. Melee enemy personnel (x10)
132. Eliminate enemy personnel (x20) using sentry turret
133. Eliminate enemy personnel as CLAW (x10)
134. Complete the mission with enemy never lowering defense field
135. Eliminate enemy ASD (x3) using only sentry turrets
136. Eliminate enemy personnel (x20) with headshots
137. Destroy enemy quad drones (x12)
138. Prevent enemy from planting more than one hacking module
139. Allow no more than one sentry turret to be destroyed
140. Complete the mission in "tactical view" only

Second Chance
141. Eliminate enemy personnel (x10) as HVI
142. Eliminate enemy personnel (x10) as VTOL turret gunner
143. Melee enemy personnel (x10)
144. Eliminate enemy personnel (x15) with headshots
145. Destroy enemy quad drones (x4)
146. Eliminate enemy personnel (x15) with explosives
147. Eliminate enemy personnel (x5) by exploding vehicles
148. Extract the HVI in less than 60 seconds
149. Find the HVI in less than 90 seconds
150. Complete the mission in "tactical view" only

Dispatch
151. Melee enemy personnel (x10)
152. Destroy enemy ASD (x6) while disabled
153. Complete mission with more than 3:00 remaining
154. Eliminate enemy personnel (x20) with headshots
155. Eliminate enemy personnel (x15) with explosives
156. Destroy sentry turrets (x3) while disabled
157. Destroy multiple ASD (x2) with one explosion
158. Use only one hacking module to complete mission
159. Eliminate enemy personnel (x10) while they are stunned
160. Complete the mission in "tactical view" only
1. Pyrrhic Victory
Loadout Recommendations

Playthrough [1]
    
Primary
Secondary
Throwables
Perks
    
Any
Any Pistol / SMG
Any
ACCESS KIT
    
Any
Any
Any
Any
    
   
Playthrough [2]
    
Primary
Secondary
Throwables
Perks
    
XPR-50 (or SVU-AS)
Any SMG
Flash
ACCESS KIT
DualBand, VarZoom, ExMag
LongBarrel, MMS, ExMag
Any
Fast Mag + FMJ


Note: 2025 weapons can only be selected in past missions after completing Judgement Day

Commonly Found Weapons:
(ALL) AK47
(ALL) FN FAL
(MPLA/Tropas) AK74u
(MPLA/Tropas) RPD

Fandom Wiki Page[antifandom.com]


1. Eliminate enemy personnel (x15) with machete [1] (Hardened or less)
Savimbi will provide you with a machete at the start of the mission. All melee kills (except ballistic knives) count towards this achievement. You can obtain all of these before you eliminate the Mortar Crews.

2. Destroy all MPLA tanks [1] (Any)
Controlling the chopper, you must destroy all of the tanks. For the first pass, go from closest to farthest. The second pass, right to left. The third pass, left to right.

3. Eliminate enemy personnal (x5) with one mortar explosion [1] (Any) [ACCESS]
Access the mortars from the wrecked Buffel. Hold on to at least 2-3 mortars. When the MPLA retreats and you mount Savimbi's Buffel use it on the fleeing soldiers. If this fails, you can use the mortars later in the mission, but enemies are scarcely this cluttered. The mortars can be replenished from ammo crates

[NOTE] Obtain the Mortars from the Buffel for a later Challenge

4. Sink enemy vessels (x5) [1] (Any)
Upon clearing the river barge, Hudson will instruct you to use the mounted MGs. The port (left) MG will be on the upper deck. The starboard (right) MG will be on the lower deck. Both will be next to ladders. Boats will explode when sunk.

[NOTE] Obtain the flak jacket on the barge for a later Challenge

5. Eliminate enemy personnel (x10) with animal traps [2] (<= Hardened) [ACCESS]
Shortly after evading the Cuban patrols, but immediately before the radio tower, there will be a shack next to an ammo crate. Obtain the bear traps from this shack, then lay as many as you can before moving to the radio tower. Be careful not to stray too far from Hudson as this will revert your progress to the previous checkpoint. The traps can be replenished from the ammo crate

After the encounter with the radio operator, you can place down traps in your retreating bounds. Lower difficulties grant you more leeway.

6. Kill (x4) enemies with one mortar primed animal trap [1] (Any) [ACCESS]
Following the same directions as Challenge 5, you need to prime a mortar on each bear trap. This is done simply by using the interact key on a placed trap. Since placing and priming a mortar trap takes a very long time, preemptive placement is the safest option. The best location appears to be the choke-point next to and around the aforementioned shack. Apparently, any kills made with mortar-primed traps will count towards the previous challenge. The traps and mortars can be replenished from the ammo crate

7. Use elevated improvised positions for confirmed sniper kills (x20) [2] (<= Hardened)
You must use a sniper rifle for every kill. A Dragunov can be obtained from the shack mentioned in Challenge 5. Otherwise, for your starting loadout, you must select a sniper (which cannot be obtained until completing the second mission). According to Grim, only the platforms in the first two sections (before the waterfall) will count towards this achievement.

8. Dive to prone on an enemy grenade and survive [2] (Recruit) [ACCESS]
Obtain the Flak Jacket from the river barge. The easiest way to pull this off is after the Radio Tower encounter, by baiting enemies into throwing grenades at you. Using the Throwback perk might help by resetting the fuse after diving on it, but this has not been tested.

9. Collect Intel (x3) [2] (Any)
1. Found on the right side of the battlefield, resting in a crater adjacent to the overturned buffel.
2. Hidden behind a corner on the upper deck of the Congo River cargo barge, next to the port side mounted MG.
3. After the encounter with the radio operator, hug the left side (southeast) wall of the jungle. In the second retreating bound, climb the left-most poacher platform (aka crows nest, sniper platform, etc.) and you will find the intel.

10. 100% suvivability rating [2/3] (Recruit)
Survive. You can use the recommended loadout, or you can use your own. The Storm PSR, paired with a grenade launcher (standalone or underbarrel) is usually a fail-proof strategy. There are no particular noteworthy threats beyond the technical MG gunners and general infantry in your retreating bounds. Be mindful of your exposure.


Video guide by TheGrimHimself

2. Celerium
Loadout Recommendations

Playthrough [1]
    
Primary
Secondary
Throwables
Perks
    
Any AR
Titus-8
Any
ACCESS KIT
    
Any
Any
EMP
Any
    
   
Playthrough [2]
    
Primary
Secondary
Throwables
Perks
    
Any AR
Shield
Flashbang
ANY
    
GL, ExMag, TargetFinder
N/A
EMP
Fast Mag + Resupply


Note: The Assault Shield is unlocked by completing five challenges in Odysseus

Commonly Found Weapons:
(PMC) AN-94
(PMC) SMR
(PMC) Type 25
(PMC) Chicom CQB
(PMC) Skorpion EVO
(PMC) QBB LSW

Fandom Wiki Page[antifandom.com]


1. Eliiminate enemy helicopter before liftoff [1] (Any)
Shortly after engaging OpFor, you will ascend some stairs (or in an elevator), which will lead to a helipad. On this helipad an MQ helicopter drone (the closest one) will attempt to take off. Shoot it with a volley of the Titus-6 explosive fletchettes. A rocket launcher, such as an RPG, is also an option, but you would have to equip it in your starting loadout. Note that grenades, either thrown or launched, will not damage the helicopter.

2. Eliminate enemy personnel (x4) with one round from Titus weapon [1] (Any)
A challenge of sheer statistics, simply fire as many explosive fletchettes into cluttered groups of enemies. One area with exactly four (mostly defenseless) enemies is the ascending elevator in the underground facility. Another great opportunity arises in the firefights following the encounter with the magnetometrist. The Titus-6 is replenished by ammo crates.

3. Eliminate enemy personnel (x10) with helicopter turret [1] (Any) [ACCESS]
On the same helipad as the drone mentioned in Challenge 1, a drone under maintenance can be hacked by an access kit. Doing so will grant you control of its dorsal turret. Kill 10 enemies for an easy challenge.

4. Destroy sentry turret (x2) while disabled [1] (Any)
EMP grenades are required for this challenge. Immediately after the previous challenge, you will pass under an archway whilst approaching the temple entrance. The entrance will be guarded by three emplaced sentry turrets. Throw an EMP to disable it, then unload into the machine. There is also an additional ceiling turret in the underground base, found shortly after descending in the elevator.

5. Eliminate enemy personnel (x30) while using Optical Camo [1] (Any) [ACCESS]
Immediately after entering the underground facility, your squad will enter a room with an ammo crate and an accessible case. Opening the case will grant you the Optical Camo. Simply ensure that the camo is always active. The ASD ambush and obtaining the Celerium device will deactivate your camo. Turn it back on after regaining control.

6. Destroy enemy ASDs (x2) by exploding nitrogen tanks [1] (Any)
The first ASD is destroyed after descending the facility elevator, as per recommendation of Salazar. A second ASD will appear in the following left-turn hallway, which also contains a few nitrogen tanks. There are also two more ASDs (and some nitrogen tanks) in the first firefight after encountering the magnetometrist.

7. Protect ASD resource from destruction [1] (Any) [ACCESS]
Shortly after clearing the lower section of the facility, you will be able to access an ASD bay. Doing so will free an allied ASD unit, named J-5. Simply eliminate all threats to you and this machine.

8. Eliminate enemy personnel (x10) with the Assault Shield [2] (<= Hardened)
Immediately after finding the magnetometrist, a firefight will ensue. You will be advised to pick up a shield. Every PMC requires two bashes to pacify, meaning you will have to work fast before your allies kill them; it is generally easier to just replay the level and start with the shield instead.

9. Collect Intel (x3) [2] (Any)
1. Found directly behind the bird used in Challenge 3, on a table in a small room.
2. Immediately after the ASD ambush, move to the base of the stairwell, do a 180 turn, then move into the room to your right. The intel is on the desk with the window to the entrance.
3. After obtaining the Celerium device, neutralize the PMCs and move directly forward. The intel is on a table against the far wall.

10. 100% suvivability rating [2/3] (Recruit)
Survive. A grenade launcher and/or an optic that allows you to see through walls is recommended (MMS or Storm PSR). The biggest threat will be the automated turrets, so bring EMPs. Sentry turrets are easy to find and destroy, but the ceiling turrets (found after descending further into the facility and after meeting the magnetometrist) can kill you quickly. Resupply (aka Ammo Pickup) and Fast Mag pairs extremely well with any grenade launcher (underbarrel or standalone)


Video guide by TheGrimHimself

3. Old Wounds
Loadout Recommendations

Playthrough [1]
    
Primary
Secondary
Throwables
Perks
    
Any AR
Any Pistol/SMG
Any
ACCESS KIT
    
Any
Any
Flashbang
Any
    
   
Playthrough [2]
    
Primary
Secondary
Throwables
Perks
    
Storm PSR
FIM-92 Stinger
Any
ANY
    
N/A
N/A
Flashbang
Fast Hands + Fast Mag


Note: The Storm PSR is unlocked after completing Cordis Die.

Commonly Found Weapons:
(ALL) AK-47
(ALL) AK-47u
(ALL) RPD
(ALL) Makarov

Fandom Wiki Page[antifandom.com]


[NOTE] Obtain the pulwar sword from the corpse shortly after meeting Zhao. Do not mount your horse until after you acquire the sword.

1. Destroy enemy helicopter with a mortar [1] (Any) [ACCESS]
Obtain the mortars immediately after the war room debriefing with Hudson. Do not mount your horse until after you acquire the mortars. Whilst facing the camp entrance, the mortars should be in a room to the left, When you mount your horse, equip the mortar and get to the camp entrance. A helicopter can be seen right in front of you. Throw a mortar at this helicopter, which will attempt to flee to your left.

2. Eliminate enemy personnel (x15) with pulwar sword [2] (<= Hardened) [ACCESS]
After obtaining the sword at the start of the mission, carry it to the chokepoint west of the valley. Dismount and obtain a stinger from the weapons cache, at the far end of the area. Destroy the mobile BTR, then swap to a pistol or SMG. Infantry will constantly spawn from the west, while the geometry of the terrain will provide generous cover. Using flashbangs or any similar throwables will also help.

[NOTE] Obtain the anti-tank mines from the western ammo cache for a later challenge

3. Destroy tank with anti-tank mine [1] (Any) [ACCESS]
Shortly after detonating the cratering charge under the archway, mount your horse and proceed back to the main valley. Hudson will notify you of incoming hostile armor from the North. Destroy the BTR with a stinger, then dismount and lay a mine infront of the tank. A second wave of armor will follow the gunships, should you miss this challenge on the first wave. The tank does not need to run over the mine for this challenge to count; you can simply place the mine next to it then shoot it to detonate it (thus, destroying the tank). Note that the tank will maneuver around your horse, and occasionally, you.

4. Destroy enemy helicopter (x4) at North Pass [2] (Any)
Upon detonating the cratering charge and mounting your horse, proceed to the main valley and head North. You will see several helicopters attempting to land infantry. Destroy them, then deal with the enemy armor.

5. Destroy enemy helicopter with truck-mounted MG [1] (Any)
During the first wave of enemy armor, head back to the camp entrance. Destroy the BTR and the tank, then immediately man the technical MG, seen to the east (left) of the entrance. You only need to destroy one helicopter for this challenge to count. For the rest, just use a Stinger, as the MG only endangers yourself.

6. Run down enemy personnel (x10) on horseback [1] (<= Hardened)
Simply run through any enemy infantry whilst on horseback. You can find an abundance of such infantry in the North and East sections of the valley. Note that you can mount and dismount in between kills, and that on higher difficulties, groups of enemies can very easily kill you.

7. Utilize Stinger (without aircraft lock-on) to destroy enemy helicopter [1] (Any)
Equip the stinger and switch to the unguided mode using the appropriate keybind. The static helicopters transporting infantry are the easiest targets. There are several of these at the East ammo cache.

8. Eliminate enemy personnel (x25) using alternate fire mode on Stinger [1] (Any)
Equip the stinger and switch to the unguided mode using the appropriate keybind. Any infantry kills made with these missiles will count towards this challenge. The best locations to obtain kills are at the West and East ammo caches. Each will feature an ammo crate and endless infantry, as long as you do not complete the objective (destroy the second BTR or eliminate the infantry at the ammo cache). The West Ammo Cache has an ammo crate where you pick up the Stinger, whilst the East Ammo Cache has an ammo crate on the upper rock path along the western wall, close to the base entrance.

9. Collect Intel (x3) [2] (Any)
1. Immediately after the war room debriefing with Hudson, turn to your right. The intel sits upon some wooden boxes.
2. After detonating the cratering charge and returning to the main valley area, proceed forward until you see an outstanding spire with a red flag at the foot of it. The intel is next to the flag.
3. At the East ammo cache, there is a shallow cave along the east rock wall. The intel is at the right of this cave's entrance.

10. 100% survivability rating [2/3] (Recruit)
Survive. This mission features very little cover, so grenade launchers are rather ineffective. Bring a weapon suited for med-long range firefights and a missile launcher with Anti-Air capability. The BTRs are the biggest threat, as they can easily shred you apart with their MG. Kill them quickly and minimize your exposure. The Hinds are also are an immediate threat once they start targeting you, so stay vigilant and destroy them before they can do so.


Video guide by TheGrimHimself

4. Time and Fate
Loadout Recommendations

Playthrough [1]
    
Primary
Secondary
Throwables
Perks
    
Any AR
Any Sniper
Any
ACCESS KIT
    
Any
Any
Flashbang
Any
    
   
Playthrough [2]
    
Primary
Secondary
Throwables
Perks
    
Storm PSR
Any Automatic AR
Any
ANY
    
N/A
GL, ExMag, TargetFinder
Flashbang
Fast Mag + Resupply


Commonly Found Weapons:
(ALL) AK47
(ALL) FN FAL
(ALL) Uzi
(ALL) SPAS-12
(ALL) AK-74u
(PDF) Galil

Fandom Wiki Page[antifandom.com]


1. Eliminate PDF enemies (x7) with shotguns in under 10 seconds [1] (<= Hardened)
As Raul, you need to kill seven PDF with the SPAS-12 in 10 seconds. There are several segments where you will be forced to swap to your machete, which will hinder your efforts. The best place to complete this challenge is the estate courtyard, after the technical rams the gate.

2. Eliminate PDF enemies (x8) with truck-mounted MG [1] (<= Hardened)
As Raul, follow the allied cartel technical when it rams the gate, then mount the MG. Simply kill eight enemies for a trivial challenge.

3. Rendezvous with Josefina in under 140 seconds [2] (<= Hardened)
As Raul, you need to get to Josefina's room in the estate as fast as you can. The timer starts as soon as you are freed by Noriega and gain control. Sprint to the objective markers and kill anybody in your way. For the first segment, ride the left side. Ignore the hatchet and simply run past to kill the enemies. Upon opening the horse stable barn doors, ride the right wall. Follow the technical and ride the left wall once you enter the compound. As Raul, you will have more health, faster health regen, and a near instantaneous reload, but you will occasionally be forced to use the machete.

4. Eliminate cartel enemy personnel with Molotovs (x12) [1] (Any) [ACCESS]
As Alex, push into the outer perimeter of the compound. Hug the right section of the level and enter a large two-story shack. The cocktails are found at the far end of the building, on the upper floor. Igniting an enemy counts as a kill, as noted by the death scream that follows. Two excellent spots to get kills are from the courtyard bell tower and in the cocaine lab. Note that the molotovs have an abysmal splash radius and throw distance; you essentially have to land a hit on top of an enemy for them to ignite. Fortunately, molotovs are replenished by ammo crates.

5. Crash an enemy truck [1] (Any)
Shortly after obtaining the molotovs, you will encounter a long stretch of land, flanked by hay barrels. A technical will approach from the opposite side. Shoot the driver to crash the truck. Any sniper rifle or AR will suffice.

6. Eliminate cartel enemy personnel with mortars (x10) [1] (Any) [aCCESS]
After Woods spots Menendez entering the stable, proceed to the estate entrance and open a garage to your right. Inside you will find the mortars. You can very easily get kills at the entrance, from the courtyard bell tower, or inside the cocaine lab. Like the other missions featuring mortars, ammo crates replenishes your resupply.

7. Eliminate cartel enemy personnel with machete (x10) [1] (Any) [ACCESS]
Once you descend into the cocaine lab, you'll find a small armory room to the left. Accessing this room will grant you the machete. Like Pyrrhic Victory, simply melee the enemies to complete this challenge. After you obtain the machete, ride the right wall to enter a locker room. This path will grant you far more cover than rushing the central room. Flashbangs and any similar grenades are extremely useful.

8. Locate evidence of CIA presence [1] (Any)
After engaging the enemy and clearing the central room of the lab, the cartel will begin burning evidence. Quickly eliminate the remaining hostiles and, upon entering the room with the fires, hug the right wall. Take a left-to-right U-Turn at the end of the wall and swiftly grab the confidential folder on the table ahead, before it catches fire. You will have about a minute or so to grab the document before it catches fire. A few flashbangs or grenades work wonders in quickly clearing this room.

9. Collect Intel (x3) [2] (Any)
1. As Raul, open the stable barn doors and head to the opposite end. The intel will be at the back of a wagon holding some hay.
2. As Alex, spot Menendez collecting the first intel, then proceed to the estate courtyard. Enter the bell tower to the right, and on the third floor, collect the intel sitting on some crates.
3, After clearing the main room in the cocaine lab, head up the set of stairs leading to the room with furnaces. Enter the auxiliarry room to the left, where the intel sits upon a bench.

10. 100% survivability rating [2/3] (Recruit)
Survive. This mission features a very diverse set of environments, from extreme close-quarters to long-range sniper duels. Additionally, you will have to survive as Raul, where your starting loadout is irrelevant. As Raul, take your time and be thorough. As Alex, watch for snipers and MGs. Let your allies take point, wherever possible. Be especially careful in the cocaine lab, as enemies can very easily gun you down. A Storm PSR and an AR with a grenade launcher will likely be the safest loadout you can take.


Video guide by TheGrimHimself

5. Fallen Angel
Loadout Recommendations

Playthrough [1]
    
Primary
Secondary
Throwables
Perks
    
Any AR
Any Pistol/SMG
Any
ACCESS KIT
    
Any
Any
Flashbang
Any
    
   
Playthrough [2]
    
Primary
Secondary
Throwables
Perks
    
Storm PSR
Death Machine
Any
ACCESS KIT
    
N/A
N/A
Flashbang
Fast Mag + Fast Hands


Commonly Found Weapons:
(ISI) FAL OSW
(ISI) MTAR
(ISI) QBB LSW
(ISI) MSMC

Fandom Wiki Page[antifandom.com]


[NOTE] At the start of the mission, hack the flamethrower on Brutus for a later challenge. Make sure to open the garage door once you leave the supermarket.

1. Avoid damage from large debris in streets [1] (Any)
Avoid any cars moving downstream and any falling debris. After exiting the supermarket, open the garage to the left with an access kit. Keep left, and wait for Harper to move forward. Clear the street as best you can, and move when you do not see any more enemies. Keep left and do not cross until Harper does. The challenge will be complete upon escaping the bus.

2. Direct CLAWs to eliminate enemy personnel (x8) in the flooded street [1] (Any) [ACCESS]
After exiting the supermarket, open the garage to the left with an access kit. The CLAWs will relocate to a higher position and will provide you targeting ability once in position. Rely on the CLAWs to kill the enemies, until you see the challenge is complete.

3. Record 400 TB of data from Menendez surveillance [1] (Any)
A rather effortless challenge, aim for about 100 TB for each of the four segments. Keep your crosshair on Menendez, whom of which will be dressed in the white suit.

4. Incinerate enemy personnel (x10) with Flamethrower Attachment [1] (Any) [ACCESS]
Hack the flamethrower on Brutus at the start of the level. When you are waiting for Salazar for extraction, take control of Brutus. Rely on the flamethrower for infantry, but use the guns/grenades for the gun trucks.

5. Protect CLAWs (x2) from destruction [1] (Any) [ACCESS]
Being relatively straightforward, take control of Brutus and Maximus when ordered by Harper. Eliminate any RPG infantry or gun trucks that appear, especially those on the roofs (when playing as Maximus). You need to open the garage at the start of the level for the CLAWs to survive.

6. Destroy enemy vehicles (x8) with the SOC-T [1] (<= Regular) [ACCESS]
When prompted to continue driving or assume control of the drone, pick the option to continue driving. Whenever you see a gun truck, either stationary or moving, use the boost to ram it. Vehicles will explode when destroyed. Eavesdropping on the ISI conversation on the SOC-Ts should give you better maneuverability and/or faster boost recharge times, but this assumption requires verification.

7. Deploy SOC-T boost to find alternate routes (x2) [1] (<= Regular)
When prompted to continue driving or assume control of the drone, pick the option to continue driving. There are two specific routes you must follow for this challenge. The first is the upper highway and the second is the industrial building right before losing the drone. Stay on the left and boost when driving over the ramp made of signs. Then, stay right until you reach a hill leading to a large window; boost right before hitting the hill. These routes are best illustrated by Grim's video, at 4:45.

8. Destroy enemy vehicles (x20) with drone missiles [2] (Any)
When prompted to continue driving or assume control of the drone, pick the option to control the drone. Simply use the missiles on the drone to destroy vehicles. The drone will automatically lock on to vehicles for you.

9. Collect Intel (x3) [2] (Any)
1. Immediately after freeing the GCM module on Maximus, turn to your right. The intel sits on a shelf, just below eye level.
2. After evading the bus, take a right into the dim alley. At the foot of the archway lies the intel.
3. Avoid being killed by the HK MQ drones, then duck into the building ruins. A section of the roof will collapse, illuminated by a drone's spotlight. You will find the intel resting next to this rubble.

10. 100% survivability rating [2/3] (Recruit)
Survive. Open the garage for the CLAWs. Take the first combat section slowly; yet again, the Storm PSR is an excellent choice. Follow Harper in the stealth sections, as the drones are the biggest threat. When given the choice between the SOC-T and the Drone, always pick the drone.

If you would like to skip the first stealth segment of this mission, you can exploit a glitch or use a Death Machine.

Self-Destruct Glitch video demonstration by VictorAlpha77

Death Machine vs Drone video demonstration by Whose (skip to 2:05)


Video guide by TheGrimHimself

6. Karma
Loadout Recommendations

Playthrough [1]
    
Primary
Secondary
Throwables
Perks
    
Any AR/SMG
Any Pistol/SMG
Flashbang
ACCESS KIT
    
Any
Any
EMP
Any
    
   
Playthrough [2]
    
Primary
Secondary
Throwables
Perks
    
FAL OSW
Any Hi-Cap SMG
Flashbang
ANY
    
GL, ExMag, TargetFinder
LongBarrel, Ex/FastMag, MMS
EMP
Fast Mag + Resupply


Commonly Found Weapons:
(PMC) Chicom CQB
(PMC) MSMC
(PMC) FAL OSW
(PMC) MTAR
(PMC) QBB LSW

Fandom Wiki Page[antifandom.com]


1. Obtain retina scan in less than 60 seconds [2+] (Any)
Easily one of the most tedious challenges of the campaign, you need to rush through the course air ducts as Ziggy. Jump whenever you are right-side up, as this will save you several precious seconds. Note that you can jump when upside down to reset your orientation, but this will slow you down, especially if you need to crawl through a hole. Do not jump whenever you are climbing up a surface, as you will fall. In the bottom left-corner of your HUD will be a mission timer. If you notice that the timer reaches 0:50 seconds while you are still in the section with the red and blue pipes. jump down into the abyss. Sometimes this will reset your timer, which saves you the need to go through the five minute intro again.

2. Retrieve precious cargo (Ziggy) [1] (Any)
After you obtain the retina scan and clear the CRC server room, move to the uplink computer. Ziggy lies on the floor, right next to Salazar. Pick it up for a free challenge.

[NOTE] In the CRC server room there will be a small office to the left. You can place a hacking module for Farid, which will highlight all enemies in red. This is not required for any challenges, but it does make some of the challenges slightly easier.

3. Kill enemy personnel with headshots (x5) in Club Solar [2] (<= Hardened)
Rendevous with Harper at Club Solar and wait for the cutscene to play. Headshots will be an instant kill, so you only need to one-tap enemies. You can also tap their torso then follow up with a headshot, to buy yourself time. Obtaining this on Veteran is difficult, as OpFor will kill you before you can line up a headshot.

4. Incapacitate enemy personnel (x20) using Combatant Suppression Knuckles [2] (<= Hardened) [ACCESS]
After the encounter in Club Solar, enter the security armory and open the locked cabinet to obtain the Electric Brass Knuckles Combatant Suppression Knuckles. As always, flashbangs and similar throwables are quite useful. Swap to an SMG or Pistol for more agility. (On an unrelated note, you can pacify DeFalco with the EBKs. He still dies, so I guess his heart just stops or something.)

5. Protect ASD resource from destruction [1] (Any) [ACCESS]
Once you clear the mall, you will come across a closed big door that Salazar attempts to open. Next to this door there is an ammo crate and a security station, which houses a friendly ASD. Free this ASD, then open the big door. The ASD is quite slow, so if you rush through the mission by riding the right, this challenge should be trivial. You can clear the first outdoor section of PMCs, just to be safe.

6. Eliminate rappelling enemies (x5) [1] (Any)
There are two areas where you can kill rappelling enemies. The first is at the far end of the mall, and the second is the outdoor section. Killing PMCs that are still in a helicopter will count towards this challenge. There are several helicopters, but most of them land troops from afar, making a long-range AR or LMG suitable.

7. Eliminate enemy personnel (x25) in the outdoor area [2] (Any)
This challenge is not very difficult, but it always necessitates DeFalco escaping. Worry not, as completing the Strike Force mission Second Chance will make his escape inconsequential (in fact, you are likely better off allowing DeFalco escape, if you intend to 100% the game), There are plenty of enemies, just take your time and ride the left section. If you try to catch up with DeFalco whilst doing this challenge, your allies will kill any PMCs you pass.

8. Ensure zero non-combatant casualties [1] (Any)
A somewhat misleading challenge, the requirements here are that you do not personally injure/kill any civilians. Civilians only enter play after Club Solar. Use a weapon with a low-fire rate and avoid using any explosives. Send rounds only after confirming the target is hostile. Bring flashbangs and EMPs instead of lethal throwables.

9. Collect Intel (x3) [2] (Any)
1. Clear the CRC server room, but before you access the uplink chamber, turn to your left and collect the intel on the table. You can also collect it after finding Karma.
2. While you are in the mall, look for a store named D'Ho, located on the lower level. The intel rests on the rear sales counter.
3. In your chase for DeFalco, ride the right wall. Just before the stairs there will be a kiosk, which holds the intel on the opposite side of your approach.

10. 100% survivability rating [1] (Recruit)
Survive. You will need a weapon for CQC and a weapon that negates cover. A high-capacity SMG and a high-powered AR with an underbarrel GL are ideal. Optics that negate cover and/or streamline IFF processing (i.e. Thermal or Target Finder) are prime. Breaching the CRC room, immediately cross over to the right wall and stack behind Salazar. You can shove him out of cover by wedging yourself into the corner, which will expose him to enemy fire for you. Take your time fighting your way to Club Solar. Aim for just below the neck and two-tap the PMCs in Club Solar. Ride the right wall when chasing DeFalco, but take your time. EMPs will weaken the ASDs, your greatest threat. Be careful not to shoot any civilians, as any mission failure will result in you losing this challenge. Do not use any explosives whilst chasing DeFalco.


Video guide by TheGrimHimself

7. Suffer With Me
Loadout Recommendations

Playthrough [1]
    
Primary
Secondary
Throwables
Perks
    
Any AR/SMG
Any Pistol/SMG
Any
ACCESS KIT
    
Any
Any
Flashbang
Any
    
   
Playthrough [2]
    
Primary
Secondary
Throwables
Perks
    
M60 or Minigun
Any SMG
Flashbang
ACCESS KIT
    
ExMag, Foregrip, Rapidfire
Ex/Fast Mag, Foregrip, LongBarrel
Concussion
FastHands + FMJ


Commonly Found Weapons:
(PDF) AK47
(PDF) FN FAL
(PDF) Uzi
(PDF) SPAS-12
(US Forces) M16A1

Fandom Wiki Page[antifandom.com]


1. Perform a knife throw at enemy guard post. [1] (Any)
After landing on the beach, climb the ladder and wait for Mason to take out the far guard. Another guard will exit the guard post. Follow the appropriate button/key prompt for a free challenge.

[NOTE] Upon descending into the hangar from the skylight, open the door control room to obtain the Flak Jacket. This will make Challenge 5 much easier.

2. Distract enemy personnel (x8) with Nightingale grenades at the same time [1] (Any) [ACCESS]
Upon approaching the exterior stairs of the hangar, there will be a locked crate containing Nightingale grenades. Hold onto a couple of these until you clear the hangar. Once you exit onto the airstrip with Noriega's jet, throw these reserve grenades just beyond the plane and technical. If this fails, you can wait until you enter the slums. The area with the destroyed globe is an opportune spot.

3. Eliminate enemy personnel (x10) with truck-mounted MG [1] (<= Hardened)
On the airstrip with Noriega's jet there will be a technical parked to the left. Swiftly eliminate the gunner and man the MG to get ten kills. Using Nightangales will help you survive. If you are unable to secure ten kills at the airstrip, there is another MG technical in the slums, on the left side (close to where you can find the IR strobe).

4. Destroy Noriega’s private jet [2] (Any)
The plane will only be destroyed when hit by a rocket/missile launcher or certain special weapons (Titus/Crossbow(?)/Minigun). If you do not select one of these for your starting loadout you can acquire an RPG from a PDF in the upper floor of the hangar. The jet will not be damaged by grenades.

5. Survive an enemy RPG blast which causes enemy collateral damage [2/3] (Recruit) [ACCESS]
Ensure you have the Flak Jacket. Do not attempt to complete Challenges 2 and 3 whilst on the airstrip. Instead, destroy Noreiga's jet and kill the technical gunner. Swap to a more mobile weapon (pistol/smg) and get slightly beyond melee range of an enemy. Place the target in between you and the balcony of the adjacent building, where an RPG soldier stands. If needed, use a flashbang or other stun device to prevent other PDF from killing you.

6. Eliminate enemy personnel (x15) with IR strobe [1] (Any) [ACCESS]
Obtain the IR strobe throwable by riding the right side of the slums. Completing this challenges necessitates that you rely primarily on the IR strobe for kills. The plaza with the destroyed monument-like globe building is a target-rich location. There can only be one active fire mission at a time. Note that while the IR strobe can be replenished at a nearby ammo crate, you must have at least one strobe in your inventory. Fully depleting the strobes will remove the item from your inventory.

7. Destroy enemy ZPU (x1) [1] (Any)
The ZPU is found halfway through the slums, on the rooftop just beyond the plaza of the destroyed monument-like building. It is an anti-aircraft artillery piece that will shoot large tracer rounds; it is vulnerable to bullets, grenades, rockets, missiles, and most special weapons. It is also vulnerable to the IR strobe.

8. Eliminate enemy personnel (x8) in the clinic [2] (<= Hardened)
This challenge requires an LMG or a minigun. Equip it in your primary (first) spot. Fast Hands and FMJ are excellent perks, whilst Extended Mag is a great choice as an LMG attachment. Minigun is the most foolproof. Remember, swapping to your sidearm is always faster than reloading.

9. Collect Intel (x3) [2] (Any)
1. On the hangars inside stairwell there will be a collection of shelves against the windows. The intel lies upon one of these shelves, next to the railing.
2. Find the church at the far end of the slums. Next to the front entrance there will be a corner building with a hole in the wall. Inside, next to the ammo crate, will be the intel.
3. Once you enter the clinic, proceed straight forward until you hit the counter against the opposite wall. The intel is next to the sink.

100% survivability rating [2/3] (Recruit)
Survive. This mission is not especially challenging, as long as you take the optimal route through the slums and, as always, take your time. You will want to hug the left, then follow the street down to the right. Clear out all the threats from afar, then ride the right all the way to the clinic. Evading the gun strike is the final hurdle, but it can be finicky. Equip anything lighter than a heavy weapon (i.e. assault rifle or lighter), follow Mason and Noriega a few paces behind (at walking speed), then sprint and jump near the end. Grim demonstrates this at the end of their video guide.


Video guide by TheGrimHimself

8. Achilles' Veil
Loadout Recommendations

Playthrough [1]
    
Primary
Secondary
Throwables
Perks
    
AN-94/Skorpion
Titus-6
Flashbang
ACCESS KIT
    
Any
Any
EMP
Any
    
   
Playthrough [2]
    
Primary
Secondary
Throwables
Perks
    
AN-94
Skorpion
Flashbang
ACCESS KIT
    
GL, ExMag, TargetFinder
LongBarrel, ExMag, MMS
EMP
Fast Hands + Resupply


Commonly Found Weapons:
(Yemeni Militia) Skorpion EVO
(YM) AN-94
(Yemeni Army/US) M8A1
(YA) HAMR
(YA) MP7

Fandom Wiki Page[antifandom.com]


1. Destroy enemy quad drones (x20) [1] (Any)
You have to scour the skies to get all 20 kills. Be aggressive; do not pass any opportunities to get a kill. A shotgun or SMG with a high firerate are especially useful. If you have trouble putting rounds into a quad, hit them with an EMP. The Titus is a solid choice.

2. Melee enemy personnel (x20) while using Optical camo [2] (<= Hardened) [ACCESS]
At the start of the mission, drop into the courtyard and follow the right arcade (wall), placing the central minarel to your left. Enter the circular room and just beyond it, in the adjacent room, will be the camo kit. According to the wiki, the camo will not affect enemy awareness. Using a pistol/smgs and stunning throwables (except EMP) helps tremendously.

3. Eliminate enemy personnel (x20) with sword [2] (<= Hardened) [ACCESS]
At the start of the mission, ride the left as you exit the courtyard. The sword will be in a locker at the back of a building. Obtain the optical camo first to get two birds with one stone; note that the camo is purely aesthetic. Use a pistol/smg (for faster movement) and stunning throwables to soften enemy troops.

4. Eliminate enemy personnel (x5) by exploding vehicles [2] (<= Hardened)
There are three specific portions where you can get these quirky kills: in the market on foot (left path), on the street controlling the sentry, and as the VTOL gunner. Aim for at least two kills before you choose to betray Menendez. For the sentry section, eliminate the ASDs first. Apparently, any kills made against friendly units (as Farid) will count.

5. Destroy enemy ASD (x4) while disabled [2] (Any)
There are only five ASDs total in this mission, so room for error is minimal. Barring the first ASD landed by VTOL, they will all be located in the open street, just before finding Menendez. Bring a weapon that can quickly kill an ASD (SMR/FAL/minigun). Note that whilst the Titus-6 can consistently kill an ASD, it takes a considerable amount of time for a fletechette/shotgun burst to do so. Work fast, as your allies will destroy the ASDs with relative ease.

6. Destroy enemy quad drones (x8) with turret [1] (Any) [ACCESS]
As Farid, pass the wounded enemy soldiers sitting next to a supply crate. Upon entering the next section, ride the right. You'll eventually find a pathway blocked off by a locked gate, open this gate and follow it all the way down, You should eventually find a balcony with a sentry gun. Take control of it and quickly dispatch any quads. Be careful not to neglect the ASDs, as they can easily destroy the turret.

[NOTE] If you wish to obey Menendez in order to get a specific ending, you should Rewind the story to this mission instead of just replaying it. There are several challenged that are practically impossible to complete without betraying Menendez.

7. Eliminate enemy personnel (x5) as VTOL gunner [2] (Any)
When prompted, betray Menendez. Make sure to have fun raining death upon your adversaries.

8. Direct quad drones to eliminate enemy personnel (x25) [1] (Any)
When you receive OpCon of the drones, rely on them for kills. Take your time and try not to personally kill any enemies until this challenge pops.

9. Collect Intel (x3) [2] (Any)
1. In the first room mentioned in Challenge 2, sitting on the floor.
2. After engaging the enemy, take cover in the left-most building to avoid the killzone. The intel is hiding behind the crates at the far-corner.
3. Exiting the town, ride the right side. Eventually, you will encounter a tall building along the path of cliff's edge. Climb to the roof using the side ladder and find the intel next to the satellite dish.

100% survivability rating [2/3] (Recruit)
Survive. At least until you rendezvous with Menendez as Farid. It does not matter whether you choose to prove your loyalty to Menendez. Once you take control of Section, you must survive until finding Menendez. Do not rely on the Camo to conceal you. Should you no longer have any challenges requiring the access kit, swap it for a more valuable perk. Follow your allies as they advance and pay special attention to enemy tech. Enemy quads can negate any cover you take whilst ASDs can absorb fire as it tries to kill you.


Video guide by TheGrimHimself

9. Odysseus
Loadout Recommendations:

Playthrough [1]
    
Primary
Secondary
Throwables
Perks
    
M8A1/M27
Titus-6
Flashbang
ACCESS KIT
    
MMS/TargetFinder, Any
N/A
EMP
Any
    
   
Playthrough [2]
    
Primary
Secondary
Throwables
Perks
    
M8A1/M27
Titus-6
Flashbang
ACCESS KIT
    
GL, ExMag, MMS/TargetFinder
N/A
EMP
Fast Mag + Resupply


Commonly Found Weapons:
(PMC) M27
(PMC) Vector
(US Navy) M8A1
(US Navy) MP7

Fandom Wiki Page[antifandom.com]


1. Incapacitate enemy personnel (x20) using Combatant Suppression Knuckles. [2] (<= Hardened) [ACCESS]
At the very start of the mission, exit the interrogation room and open the equipment crate on the table. Using a lightweight weapon (pistol/smg) and stunning throwables (flashbang/EMP) will help you get melee kills in this extreme CQC mission.

2. Destroy security turret (x3) while disabled. [1] (Any)
Being one of the first kills of the mission, toss an EMP to disable the ceiling turret. Magdump, noobtube, or fletchette salvo a machine for a quick kill. You will encounter five more turrets in this mission, two of which can be hacked to fight for you. Of the non-hackable turrets, there is one found whilst entering the bridge, and the two remaining turrets are below deck, and should be hit by an EMP. Note that having Harper present will make this challenge slightly more difficult, as he will hack the first turret you encounter on the lower deck.

3. Locate gift in Mason's state room.[1] (Any)
Exit the armory/interrogation room, disable and destroy the ceiling turret, then take an immediate right into the auxilliary hallway. The first door can be opened by interacting with it. The curio will be on the table against the far wall.

4. Eliminate airborne enemies (x8) before they land. [1] (Any)
Immediately after splitting up with Salazar and going outside, you will see, in trios, PMCs parachuting onto the carrier deck. Don't worry, these enemies spawn infinitely and will not retaliate. In other words, this area is a shooting gallery.

5. Eliminate enemy personnel (x10) with security turret. [1] (Any) [ACCESS]
Fight your way to the bridge, destroy the first turret, take a right, then manipulate the relay terminal. Neutralize as many hostiles as you can. There will be a second turret relay terminal below deck, shortly before getting to the security room.

6. Provide sniper overwatch for SEAL team advance across flight deck. [1] (Any)
After attempting to restore control at the bridge, descend towards the lower decks. Whilst you are still outside, search for an XPR-50 resting against the balcony. Pick it up and shoot the PMCs on the deck of the ship. Support the SEALs until they advance across the deck (when the enemies stop spawning).

7. Direct CLAW to eliminate enemy personnel (x5). [1] (Any) [ACCESS]
Fast forwarding to reaching the flight deck, take a left towards a small tower. Clear the debris with the Jaws of Life to gain tactical command of a CLAW. Take your time and direct the CLAW to engage any PMCs close to it,.There will be plenty of targets. Note that because the CLAW is quite slow, you will be unable to complete both this and the following challenge within the same playthrough.

8. Get to extraction in under 90 seconds. [2] (<= Hardened)
Do not attempt this challenge on Veteran. The fields of fire are long and wide, whilst cover is relatively sparse and low. Use flashbangs and any other stunning throwables to grant you valuable time. Do not attempt to kill every enemy; only engage immediate threats. You are given ample time, as long as you do not waste any on the trapped CLAW.

9. Collect intel (x3). [2] (Any)
1. Seen on the starboard (right) side of the bridge. You will face it upon attempting to access the central bridge terminal.
2. Located on a small upper observation area, shortly after the server room incident. The staircase will be on the right, just below the descent to rendezvous with Salazar.
3. On the floor of the far-most intact VTOL of the flight deck.

10. 100% survivability rating.[2/3] (Recruit)
Survive. This level features extreme CQC, automated turrets, and a long open stretch at the end. Despite being a short level, there are a plethora of opportunities to instantly die, even on Recruit. Check every corner carefully. treat every hallway or large room as if it has a ceiling turret. Do not carelessly attack a corner if enemies force you to retreat into cover; instead, let them approach the angle you hold or soften up their position with a flashbang or other throwable. Take your time on the final stretch on the flight deck, picking off enemies from afar. Let the CLAW advance, allowing it to take fire for you.


Video guide by TheGrimHimself

10. Cordis Die
Loadout Recommendations:

Playthrough [1]
    
Primary
Secondary
Throwables
Perks
    
Type-25
Storm PSR
XM25
ACCESS KIT
    
Reflex Sight
N/A
EMP
Any
    
   
Playthrough [2]
    
Primary
Secondary
Throwables
Perks
    
SWAT-556/M27
Storm PSR
Flashbang
ACCESS KIT
    
GL, ExMag, TargetFinder
N/A
EMP
Fast Mag + Fast Hands


Commonly Found Weapons:
(PMC) SWAT-556
(PMC) M27
(PMC) Vector
(PMC) Chicom CQB
(Secret Service/LAPD) M8A1

Fandom Wiki Page[antifandom.com]


1. 100% impact ratio with SAM engagement on highway [2] (Any)
At the start of the mission you will have to mount a SAM turret to destroy the drones targeting POTUS, Allow the first group to pass, then line up the crosshair until all the drones are targeted. Fire when the targeting system stops beeping. You should see and hear six lockons before you shoot. Repeat until you have finished the segment. If you are not confident that all six missiles will hit, allow the group to pass. Whenever you lose track of the current group or are looking for a new group, look at the bottom bar, which will show radar contacts (drones) as yellow diamonds and your field of view as the center box. You can also use this to target drones, making sure to fire only when every yellow diamond becomes red. If you miss a shot, aim directly down and keep firing until you revert to the previous checkpoint.

2. Perform headshot (x10) sniper kills from the upper freeway [1] (Any)
Upon meeting Anderson, choose to provide sniper support for the Secret Service Agents. Using the Storm PSR, or any other sniper rifle, perform as many headshots as you can. Take your time to line up the shots. The sequence ends once you take out the technical gunner and the snipers on the overpass.

3. Direct quad drones to eliminate enemy personnel (x8) [1] (Any) [ACCESS]
Upon exiting the MRAP, go directly forward and enter the overturned truck to the left of the CLAW you (or Harper) destroyed. Free the Dragonfire and order it to engage the enemy. Note that this particular quadrotor is equipped with rockets instead of a machine gun, allowing you to partially negate enemy cover. Once you enter the plaza, the rocket quad will be replaced by a trio of gun quads.

4. Rescue trapped SSA in damaged vehicle [1] (Any) [ACCESS]
After clearing the street you will approach the entrance to a shopping plaza. At the far end of this entrance, in a wrecked MRAP, will be a squad of trapped Secret Service Agents threatened with the growing flames. Free them with the Jaws of Life to get a few extra rifles.

5. Destroy enemy drone (x30) using SAM on roof [1] (Any) [ACCESS]
When entering the shopping plaza, head inside by hugging the left side. Ascend the escalators and open the glass door leading to a staircase. Ascend to the roof to access the SAM, which will have the same control scheme as the start of the mission. Whenever you destroy a squadron, look to the at the central-bottom element of the HUD, which will show you incoming radar contacts. Fire with reckless abandon. (As an unrelated side note, this particular SAM can be used to acquire an absurdly high score)

6. Protect G20 cougar at the intersection [1] (Any)
A rather trivial challenge, when you find the French G20 vehicle, eliminate the two PMCs with RPGs on the opposite end of the street. They will be on the balcony partially obstructed by the blue smoke. The Storm PSR is the easiest way to spot and neutralize these two foes.

7. Protect all G20 vehicles [1] (Any)
As you take flight in the FA38, keep a close eye on the three G20 vehicles you need to escort. Destroy any enemy vehicles immediately so that none of them are destroyed before you begin chasing drones. You may have to exit to the menu to revert to your previous checkpoint, and the ambulance might need to take damage for the G20 vehicles to survive.

8. Destroy drones (x3) with one shot [2] (<= Hardened)
Completing this challenge requires Anderson survive. You can achieve this by (obsessively) protecting the ambulance; alternatively, if Harper is present, Anderson will always survive. If done correctly, you will have access to the Skyburster missiles, which allow lock-on to multiple drones. Note that this challenge is notoriously bugged: it has been reported that if you deviate in your starting loadout, difficulty, or allow the ambulance to take any damage (without Harper), then you will not be able to use the Skyburster missile. You may not be able to legitimately complete this challenge, forcing you to use the provided save file in order to finish this achievement.

9. Collect intel (x3) [2] (Any)
1. Rappel from the freeway, then enter the lanes of opposing traffic. Find the burning chasis of an SUV, with the body of a late motorcop in the driver seat. The intel is on the floor, next to the driver-side rear seat.
2. Clearing the street after the ambush, enter Hotel Kaylor to your left. Sitting upon the check-in desk is the intel.
3. Enter the shopping plaza interior to the left, then ascend the escalators and hug the right. You should see a t-shirt souvenir kiosk containing the intel.

10. 100% survivability rating [2/3] (Recruit)
Survive. Take the Storm PSR and a solid automatic. Choose to provide sniper support instead of repelling down. Take caution exposing yourself to the enemy CLAWs autocannon and grenade launcher, and be mindful of the elevated snipers. Free the Dragonfire(s) and Secret Service Agents, if you can. Stick to the left when entering the plaza. Finally, avoid hitting any terrain whilst in the FA38.


Video guide by TheGrimHimself

11. Judgement Day
Loadout Recommendations:

Playthrough [1]
    
Primary
Secondary
Throwables
Perks
    
Any AR
Storm PSR
ANY
ACCESS KIT
    
GL, ExMag, TargetFinder
N/A
EMP
Any
    
   
Playthrough [2]
    
Primary
Secondary
Throwables
Perks
    
Any AR
Storm PSR
Flashbang
ANY
    
GL, ExMag, TargetFinder
N/A
EMP
Fast Mag, Resupply


Commonly Found Weapons:
(PMC) AN-94
(PMC) Type 25
(PMC) QBB LSW
(PMC) Skorpion EVO
(PMC) PDW-57
(PMC) S12
(PMC) M1216
(JSOC) M8A1

Fandom Wiki Page[antifandom.com]


1. Avoid ALL anti-air missiles [2] (Any)
Whilst descending, you need to evade the ten incoming missiles. They will spiral rhythmically, allowing you to foresee their paths easily. The fireball of each missile will be slightly larger than the circumference of the projected spiral, so take caution. Note that the area of maneuverability is frustratingly small; you can very easily find yourself trapped in a corner. To counter this, try sticking to the center, whenever possible. Another approach is to stick to the bottom-right corner whenever possible. Grim uses the approach of dodging left, right, right, right, left, left, right, right, right, right. (The missiles seem to be RNG-based, therefore, no fail-proof sequence of movement can be recommended)

2. Direct quad drones to eliminate enemy CLAW [1] (Any) [ACCESS]
Immediately after touchdown, sprint straight forward until you find a lone accessible crate. Opening this crate will grant you command of rocket quads. Direct them to destroy the CLAW immediately, before your allies do so. If the Quads fail to destroy this CLAW, you will have the opportunity to kill a second CLAW just before the front entrance of the facility (just make sure not to obtain the Kinetic Strike Weapon or allow the drones to be destroyed). If you completed the Strike Force missions and secured the SDC's assistance, the last two CLAWs will be targeted by an anti-armor fireteam. In this case, target the far-most CLAW first.

3. Perform sniper kills (x10) from more than 40m distance [1] (Any)
Position yourself in the rear lines of the assault, putting yourself as far from the enemy as possible. Pick the enemy off from afar with a Storm PSR, or any sniper rifle for that matter. Three notable areas to get kills is from the start of the mission, from the exterior looking into the front entrance (do not descend the steps to the elevation of the CLAWs), and in the mission control area (looking up at the upper command booth, which houses three PMCs.)

4. Eliminate enemy personnel (x5) with one strike of the kinetic projectile weapon [1] (Any) [ACCESS]
Looking at the first enemy-occupied building opposite of the ascending car-park ramp, destroy the sentry turret in the window. Then, move to the rear of that building. You will find a crashed VTOL, which can be opened with the Jaws of Life. Doing so will grant you access to the Kinetic Strike Weapon, which can be called upon any targets outdoors. The easiest way to get five kills is either from the snipers on the catwalk, or from the gun truck at the top of the stairs (which can be triggered by walking next to the crashed truck).

5. Destroy ALL laser turrets [1] (Any)
There are a total of six laser turrets, which actively spin in a limited (~200°) arc. They are primarily positioned on the near corners of each roof, but there are two that are somewhat hidden. There are two atop Building 4, two atop Building 2, one on Building 27. and one adjacent to Building 27, on ground level. The Storm PSR, snipers, and most special weapons can destroy these turrets.

6. Melee camouflaged enemy personnel (x3) [1] (<=Hardened)
Adjacent to the accessible downed VTOL there will be a supply yard (construction area). Entering this zone will spawn several enemies with active camo. If you cannot get all three melee kills here, you can get a few more towards the end of the mission, whilst trying to reach checkpoint Four (in fact, the last three enemies of the game will have active camo.)

7. Protect ASD resource to the objective location. [1] (Any) [ACCESS]
After entering the facility you can hack an enemy ASD to fight for you by accessing a middle console on the second floor balcony. Escort this ASD until it reaches the control room. Destroy the enemy ASDs as fast as you can and don't allow the PMCs to target it. You could try spawning and destroying the ASDs first, then backtracking to the ASD console before you advance any further.

8. Destroy enemy quad drones (x3) while disabled. [1] (Any)
While this challenge can be achieved at the start of the mission, doing so will come at the direct expense of Challenge 2. A better area to obtain this challenge is at the start of the mission control area. Allow the six enemy quads to descend to the bottom of the room before you throw EMPs, otherwise, you will be forced to search each row of computers. which could endanger yourself.

Collect intel (x3). [2] (Any)
1. Found on the second floor of Building 27, on top of a desk next to a window.
2. Sitting next to a computer on the second row, left column (whilst at the bottom, facing towards the upper rear command booth.)
3. At the bottom of the Celerium device chamber, identical to its Myanmar counterpart. Use any staircase to descend (ignore the illusion of obstruction). Found on a crate of the lower floor.

100% survivability rating [2/3] (Recruit)
Survive. If possible, complete the Strike Force Missions and gain SDC reinforcements in the timeline prior to starting this mission. Additionally (should he be in the condition to fight) Harper will prove a valuable battle buddy for the final segment of this mission. Stick to the rear of the assault force and allow your allies to take fire for you. Use EMPs whenever encountering cloaked or synthetic adversaries. As always, the Storm PSR and/or MMS is quite useful, and so is any grenade launcher.


Video guide by TheGrimHimself

A Quick Note on Strike Force Missions
As this guide will reiterate ad nauseum, the Strike Force Missions are of inferior quality in comparison to the main missions. They are plagued with a plethora of issues, including but not limited to design, optimization, balancing, and bugs. As a result, players should expect to put an unreasonable amount of effort to successfully complete the challenges, even on lower difficulties. Allies have poor performance, and on rare occurrences, will refuse to follow orders.

A likely explanation for the difficulty disparity is that the behavior of the game engine is largely dependent on frame rate, and that the Xbox 360 and PS3 versions run at a lower frame rate than of modern PC hardware. Thus, one can reasonably conclude that that Strike Force missions are poorly optimized for modern hardware. Another theory is that the developers severely overcompensated for the Steam release of this game, therefore enemy spawns are unreasonably frequent.

(Test runs were made with FOB Spectre, on Hardened difficulty, between 60fps and 30fps. Using the same strategy, the former run required destroying several hacking modules in the last four minutes, as allied units and the key objectives were lost almost instantaneously. This contrasts sharply with the latter run (30fps), in which the shield only fell in the last 30 seconds, in which enemies stopped spawning. Any further input would be appreciated, as the evidence here is purely anecdotal.)

For any of those still wishing to complete the remaining 50 challenges, please consider the fact that it may take upwards of two or three hours, granted each run is made successfully. Additionally, it would be wise to play strictly on Recruit or Regular difficulty, as the greater difficulties lack proper balancing and/or playtesting. Finally, keep in mind that there are some challenges that may be impossible to legitimately achieve, requiring you to use the provided save file to unlock the achievement.

The following sections will lack any loadout recommendations, as Strike Force does not offer such a feature.

As an important side note, you do not have to win the mission in order for the challenges to count. You simply need to quit the mission when prompted.
Strike Force - Shipwreck
Strike Force missions are an incomplete and unbalanced portion of the campaign. Challenges will either be trivial, tedious, or downright bugged. Expect to One-Man Army every Strike Force mission you play.

1. Eliminate enemy personnel (x10) with headshots [1] (<= Hardened)
Boom. Headshot.

2. Melee enemy personnel (x15) [1] (<= Regular)
An elegant weapon, for a more civilized age.

3. Eliminate enemy personnel (x15) with explosives [1] (<= Hardened)
Kaboom.

4. Eliminate enemy personnel (x15) while they are stunned [2] (<= Hardened)
Think fast chucklenuts.

5. Destroy CLAWS (x2) using only soldiers [1] (<= Hardened)
Using the SMAW and/or grenades (thrown or launched) kill two CLAWs, which appear as the biggest contacts on the minimap.

6. Destroy enemy ASD (x3) as a CLAW [2] (<= Hardened)
Once the CLAW lands, take control of it and hunt for the enemy ASDs, which can found using the minimap.

7. Run over enemy personnel (x20) with ASD [2] (<= Regular)
Nyoom.

8. Complete mission with more than 2:00 min remaining [1] (<= Regular)
Shipwreck has a time limit of 10 minutes, which means you will have 8 minutes to plant and defend all three intruders. Plant the nearest intruder immediately, then aim for approximately three minutes for each remaining intruder. Do not rely on allied forces to defend the remaining intruders.

9. Use only 3 network intruders to complete the mission¨[2+] (<= Regular)
Use the intruder on the closest area then the farthest, finishing with the intruder in the middle of the map. Clear out each area prior to starting the intruder, and try directing all of your units towards the middle area. Try getting the CLAW in the middle area before you plant the last intruder.

10. Complete the mission in "tactical view" only [3+] (Recruit)
This challenge is reportedly bugged; infantry will sometimes refuse to plant the last intruder, causing you to fail the mission. If you still wish to attempt this challenge, plant the nearest intruder, wait for reinforcements, secure the middle section, plant the second intruder, then secure and plant the final intruder.


Video guide by TheGrimHimself

Strike Force - I.E.D.
Strike Force missions are an incomplete and unbalanced portion of the campaign. Challenges will either be trivial, tedious, or downright bugged. Expect to One-Man Army every Strike Force mission you play.

For this particular mission, Recruit difficulty is recommended for all challenges.

1. Eliminate enemy personnel (x20) as a quad drone [1]
Kill.

2. Eliminate enemy personnel (x10) on horseback [1]
Kill.

3. Destroy tanks (x3) with kinetic projectile weapon [1]
Kaboom.

4. Destroy helo with kinetic projectile weapon [2]
There are two helos, both of which appear nearing the end of the mission.

5. Use only ASDs to destroy tanks [2]
The rockets on a quad can damage any part, while the main gun can damage the rear.

6. Run over enemy personnel (x10) as ASD [2]
The best area to run over enemies is at the final stretch of land where the convoy exits the map. Enemies will spawn in the dozens, in nice orderly lines, just for you to flatten with cutting-edge military automatons.

7. Eliminate enemy personnel (x3) while they are planting IED [2+]
Destroy any set of IEDs already placed, then watch for enemies that attempt to visit that set and replant more explosives. Kill them, immediately.

8. Convoy never stopped by presence of an IED [2+]
Destroy every set of IEDs and prevent any more from being planted. Using Quads and/or the Tactical View are the most viable approaches.

9. Keep all vehicles in convoy safe [2+]
Destroy RPGs first, then tanks. Quads can easily destroy helicopters, which take some time to damage the convoy. Destroy IEDs before the convoy has the opportunity to stop. Focus the defense on the lead vehicle, but do not completely neglect the other three vehicles.

10. Complete the mission in "tactical view" only [3+]
Can be done in conjunction with the previous challenge, granted all units follow orders and the quads are able to quickly eliminate any RPGs.


Video guide by TheGrimHimself

Strike Force - FOB Spectre
Strike Force missions are an incomplete and unbalanced portion of the campaign. Challenges will either be trivial, tedious, or downright bugged. Expect to One-Man Army every Strike Force mission you play.

This particular mission is the prime example for the quality (the lack thereof) in Strike Force Missions. Comparing the Steam version to the console versions, PC gameplay of FOB Spectre is dramatically more difficult. Some likely theories for this behavior are the affect of high framerates on the game engine, poor optimization, and/or poor balancing, Regardless of explanation, this mission is, quite truthfully, not fun to play.

1. Eliminate enemy personnel (x20) with headshots [1] (<= Hardened)
Boom. Headshot.

2. Melee enemy personnel (x10) [1] (<= Hardened)
An elegant weapon, for a more civilized age.

3. Destroy enemy quad drones (x12) [1] (<= Regular)
Quads are airdropped in groups of four by a VTOL, near Alpha or Charlie. Using EMPs or a sentry will help.

4. Eliminate enemy personnel (x20) using sentry turret [2] (<= Regular)
Sentries can be moved to better firing positions. The best place to get kills is by moving a sentry from the outside into the facility, once the defenses fall.

5. Eliminate enemy ASD (x3) using only sentry turrets [2] (<= Regular)
Sentries can be moved to better firing positions. The best place to get kills is by moving a sentry from the outside into the facility, once the defenses fall. Note that your allies might steal your kills on these relatively slow targets.

6. Eliminate enemy personnel as CLAW (x10) [2] (<= Regular)
The area between Alpha (Comm. Satellite) and Bravo (Power Transformer) is the best area to obtain kills.

7. Complete the mission with enemy never lowering defense field [2+] (<= Regular)
NOTE: This challenge may not be achievable. The AI are not competent enough to defend the facility, even on Recruit. It may take several attempts to complete this achievement, and even then, it may be impossible to achieve.

Do not attempt this challenge on any other difficulty except Recruit. Start the first few seconds in tactical view, ordering the first squad of soldiers to Charlie (Cooling Tower) and the second squad to the second-story balcony which has Line-Of-Sight to both Alpha (Comm. Satellite) and Bravo (Power Transformer), Order the CLAW to take position in the lot with Bravo, then take control of a SEAL. Move the sentry at Alpha to cover the door and stairwell (but make sure that it can also engage any enemies attempting to take cover), then move the sentry at Bravo to cover the gate and the door to the auxiliary building.

Look to the skies for OpFor helicopters (which cannot be destroyed) and the minimap for any OpFor that breach the perimeter. Take command of a soldier at Charlie whenever it comes under assault, then swap back to a SEAL defending Alpha/Bravo whenever all threats have been killed.You can use the yellow pipes on the side of the building to run between the roof of Alpha and the balcony overlooking Bravo. If an enemy CLAW becomes a threat, use a SMAW or swap to your CLAW. Use EMPs on ASDs or any troublesome quads. (Additionally, if you are quick, you can immobilize the first enemy CLAW as soon as it lands near Charlie, which will prevent any more from spawning.)

8. Prevent enemy from planting more than one hacking module [2+] (<= Regular)
Achieved in conjunction with the previous challenge. You can allow the shield to go down, so long as you prevent any PMCs from entering the facility.

9. Allow no more than one sentry turret to be destroyed [2+] (<= Regular)
Achieved easily in conjunction with Challenge 7. Sentries can be moved to safer positions, if needed.

10. Complete the mission in "tactical view" only [2+] (Recruit)
Try having units always engaging a target, Keep the infantry and CLAW close to the sentries, such that they can protect each other. Abandon Charlie (Cooling Tower) once defending it no longer proves viable.


Video guide by TheGrimHimself

Strike Force - Second Chance
Strike Force missions are an incomplete and unbalanced portion of the campaign. Challenges will either be trivial, tedious, or downright bugged. Expect to One-Man Army every Strike Force mission you play.

1. Eliminate enemy personnel (x15) with headshots [1] (Any)
Boom. Headshot.

2. Melee enemy personnel (x10) [2] (<= Hardened)
An elegant weapon, for a more civilized age.

3. Eliminate enemy personnel (x15) with explosives [1] (Any)
Kaboom.

4. Eliminate enemy personnel (x10) as HVI [2] (<= Hardened)
As Chloe (Karma) pick up an enemy weapon and head towards the extraction VTOL, but do not go beyond the statue, as this will end the mission. Instead, take refuge in the nearby house and allow the enemy to come to you. Note that as soon as Chloe as found, you will lose both the VTOL gunner and any friendly reinforcements.

5. Eliminate enemy personnel (x10) as VTOL turret gunner [2] (<= Hardened)
Take control of the Raptor 1 (VTOL) gunner and rain hell from above. You can move laterally or longitudinally, but not vertically.

6. Destroy enemy quad drones (x4) [1] (Any)
On lower difficulties, there will be no enemy quad reinforcements; the only quads present will be those that are at the start of the mission. EMPs can help. Hardened and Veteran will have more than enough targets.

7. Eliminate enemy personnel (x5) by exploding vehicles [2+] (Recruit)
Bait an enemy (or two) to take position near or behind an undamaged car, then mag dump into any part of the chasis. Obviously, the resulting explosion can also injure/incapacitate you.

8. Extract the HVI in less than 60 seconds [1+] (Any)
After finding Chloe (Karma), run straight to the extraction VTOL.Searching the farmost buildings first will help, as Chloe will never be found in the first two buildings searched (implying that she can only spawn after the second building is searched.)

9. Find the HVI in less than 90 seconds [2+] (<= Hardened)
Search the buildings as fast as possible. Some luck may be required, as Chloe will never be found in the first two buildings searched. One viable strategy could be to command the two squads to search the nearest building, then take command of a SEAL and search the remaining three buildings. (It is likely that Chloe only has a small chance to spawn after the second building is searched, then a greater or 100% chance of spawning after the third building.)

10. Complete the mission in "tactical view" only [3+] (Recruit)
Because the frequency of enemy reinforcements appears to be dependent on time and/or the amount of buildings searched, start with the furthest buildings first. Otherwise, you will find your troops unable to search these buildings or even escape their spawn. One approach is to combine the squads and search the buildings in a strictly clockwise or counter-clockwise direction, aiming for the far buildings first. Regardless of strategy, do not depend on the VTOL gunner to provide fire support, as the AI is incapable of getting a proper firing angle or engaging targets in a timely manner. Another extremely important detail is that you will lose both the VTOL gunner and any infantry reinforcements once you find Chloe. Therefore, you need to extract Chloe as fast as possible. Have the SEALs defend Chloe and clear a path whenever necessary. The mission can be very easily soft-locked if Chloe is surrounded and you have no more units on the field, as she will be unable to move. At this point, the only way to finish the mission is taking control of Chloe.


Video guide by TheGrimHimself

Strike Force - Dispatch
Strike Force missions are an incomplete and unbalanced portion of the campaign. Challenges will either be trivial, tedious, or downright bugged. Expect to Rambo every Strike Force mission you play.

1. Eliminate enemy personnel (x20) with headshots [1] (Any)
Boom. Headshot.

2. Melee enemy personnel (x10) [1] (<= Hardened)
An elegant weapon, for a more civilized age.

3. Eliminate enemy personnel (x15) with explosives [1] (Any)
Kaboom.

4. Eliminate enemy personnel (x10) while they are stunned [2] (Any)
Think

5. Destroy sentry turrets (x3) while disabled [1] (Any)
fast

6. Destroy enemy ASD (x6) while disabled [1] (Any)
chucklenuts.

7. Destroy multiple ASD (x2) with one explosion [2] (<= Regular)
There will be a pack of ASDs near Zhao's downed VTOL, granting ample opportunity.

8. Use only one hacking module to complete mission [2] (<= Hardened)
Throughly clear the area, then command all units to hold the area. Plant the module behind proper cover.

9. Complete mission with more than 3:00 remaining [2+] (<= Hardened)
Ride the right side and kill anything in your way. Destroy all the enemies at Zhao's VTOL, then plant the module behind cover as soon as you can. You will be swarmed by all the enemies on the map, so don't worry if you lose the first module. You will have approximately five minutes to assassinate Zhao.

10. Complete the mission in "tactical view" only [3+] (Recruit)
Command all units to ride the right, killing anything in the alley. Then, command all but one element to assault the emplaced ASDs and automated turrets. Allow the remaining unit to cover the rear of the assault force, including any reinforcements. Note that, despite the command to explicitly destroy any enemies around the VTOL, units will attempt to plant an intuder whilst under direct fire. If you lose all your units, allow reinforcements to arrive in full before advancing towards the VTOL.


Video guide by TheGrimHimself

Addendum - Special Notes
As a disclaimer, this guide, although detailed to the fullest extent of the author's knowledge, is not truly comprehensive. There are several alternative methods or supplementary factoids that could be included, as well as any additional visual demonstrations for specific challenges. Therefore, consider this section as an invitation to provide such contributions: if you have any information that was not included in this guide and that you feel should be added, please leave a comment.

Any contributions made to this guide through comments will be attributed to in this section, for the foreseeable future.

To TheGrimHimself: If you would like your videos removed from this guide, please contact me as soon as possible so that I may do so as soon as possible. Thank you once again for your giant contribution to the Call of Duty community.
Conclusion - Thank You!
Thanks for looking at this guide. Hopefully it allows you to complete those last few challenges in the year 2025 and the future that lies beyond.

As with all of my other guides, constructive criticism is welcome in the comments section below. Additionally, any words (or actions) of gratitude are always welcome and appreciated, as they help others find this guide.
4 Comments
CodMW4YT 24 Apr @ 8:09am 
Just to be safe, I’ve already given up on that achievement. I don’t want to use third-party save files to boost achievements either.
M3L0  [author] 23 Apr @ 11:05pm 
@CodMW4YT

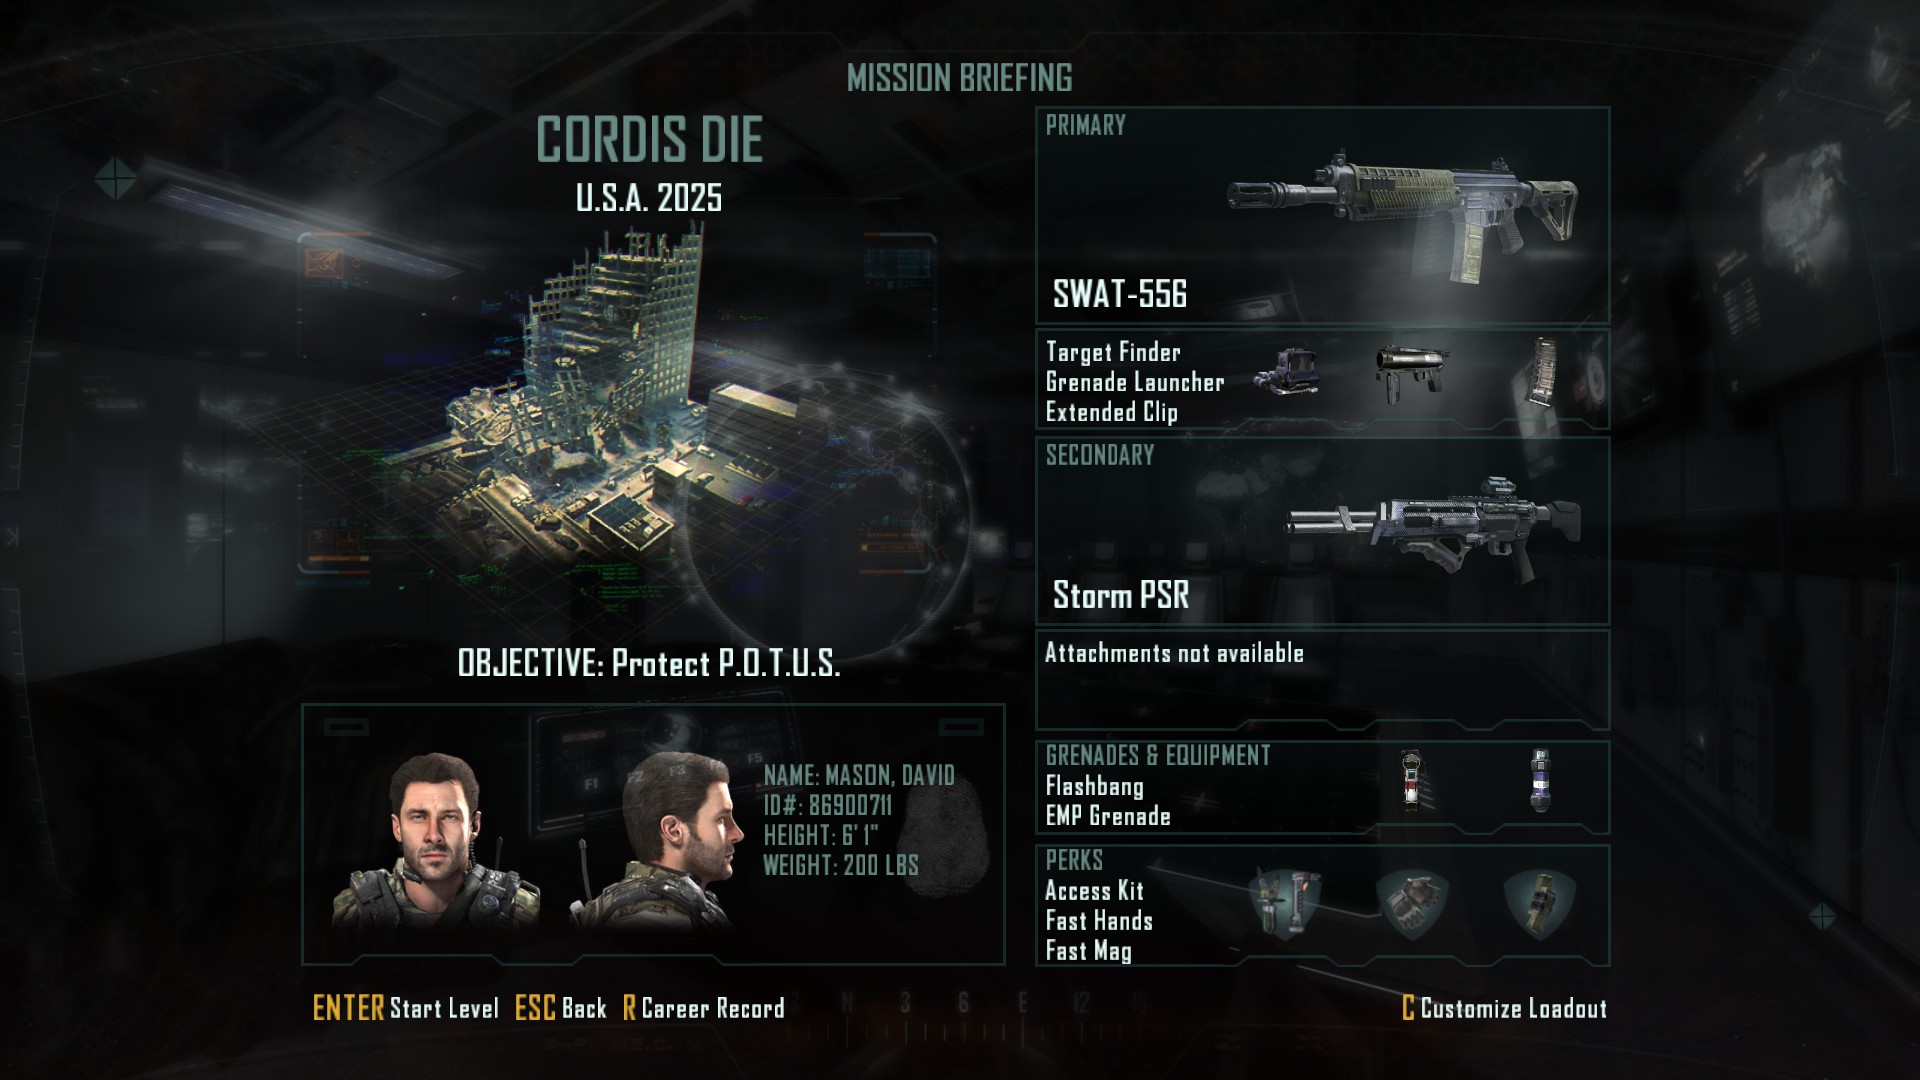
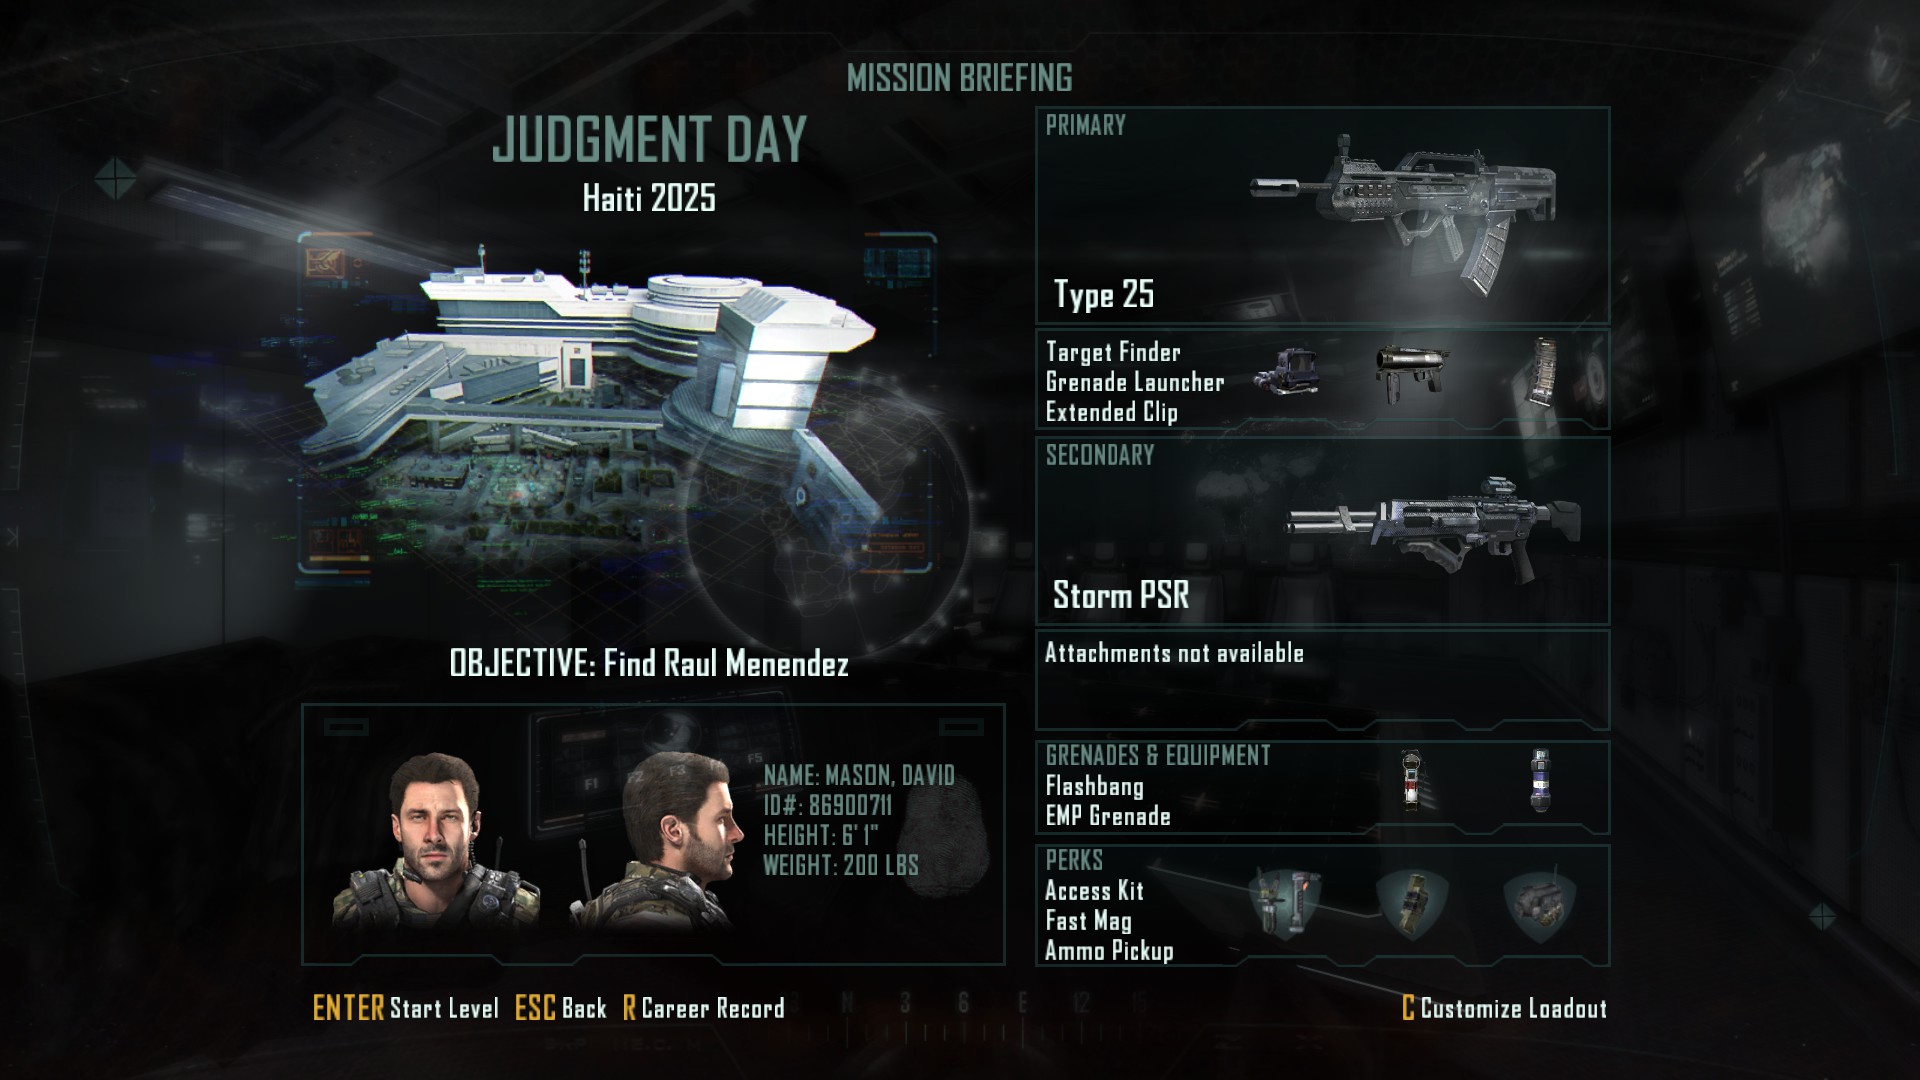
I do believe restarting the story wipes all of your challenges. You need to see 160/160 to have the achievement pop. If you encounter a challenge that the game absolutely refuses to grant (there are several mentioned in this guide) then feel free to use the Giant Accomplishment Save File linked in the Introduction section.

As a sidenote, replaying the mission should update your score in Career Mode, as long as the new score is greater than the old score. It does not matter whether you Rewind the Story or simply replay the mission.
CodMW4YT 16 Apr @ 3:05am 
If I completed almost all the challenges in this game (there were only about 10 or a bit more left), and then suddenly changed my mind about finishing them because of one of them, so I restarted the story — then, if I did that, would I have to do all the challenges again from scratch if I decide to complete them later? Or can I just finish the ones I didn’t do? It's just that the score in the career mode is saved regardless of whether I started a new game or not.
bob.dangerzone 4 Mar @ 10:53pm 
thank you so much for this guide i decide to 100% this game after it hit 2025 and this guide is SO helpful :peppinoP: