Tomb Raider: Anniversary

Tomb Raider: Anniversary

70 ratings
Lara Croft fixes your game
By Loco
Fix profiles not saving or loading and out of table range disc error while reading BIGFILE. Works for Tomb Raider Anniversary, Legend, Underworld, Lara Croft Guardian of Light.
   
Award
Favorite
Favorited
Unfavorite
About
Learn to create a Windows Virtual Hard Disk (VHD) and install game into it.
Estimated time: 10 - 15 minutes

I came up with this idea to fix old Tomb Raider games by running them from a virtual disk.

Solved issues
  • ERROR OUT OF TABLE RANGE Disc error while reading BIGFILE.000
  • unable to save or load or auto-save to profile.
  • game can't find steam or crashes.
  • game won't run unless installed to C: startup disk.
  • game won't run unless installed to external drive and saving won't work.
  • errors on Windows via Bootcamp for Apple Mac users.

Compatible games

The reasons I like to use virtual disk
  • There is no performance penalty for running programs off a virtual disk.
  • You can relocate the virtual hard disk file (.vhd) to a different volume or external drive.
  • Likely to help for any old programs that are hard-coded to run from specific drive letters, paths, file systems or partition schemes.

Example error messages
Rate it up and comment :)
Ratings and favorites help make finding this guide easier and encourages me to make more guides like this.


Before you begin
Read the Steam Troubleshooting and How-To's.

Check out all the Useful Links I've included at the very bottom of this guide.

Do you have an unrelated problem?

If you aren't experiencing any of the problems described above then please try other troubleshooting steps. Some people may find virtual disks confusing. Only use them if you are confident in your computer skills and if it is likely to solve your problem. Don't use virtual disks unnecessarily.

Need help? Lost your save games?

Check out Stella's TombRaiders[tombraiders.net] website for game guides, info about common bugs, fixes and patches. You can even download savegame files[tombraiders.net] if you lost your progress. Thanks Stella!

Game can't find Steam?
If you see any errors like "Failed to find Steam" or "Steam Not Found" or "Could not find Steam" you might fix that by copying steam.dll file into the game install folder. Also note TexMod can cause the problem. Request help in Steam discussion.

Game runs but can't resume or "Autosave is damaged"?
If you see an error like "Autosave is damaged. Will be recreated" and problems persist, you might see here or here and read this steam guide "No Resume option and Croft Manor saving fix".

Game crashes on launch without showing errors
If your computer has a multi-core CPU and Tomb Raider Underworld crashes on launch, you might solve the problem by temporarily lowering the number of CPUs used by the Steam applications. Open Task Manager, right click on Steam and choose Set Affinity, then deselect some cores and click OK. Try launch game. Remember that restarting Steam will reset the Affinity back to normal.

Try basic troubleshooting steps first

None of these ideas work for you? Then follow the virtual disk guide below.
1. Install game with Steam
Open the Steam Library. Begin installing game to C:\ boot drive like normal.


Note this guide is for Tomb Raider: Anniversary but steps are similar for other games.

While your game downloads we can continue.
2. Create Virtual Hard Disk file
In Windows operating system, search for and open the app Computer Management for Disk Management. The new window should appear like so.


In the menu bar select Action then from the drop-down select Create VHD. A new Create and Attach Virtual Hard Disk window should appear.


We must store the new virtual hard disk file in a new folder at our drive root (\) and type a sensible file name for it. Never install multiple games inside a single virtual disk.

Create new folder at the root (\) of C drive:
C:\VirtualHardDisks\

Location for my virtual disk will be this folder, with this filename:
C:\VirtualHardDisks\tr-anniversary.vhdx

Select settings for the new virtual hard disk:
  • Virtual hard disk size: 10GB to fit Anniversary. Greater than size of game.
  • Virtual hard disk format: VHDX is best for modern Windows systems.
  • Virtual hard disk type: Dynamically expanding is best to conserve storage.

When finished click OK.

Disk Management should now show a new disk of the size we chose.
3. Initialize Disk
By default that new virtual hard disk VHDX file we created should have automatically attached and appear in Disk Management.


Right click it and from the drop-down menu select Initialize Disk. A new window will appear.


Choose MBR (Master Boot Record) partition style because these games are very old and our VHDX has only a small file size.
4. New Simple Volume
After we initialized the disk it will be marked as unallocated. We should make a new volume on it. Right click it and select New Simple Volume.


A new window will open for the New Simple Volume Wizard. Click next to begin.


Click next again, using the default value of maximum disk space.


Choose Do not assign a drive letter or drive path. This is very very very very important!


Choose to format as NTFS and type volume label to be same as the VHDX filename.


Review and then finish the wizard.

Wait for download to finish
Stop and wait until your game has finished downloading and installing.

5. Making empty folders to mount the VHD
Only do these steps once game is 100% downloaded and installed.

Create new empty saved games folder

Find where the saved-games folder is. Mine was here:
C:\Users\%username%\Documents\Eidos\Tomb Raider - Anniversary

Rename that folder to something different, for example:
C:\Users\%username%\Documents\Eidos\Tomb Raider - Anniversary Backup

Create a new folder in the same place with the original folder name:
C:\Users\%username%\Documents\Eidos\Tomb Raider - Anniversary

Create new empty Steam game folder

Right click the game in steam library and open the Properties window.


Select the Local Files tab and then click Browse Local Files. It will open a new window in Windows File Explorer to where the game files are stored.

My game files installed to this folder:
C:\Program Files (x86)\Steam\steamapps\common\Tomb Raider Anniversary

Rename that folder to something different, for example:
C:\Program Files (x86)\Steam\steamapps\common\Tomb Raider Anniversary Backup

Create a new folder in the same place with the original folder name:
C:\Program Files (x86)\Steam\steamapps\common\Tomb Raider Anniversary
6. Mount to the empty NTFS folders
Return to Disk Management.


Right click the virtual disk and select Change Drive Letter and Paths. A new window will appear. It should not have any paths mapped yet.


Select to Add. Add Drive Letter or Path window appears.


Choose to Mount in the following empty NTFS folder. Click Browse. The Browse for Drive Path window appears. Browse and select the empty save-game folder you made, then click OK.


You should now see a path has been added to the save-game folder. Now repeat this process again to also mount the virtual hard disk onto our empty steam game files folder.

As you see in my case I mounted the virtual disk onto both these empty folders we made:
C:\Users\%username%\Documents\Eidos\Tomb Raider - Anniversary C:\Program Files (x86)\Steam\steamapps\common\Tomb Raider Anniversary

From now on any files you put in those folders would actually be inside the virtual disk we made. You'll see the file size of the tr-anniversary.vhdx file will grow as we move in the game files.
7. Relocate game files to virtual disk
You need to put all the game files inside of the virtual hard disk.

Copy all files from inside this directory:
C:\Program Files (x86)\Steam\steamapps\common\Tomb Raider Anniversary Backup

Paste them into this directory:
C:\Program Files (x86)\Steam\steamapps\common\Tomb Raider Anniversary

If done correctly the file size of .vhdx will increase.


If file size of .vhdx did not increase you made a mistake.
8. Verify Integrity of Game Files
Verify Integrity of Game Files. It should validate 100% complete. This means all game files are available inside attached virtual disk.


Delete this directory to clean-up at the end:
C:\Program Files (x86)\Steam\steamapps\common\Tomb Raider Anniversary Backup
9. Read before you play
Remember the game won't run and missing executable error appears if Steam can't find game files. This happens when virtual disk is detached or mount paths are wrong.


If you see this error then check virtual disk is attached and using correct mount paths.

Steam - Error
An error occurred while updating ... (missing executable) :

Virtual disks detach every time you reboot. Attach them again after reboot. This guide explains how you can make computer do this automatically at startup.
10. Launch game
Launch the game from Steam library. It should work. Ignore if it says default profile won't load.


Create a new profile. Start a new game then try saving. It should work.


How-to: Attach or detach virtual disks
Attach virtual disks by double clicking the vhdx file. It is OK if you see error Couldn't Mount File because we didn't assign a drive letter. Open Disk Management to see it did attach.


Attach virtual disks by opening Disk Management and in menu bar select Action then Attach VHD. This way you won't see the error message.


Detach virtual disks by opening Disk Management window and right clicking the disk then from the drop-down menu select Detach VHD.


How-to: Auto-mount virtual disk at startup
Attach virtual disks automatically with Task Scheduler. This is optional.


Open Computer Management.

Select Task Scheduler. Select Create Task and the Create Task window appears.


Give the new task a name and description you'll recognise. Make sure you check Run with highest privileges and Configure for: Windows 10. Change nothing else.

Select the Triggers tab. There are currently no triggers.


Click New and the New Trigger window appears.


Choose Begin the task: At startup. Make sure Enabled is checked. Delay task for: 30 seconds is optional but may work better for old computers. Change nothing else.

Click OK to add the new trigger.


Select the Conditions tab. Uncheck all boxes.


Select the Settings tab.


Select the Actions tab. There are currently no actions.


Click New and the New Action window appears.


Use these settings...
  • Action: Start a program
  • Program/script: PowerShell
  • Add arguments: type script below including path to your own vhdx file.
Mount-DiskImage C:\VirtualHardDisks\tr-anniversary.vhdx

The path to your .vhdx file must always be exactly correct otherwise it won't mount. If you move the .vhdx file then you must adjust the path in the argument. If you uninstall and delete the .vhdx file then remember to delete the action.

Click OK and the action is added to our new task.


New actions can be added for each virtual disk you want to mount automatically.

Click OK when finished.


Task Scheduler should now list the task. From the actions sidebar you are able to permanently Delete, temporarily Disable, or Run the task immediately.

First let's reboot and login to test it works.

After you reboot some blue windows will temporarily appear as PowerShell runs the Mount-DiskImage script we specified in the action argument.


Open Computer Management and select Disk Management. You should see the virtual disks you specified were mounted automatically. Launch the game. It should work.
External drives
You can store the game (.vhdx file) on another volume or external drive.
  1. Close the game.
  2. Detach virtual disk.
  3. Copy or move .vhdx file to the new location.
  4. Open Disk Management.
  5. Attach virtual disk. Check NTFS mount paths are still correct.
Uninstall game
This is how to properly delete your game.
  1. Attach the virtual disk.
  2. Open Steam and uninstall the game like normal.
  3. Detach the virtual disk.
  4. Open Windows File Explorer and delete the vhdx file permanently.
  5. If you configured to auto-mount at startup then remove that action from Task Scheduler.
Useful links
These links may help you.

Resources

Related issues


Unrelated issues


    Using Alt + Tab in the game
  • Can’t Alt + Tab Help. Note: MSI Afterburner and Windows FSE are possible causes. Try disable screen-capture or overlay softwares (eg. Discord).
31 Comments
Loco  [author] 28 May @ 9:48pm 
Happy I could be of help! Thanks for letting us know it worked for you. Enjoy the game!
Beto 23 May @ 10:11pm 
You are so awesome! It actually works! I have tried so many things, but this was the ticket! Thank you so much! :happylara:
Beto 23 May @ 9:03pm 
I opened Computer Management (using the Search bar), and I clicked on Action (tab), but there was no option for Create VHD, I then tried typing Disk Management into the Search bar and a result popped up that said "Create and format hard disk partitions". I clicked on that and that had the VHD options under the Action tab.
Sqrly 18 Dec, 2024 @ 8:13am 
It was way simpler for me.

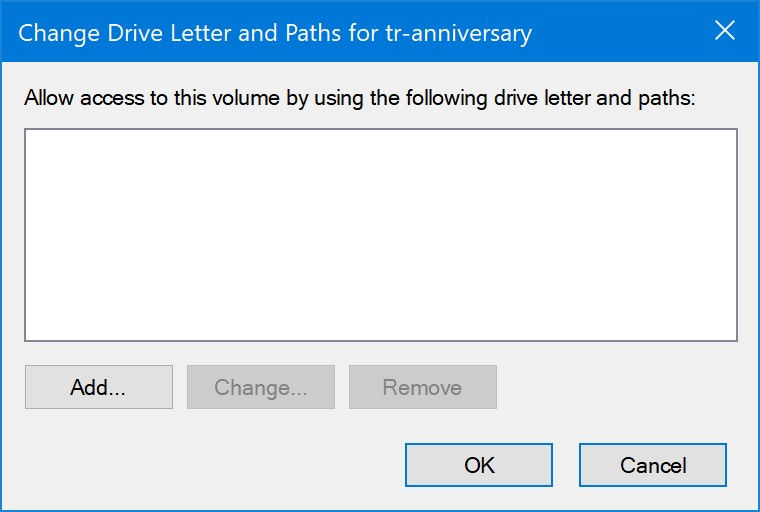
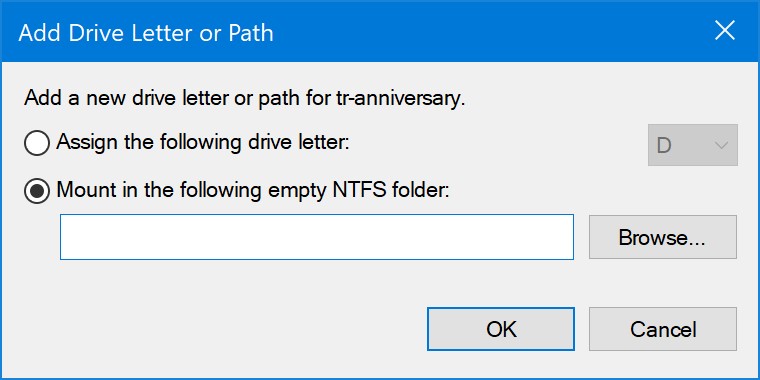
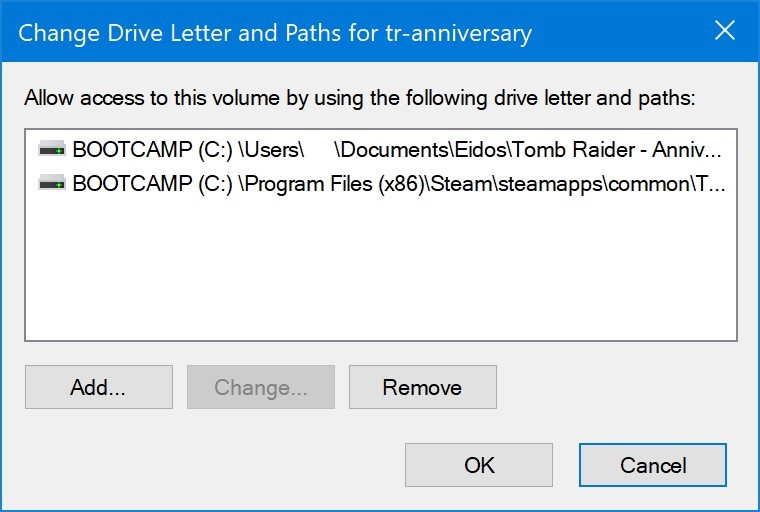
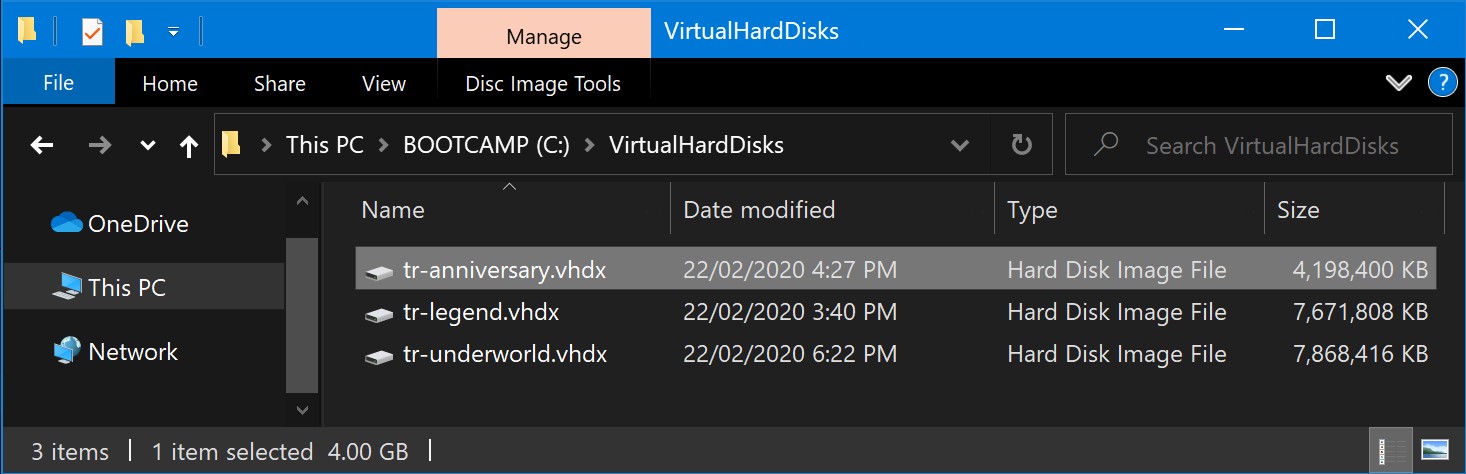
I just installed TRL, the GoG version and noticed my game wasn't saving. I started searching and ended up here.

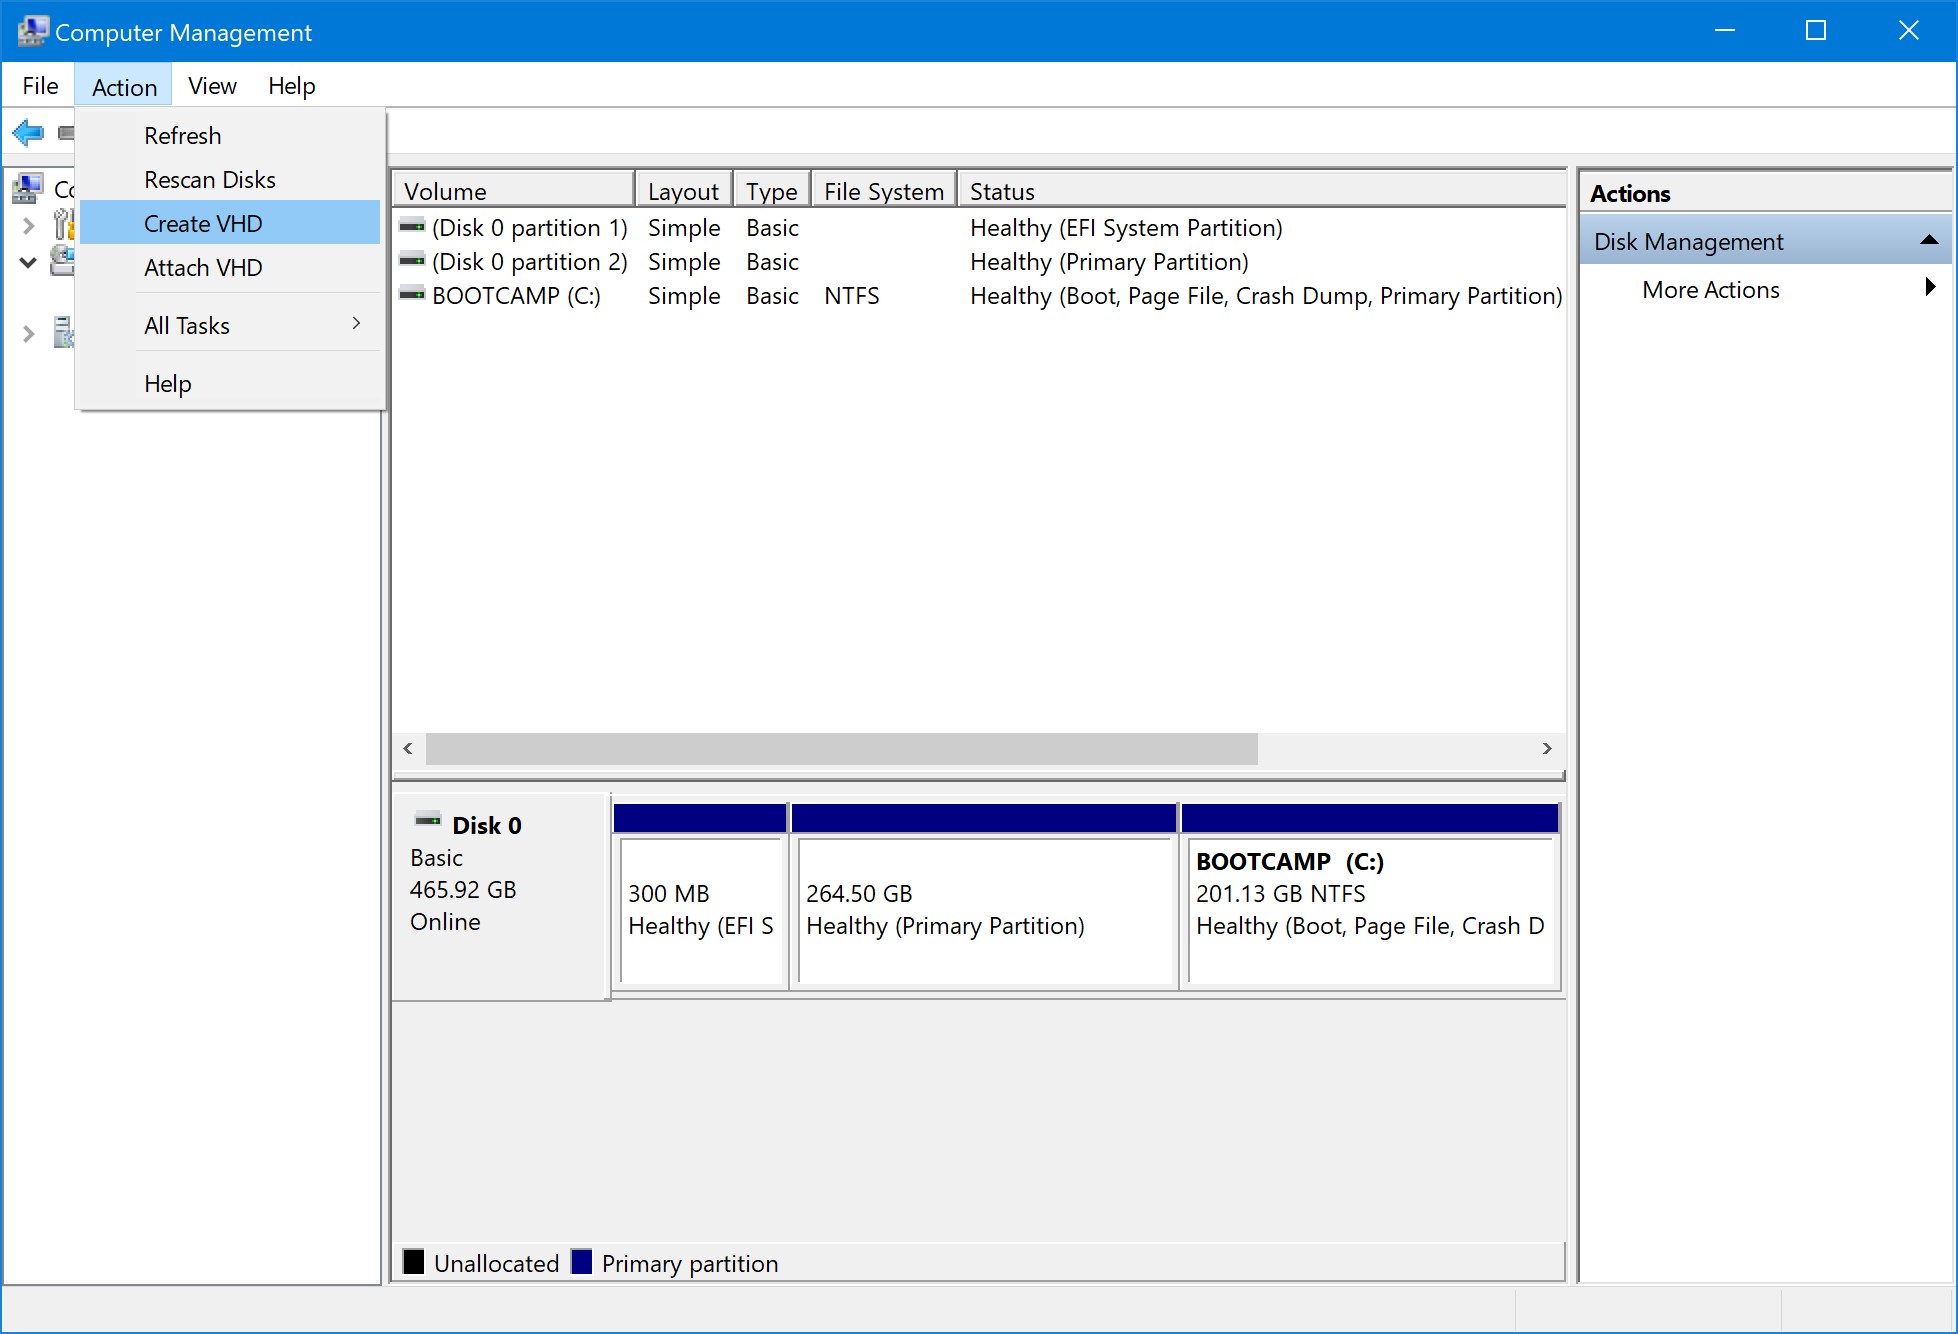
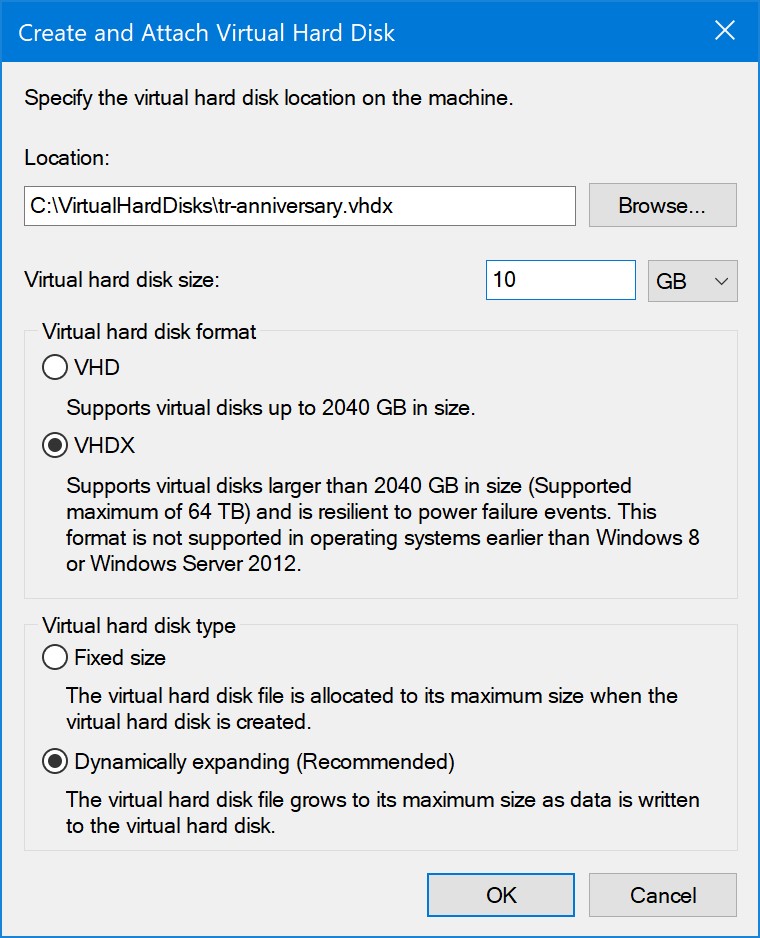
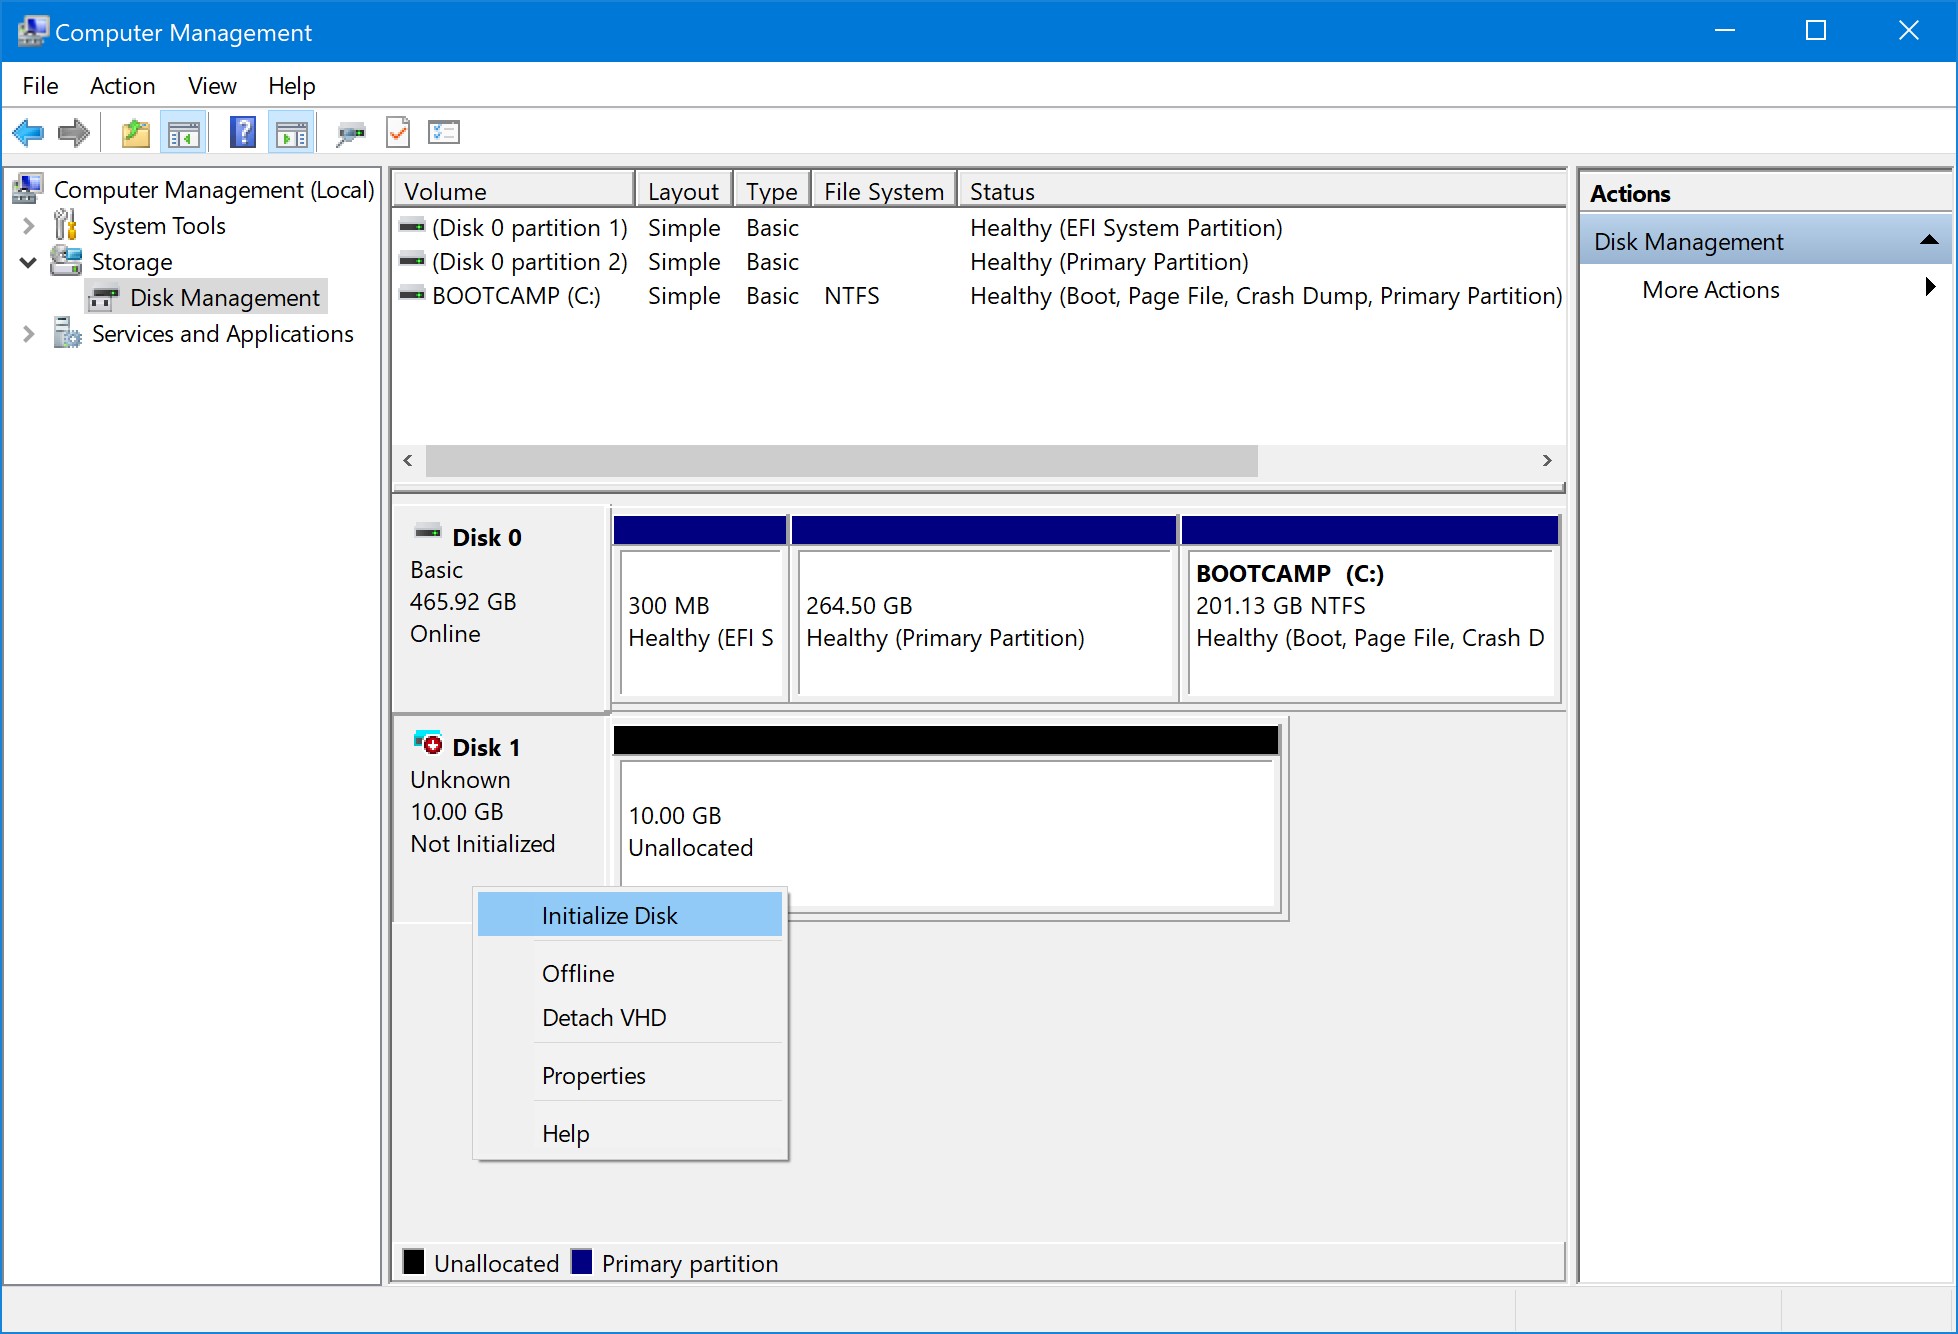
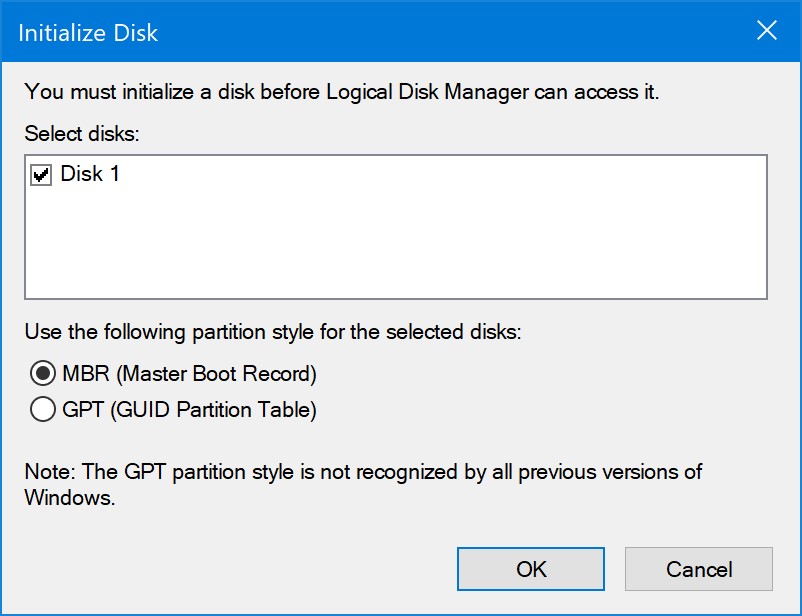
This solution looked way too complicated so I did my own trouble shooting.

FYI The game is installed on D: and "My Documents" is on E:

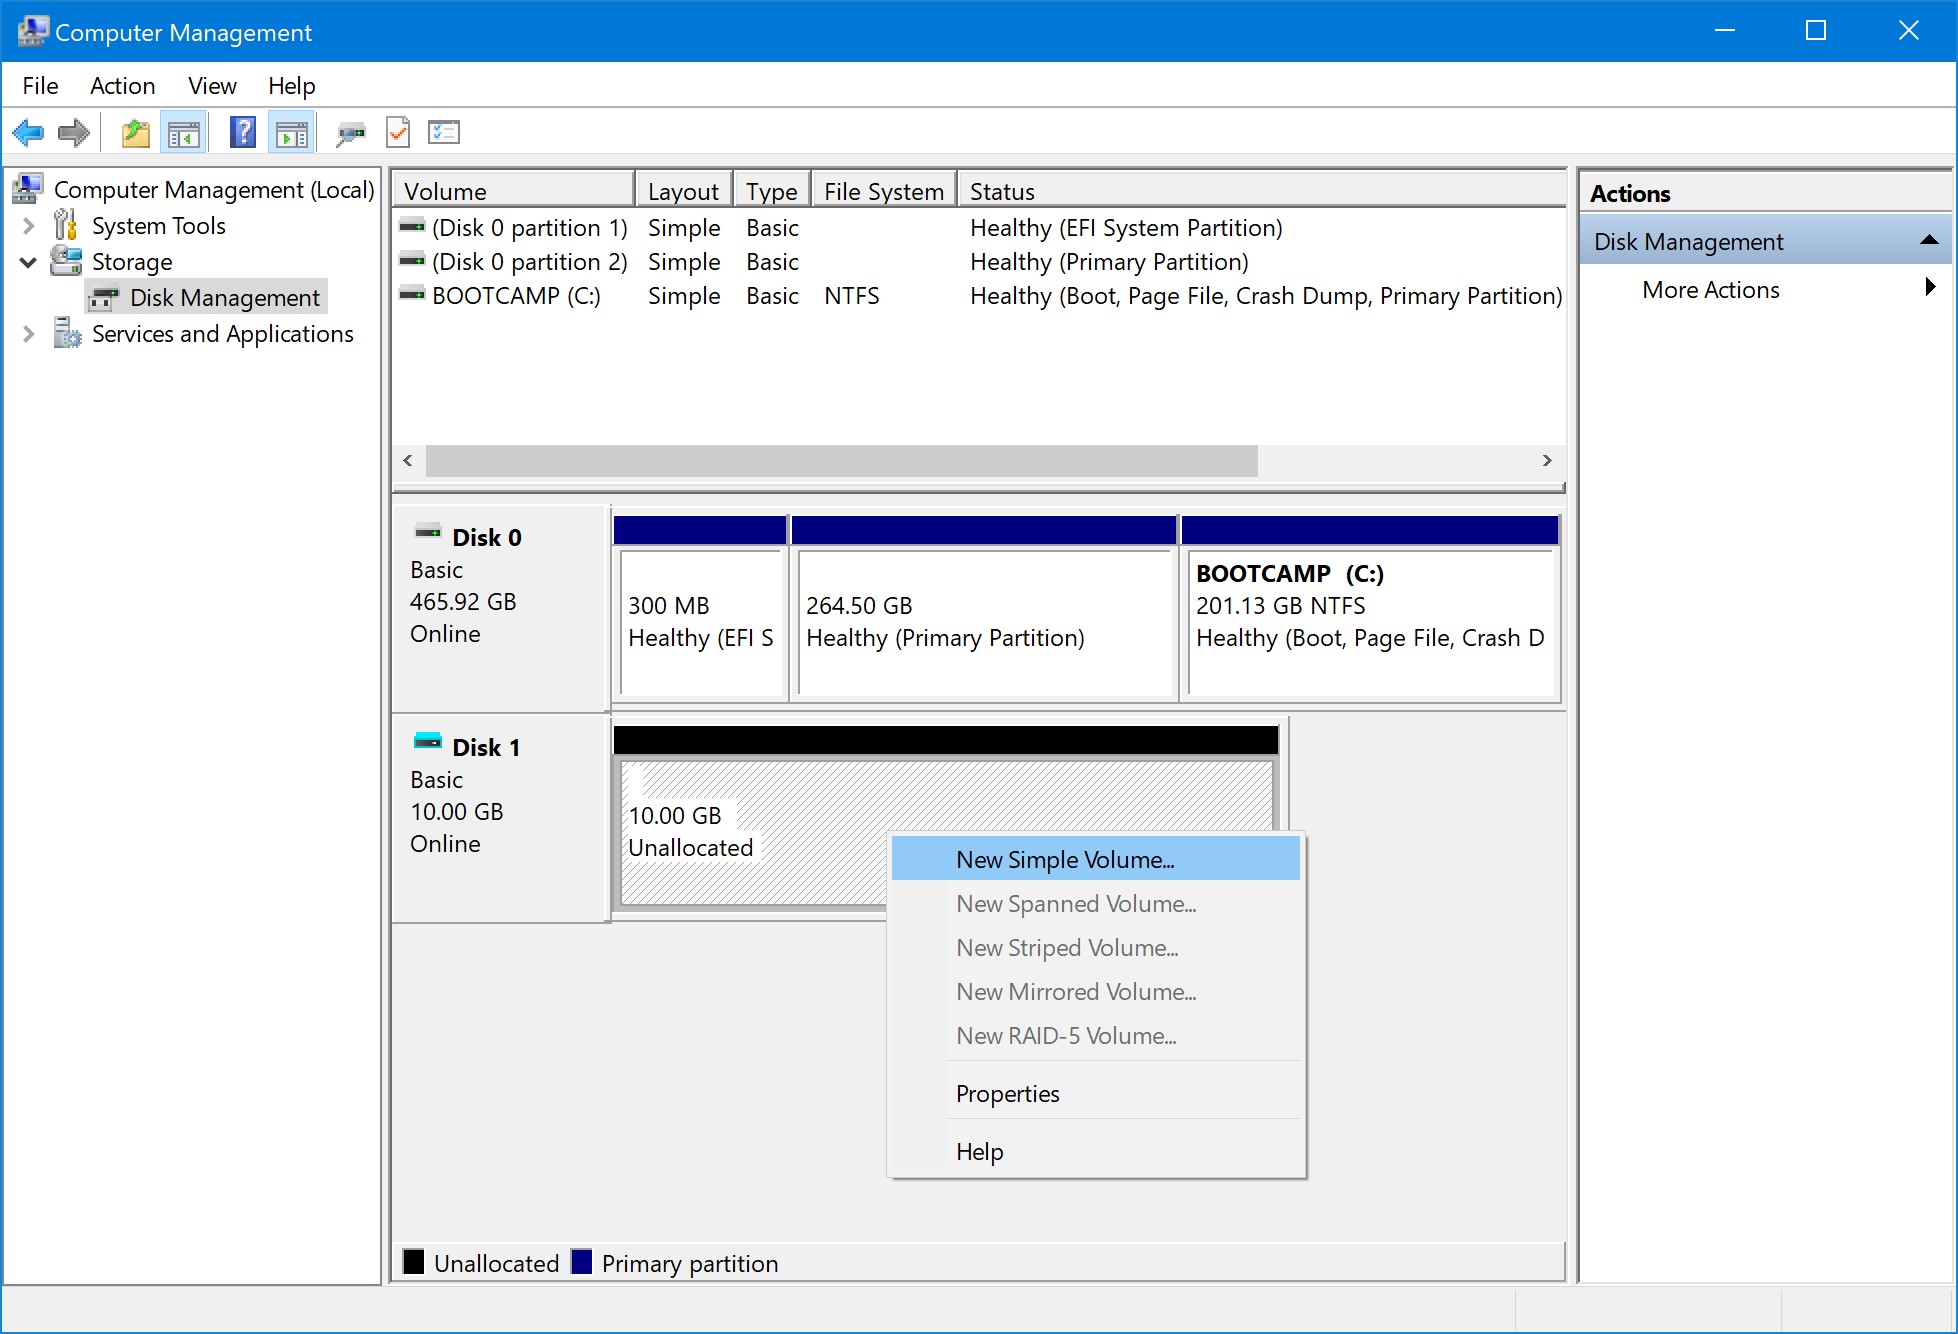
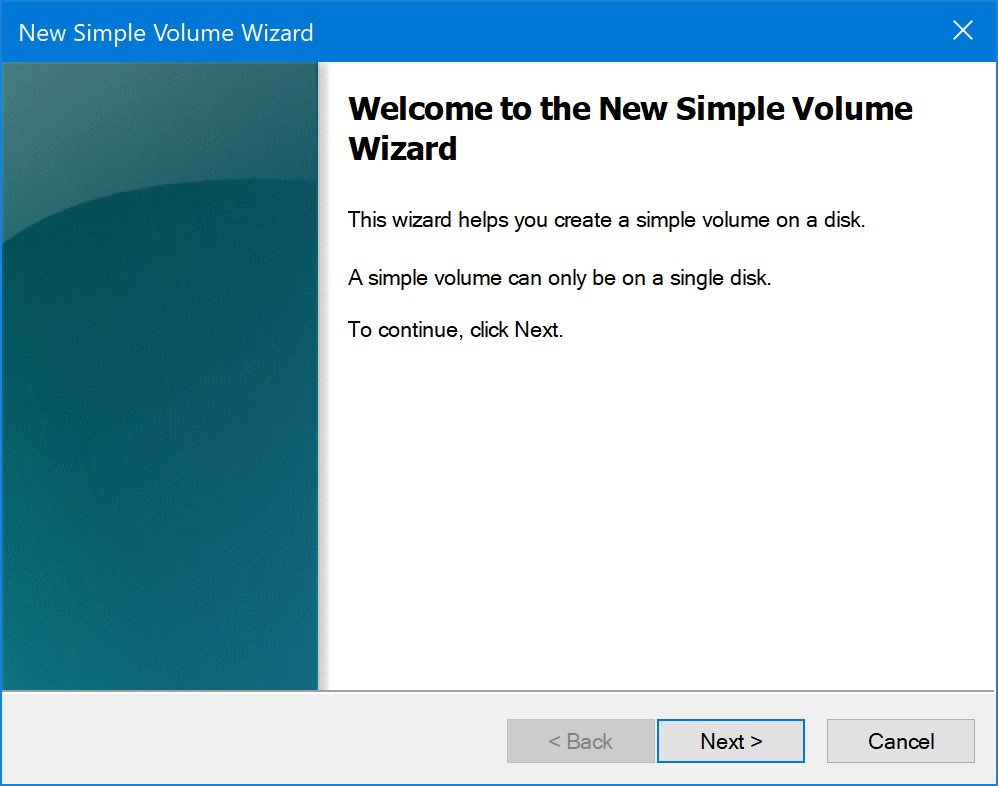
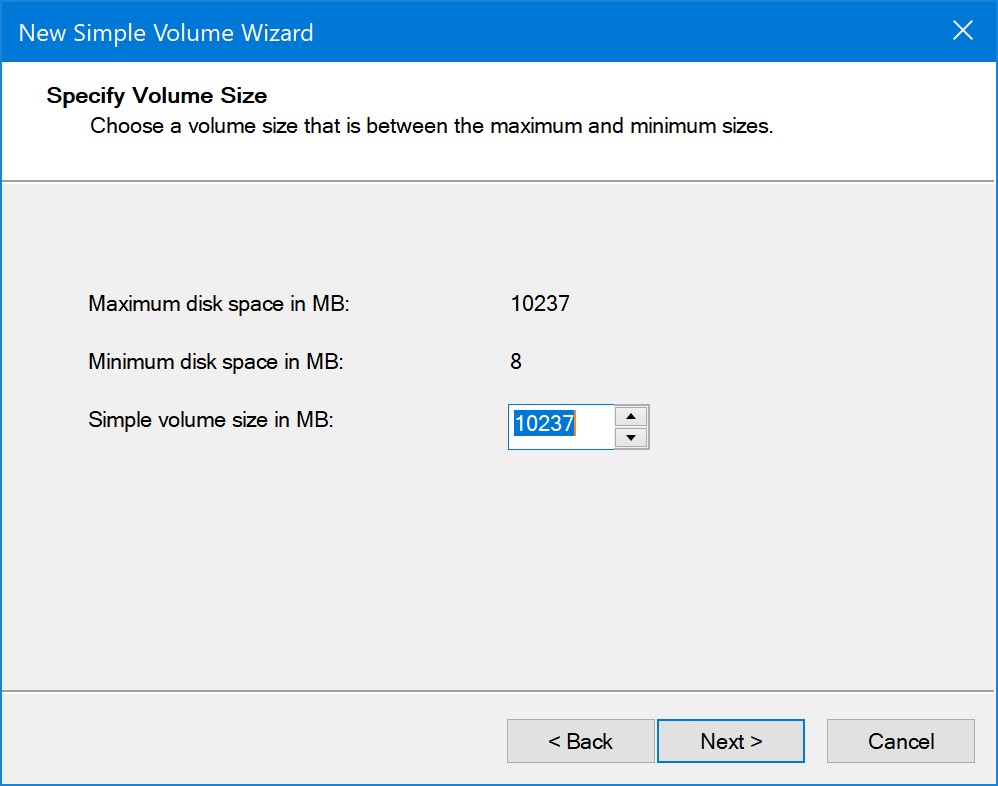
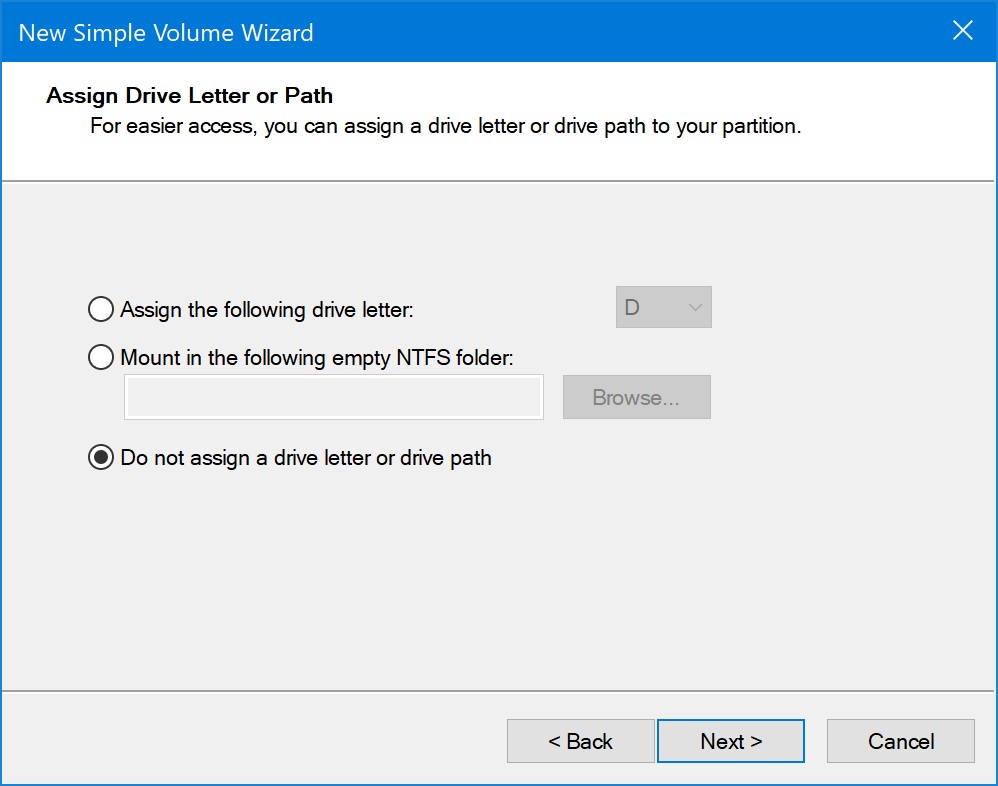
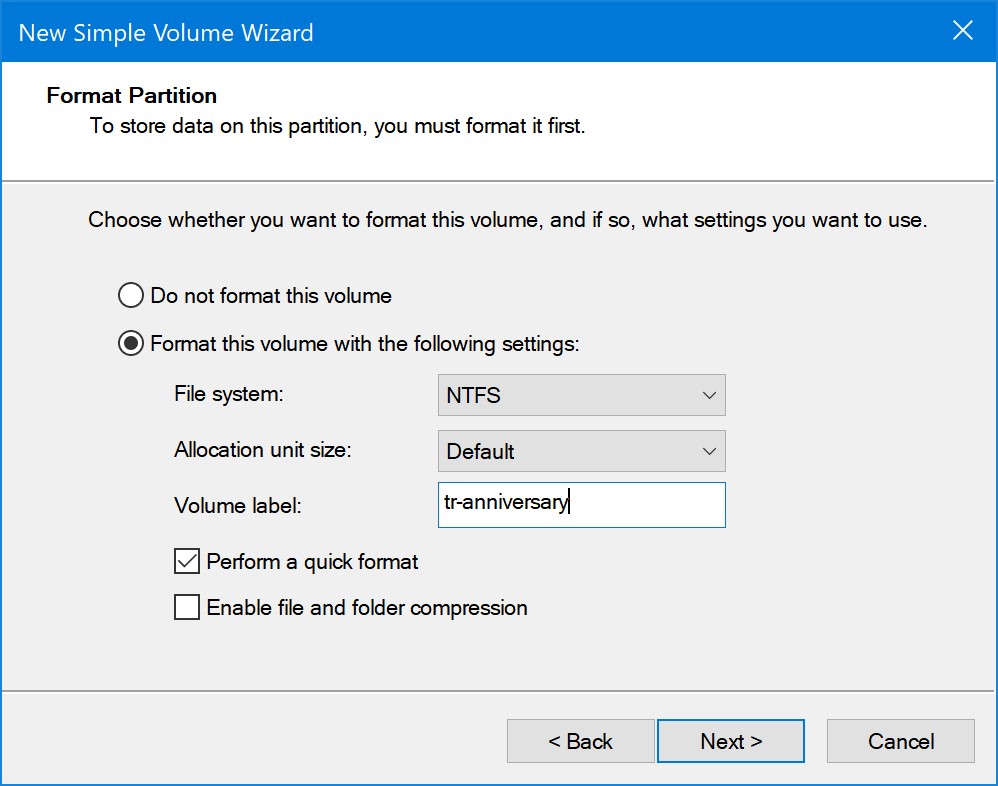
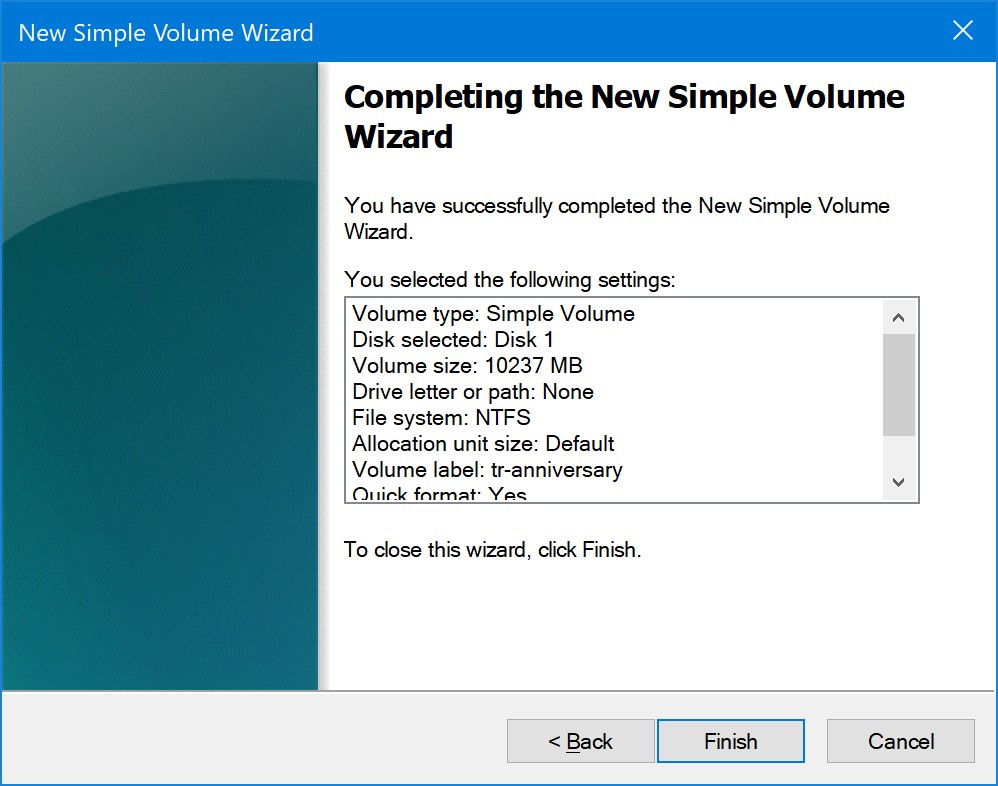
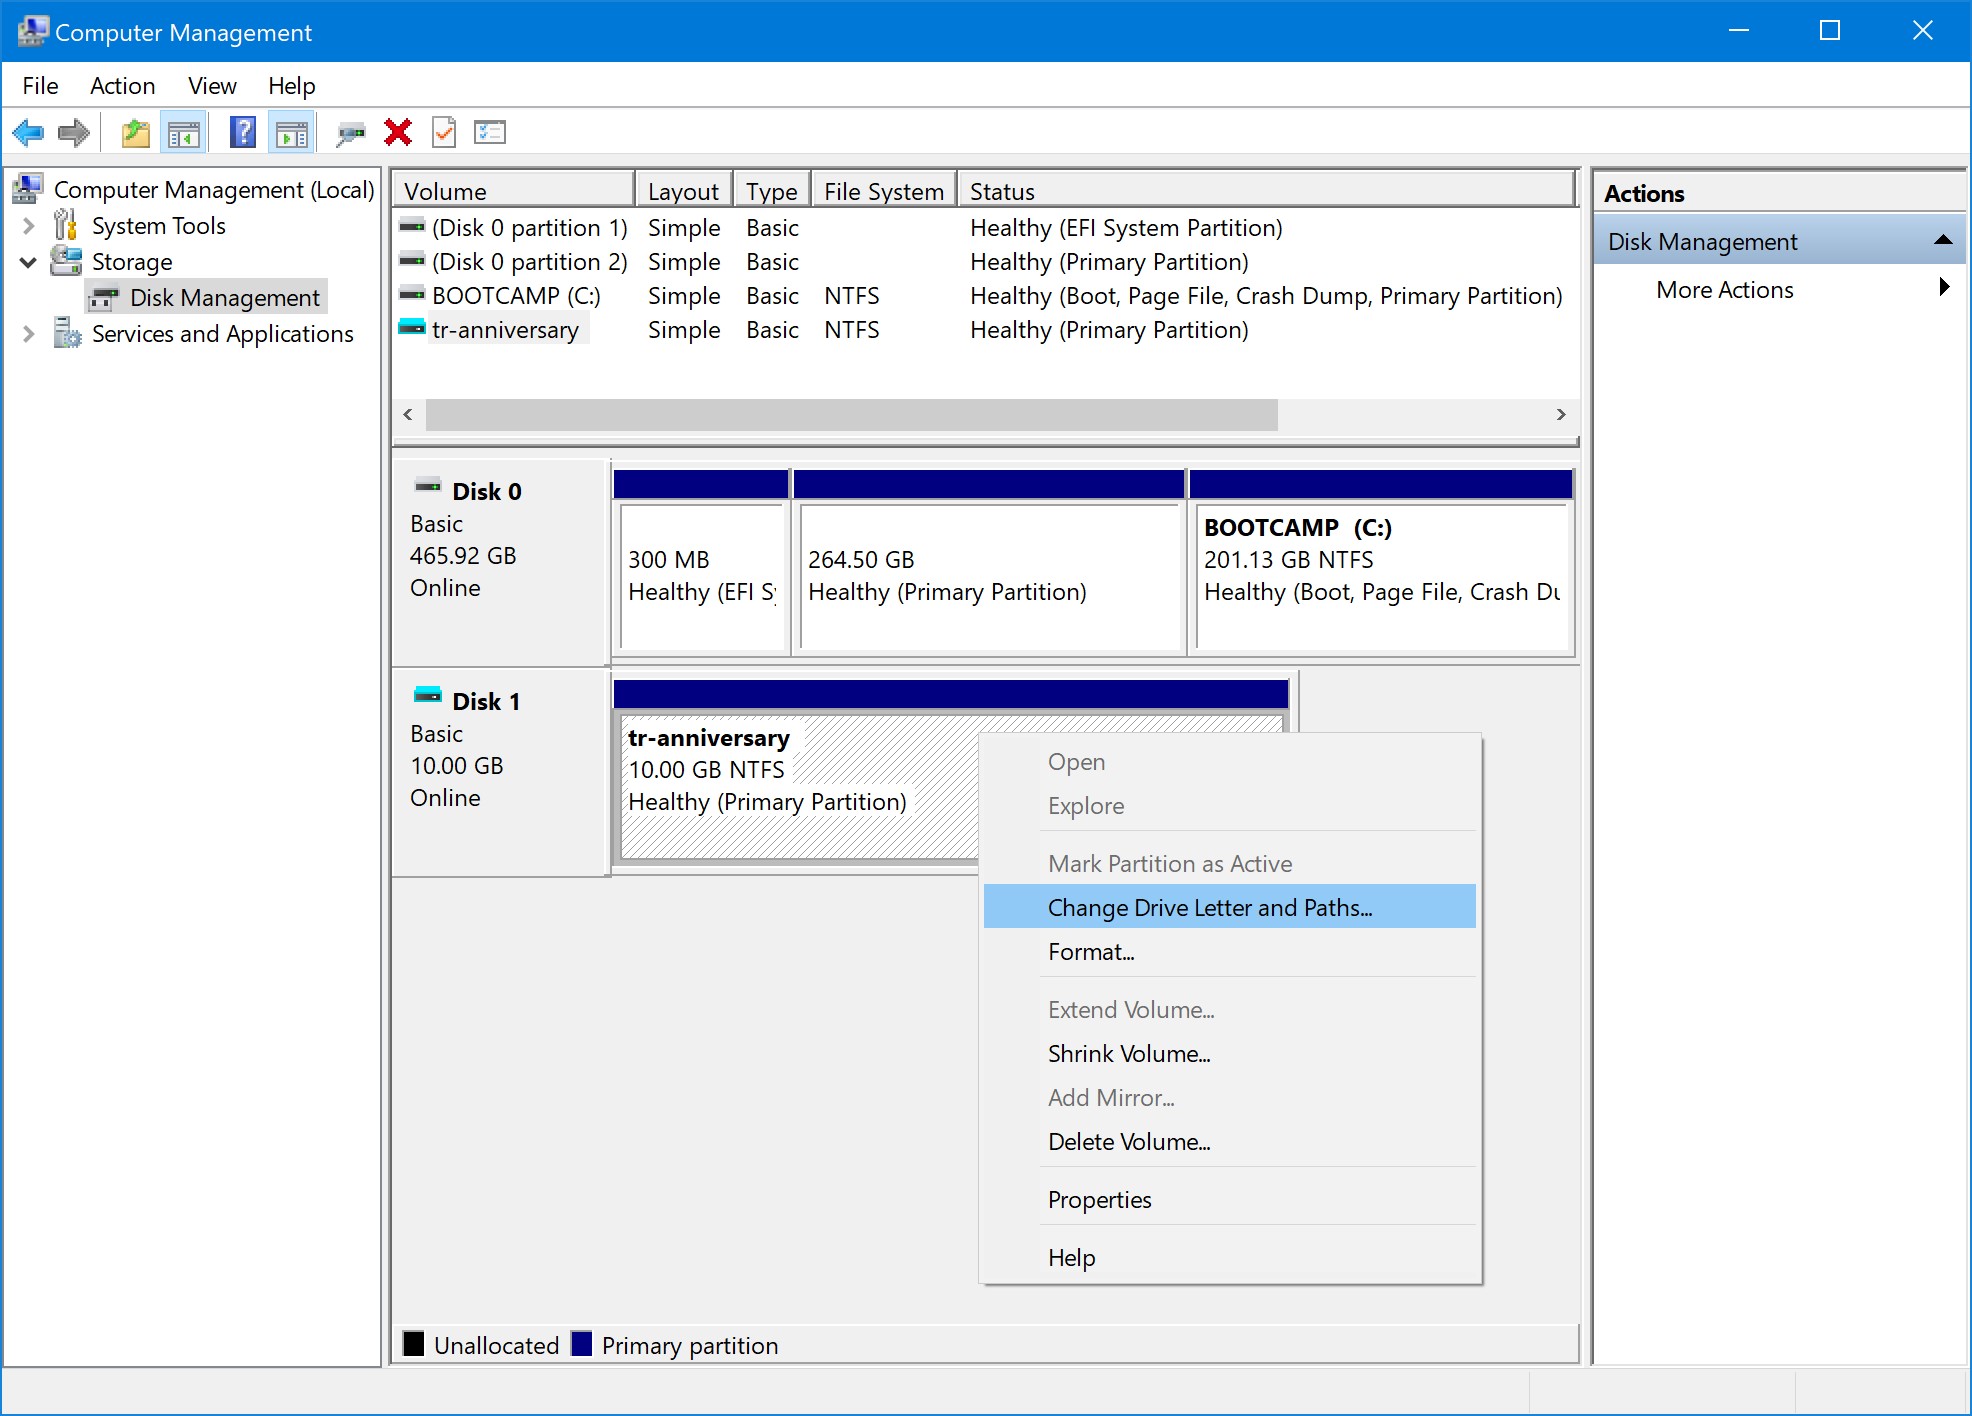
Never install games to C. If you only have one physical drive then create a seperate partition for games. Windows 11 gets by just fine on a 145GB partition.

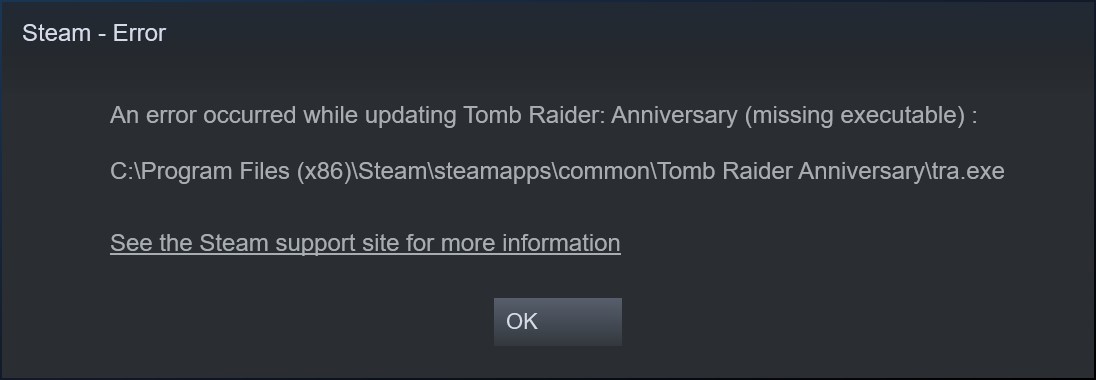
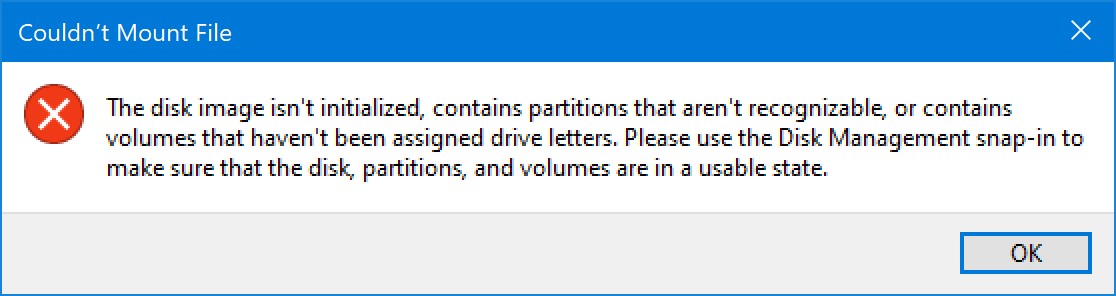
I went into my documents and found the "Tomb Raider - Legend" folder. I got an error when I tried to open it.

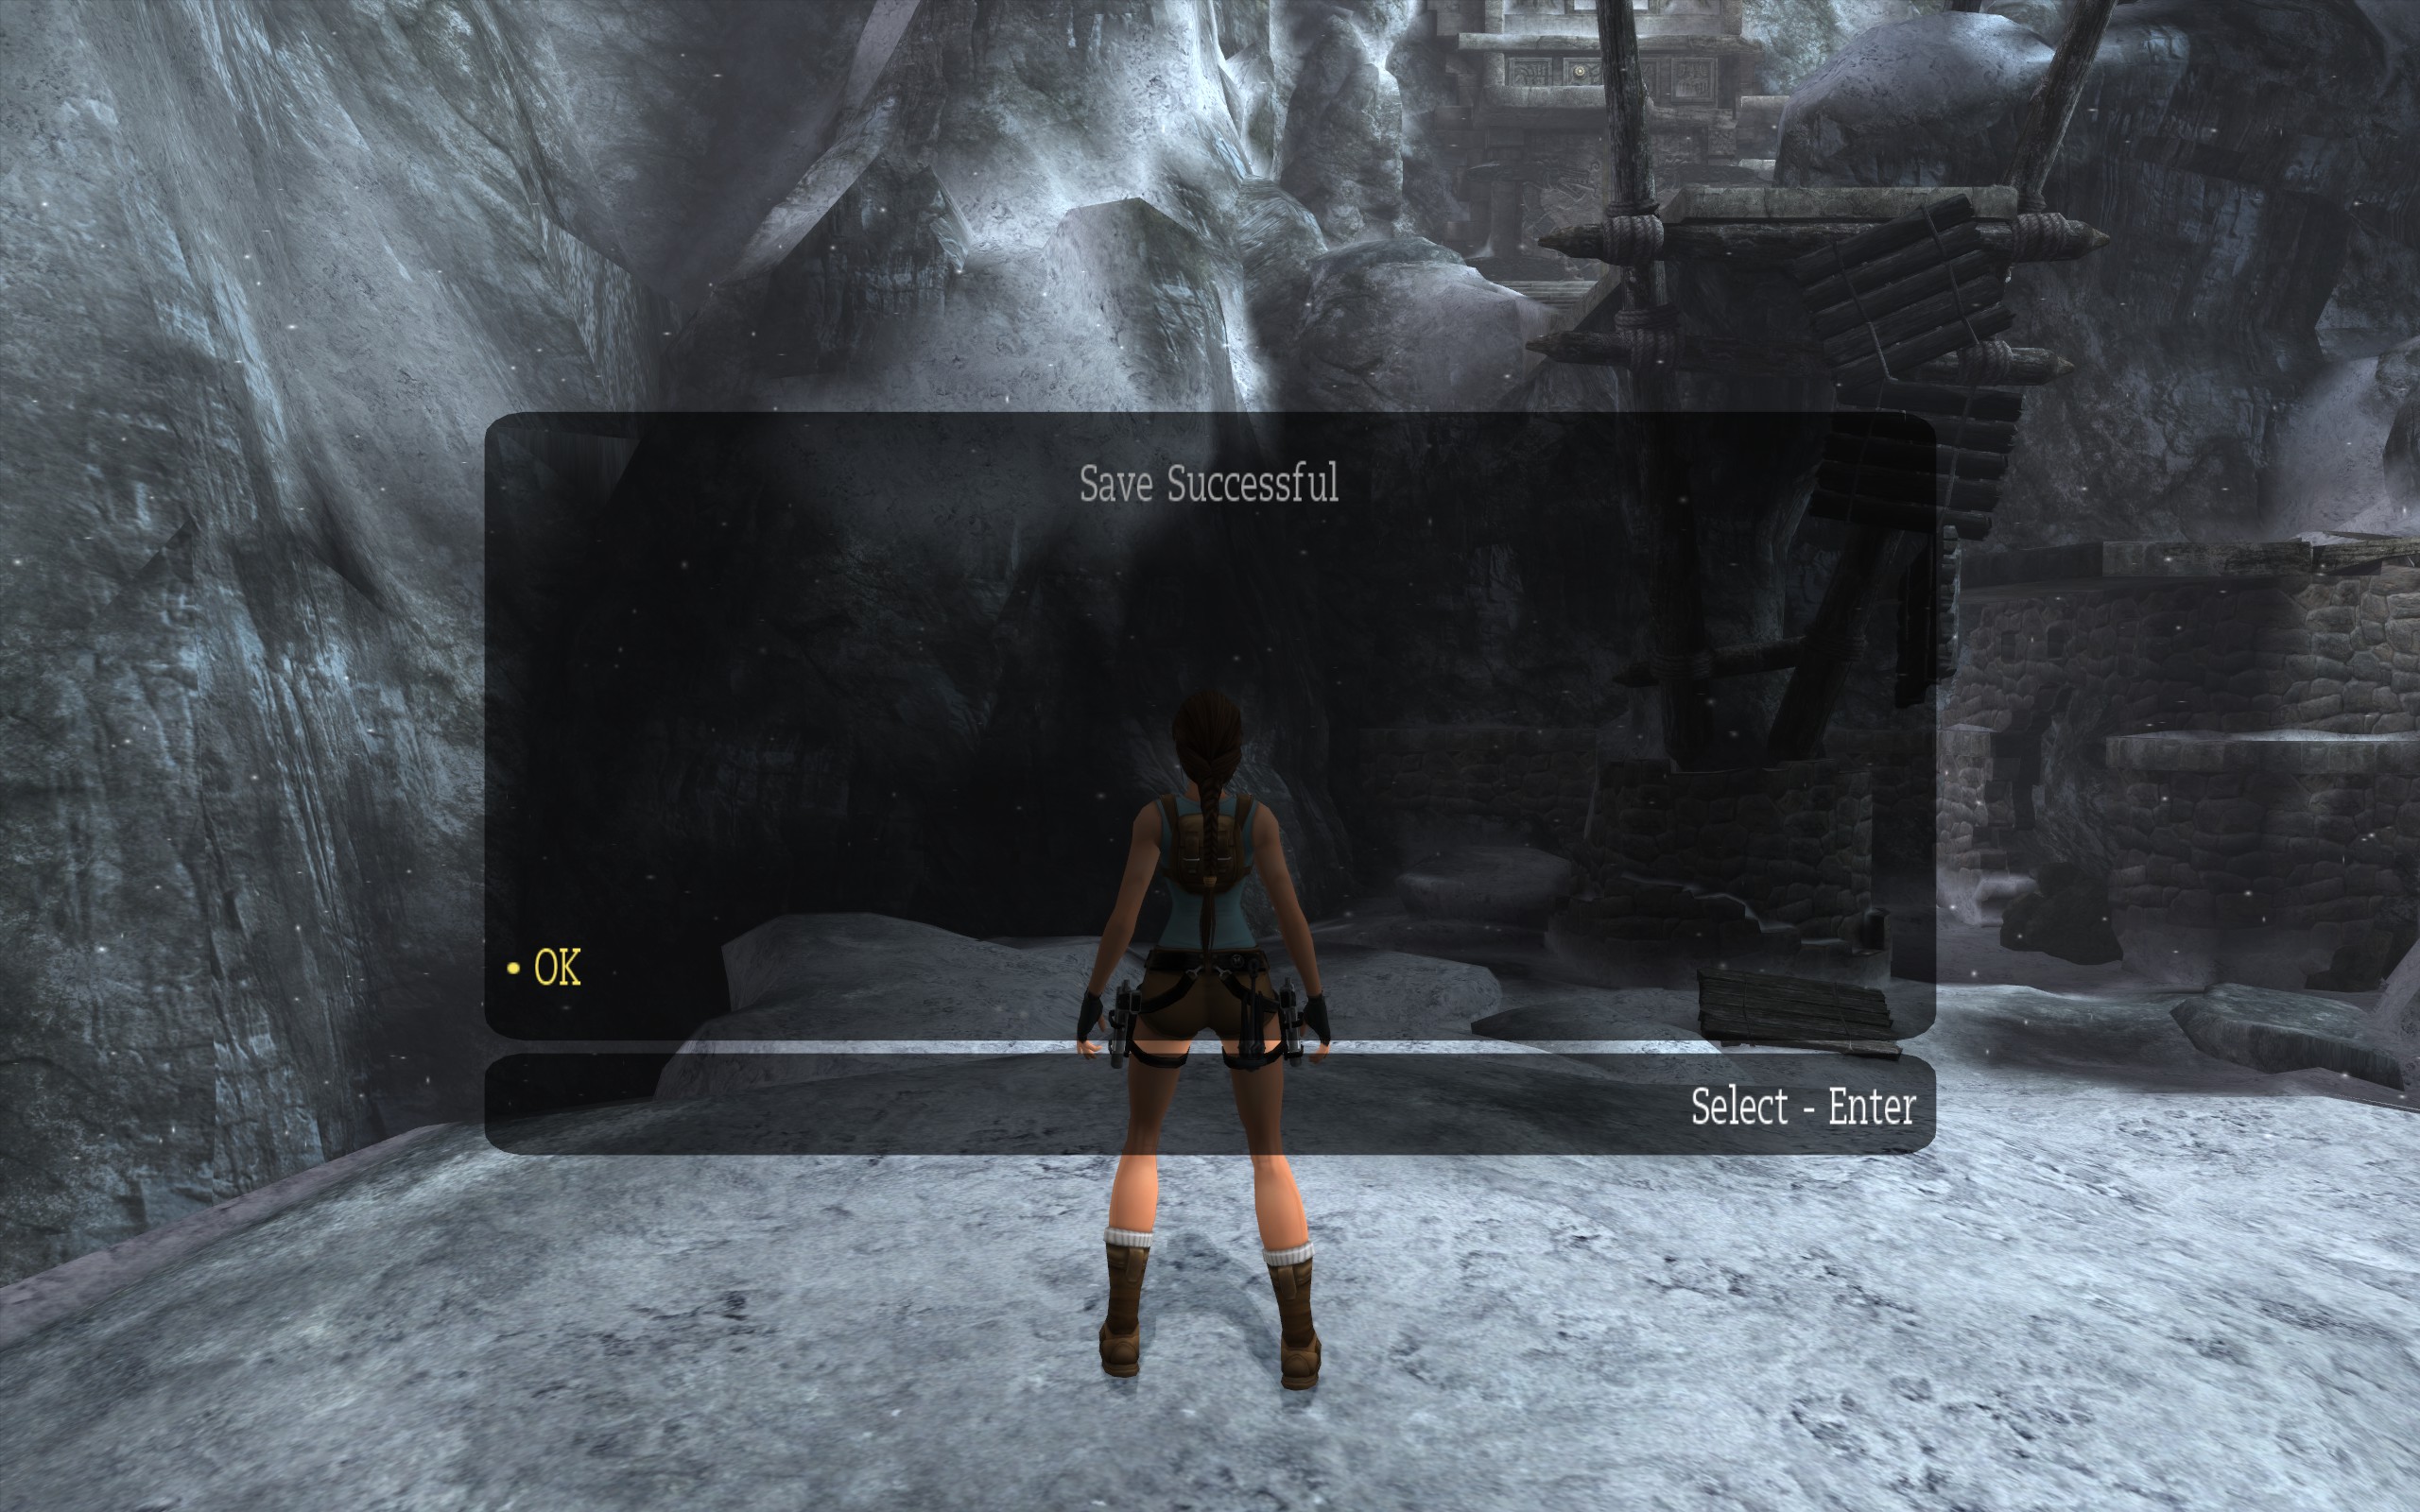
I deleted the folder and manually made a new one in the same location and made sure read only was off.

TRL saves fine now.

Win 11 23H2
Loco  [author] 12 Feb, 2024 @ 5:55am 
Which steps are you having difficulty with?
killered7 11 Feb, 2024 @ 5:44am 
This needs an update for Windows 11 because I've been trying to follow the steps but everything is all different now.
CyDragonV2 3 Feb, 2024 @ 7:54am 
man who knew you had to dig into the latest windows security functions just to green light this game to work
CyDragonV2 2 Feb, 2024 @ 11:40pm 
I very recently installed this to a partition of my ssd on my current gaming laptop and as soon as the first cutscene of the nuke explotion plays out or gets skipped the game crashes
Loco  [author] 15 Nov, 2023 @ 4:13am 
You are very welcome. Have fun!
lvdv4j 27 Oct, 2023 @ 7:00am 
Oh my soul you are a star! Thank you so much, this worked!