Far Cry 4

Far Cry 4

306 ratings
Far Cry 4 Useful Weapons Guide
By Category Theory
This covers the most useful weapons in Far Cry 4, with some discussion of typical loadouts for both stealth and loud operation. It also has a section covering weapons that are overpowered so that you can avoid these on your first playthrough if you want to avoid spoiling the game.

(This material is available under a CC-BY-SA[creativecommons.org] license; see the last section for details.)
6
   
Award
Favorite
Favorited
Unfavorite
Introduction
Editor's note: if you like this guide, please remember to rate it using the "thumbs up" button above!

This is not a guide to all the weapons in Far Cry 4, but primarily the most "useful" ones. (For stats on all weapons, and information on where to find them, see the Far Cry 4 Weapons Database, also on Steam.) By "useful" I mean the weapons that are best-in-class as you earn them during the game. However, some weapons (mainly specials that come with pre-order bonuses or the Season pass) are so powerful as to destroy the game balance, either at the time they become available or in some cases at any stage of the game. I list these as well so that you can avoid them if you want to play a balanced game (or use them if you want to blitz through a section of the game that's otherwise causing you a lot of trouble).

Editors note: there may still be one or two of somebody's favourite weapons missing from this guide, since it was written by someone who tends towards a stealthy playstyle. If your favourite weapon is missing, please leave a comment!

I give fairly detailed descriptions of each weapon so that you can easily choose the ones that suit your style of play. I also include a few weapons I call "interesting" because, though not necessarily particularly effective, they're fun to try out and can add enjoyment to the game.

Spoilers

The main thing spoilt by this guide is that you're going to know at the start of the game about weapons that are not yet unlocked thus don't appear in the Weapons list at the trading post. You'll also know detailed information about the characteristics of each weapon before trying it out.

Beyond that, there are a few cases where I mention on which particular missions you can first get a weapon; these are blocked out with spoiler tags in case you don't want this information. For more details on where or how all of the weapons are unlocked, see the following resources:

Weapon Statistics

For easy reference, with most weapons we give the stats as well. Here is the format and detailed descriptions of the fields.

(A/D/R/F/M, m/e)
  • A; Accuracy
  • D: Damage
  • R: Range
  • F: Fire Rate
  • M: Mobility
  • m: magazine size
  • e: extended magazine size, if one is available for the weapon.

Experience Points (XP)

There is here mostly because I can't find a better place to put it. :-)

Headshots get you more XP than normal: typically 25 XP rather than the 10- you get for a takedown. However, longer-range headshots seem to get you more XP than you would otherwise; e.g., a 50-XP headshot against a certain type of soldier might get you 125 XP at a longer range.

I've seen what seem to be similar things for takedowns, such as 120 instead of 30 XP for a takedown of the most basic enemy soldier in some circumstances (such as when I was saving a hostage). I am not yet clear on the details of how all this works, however.

Corrections and Updates

I'm always happy to have help with the guide; please feel free to contact me (Category Theory) with any thoughts on particular weapon characteristics or weapons that you think should be in the guide but that I've missed. Or post a comment if you've got any thoughts at all on what's good or bad.
Thrown Weapons
The thrown weapons, particularly the throwing knife, are sometimes overlooked, but are some of the most useful weapons in the game for several reasons.
  • They do not take up weapon holster slots; you have all four available at all times, in addition to any other weapons you have.
  • They're the most silent weapons in the game.
  • They can be used while driving a vehicle, unlike any other weapons except sidearms.
  • They include the throwing knife, a surprisingly powerful and accurate silent ranged weapon, and a powerful explosive weapon (the grenade).
  • They are all available immediately upon starting the open world part of the game. (They're made available to you during the linear missions leading up to that point.)
The main disadvantages of thrown weapons are:
  • Considerably lower ammo load.
  • Ammo is more expensive than for launchers and bows (though throwing knives are retrievable after use).
  • Throwing knives may do less damage than bows.
  • Grenades are more difficult to use than explosive launchers (especially without Sticky Grenades).
  • Shorter range for throwing knives and grenades as compared to bows and launchers.

Selecting the Current Thrown Weapon

On the PC, the default button to use the current thrown weapon is the middle mouse button. There are two ways of selecting the current thrown weapon: turning the mouse wheel or bringing up the on-screen weapons wheel (the default key for this is 'Q').

There are two unfortunate issues with using the mouse wheel to select the current thrown weapon. First, it's rather to easy to accidentally change the current thrown weapon when you try to use it by pressing the mouse wheel, and second, regardless of which direction you turn the wheel, it always cycles through the weapons in the same direction. Thus, I suggest you chose something other than the mouse wheel for this purpose and instead always use the weapons selection key/wheel to select the thrown weapon you're about to use.

However, do keep in mind that this binding is also used to select the zoom level for sniper rifle scopes, so you should still assign it to something you can reach easily enough for that purpose.

Throwing Knife

Potentially the most under-rated weapon in the game, the Throwing Knife is very nearly the equivalent of a bow, and even more silent. As with the bow, you have to hold down the button for a moment or two in order to get the best accuracy (or much accuracy at all), but once the cross-hair has switched to a dot, you'll find that you can easily do headshots at 15 m or more.

The throwing knife will silently kill unarmoured enemies with one shot to the body and any non-heavy enemy (even northern lieutenants) with a single headshot. (However, while most armoured enemies can be killed with 2-3 hits to the body, the knife will completely bounce off heavies, doing no damage at all.) It's also useful on small- to mid-size animals (especially herbivores), and gives you the same double-skin and karma bonus you get from the bow.

If you don't need the grenade/Molotov launcher capabilities of the Recurve bow, and can live with the more limited range of the Throwing Knife, consider trying it as your substitute for a bow. If this works for you, it frees up a weapon holster slot for something else.

Knives, as with arrows and bolts, can be collected again after being thrown, either from the corpse (for those that hit) or the nearby area (for those that missed).

Grenade

The lowly grenade has neither the range nor accuracy of a grenade launcher, and requires practice to deal with both the delayed fuse and where it will bounce after it hits a surface. (The Sticky Grenade skill helps with the latter.) However, once you've learned to use it, it's perfectly capable of substituting for the M-79 Grenade Launcher as a way of blowing up enemy vehicles (and usually their occupants) that disturb you while you're driving along.

Since the enemy spots a grenade as soon as it lands near them, the main skill you need to learn to use them effectively is how long to wait before throwing them. (This wait is also what reduces the fire rate of hand grenades considerably below that of a grenade launcher.) As soon as a grenade lands near the enemy they will see it and scatter, and it will also (if you're not using sticky grenades) bounce away from its original aim point. Holding the grenade for a couple of seconds before you let it go helps mitigate this delay, but of course be careful not to blow yourself up. (And, at longer range, take care not to hold it so long that the grenade detonates before reaching its target.)

Buying and using the Sticky Grenade option will mitigate the bounce problem.

Molotov Cocktail

While explosive weapons can set things on fire, they're not nearly as reliable as a Molotov or a Flamethrower for doing so. Those two weapons are also quite complementary due to the rather short range (and more expensive ammunition) of the flamethrower.

While Molotov cocktails suffer from having a relatively low ammo load compared to the Flamethrower, they have the significant advantages of longer range, being cheap, and being available from the start. It's not unreasonable to consider them the best fire-based weapon available.

As direct-fire weapons they aren't as good as grenades, since, though they explode on contact, they take some time to kill enemies or destroy vehicles. However, in appropriate territory they're great as area denial weapons: you can set an area of grassland on fire and ensure that enemies won't approach from that direction while you deal with enemies from a different direction. (Do keep in mind that enemies with ranged weapons will still shoot at you through the fire, though.)

They're also useful when you don't have a Hunting Syringe available (or don't want to use one) to burn off canopy that's blocking your sight lines. For this purpose you'll usually want to aim at a lower or middle part of the trunk of the tree that's blocking your view.

Bait

Bait has three basic purposes:
  • to quietly attract wildlife to an area where enemies are present, in order to distract the enemies into dealing with said wildlife (and perhaps even have the wildlife kill them);
  • to quietly distract wildlife (for a short time) that's bothering you when you're busy trying to deal with something else (such as scouting enemies); and
  • a purpose described below, in the spoiler section "Easy Pelt Collection".
Bait cannot be bought; it's gained from skinning killed animals.
The Weapons Holster and Weapons Acquisition
Acquiring Weapons

Standard weapons can be acquired in two ways: by purchasing them at the shop when they become unlocked, and by picking them up in the world from dead soldiers, weapons stashes and the like. In the latter case, merely picking up a weapon and dropping it again will unlock it and make it free in shops, so it's worth doing this when you see a new weapon, or are offered one at the start of a mission, even if you don't intend to use it. (However, if you're offered a weapon at the start of a mission, that's a suggestion worth following. Take it, unless you already have a similar but better one.)

Special weapons can be acquired only through purchase, after unlocking them. Most special weapons require completing certain objectives (missions, spinning mana wheels, etc.) to unlock them. A few (notably the Sandman and the Driller) are unlocked for purchase immediately if you have the Season Pass. A notable exception is the A.J.M. 9 (also described below), which is purchased with Uplay points.

A number of the special weapons are considerably overpowered, so it pays to check the descriptions of them later in this guide before using them, lest you inadvertently ratchet the game down in to "easier than n00b mode" by using one.

When it comes to purchasing weapons, it will quickly become clear that if you regularly loot bodies and do any reasonable amount of exploration for chests (without buying maps) it's not hard to earn enough money to buy everything as it unlocks and then some. (The game really does give you a huge surplus of cash if you do much more than the bare minimum to get through the main campaign.) So it's usually not worth putting off buying a weapon that you want to try simply because you're worried about the cost.

The Weapons Holster

The weapons holster initially holds a single weapon of any kind. Adding a second slot, which can hold a sidearm only, requires three Tibetian Wolf pelts, which will come easily with one of
the first missions in the open world. (If you want it immediately upon entering the open world portion of the game, do Amita's mission, "The Wolves' Den," first, but see below about the Recurve Bow,)

Two slots is actually a reasonable minimum configuration for a good deal of the game, if you carefully consider what weapons you need and know how to use them, as well as make good use of your thrown weapons and takedowns. That said, it won't let you play around as much with weapons as you could otherwise.

The third slot (which can hold any type of weapon) can be achieved quite early in the game. You'll need 3 Tapir skins; these are not too hard to find if you explore the area between Banpur and Khilana Bazaar (the first outpost) during the evening or just look for a hint online

Easy Pelt Collection

Though this doesn't really apply to the Weapons Holster, there's a particularly easy way to collect carnivore (but not herbivore) pelts for other upgrades. You're likely to figure this out on your own, but just in case you don't have the patience to do that, here's the trick.

You need to find a rock or outcropping that's significantly higher than the ground below it, and which requires travelling a moderate distance to either side in order to be able to get up to that position. You can also climb a building (such as the one in the middle of the first outpost, Khilana Bazaar) but be warned that the cats can jump as high as you can, and so will be able to jump up to the top of a building from the same direction you came up.

Once you're up top, toss bait to the area down below you. Soon a random carnivore will appear and stand still to start devouring the bait. This gives you several seconds to aim and get an initial headshot on the animal. If this kills it immediately, you can jump down to retrieve the pelt(s) and also gain another unit of bait. Otherwise a second shot to the body will generally kill the animal. An exception is bears, but fortunately they cannot climb buildings.


The Recurve Bow is especially good for this, since a kill with it gives you two pelts per animal, a single shot does quite a lot of damage, and the technique mitigates the slow reload of the bow. If you're using a bow without a scope, remember that at this range you'll probably find shooting from the hip to be more accurate.
Standard Weapon Loadouts
While you might take special loadouts for certain missions, there's usually a set of weapons of particular types that you'll carry for most missions (and when just wandering around) that suit your specific playstyle. Most players split in to one of two groups: Quiet and Loud.

The Quiet player works via stealth and attempts to avoid being spotted. Distraction and takedowns are often a primary weapon, but (as you'll see below), nearly silent arrow/bolt weapons and quiet suppressed firearms also have their place. (But don't forget that you have Throwing Knives as well.)

The Loud player has less of a problem with letting the enemy know that they are under attack, though he might still hide fairly well from the enemy with clever use of movement, even though he has a noisy gun. Though some missions (such as hostage rescue and bomb defusal) are heavily tilted toward stealth, a sufficiently clever and fast player can work them with loud weapons as well, especially with clever use of incendiary and explosive weapons (including time-delayed ones such as C4 and mines).

When it comes to earning XP when taking down strongholds, either strategy can work well: loud players compensate for the loss of the unspotted and no-alarm bonuses by having more enemies to kill and thus earn XP from.

Quiet Defense

Though it's not initially obvious, when working in stealth mode you will probably want a weapon that can deal a lot of damage quickly at close range, but do so nearly silently. When you're busy scouting an outpost or other group of enemies, a leopard, group of dogs or some other annoying animal tends to pop out near you at the most inconvenient of times. A noisy shotgun or submachine gun (or, worse yet, a grenade) is likely to alert the enemy that you're in the area, changing guard patterns and possibly sending some of the guards your way.

One way of dealing with this is by tossing some bait to distract the animal. However, this provides only a temporary reprive as the animal soon grows bored of the bait and comes back after you.

Until the Bull (a special weapon, and the only suppressed shotgun) becomes available, your only serious options in the "get rid of annoying animals quick, but quietly" category are a suppressed fully automatic weapon (assault rifle or SMG) or perhaps an A.J.M. 9. If you have three slots, or if your main weapon is a suppressed assault rifle (perhaps excepting the MS16/Trooper) or SMG, you're fine. Otherwise, with only two slots, you can try the A.J.M. 9 or Stinger as your sidearm, both of which are also practical for silent headshots at moderate (25 m) ranges if you take time to aim.

A suppressed semi-auto pistol, given a large enough magazine, may be workable in the earlier parts of the game. (The Sandman, a special version of the 1911, is available for purchase from the start if you have the Season Pass.)

The recurve bow, unfortunately, simply has too low a fire rate to be practical unless you're spectacularly good with getting headshots while shooting it from the hip while you're being attacked.

Quiet Assault

The throwing knives and the bows are by far the quietest weapons, and also give you bonus karma and skins when hunting animals, which can be quite useful early in the game. However, with the exception of the Auto Crossbow (which is not available until the middle of Act 2), all of these weapons are limited by a slow rate of fire and poor or no sights. The Hunter Bow and Recurve Bow do allow you to silently fire incendiary and explosive ammunition (once you have the correct skill to buy it) with considerably more accuracy and range than you can achieve with Molotov cocktails and grenades.

The better suppressed firearms invariably offer considerably higher rates of fire and better sights. Sniper rifles, in particular, have sights allowing accurate fire at considerably longer ranges, and also offer the ability to perfectly stabilize your aim for a short time by holding your breath. However, suppressed firearms, while still avoiding immediately alerting the enemy to your location, are noisy enough that you will usually be spotted after a few shots, so it pays to keep moving when using these.

See the "Sidearms" section below for details on the various suppressed and loud sidearms that are available. If one of your main arms is quiet or suppressed, having a quiet or suppressed sidearm is usually not terribly critical since noise makes no difference in situations where you must use a sidearm, such as on a vehicle. (The noise and obviousness of the vehicle itself will generally ensure you're quickly spotted.)

If you are going to carry a suppressed sidearm, the best ones are the A.J.M. 9, Stinger, and Auto Crossbow.

Loud

For loud players, the obvious sidearms are the M-79 and the D2. These are complementary: The M-79 works very well at long ranges, but you risk damaging yourself at short ranges. The D2 is very effective at short ranges, but drops off so quickly that even at medium ranges it's almost useless.

Beyond that, you'll want to look at the particular weapons that are available at your stage of the game, and see what loud weapons offer enough of an advantage that they're worth replacing a quieter counterpart. By the time you get near the end of the game, suppressed weapons have such high damage and fire rate that the only significantly better options are the overpowered main arms described in a later section below.
Sights
Outside of sniper rifles, explosive weapons, and so on, for most weapons there will be a selection from one of four standard sights that have the same zoom and stats bonuses:
  • Red Dot sight - low zoom and moderate stats boost; poor in low-light conditions.
  • Reflex sight - low zoom and moderate stats boost; better in low-light conditions.
  • Optical sight - moderate zoom and good stats boost; easiest to aim.
  • Marksman sight - moderate zoom and good (but different) stats boost; less easy to aim.

As you can see when you select a sight for potential mounting or replacement in the store, thesehese sights make a difference beyond just how much more zoom you get when you aim in: they also increase the accuracy, mobility and sometimes the range of the weapon. These bonuses apply even when shooting from the hip (i.e., not using the sight).

The Red Dot and Reflex sights, as well as providing slightly more zoom compared to the iron sights, are always equivalent in that they each give an extra point to both accuracy and mobility. The key difference between the two is how they react to light: in dark areas, the Red Dot sight will tend to wash out to red (making it harder to see through the sight) much more than will the reflex sight will wash out to blue, and the reflex sight's sight picture, with a smaller dot in the middle, makes it easier to fire more accurately. Thus, if you have a choice between the two, you should always pick the Reflex sight over the Red Dot sight (unless you have an aesthetic reason for choosing otherwise, of course.).

The Optical sight typically goes beyond the previous two to give two more points to accuracy and one more to range, as well as one to mobility. It also has more zoom when aimed in. Thus, if you're working at range, it generally makes more sense to take the Optical sight. The Optical sight is also the best of the lot in terms of sight picture, since you aim based on lines around the centre, with nothing blocking your view of the exact target of the weapon.

Some weapons also have a Marksman sight available; this is distinguished from the Optical sight by having very slightly more zoom and providing only one more point to accuracy (rather than two) but two more points to range (rather than one). However, the sight picture is quite different: the Marksman sight uses a thick red "A"-shaped triangle in the reticle that covers the aim point. This is not nearly as easy to use as the Optical sight, though with practice you may find you can work with it.

Keep in mind that, within a 5-10 m range, almost any rifle is accurate enough to put the majority of its rounds in to an enemy's main body mass, and often even the head, when shooting from the hip. (This range increases to 10-15 m with the Casual Marksman skill.) When the enemies get close in, it's often better not to aim in (especially when using a higher-powered optic). Instead, avoid the aim-in delay and use the the wider field of vision and faster movement you have with hip-firing to help you engage targets and find cover more quickly.
Introduction to Sidearms
Your second weapon slot can carry a sidearm only. This limits you to the guns under the "Sidearms" section of the shop, along with the first five signature weapons (the Sixer, HS77, Sandman, Cannon and Rebel, all of which use pistol ammunition) and the signature 87 shotgun.

Sidearms have the following general characteristics:
  1. They are the only weapons, outside of throwables, that can be used when driving a vehicle or on a zipline.
  2. They are worse in every statistic (accuracy, range, damage, ammo capacity and available mods) than two-handed weapons of a similar level.
  3. With the exception of some of the signature sidearms and the M79, they're worse than pretty much every two-handed weapon in the game.
That's not to say that they can't work well, of course. The key is to understand the situations in which they can be used effectively, and use them only there. (This of course can be fairly helpful in the game, since one of your weapons must be a sidearm.)

Sidearms and Driving Vehicles

The major area you'll be using sidearms is when driving, since in that case you have no choice of any other weapon. When driving, noise suppression is typically unimportant (you're usually quickly spotted by enemies due to the noise of your engine and size of your vehicle), but the range at which you're likely to use a weapon when driving should be carefully considered.

If you're mainly concerned with short-range work (usually, killing drivers and passengers in other vehicles when you don't have the Vehicle Takedown skill) the sidearm shotguns (the D2 and the signature 87) are often the best. They do great damage and also have spread that can allow you to damage or kill more than one enemy with a single shot.

When dealing with enemies not immediately adjacent to you, the pistols (including the A99 SMG, which uses pistol ammunition) and the single-handed SMGs (the Skorpion and signature Stinger) do better, so long as you can manage to aim them decently when moving.

The M-79 grenade launcher incredibly effective at medium to long ranges, but dangerous when shot at short-range targets since you are likely to hurt both yourself and your vehicle.

In some situations it may make sense to carry two sidearms, one in the sidearm-only slot, and another in a regular slot.

Choice of Sidearm

Your choice of sidearm will be very much predicated on your preferred playstyle. If you like blasting away at enemies (or groups of enemies) with shotguns at close range, the D2 will probably work for you and the signature 87 will be brilliant. If you prefer to start off shooting when you're a little further back, a pistol or SMG will probably be a better choice. And if you prefer stealth work, where damage isn't as important as being quiet, you can make very good use of any of the suppressed sidearms, leaving a two-handed slot free for a more powerful but louder weapon.

The Auto Crossbow

Though this is a sidearm, it's rather different from all the other sidearms in that it's got very low DPM and fire rate, and is extremely difficult to use when pressed at short range or when driving in a vehicle. For this reason we discuss it in the section about bow weapons. It's perfectly reasonable to dedicate your sidearm weapons slot to this weapon, so long as you keep in mind that you probably won't find it useful in driving/zipline situations where a sidearm is your only available weapon.
Useful Sidearms - Pistols/SMGs
These weapons are given more or less in order of preference as you encounter or unlock them from the start of the game. However, you should consider your own preferences for range and accuracy as well; you may find the Sandman or even the 1911 to be superior to the Skorpion or the A.J.M. 9 if you work better with small amounts of well-aimed fire over a more "spray-and-pray" approach.

Sixer
(5/4/3/2/5, 6)
A Signature weapon, but unlocked for purchase from the start, assuming you can scrape up the 255,000 K to purchase it. Given how easy it is to grind money if you want to, it's probably worth a go.

Were it not for the low ammo capacity and the slow reload, this would rank better than the 1911 throughout the game. Still, it does rank better in both aiming (the optical sight really helps here) and in fun: it has both a more powerful "feel" than the standard 1911 and that Dirty Harry vibe. ("Do you feel lucky, Rhino?")

Sandman
(6/5/3/5/6, 10)
A signature weapon available from the start if you have the Season Pass, this variation of the fairly powerful 1911 pistol has an extended magazine, a suppressor and a Red Dot sight; only the first of these is available for the 1911. This makes it the best pistol available (if you have access to it) until you can unlock the A.J.M. 9, and even then it's arguably better for ranged work due to the sight giving you a little bit of zoom. (It's also a bit more economical on ammo.) It's an excellent start to a stealth loadout, and eminently usable throughout the first half of the game.

It's also worth mentioning how satisfying it is to shoot this handgun. The scope and its zoom make targeting a pleasure, for a start. You'd also expect a 1911 to have a nice little bit of kick (the standard version rather fails on this point), but the Sandman makes a very satisfying, quiet "thwack" when you shoot, and does enough damage that you don't feel you're using a spray-and-pray weapon.

Skorpion
(2/3/2/7/6, 24)
The Skorpion is immediately available from the shop when you reach the open world portion of the game. It's the only other non-special sidearm that's comparable to the A.J.M. 9 (see below), but, while fully automatic (and it's debatable whether or not that's better) and having a much larger ammo pool, it doesn't have a suppressor, which renders it far less useful if you're using any stealth at all. It's also rather less accurate, making it harder to take out guards with headshots. However, if you're running loud early in the game, or need something reasonably powerful to defend yourself while driving, a Skorpion paired with an assault rifle gives you a goodly amount of firepower and a very large ammo pool.

(See below for the Stinger, a much more useful special version of the Skorpion.)

A.J.M. 9
(6/6/5/4/5, 9/18)
Unlike any other weapon in the game, the A.J.M. 9 is unlocked via Uplay points (30 required), which means that if you've played other Ubisoft/Uplay games, you may even be able to unlock it right at the start. Doing so is well worthwhile.

The A.J.M. 9 fires a three-round burst with each trigger pull, though it will fire only one or two rounds if you take your finger off the button quickly enough. It comes by default with a partial night sight (the front sight blade is illuminated, though the rear is not), and has a suppressor and an extended magazine available. (It's not actually a signature weapon, so you need to buy these attachements.) Fortunately both can be mounted at the same time, since the standard magazine is woefully small.

Unlike other sidearms, the range is quite good, exceeding that of the early assault rifles. However, given that it has only iron sights, it's very hard to make effective use of this range under most circumstances.

In its fully upgraded configuration it's not the quite equal of a good submachine gun for damage or—especially—ammo capacity, but nonetheless is quite effective against smaller animals (such as Dholes and Tibetian Wolves), weaker enemies, and also accurate enough for quiet headshots at ranges up to 40 m or so. However, stealth sniping will almost invariably be easier with the Sandman, due to its optic sight giving a little bit of zoom. Often even relatively short range situations can be easier (and considerably more economical on ammunition) with the Sandman, because of the optical sight.

If you can get this weapon reasonably early in the game (either by getting the Welcome to Kryat and Community Surprise Uplay actions as soon as you can, or by using Uplay points earned in other games) it will serve you well as a stealth weapon until you can get the Stinger special SMG, and perhaps even past that. If you're going loud, you'll probably want to upgrade to either the D2 or 87 shotgun (assuming you don't mind the reduction in range) or M-79 grenade launcher as soon as you can.

1911 Pistol
(4/3/2/4/5, 8/10)
The 1911 is not a bad weapon at the start of the game, despite the lack of a suppressor. However, you'll only find them in the south on solders who were driving a vehicle and shot at someone while doing so. (The earliest one is the one soldier who charges in on a snowmobile during the tower defense encounter at the end of Act 1—if you rush to his body before the avalanche, you can pick it up, per Your_Highlord's comment.) If you use that trick to find one early, you've got an decent handgun near the start. Otherwise, if you have to wait until well in to the game, after you've liberated 13 Bell Towers, you're likely to have found a useful sidearm by that point. This might be one with sound suppression (such as the Skorpion, A.J.M. 9, or Auto Crossbow) or without (such as the 87, unlocked from environmental missions, or the M-79 or D2, unlocked after liberating 8 and 9 Bell Towers, respectively).
Useful Sidearms - SMGs
Though this submachine gun section is separated from the "Pistols" listings in the sidearms section, it is still true that, for many players, we're going in order of desirability and the following weapons will work better than the pistols listed previously. That said, keep in mind the warning at the introduction to the sidearms section: your playstyle (particularly regarding aiming vs. spraying) will be the key choice you make, and the weapon should follow from that. If you find a pistol more fun than what's on this page, then continue to use it!

Stinger
(3/4/3/7/6, 30)
The Stinger, a special version of the Skorpion (see above) with a suppressor and a sight (which greatly increases the accuracy), greatly mitigates the issues of the Skorpion. However, except very early in the game, those who prefer firearms and have three or more weapon slots may be better off using a more powerful two-handed SMG, leaving the sidearm slot free for another weapon. However, the Stinger is certainly a useful backup weapon for a bow user.

The Stinger can be unlocked reasonably early on by destroying two Pagan's Wrath convoys.

A99 / Rebel
(6/6/9/3/7, 20/30/50)
The fully automatic A99 is quite a decent machine pistol, though marred by some problems. Equipped with the Optical sight (giving better accuracy and range than the A.J.M. 9) and a suppressor, it's quiet and has the advantage of using the pistol rather than the SMG ammo pool. However, while the extra ammo (if you're also carrying an SMG) is welcome, the ammo pool is small (only 40% that of the SMG ammo pool), the ammo is slightly more expensive than SMG ammo, and, most critically, it's not available until quite late in the game. That said, once you get it, it's a decent option as a suppressed sidearm, and can take out even large animals fairly quickly as well as being better at mid-range headshots than the A.J.M. 9.

The Rebel is available much earlier if you concentrate on liberating the ten outposts necessary to acquire it, but suffers from lack of a suppressor, as well as using Red Dot sight, which is the worst of the three sights available for the A99. It does, however, have a 50 round magazine, rather than the 30 round (extended) or 20 round (normal) magazine of the A99. For loud use, you would probably be better off with the D2, given that you've got plenty of other long-range options as main arms.

Due to the small ammo pool, both sidearms require you to be fairly light with your trigger finger to avoid eating through your ammo pool too quickly.
Useful Sidearms - High-damage
87
(2/10/1/5/6, 9)
Available very early in the game (but after taking over your first outpost) by finding five of Mohan Ghale's journals, this is a short-ranged but extremely powerful weapon. As with most shotguns, it's great at point-blank range, and at short ranges (<20m) against groups of targets, but not even as good as a pistol or SMG at medium ranges.

The M133 shotgun will have become available very near the start of the game, and if that worked for you, this is an improvement in almost every way. While the range is the same (the worst possible, short of dropping a grenade at your feet), it does a nominal 25% more damage, holds two more rounds in the magazine, and most importantly can be used as a sidearm as well. It can easily kill several adjacent enemies with one shot, which is particularly useful when they happen to be in a truck right next to the vehicle you're driving.

It can also be useful for killing rhinos for early-game crafting, since you can do it in as little as three shots. That said, the M133 can do almost as well in this role (4 shots) if you know what you're doing; the advantage of the 87 here is that, with its slightly greater damage and two extra rounds, it gives you the extra margin you may need if your skills lead you to kill a rhino in 6-8 shots instead.

D2
(2/9/1/3/8, 1*)
This sawed-off shotgun is loud and short-ranged, but powerful enough that the slow fire rate is not usually an issue, at least against enemies in the first half of the game and all but the largest animals. The useful range is, however, extremely short, making it practical in CQB situations only. This makes it rather the opposite of the M-79.

If you're committed to loud attacks, this enormous single-shot damage output and wide spread (you can easily kill two nearby enemies with one shot) makes this one of the best CQB weapons you can have short of going to one of the overpowered LMGs.

This shotgun actually holds two rounds, but fires them both simultaneously with a single trigger pull, giving it a "magazine capacity" of one shot.

M-79
(5/10/8/2/4, 1)
The M-79 is quite dangerous to use at close range due to the splash of the grenades. However, at medium to longer ranges, it's by far the most powerful sidearm available, and will easily take out a small group of soldiers or even a pickup truck with a single shot. At any point in the game this is the sidearm you want if you're going loud, and it's especially effective when on a vehicle. With an upgraded explosives bag, you can also carry a ridiculous amount of ammo (50 rounds), making it arguably more powerful than any of the rocket launchers. (It's easily capable of taking down a helicopter in one shot once you've learned how to aim it properly.)

The iron sights are unusual and take some practice to use accurately; it's often better to shoot from the hip, especially when aiming at vehicles.
Useful Bows and Bolt Weapons
Stats for the weapons are given in the usual (A/D/R/F/M,m/e) format; see the introduction for details.

One key feature of all bows and bolt-type weapons (as well as throwing knives) is that your ammunition can be picked up after use (either from the corpse, if you hit it, or from nearby, for misses) and re-used. This obviously saves not only expense, but trips to the store to re-equip ammunition.

That said, it's not unusual to find arrows and sometimes throwing knives to be picked up out in the wild (either as bundles, or stuck in walls or similar). However, bolts and harpoons are never found.

Recurve Bow
(7/8/8/5/7, 1)
The Recurve Bow is available for purchase (for about 60,000 rupees) immediately upon completing the initial escape from Pagan Min. Unless you're already quite good with the bow from Far Cry 3, or want to learn using the more difficult Hunter Bow (6/7/7/4/6, 1), it's probably worth buying the recurve bow and a sight right off, especially before doing Anita's first mission. (Earning the cash for this isn't difficult if you run around the area near Banapur looking for chests, and perhaps do another mission first.)

Though it or the Auto Crossbow is required for several hunting missions, it's otherwise hard to say whether the Recurve Bow should be put under the "useful" or "interesting" category. The weapon has three main advantages:
  • In the earlier parts of the game, it's useful for hunting small- to medium-size animals because you'll get two pelts instead of one, as well as extra karma. (This advantage is shared with the Auto Crossbow, which you get only later in the game, and knife attacks, including both Throwing Knives and melee attacks.) However, rhinos, and even bears, are extremely challenging to kill with arrows, especially without appropriate syringes. Even the large cats take enough skill and planning that it may be easier to kill twice as many with firearms.
  • It's quieter than suppressed firearms. More than one or two shots or bursts from a suppressed firearm fired from the same location will usually result in the enemy detecting you. The bow will take longer to do this.
  • It serves as an accurate and long-ranged grenade and Molotov cocktail launcher once you've unlocked the appropriate skill to let you buy the ammunition. (The ammunition is expensive, but money's not usually a problem if you're not trying to speed through the game.)
  • Ammunition is retrievable after use (see above).

Yet for all this, the bow suffers from a slow rate of fire, unsteady aim (mitigated by a skill, but still worse than any other weapon, not to mention nowhere near the solidity when holding one's breath with a sniper rifle), and sights with only low magnification (particularly low compared to sniper rifles). Beyond this, though the bow will kill any unarmoured enemy with a single shot, and any non-heavy enemy with a headshot, the same is true of the Throwing Knife.

For aimed-in work, sight on the bow is pretty much essential. (Besides the lower damage, the lack of sights is a good reason to avoid using the Hunter Bow.) With the iron sights, you need to be able to calculate the drop of the arrow based on distance; with either the Reflex sight or the Marksman sight, you simply aim the dot at the target and let the sight deal with the drop. (Don't be fooled by the meter markings in the Marksman's Sight; no matter how far away the target is, the arrow will land where you point the "0 m" mark, not below.) Given the low magnification of the sights, when using standard bolts the Reflex sight, which prioritizes accuracy, is preferable to the Marksman sight, which prioritizes range. However, when using the bow as a grenade launcher, the slight range boost given by the Marksman sight might be useful.

For short- to medium-range targets, if you have no sight you may find it easier to aim from the hip rather than zooming in. The high accuracy of the bow makes this workable, and you don't have to worry about arrow drop in this case. (This applies to the Hunter bow as well.)

The best use of the bow is early on in the game, when your'e still hunting down the non-special animals to craft your various bags and pouches and whatnot. Killing animals with the bow will give you not only two skins per kill, rather than one, but will also grant you some extra karma.

But later in the game, even in just the mid-game, the ability to get headshots with more accurate silenced weapons will gain you more XP, you'll be able to defend yourself better, and your damage output will be significantly higher. Grenades and Molotov Cocktails will never be quite as accurate as explosive and flaming arrows, but they're cheaper and, with practice, often just as useful in many situations.

Auto Crossbow
(6/6/6/6/6, 8/12)
Though it has a completely different feel, the Auto Crossbow is in fact similar to Recurve Bow in many ways. The differences are as follows. (Advantages are marked with '(+)' below, and disadvantages marked with '(-)'.)
  • (+) Less sway when holding an aim point.
  • (+) With the Optical scope, similar accuracy and more magnification.
  • (+) Faster fire rate.
  • ( ) Less damage per shot (sometimes mitigated by the faster fire rate).
  • (-) Incendiary and explosive bolts not available.
  • (-) Less range.
  • (+) Usable in sidearm slot.

The Auto Crossbow is unlocked after the eighth mission in Act 2, City of Pain. This is early enough in the game that if you're not having much luck with using the Recurve Bow for hunting missions, you may want to grind through to that mission and then try using the Autocross instead. (All hunting missions that require the bow can also be done with the Autocross, and the Autocross will also give you two skins per kill rather than one.)

Harpoon
(4/10/7/2/2, 1)

This special weapon becomes available to those with the Hurk missions DLC (available with the Seasons Pass) after completing all three Hurk missions.

Were it not for the low accuracy and rate of fire, this weapon could be considered overpowered, and for hunting rhinos, it might well be anyway. However, if you're having difficulty getting rhino skins, this will kill a rhino with one head shot or two body shots. That said, make sure you get him with your first shot or two, because otherwise an angry rhino is likely to make short work of you while you try to reload and aim again. It's also useful for bears if you prefer to take them at range rather than use a shotgun.

As with the more powerful sniper rifles, the harpoon is apt to go straight through lesser creatures
killing a second animal or enemy behind the target.

Though the weapon fires bolt-like harpoons, you still get just one skin from the animal, rather than the two you would get for a knife or bow kill. However, you still can retrieve your used ammunition.
Useful Rifles and Two-handed SMGs
(XXX Note: this section is not yet complete.)

As usual, stats for the weapons are given in the usual (A/D/R/F/M,m/e) format; see the introduction for details.

Warrior
(6/6/4/4/6, 40)

For the early game, the AK-47 (4/5/4/4/5, 30) is not a bad weapon at all: it's good out to a reasonable range, does adequate damage, and ammo is easy to find. You won't be encountering enemies with anything more powerful for some time. Its main downside is the complete lack of accessories.

The Warrior fixes this and brings the AK-47 to a new level, one that might be about the best you're going to see in the early game. Starting with boosted base accuracy and damage, it adds a reflex sight that further increases accuracy as well as increasing zoom and mobility, a 33% larger magazine, and suppressor to top it all off. While it's nice that the Warrior has the stats of weapons further down the upgrade path, it becomes an especially important weapon if you tend towards stealth playas it's the first suppressed weapon more powerful than a basic handgun, A.J.M. 9 aside, and even if you do have access to the A.J.M. 9, this has a much larger magazine and ammo pool.

The Warrior is unlocked by intercepting and capturing or destroying two royal cargo trucks. If you take the time to carefully explore after capturing the first outpost and getting out of the initial valley, chances are that you'll quickly figure out how to do this. The cargo trucks appear regularly straight down the road leading out of Khilana Bazaar outpost. (You don't need to have captured any towers to see them.).

MS16
(7/6/4/4/6,15/20)
(9/6/5/4/7,15/20) with optical sight

At first glance, with their smaller magazines and low fire rate (they're semi-automatic, giving only one shot per trigger pull), the MS16 and the Trooper might seem inferior to other assault rifles. However, though classified as "assault rifles" in the game for ammunition purposes, these are actually more along the lines of "battle rifles," the significantly more powerful and longer-ranged weapons that assault rifles replaced.*

One of the first things to note is that for these rifles a suppressor is available. If you prefer to work in a more stealthy way, this is invaluable since assault rifles have the best combination of power, fire rate, accuracy and ammo load. (SMGs come close, but are not usable at longer ranges.)

Despite having the same nominal damage stat (6) as the Warrior (see above), the MS16 is clearly more powerful, consistently killing enemies and animals with 15-20% fewer shots. And, though limited by the 80 m maximum range limit of all assault rifles in the game, it has considerably more accuracy at range. This accuracy becomes quite usable with the addition of an Optical scope, which is not available on the Warrior. As well, use of this gun requires less self-discipline than fully-automatic weapons such as the Warrior, where firing very small bursts (rather than long ones) may not come naturally to many players.

Thus, the MS16 is probably best thought of as a sort of "sub-sniper" rifle. It's easily capable of taking out enemies with headshots at medium and even long range, yet it still works well from the hip as a close-range weapon, delivering damage fast enough to stop even a surprise bear from killing you.

This is really only a rifle for those who care to take the time to aim, but those players will be rewarded with an effective weapon that gets you plenty of headshots (and thus more XP) and is very conservative with ammunition.

The special version is the Trooper (7/6/4/4/6,20). This is an MS16 with the suppressor, extended magazine, and a Marksman scope rather than the Optical scope. That last is a slight disadvantage (despite the Marksman scope's slightly greater magnification, the reticle is inferior to the Optical scope making long-range shooting slightly more difficult), but the extended magazine helps to make up for that. More importantly, the in-game stats for the Trooper appear to be quite wrong; from experimentation it seems to be more powerful (in terms of damage) than the MS16 is.

Last but not least, the MS16 and Trooper are both very comfortable to use as long as you're not in a situation where you're taking a lot of immediate damage and thus lose your ability to aim well. I (Category Theory) prefer a weapon where I can aim, be fairly sure of hitting, make every bullet count, and do significant damage with each one, while still being able to "spam-fire" at close targets in cases of urgent need, and this weapon satisfies those criteria perfectly. From when it first became available, though to the end of the game, this was my most-used weapon.
_______________________________________________
*The replacement of battle rifles using large, high-power rounds with assault rifles using smaller, lower-power rounds, started near the end of WW II, when military planners realized that engagements were usually occurring at shorter ranges than originally expected and the ability carry more rounds of lighter ammo was preferable to having fewer rounds of ammo that was unnecessarily more powerful. Of course, ammo capacity in this game is not an issue since you carry the same amount regardless of whether you use a battle or an assault rifle.

Bushman
(8/6/9/5/7, 40)

Vector .45 ACP
(6/3/4/10/7, 30/40)

The special version, the Shredder (6/6/5/10/8, 50) is basically a fully loaded Vector .45 that offers more damage and a slightly larger magazine. (The description claims less recoil, but in practice the Vector .45 has exactly the same, very low, recoil.) According to the stats, the Shredder doesn't get the accuracy or range bonus from the Optical scope, but as usual the stats appear wrong in this case.
Useful LMGs
The Light Machine Guns are some of the most powerful weapons in the game; many of them are actually overpowered (particularly the signature versions). As well as being able to throw out a lot of damage (and often very quickly) before reloading, they also usually have better range than the assault rifles. There are some disadvantages, however.
  • They're quite noisy (no suppressors are available), though if you need to put out this level of damage you're probably going loud anyway.
  • You won't be picking up much ammunition, so you'll have to make sure you're regularly in a position to buy more from a shop.
  • Reload times are relatively long, so you need to be a bit careful about deciding when to take yourself out of action (and become vulnerable to enemies) to do this. However, the large magazine capacities do give you considerable leeway as to when you might do a tactical reload (i.e., reloading before your belt is finished or your magazine is empty).
As usual, stats for the weapons are given in the usual (A/D/R/F/M,m/e) format; see the introduction for details.

PKM
(5/5/6/8/2, 100)
Available in the first shop, this is probably the weapon you want to start with in the early game if you're going to be doing significant work in "loud" mode. Without any scopes available it's a bit difficult to aim at the longer ranges it's capable of reaching, but given that you can put a lot of bullets down that direction, you'll get enough lead on to your target eventually.

The biggest disadvantage of this LMG is its terribly slow reload time: probably the slowest in the game. You'll want to be careful about timing your reloads so that you're not taking a lot of fire when you're out of action doing this.

Also, unless you can plan things out to frequently visit a shop or sherpa to re-arm, you may want to back this up with an assault rifle to take advantage of the much more frequent ammo pickups you'll have with that.

The special version of this weapon, the Driller (7/9/6/8/4, 200), is incredibly overpowered for the first half of the game; it's discussed in the "Game-breaking Weapons" section below.

U-100
(6/5/6/6/4, 80/120)
Unlocked around the middle of Act 2 (in the 8th mission, "City of Pain"), this something of a cross between an LMG and an assault rifle. The low standard ammunition count (80 rounds) is compensated for by the fastest reload of any LMG.

However, the biggest advantage over the PKM is the availability of an Optical sight, which both makes aiming easier and adds considerable accuracy. This allows you to much more effectively use the extra range provided by LMGs. Being able to hit the target more reliably makes up for the slower fire rate (again, more like an assault rifle than an LMG), except at very close range.

The small (for an LMG) standard magazine is something you'll have to live with, since only one attachment is allowed and you'll certainly want to use this for the Optical sight.

MKG
(6/7/6/9/3, 80/120)
With only a slightly slower reload than the U-100, this gives you increased damage and greatly increased fire rate, making it a suitable upgrade for a machine-gunner moving up to the northern half of the map.
Interesting Weapons
The weapons described in this section, unlike those of the sections above, are not the most useful and won't necessarily make it easier for you to move ahead in the game. (In some cases, they'll make things more work than they ought to be). However, the weapons here are worth trying simply because they're interesting and enjoyable to use.

Stats for the weapons are given in the usual (A/D/R/F/M,m/e) format; see the introduction for details.

D50
(6/9/3/3/6, 8/10)
This unlocks late, so it's basically just for fun, but who can resist a Desert .50, especially when you can get it in gold? It's just like Eddie's gun in Uncharted. The sights, particularly the Optical sight, improve the stats, but I still like to use this with just the Night sight which, though it gives no stats boost, gives you the most authentic Clint Eastwood feeling. (Technically, you should use the .44 Magnum (7/7/5/3/7, 6) or the Cannon (8/8/5/4/7, 6) for that, but it's the modern age, so let's just go for the more serious damage and the bigger magazine.)

It does do a reasonable job of taking out enemies, though in the North it feels like a bit more work than it should be. Definitely worth a try.

F1
(6/3/4/7/7, 30/45)
The F1 is nearly unique in Far Cry 4 in being the only weapon, other than the A.I.M. 9 (see above) that uses burst fire, shooting up to 3 rounds with each pull of the trigger.

This helps to conserve ammo and reduce recoil, and perhaps is part of the reason for this rifle's excellent accuracy. Unfortunately, with only the lower-magnification Red Dot and Reflex sights available, the F1 can never make full use of these advantages. Given the poor sights, you're best off mounting the suppressor and an extended magazine.

While probably not something you'd want to use a lot, this weapon can be a good training device for players with poor trigger control (i.e., players that tend to hold down the trigger on full-auto weapons and waste a lot of ammo, rather than fire short bursts). Work with this instead of your normal auto weapons for a while and, once you've got the hang of being able to kill enemies with 3-6 shots, move back to your full-auto weapon and work on taking your finger off the trigger quickly enough to use the same short bursts.

SPAS-12
By the stats, not as powerful as an 87 or a Bull (having both lesser damage and range than either of those two), but somehow it still seems to kill things very quickly, even at a distance. My experience has been that this shotgun can single-shot regular solders (even northern ones) out to 25 m or more, whereas other shotguns with allegedly better range can't do this.

As for bigger animals, at some distance, rhinos might take five shots or so, but close up I've killed one in two shots to the head. Bears? Just two or three shots, and Yaks but one. Perhaps it's the high fire rate and large magazine that really makes the difference: even the heaviest heavy, once you get close enough, will die before you need to reload (and certainly well before he does). Or perhaps it's that high value (8) in that weird "mobility" stat that helps. Regardless, it's an incredibly satisfying weapon to use.

For close defense, it hardly seems to matter what shotgun you use. However this one works pretty well, excepting for the noise. The nice thing about it is that you've always got a lot of ammo left in the magazine if you make a mistake with the first shot or two (or three).

You ought at least to take this out for a couple of hunting missions or close-up almost-melee attacks, just to learn the joy of what it can do. You might even find it really suits your style, if you like to blast things to pieces, but want to be a bit more subtle than you can be with the grenade launcher. But even if you don't use it in the long run, a day or two with it will give you a whole lot of fun.

That said, the Signature Bull is quite as effective (except perhaps at range), and suppressed to boot, so if you're partial to shotguns, there's probably no particular reason to use this once you have that. (Though, honestly, I'm not entirely sure the Bull is really as powerful, especially at range.) Yet the SPAS still seems more fun, for some reason. Perhaps it's just all the noise that it makes.
Game-breaking Weapons
Far Cry 4 has some serious game balance issues. These include not only being able to earn cash, XP and karma too quickly (without using maps, I had almost maxed out XP, maxed out karma, and had more cash than I knew what to do with before I even unlocked the northern part of the game), but also weapons that are so ridiculously overpowered they basically break the game. I list those here.

These are weapons that are not difficult to get but that I suggest you completely avoid until after you've finished the campaign at least once because they'll make the game far too easy. On the other hand, if you're stuck on some particular non-stealth mission, they might be useful to help get over it.

As usual, stats are given as (Accuracy/Damage/Range/Fire Rate/Mobility,Magazine Size).

Driller
(7/9/6/8/4,200)
This is available from the start of the game for those who have the Season Pass, and is a signature version of the PKM (4/4/6/8/2,100) (see above) with an Optical scope and greatly extended magazine. The scope makes it considerably easier to hit targets at long range and, combined with the greatly increased damage (one magazine does more than four times the damage of a PKM magazine) it's overpowered throughout the game, and considerably so in the first half.

Ripper
(7/9/7/9/4, 200)
Fortunately only available after you've conquered all four fortresses, which means you're well in to the north, still it's yet more powerful than the Driller above, in the same way that the MKG is over the PKM. The only reason it might be less game-breaking is that it comes so late in the game. Useful if you want to easily clean up near the end with a low level of challenge (yet not quite so low as the Buzzsaw below), but otherwise should be avoided.

MG42
(7/7/7/8/2, 100/200)
The MG42 is acquired fairly late in the game after the "Payback" story mission (about half-way through Act 3), Though the stats appear only slightly better than the MKG (6/7/6/9/3, 80/120), and the MG42 has a longer reload time to help compensate for the larger magazines, something about this gun seems to make it feel considerably more powerful. The MKG feels correctly balanced for the final part of the game; the MG42, in my opinion, does not.

Buzzsaw
(9/9/8/9/4, 400)
One might debate whether or not the MG42 is overpowered, but there's little question that this Signature variation of it is the most ridiculously overpowered weapon in the game. All regular soldiers can be taken out, even at long range, with 1-3 shots to the body, and even the hardest heavies will be brought down by less than a one second burst. Helicopters are taken down with a fairly short burst to any area and, just as with mounted heavy machine-guns, a few seconds of fire in to the engine of a vehicle will set it on fire momentarily, to explode shortly thereafter.

It is, however, amusing to take out a typical northern outpost, including three reinforcement waves, without reloading even once. (With good trigger control, you can do it in just over half a magazine.)

It's unlocked by liberating all 17 bell towers, which means that if you prioritize that liberation you'll be able to do all all northern missions and even a few southern missions in "silly Rambo" mode.
Uninteresting Weapons
The weapons in this section are uninteresting in the sense that they're neither as powerful as those in the "Useful Weapons" section (given the time they become available) nor do they offer any particularly interesting features such as those in the "Interesting Weapons" section. They're mentioned here mainly because you're likely to encounter them fairly frequently.

Mark IV Revolver (Sidearm)
The only advantage to this is that it's the first sidearm available in the game, available even in the prelude, before you get to a weapons shop. You can find it in the first deep part of the river you come to, in a sunken cage, and since you'll already have found pistol ammo for it, using it early can help conserve your rifle ammo. Beyond that, you'll certainly have found something better by the time you have a second holster slot.

STG-90 (Assault Rifle)
The lower per-round damage of this weapon compared to other early assault rifles is more than compensated by its high fire rate, allowing it to spit out a lot of damage in a short time, but this has unfortunate consequences for ammo consumption. Though it also has better accuracy than other early assault rifles, the lack of an optical sight nullifies this advantage. (The Far Cry Wikia[farcry.wikia.com] indicates it has an optical sight, but this is true only in Far Cry 3.) Last, there's no suppressor available, restricting your stealth abilities. All of this, on top of being able to mount only one modification, seem to make this a fairly uninteresting weapon, though it's still surprisingly popular.

P416 (Assault Rifle)
(6/5/4/9/6)
The standard weapon of northern solders, it's considerably better than a standard AK-47, and has all sights available, but still no suppressor. The high accuracy with an optical sight makes it usable if you're don't mind being loud, but by the time this becomes available for free you should have considerably better assault rifles unlocked.
To-do List
  • Note that sniper rifle can be used for silent close defense, if you're damn good at aiming. (50 cal. will one-shot bear in body.)
  • Add Z93 and Predator, separate section for sniper rifles?

  • Check stats of PKM (with and without optical scope) in Interesting/Driller entry.
  • Add Warrior; note its surprising utility compared to the AK.
  • Add MS-16/Trooper; note that Trooper is better than the stats say, though the sight marking is not as good as the MS-16 Optical sight.
  • Images of scope sight pictures, for both light and dark areas
  • Finish adding stats to all weapons
  • Finish adding images.
Appendix I: Prologue Missions
In the first three missions you can do little except run (though you can pick up some ammo while you do this) and, while you're being driven in the vehicle, shoot enemies. (The Skorpion SMG you use in the truck does not count as a "picked up" weapon; you'll still need to pay for it in the shop if you don't pick it up later in the game.) The fourth mission finally brings you to the point where you're properly playing.

During this fourth mission you will be able to pick your first weapon, an AK-47, from one of the first guards you kill. You'll also be able to pick up a second weapon, the Mark IV pistol, at the bottom of the pool next to the first treasure chest you encounter, which will save you having to pay for it at the shop later.

You'll also be able to do at least one crafting upgrade using hides from the various animals you discover on your way to the tower. If you use a few takedowns on the guards where you can, you should be able to finish the mission with a fair amount of various kinds of ammo, 300-400 XP (close to the 500 XP you need for your first skill point) and, after selling off all your loot, about Kr150,000.
Appendix II: Weapon Database
The information that was here has been moved to the Far Cry 4 Weapons Database Steam guide.
Copyright Notice and License
This work is Copyright 2015-2016 by "Category Theory."

This work is licensed under a Creative Commons Attribution-ShareAlike 4.0 International License[creativecommons.org].

You are free to:
  • Share— copy and redistribute the material in any medium or format
  • Adapt — remix, transform, and build upon the material for any purpose, even commercially.
under the following terms:
  • Attribution — You must give appropriate credit, provide a link to the license, and indicate if changes were made. You may do so in any reasonable manner, but not in any way that suggests the licensor endorses you or your use.
  • ShareAlike — If you remix, transform, or build upon the material, you must distribute your contributions under the same license as the original.
  • No additional restrictions — You may not apply legal terms or technological measures that legally restrict others from doing anything the license permits.
Should you include text from this guide (whether straight or remixed) elsewhere, e.g., in a wiki, I consider providing a link back to this Guide to be sufficient attribution. E.g.,

Contains CC-BY-SA[creativecommons.org] material from the FC4 Useful Weapons Guide.

If even this seems too burdensome, please contact me (Category Theory) and we'll see if we can make some sort of alternative arrangements.

Also, if you reproduce the guide elsewhere, I'd love to know about it.
52 Comments
HyperNova 1 Nov, 2024 @ 5:16am 
LMGS and Snipers in this game that I decided to do a no-sniper no-LMG (except for the special animal skin) no-sidearm-grenadelauncher run. All Outposts Undetected.

and you know, even on hard difficulty, its still decently easy. Although thats my fault, doing outposts undetected gives way too much xp. and ive played this game so much that the AI is quite predictable.

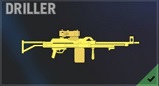
It did help that Arena rank carries between saves so I unlocked the bushman early on, but honestly the bushman isnt even that strong, the shredder is so much better.
JameingX 16 Aug, 2024 @ 7:10pm 
You forgot about the A52. Although it lacks the ability of a suppressor, it is the most powerful rifle in the game, being better than most other guns in the game, and although it is slow, you wont get an itchy trigger finger since you wont lost ammo too fast. The A52 is also highly accurate and has a high amount of range. The gun sound is also muy bien (very good).

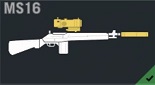
There was a removed special weapon of this weapon called the ACE, yet it had a suppressor on it, which would've made it one of the most overpowered weapons in the entire game. This is, however, available with the Golden Path / Kyrat mod.

Also, this is one of the best guns to get on Valley Of The Yetis.
Oliver 22 Apr, 2024 @ 8:43am 
thank you
Your_Highlord 6 Mar, 2024 @ 7:35pm 
A late tip to add in regards to the 1911: You can technically get it before even getting to Banapur. The one soldier who charges in on a snowmobile during the tower defense encounter carries it, and if you rush to his body before the avalanche, you can pick it up and hold onto it so you don't even need to wait to use it before unlocking enemy vehicle patrols.
TonkDuck 6 Nov, 2022 @ 1:02pm 
btw if u wanna be immortal then use this loadout: sidearm grenade launcher lmg: buzzsaw shotgun: nitro sniper: sa 50/ z93 with this loadout and bulletproof vest u can be an final boss XD
Babbdullah 12 Jul, 2022 @ 8:06am 
Honestly if you have the buzzsaw and the SA-50 and the grenade side-arm youre invincible
Ortismo 8 Oct, 2021 @ 5:06am 
When i equip buzzsaw i think of the announcer in black ops saying "death machine spinning up"
The buzzsaw isn't overpowered
With this thing it's still not suoer easy to take out entire outpost as all enemies will immediately start firing at you and you'll lose health very fast and the helicopters will still damage you before you shoot them down in most cases
A silenced sniper rifle is much more "OP" weapon than any machine gun
LK1018 rocket launcher is much more game-breaking cause it's basically a handheld mortar with cluster rockets
FlangEG 31 Aug, 2020 @ 2:04am 
Speaking of game breakers, does the AMR count? It can take nearly everything down in one shot, including rhinos and vehicles. Headshots are rarely needed.
P51ACE1943 12 May, 2020 @ 12:53pm 
My loadout: Sidearm(Swaps between D50 and AJM) Buzzsaw, Shredder, and AMR. Working on the Bushman right now