Frostpunk 2

Frostpunk 2

72 ratings
Optimal Start For The Hardest Difficulty
By Fortune
By following this guide you will have no problems colonizing the Oil site on the hardest difficulty level by week 100. Good tips for lower difficulties to make the game much easier in the beginning hours.
4
2
   
Award
Favorite
Favorited
Unfavorite
Welcome to New London, Captain
In this guide I will provide you with the necessary knowledge, skills and district layouts needed for a strong opening that will allow you to dominate the Frostpunk 2 campaign. The guide is designed around the hardest start (Captain), but with pausing, so that you can set everything up. Maybe try without pause later, when you know what you are doing. Order and timing is critical for your success.

On this difficulty setting money, resources and manpower will be very tight. That is why throughout this guide you will see me squeezing every little bit of value out of my early game city. Our city will be self sufficient by week 50 and ready to colonize the Oil site by week 100.

Is this a good guide for someone playing on a lower difficulty level? Yes, but you will be advancing even faster, so the timeline will be accelerated. No matter what, you will be getting to that sweet, sweet oil within the first 100 weeks of gameplay.

This guide has been tested after the latest patches [as of 13.11.24.] and still works. It has, however, become a little harder to advance so quickly in the early game. Spend your Heatstamps VERY wisely. If you are having difficulties even after following my advice, simply do not take in any refugees before week 100. You will have an easier time playing the scenario, but it will take you some 50 or so weeks more to finish it, which is fine.

So, open up the game, launch the New London campaign and press pause. Now stare at your screen. We have to set up for our success.
First off, we are going to collect money from all of the three starting factions. We can afford to lose the favor for now. More importantly, at the beginning of the game we will always be low on Heatstamps, so we need to get our frost-bitten hands on every single one we can get.
Continue by constructing the Council Building in the city center. Passing laws is critical for your success on higher difficulties.
Now lets get down to planning the city. First we will place down our Housing Districts. On this difficulty setting we need five of them, plus one expansion to cover all of our needs. On Normal difficulty it is enough to build 3 Districts +2 expansions.

First, we set up 3 districts on the left side of the generator crater. This layout will enable four Housing districts to be covered by a single hub. Heat is also not an issue, since all districts are connected with two others from the start, costing us zero coal to maintain at current temperatures.
Next we build 2 Housing Districts on the right side of the crater. One of them will be expanded for improved Heat management. This is where we will be building our first Research Institute (as soon as you can, place it inside the district and begin researching).
There are other locations for these two Housing Districts that you might prefer, but I make us of this one because it lets me run a positive Coal efficient for the entire early game. Even with just one operational Extraction District.
Next up we will be doing some Frostbreaking. The first one will set up our Materials Extractor. Follow the layout directly, because we don't have a single hexagon to spare. Be efficient. Save money in the early game. By following my design you will be setting up for expanding your industry later.
You can start building your first Prefab extractor from the get-go. Do it. You will need all the resources you can get. That is why you have to start mining from both sites as early as possible.
Once this is done, we will be setting up our Industry and Extraction like this:
The Districts are mutually supporting one another by providing Heat. We have also left room for adding a second Materials Extraction District down south, once we have the resources to do so.

Next we are going to set up the Coal and Prefab Extractors to the south-east of the crater. Start off by laying down this path to the exact specifications.
Now expand it. This will allow us to mine from both sites while gaining Heat efficiency. Later we will be adding on an Industrial District and a second Extraction District for the other Coal deposit.
This is how it should look:

The final direction of our expansion is to the north. We will be building a Logistics District from the very beginning. Run the path like this:
Next, Frostbreak enough area and build it. Then, as soon as you can, expand it to get the extra 5 Frostland Teams.

This covers the initial setup, spanning a few weeks of in-game time. During that time you will be passing your first law, setting up for research and exploration. More on those in the next chapter.

By week 12 your city should look like this:
Laws and Research
Throughout the early game it is important to balance the favor of the factions. But right now we only really care about one thing: is it high enough that I can tax them?

When selecting laws to pass, make sure to promise factions future laws or research, if their demands align with your plans. Promise them something, even if you already have 51 vote majority. If you keep your promises their opinion of you will rise. Otherwise you are left to balance their mood by farming the minor bonuses you get from general research and building construction.

To pass laws you must first construct the Council Hall building, which is found in the same construction tab as the Research Institute and the other district-based buildings. You can pass a new law every 10 weeks, making it one of the most time-sensitive tasks in the early game. Pass laws as quickly as possible, since you only get “3 freebies”. If you waste no time passing laws, the first event to force your hand will come about just after the 4th voting session (including the vote of confidence that you automatically get after building the Council Hall).

Order of laws to be presented to the Council:

1. Vote of Confidence – the first instance of voting is automatic, but you can still fail and, in this case, lose the game. I suggest promising (negotiating with) a faction to pass something you already would in the near future, like “City Development Effort”. Otherwise, if you are ok with save-scumming, just roll the dice.

2. Basic Necessities: Paid Essentials – one of the few laws that increases Heatstamp (cash) generation. Crucial early on as not only will it grant you precious extra income, but this law will also boost your overall production in all districts. When first passed, grants you extra 1.6 Heatstamps per week.

In a few weeks you will get an event prompting you to provide a basic minimum stipend to aid the less fortunate of your citizens. If accepted, the Heatstamp boost is cut in half, but even if you take this moral decision, the productivity boost is not diminished.
I don’t know the outcome of the second choice. Let me know in the comments.

At this point you should have a Research Institution up and running, which means that the factions might want you to research certain laws or buildings. Make sure to promise them in the negotiations, if only for the relationship boost.

3. Community Service: Service Exemptions – this will boost your Heatstamp income for the entire game. Best of all, it scales with population. Extremely valuable during the first 100 weeks of gameplay. Might be difficult to pass, if you promised something else during the first few weeks.

Alternatively: City Development Effort – it grants you 5 prefabs (construction materials) per week. While a small amount initially, over time it will add up. Over 40 weeks this law will have given you 200 prefabs, which is enough to build a Housing District. You will be building a lot of those, and prefabs will be scarce in the beginning of the game.

Cons: it does not scale over time (forever +5), so feel free to change the law when you need to.

4. Durable Goods/Mass Produced Goods – I will discuss them later in the Guide.

Once you have dealt with the early game events, requiring laws to be passed, you should pass the Food Addatives law. It’s best to pick one that will complement the chosen design of Hothouses in your city. This will result in an event triggering, where their synergy results in an increase in food productivity.

The perfect order of laws to be passed goes like this:
1. Vote Of Confidence;
2. Paid Essentials;
3. Service Exemptions;
4. Durable Goods;
5. Apprenticeship/Mandatory Schools;
6. Food Adatives (depending on what Hothouse you are researching, because the right combination grants extra food).
7. Funerals or Contagion Prevention (depending on what events trigger first);
From here on out you should focus on researching efficiency and manpower techs, then passing the corresponding laws. Efficiency comes first when playing on Captain difficulty.

Now for the research order (we are looking to balance the research between factions, since we don't want to suffer from too much Squalor or Sickness early on, while we can't counter their negative effects):

1. Sawmills (Mechanized) – we will need to build one early on. A single Mechanized Sawmill is ~2 times more efficient than an Extraction district in the early game. We will also save some cash on not having to Frostbreak for placing down the second District.

2. Hothouses (Biowaste) – we will need to build one to save on 160 Prefabs. It costs 40 Heatstamps and 200 Prefabs to build a Food District. It costs 80 Heatstamps and 40 Prefabs to build the building inside the district. Plus, it is more manpower efficient in the early game. It’s the same for all districts and buildings, as far as this guide is concerned. When passing the Foraged Additives law you will further improve this building. Adaptation food production is simply better than the alternative one. Especially in early game.

3. Factories (Salvaging) – we will need to build one in the upcoming months, once we start taking in more refugees, increasing our population. Without the Goods that the factories produce you will suffer a deficit of Heatstamps and a rise in Crime due the worsening deficit. Nothing riles up a population like empty shelves in their local store.

Prefabs are also most reliably produced in factories at a base rate of +10. We will need them once the starting stockpiles start to run low. Eventually having 2 factories will be enough to cover all of our needs until we hit ~20 000 people.

4. Coal Mines (either one, depending on your needs and limitations) – yes, we will finally be researching them, because we don’t want to get caught without heat in our homes. The two that you can build in your settlement (if you follow my layout) will allow you to survive until more sources of fuel can be found out in the wastes.

After this its time to start researching laws and passing them to raise efficiency.

BE WARNED: you will be skirting death on harder difficulties, because temperatures will be dropping soon, and your stockpile of coal will not last long. Be smart. Get the insurance of having the Coal Mines researched at this point.

I was able to do without Coal mines till week 100, but that requires you to discover a site for collecting 50 000 coal further west. If timed correctly, it will last you though the early drop in temperature.

Remember that the free resources that you collect out in the wasteland will always be added in full. You can safely collect them even if there is not enough room in the stockpile.
Stage #1: The Setup
Once your first Industrial District finishes, make sure to set it to producing Goods. You will need to lower the deficit of this resource, as it negatively affects the amount of Heatstamps your city generates.

Once your Research Institute is online, start researching Sawmills. It is the first building you will need to build.

Do not be afraid to use the 'special' ability of the Research Institute. Press the button and your research will be sped up by about 40%. The population will not rise up against you, even at this early stage of the game. Just make sure to have the Heatstamps to cover all of your accelerated research.

At this point you will also start producing Coal. If you follow my design, you will find that once the Logistic District finishes, you will still be generating a little bit more coal than you consume. This will help you kick-start your economy, while keeping the people happy and safe.

The Logistics District will be key in our early survival. Once the district is up, send out your first scouting party towards the “Foothills”.
Then immediately expand the district by adding another 3 tiles. This will grant you 5 more Frostland teams, which will allow you to carry out 2 scouting missions from the very beginning.

Send Out The Second Party (week 12, day 2): Once the expansion of the Logistics District is complete, and you have 10 free Frostland Teams, immediately send them out to scout the “Frozen Bay”. After that, keep passing time until you can select your first law.

The first law you should suggest during the next Council meeting is “Paid Essentials”, for the reasons described above. This will increase income and work efficiency, which results in more Goods being produced, further increasing your wealth. Hands down, the best early law.

If the main faction of your city (Stalwarts or Faithkeepers) are pleased with your, make sure to use their bonus ability.

More Laws (week 23, day 1): If you can, pass “Service Exemptions” to further boost your income. City Development is an alternative choice.

From here on out you will have more things to manage. Make sure to select Hothouses as your next research in a few weeks.

Coal Mine Discovered (week 26, day 1): Your first expedition will have uncovered a new area. There are three locations of note, but we are only interested in the abandoned Coal Mine. When interacting with it, make sure to choose the middle option of NOT taking the Prefabs from the site. While a tempting choice, salvaging the 300 Prefabs will double the work cost of operating the mine from 10 to 20 Frostland Teams. Since we will need all the Coal from this outpost AND the Food in the adjacent region to survive the early game, we cannot spare the manpower. Sacrifice the Prefabs.
Without un-pausing, construct a trail to connect the outpost with your city. The location of our first Logistics District plays perfectly into setting up this “trade route”.

It is crucial to get the +250 coal from this site in the early game, because we can postpone the construction of Coal Excavators for a long while and save on resources.

For reference, this one excavation outpost is as powerful as two basic coal mining districts, while costing us 10 Frostland Teams to operate, instead of 1200 workers back home. Plus, you save on heat and materials, since the outpost requires no supplies for maintenance.
Fishing Village Discovered (week 28, day 2): When the Frostland Teams are done searching the second region (Frozen Bay), you will discover a food harvesting site, which is currently occupied by some 1900 Frostlanders. Immediately bring them back to the city, because this will free up the site for harvesting. Then harvest it.
For the cost of 5 Frostland Teams you will get yourself a stable income of 100 food, which will last you for a good while. It will not cover all your food consumption, but, once again, we get a lot of resources for having spent very little in exchange.

First Settlers Arrive (week 29, day 5): With the added food income from the Fishing Village, our food stocks will be stretched to last a little while longer. We must start building up our food production immediately.

This is why saving on every little bit of scrap is necessary in the early game. You do not want them to starve or freeze to death due to lacking infrastructure. Once they arrive, make sure to put them to work building 2 new Housing Districts and a Food District. This will save us Coal in the long run. Next add a Sawmill to your Materials Extraction District.
*We now have 5 Frostland Teams with nothing to do, so we should lower the production of the Logistics District by one, saving on a small number of resources. You can, also, quickly grab the 2 Cores that can be found in the nearby “Rusted Engine” map location, but make sure to free those workers up afterwards.

Have You Got The Goods? (week 33, day 1): We can now pass our third “free” law. I strongly recommend you pick the “Durable Goods” from Society/Goods law. Faced with the choice between this law and the alternative “Mass Produced Goods”, it is not even a contest.

Durable Goods flat out decreases demand for this resource, while the other option simply boosts the production at your Industrial Districts when producing Goods.

The whole point of picking this law right now is to decrease the negative Heatstamp modifier from not having enough Goods. We need more cash, and this will fix our issues for a short while. It won’t be enough when more citizens join us, but, by that point, we will be able to construct factories to produce more consumer products.

Be warned: a short while after picking your third (technically fourth) law you will be notified of growing violence among the children of the city (maybe it’s a timed event?). I strongly recommend you pass the Society/Childhood law next. That way you will avoid more violence and possible deaths from this issue. Passing the law will also lower the crime rate (which at this point in the game mainly affects population growth rate). If you get the event, prioritize whichever Childhood law is best for your playthrough.

If the starting faction of your playthrough (Faithkeepers or Stalwarts) feel like they like you enough to use their special ability, do it. Their affection might not last long. But if you have planned out your city with factions in mind, they might end up granting you bonuses. I will not cover it here, because it’s a long discussion.
Stage #2: Taxes and Ice
Here Comes The Frost (week 40, day 4): Temperatures are dropping.

Since we sorted out our Coal situation, this will not be a problem. Just keep pumping your available Coal and we will make it to where we can actually expand the industry later down the line. Steady on, Captain!

What you should do, however, is briefly pull the workers off the Materials Extractor in your city to have them Frostbreak an area for the next Industrial District.
We Do Need That Education (week 43, day 2): Time to pick up an education law of your choosing. While “Family Apprenticeship” is the superior short-term choice when playing on easier difficulties, where you might have a surplus of jobs to fill, the “Mandatory Education” does boost research and grants more bonuses down the line.

Frankly, since we will be starving for resources more than manpower at this point, either goes. Pick your poison or play into your chosen zeitgeist. For clarification:

*Family Apprenticeship – more workers now and in the future (a net % increase of total workers). The event associated with this law asks you to choose between lowering the bonus (the seemingly moral option) or keeping it the same. I don’t know what the outcome of the second option is. Maybe someone can add it in the comments.

*Mandatory Education – a boost to research speed, but a noticeable malus to Heatstamp income. At this point, this removes 2 weeks of research time. With ~10 000 people living in the city you are losing 1 Heatstamp per week for passing this law. You will be able to upgrade this law later for free with either more research speed or extra food income, depending on your choice (or neither). I don’t know the event for choosing neither. Let me know.

Time To Round Up Some Citizens (week 50, day 1): Our city seems to be slowly dwindling away. Every single resource is slowly depleting. Our stocks of Coal will not last us through the next drop in temperature.

That is why this is the perfect time to recruit from ONE of the two settlements that we have discovered! If you are rolling with “Adaptation”, pick the 2283 Frostlanders from the “Old Observatory”. If you are going for “Progress” then pick the 2665 New Londoners from the “Abandoned Shelters”.
In terms of population, they are about the same. But some strategies might call for more or less citizens to join you at this point. Ideologies might also not matter, depending on your choices.
I picked the New Londoners, because they have the right amount of people to work with my strategy.

THE TAXMAN COMETH (week 51, day 2): This is it. The moment we have been building towards all this time. The Great Taxation of 1916 has finally arrived.

Once the settlers are brought in, start building up infrastructure to house and feed them. This is the tipping point. Whatever resources you have saved will now be devoted to fixing the deficits of your city. Start by building a Hothouse in your Food District (you don't need more districts for food right now)

Build an Industrial District (for producing Goods) and two Housing Districts. Then expand your Housing Districts to leave no one out in the cold.

The money for all of this will be provided by the people themselves. The shakedown we did of our citizens at the verry beginning is set on a 50 week timer. Furthermore, it is based on the total population of your city, divided between the various factions. Since we are nearing the point where we can ask them to “chip in” once again, we need to increase the total population of our city as much as possible for the best possible results.

This is it. The great gathering of taxpayers has come. We have saved up enough Prefabs and Heatstamps (pending taxation) to take care of them. If we had recruited them earlier than this, the city would not have survived.

With 12 614 citizens now residing within the city limits of New London, we can finally get to work collecting those Heatstamps. It does not matter that they were lured here with promises of comfortable housing and a warm meal—with none to be found upon arrival. What matters is this: they will subsidize their own survival as you collect their donations for the sake of building a brighter future.

First we tax the smallest faction (Stalwarts or Faithkeepers) for the small amount of money we need right now to finish up the infrastructure. It nets me 112 Heatstamps. If you have promoted them once or twice, growing their faction at the expense of another, you will get more money from them, but the same amount of money overall.

In this playthrough I absolutely neglected the Frostlanders by focusing only on the Stalwarts (RP reasons). Their disposition towards me was in the red, but by sacrificing a single “Grant Agenda” action to garner their trust (I probably won’t let them pass their law anyway, not to mess with the RP), I am able to push their trust high enough that I can collect 310 Heatstamps from their faction alone. All in all, I have collected 781 Heatstamps for the cause of building up New London.
Stage #3: Good to go!
You will find that the city is still lacking, most notably, in workers. But there is another influx of citizens that awaits us in the near future. At this point the city growth should sit at around 81%. In a few weeks a new batch of citizens will be discovered, following the passing of the new census. These are the missing pieces in our puzzle.

The reason why we did not wait for them before collecting the taxes was because we needed to set up the infrastructure beforehand. The Heatstamp generation is too slow at this point to fuel our expansion. We will be Frostbreaking to set up a new Materials Extractor as well as one more Housing District in the North.

We will also be Frostbreaking towards the southern Logistics District. We want to build a second exploration hub as soon as possible. With 15 teams tied up in gathering resources, a second Logistics District will provide 15 more, bringing our total up to 35. That means we can begin exploring the wasteland 2 regions at a time.

Fifth Law (week 53, day 2): we pass either Chemical or Foraged Food Additives. Your choice, depending on the playthrough. After this one, you should expect another event to pop up requiring a law to be passed to avoid issues. It’s going to be either sickness one or old people one. Deal with it during the next law-giving cycle.

Researching The Coal Mine (week 54, day 4): Do it. If you don’t, people will die.

It might be tempting to build a second Research Institute, so do it when the time is right. Most likely when one of your Prefab Extractors runs out of resources. Each time it happens you will get 600 workers to re-distribute into other jobs.

You will be low on funds until the next taxation comes about in 50 weeks. What you should do instead is to build a Factory. This will place you a little bit closer to removing the “missing goods” modifier. Plus, the factories will take over the production of Prefabs from the Extraction Districts, which will be running out soon.

The New Census (week 59, day 5): 1892 people joined the city on this day. They were immediately tasked with expanding the Housing Districts to find the missing 35 housing spaces. One full sized District and 3 extensions, since they are much cheaper in terms of Prefabs and will accommodate future buildings. Besides, I am not planning on taking in any more settlers for the immediate future. This will do, until the next census.

Beyond this point you should be looking to nix any remaining production shortages. Conveniently, one of your Prefab Extraction Districts will start running out of materials right abut now. Once it is depleted you will get back 600 workers, which you should immediately invest into building a new Coal Extraction District. The salvaged Heatstamps and Prefabs also help.

Unless you have been incredibly unlucky, you should have no further issues starting the exploration of the Frostland. Do some efficiency tech. Fix your last shortages.

By week 100 your city should look something like this:


We have all our resources covered and are building up a large stockpile of Prefabs. When we collect donations in one week, our Heatstamps will also surpass 1000. This will allow us to immediately set up the Oil colony. Nothing will stop us from here on out.


We have already explored a lot of the early areas and have gained access to a lot of resources. We can begin the colonization of the Oil site immediately. Now we must research exploration tech to venture further.

Bring in more settlers from the Frostland. We can finally afford to expand recklessly.
Closing Advice
When playing on the hardest difficulty mode, I strongly recommend that you do not grow your population, since Food will become an issue past Week 500. When choosing to support the faction that wants to focus on integrating Oil and building up the Generator in your city, you will be placed on a very tight rope, once the normal Food gathering sites start running out.

While the Deep Drill technology promises near-infinite resources, it is a lie. In fact, the extraction of Food is insufficient, compared to double Hothouse Districts. I had the misfortune of wanting to grow my population on my test run and it almost ended in disaster. By the time I went searching for Cores in the ruins I lacked for nothing, except food.

With how the game is set up by the Developers, you can replace Materials and Fuel extraction by investing in technologies. But Food, in practice, is a finite resource. You will not be able to feed a 70 000+ population on the Stalwart path by Week 550. You can do nothing about it. It's game over.

My closing advice is this:
1. Pick Mandatory Education and later choose the event that provides food, instead of research.
2. Avoid growing your population beyond 40 000 by the end of the game. That should be sufficient to cover all of your needs, without stressing the resources. When looking to finish the campaign on the hardest difficulty, I really don't think you need to have a large city at all, unless you want the extra challenge. Earn the population size achievements elsewhere.
3. Adaptation tech is better than the Progress alternative 90% of the time. Dealing with sickness is cheap and can be done at scale by using the medical hub. Squalor, on the other hand, is inefficient and expensive to deal with. Plus, the Adaptation buildings simply offer better value for your resources. Employing 25% more workers means nothing, once you have 20 000 people in your city.
15 Comments
OniLiquid 3 Dec, 2024 @ 3:27pm 
in addition to what OnepunchWrench said: FIRST take money from the Frostlanders and New Londoners, then support Stalwarts > Mobilize 5 defenders > take their money. Supporting them reduces the members, and thus the money you get, from the other two.

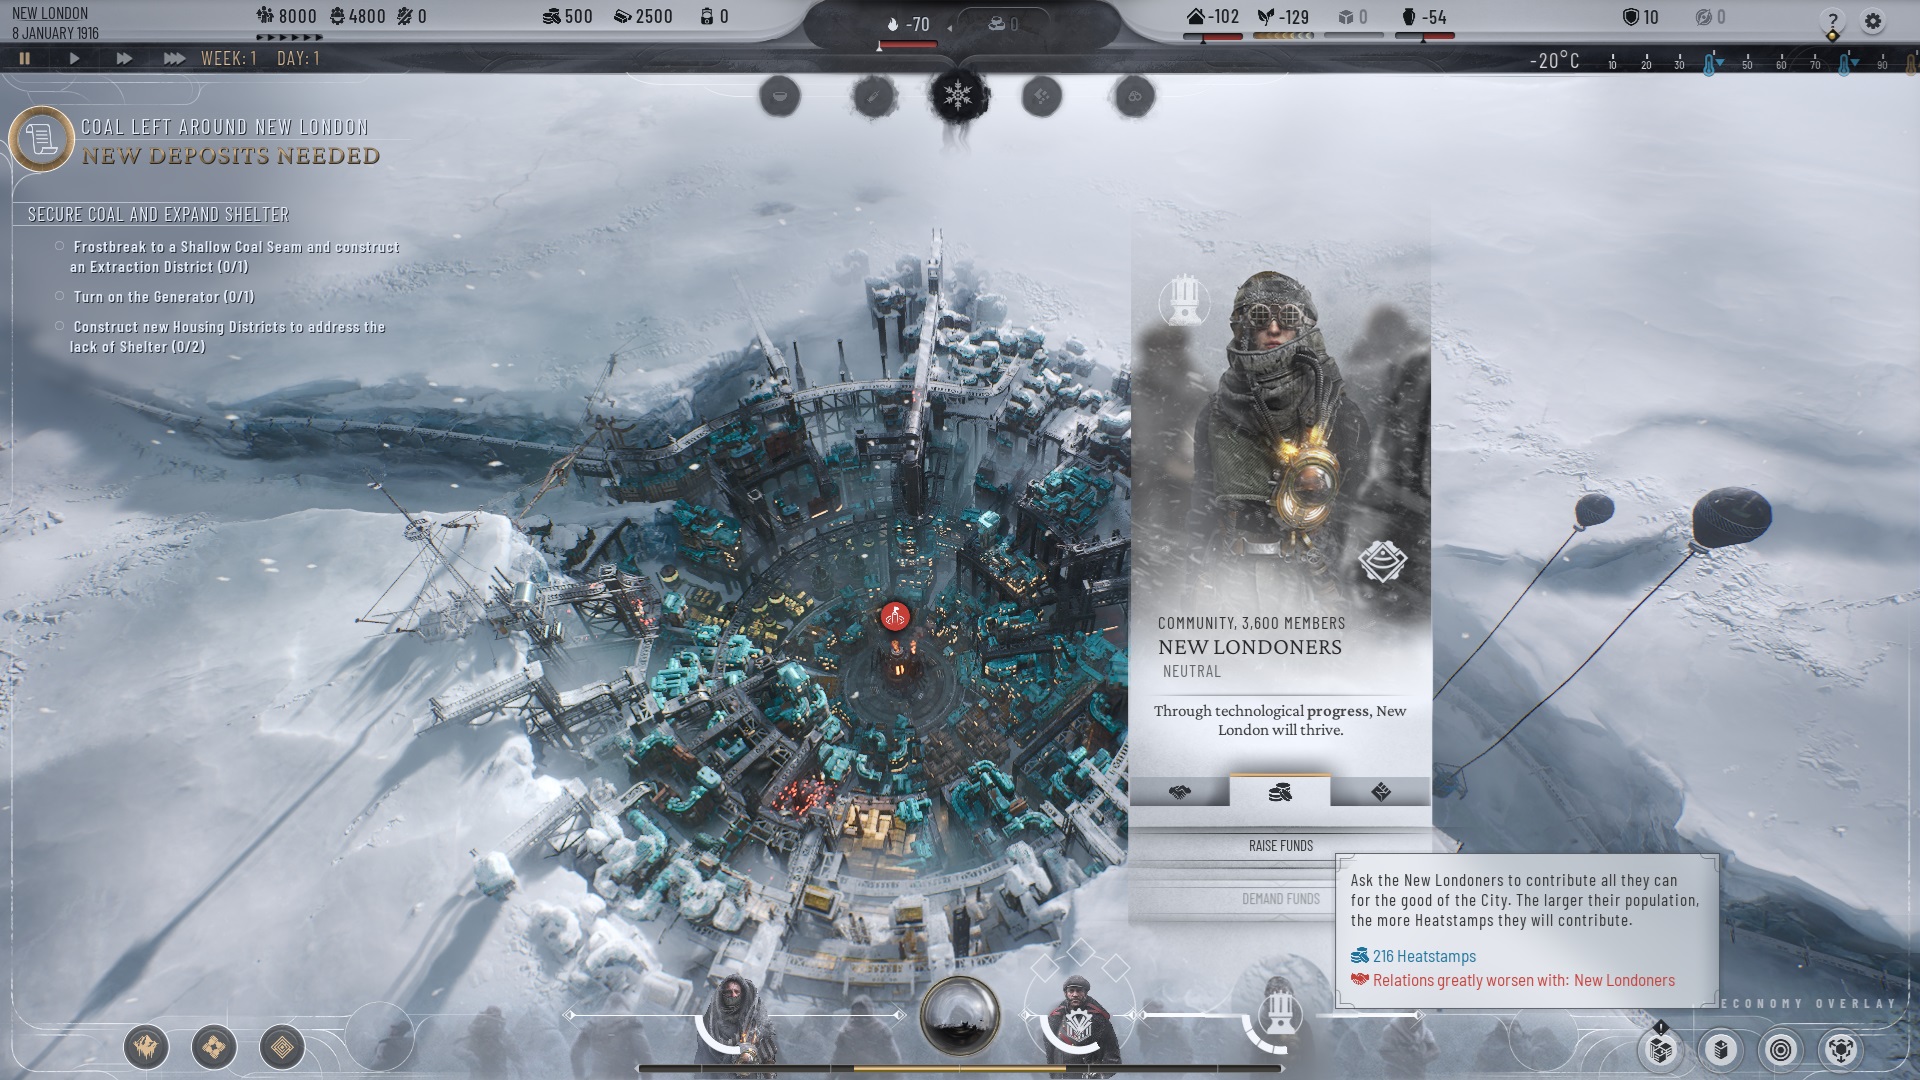
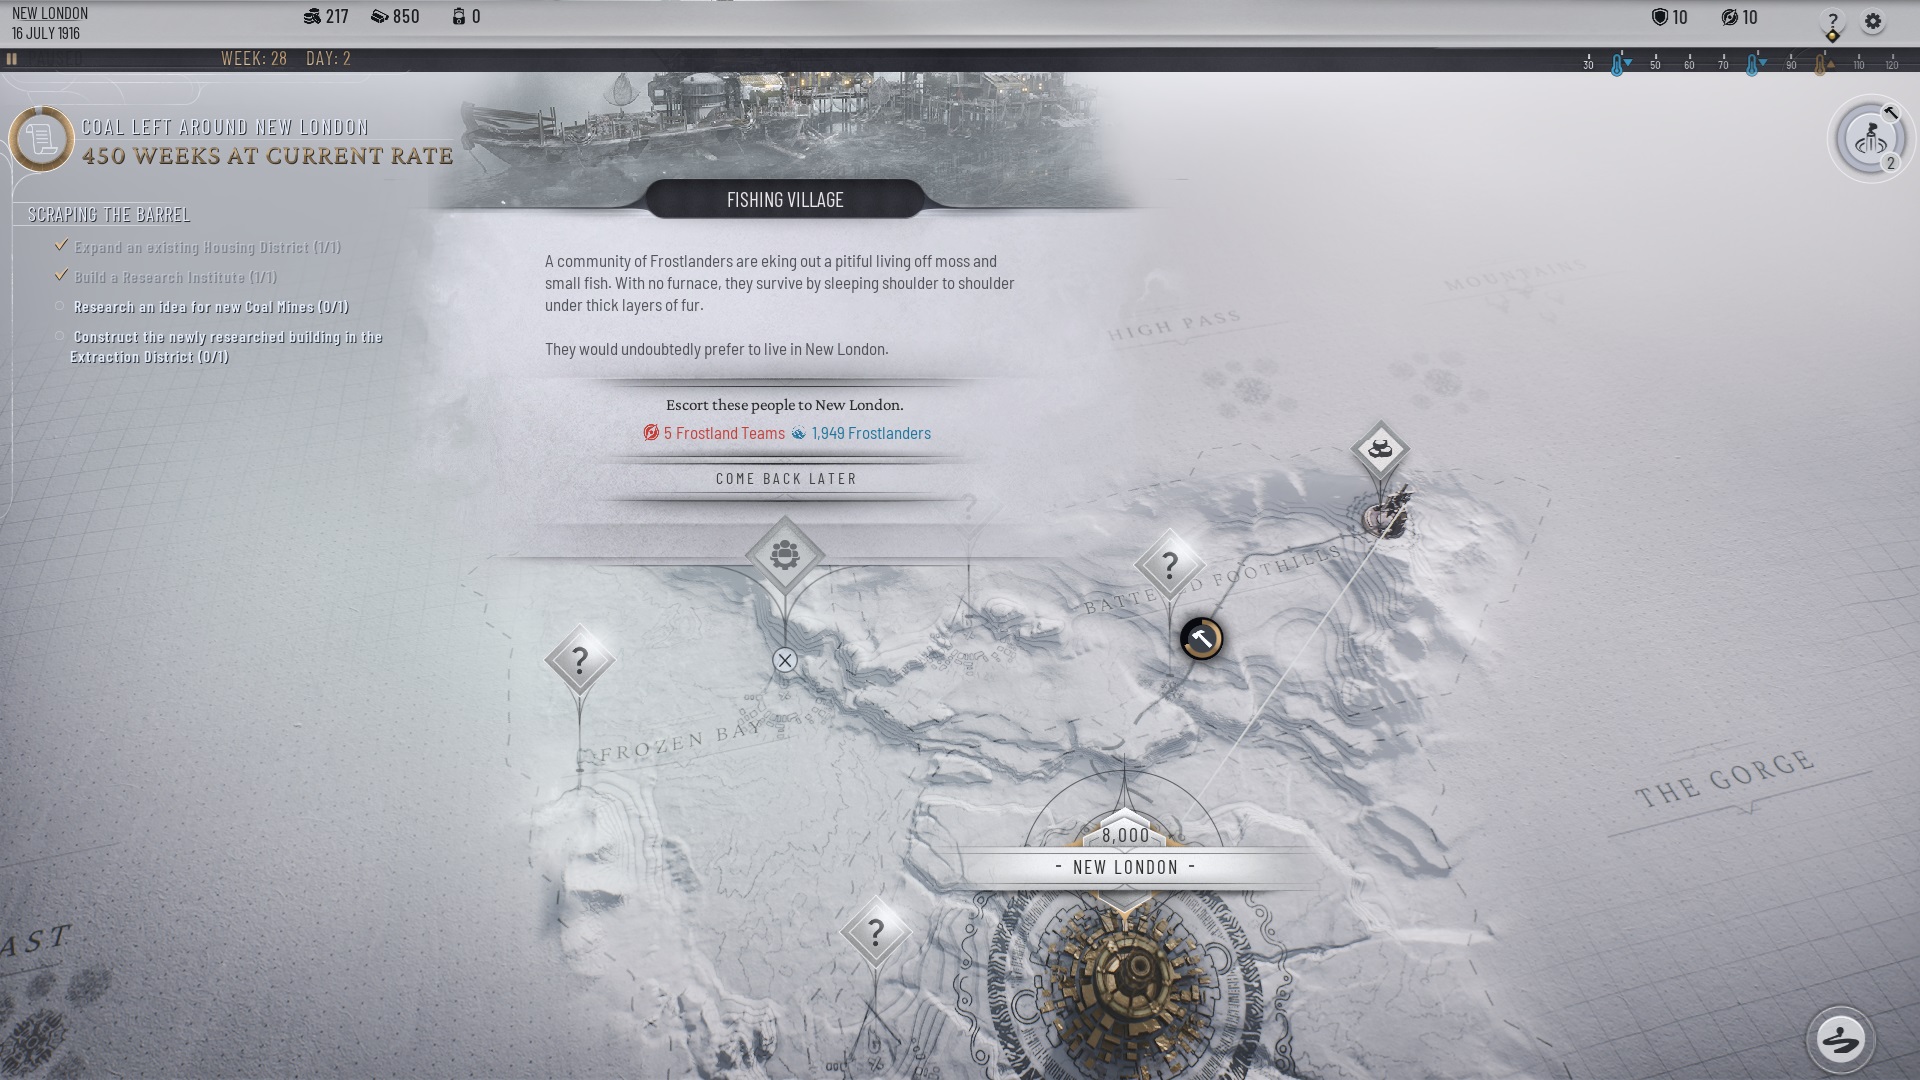
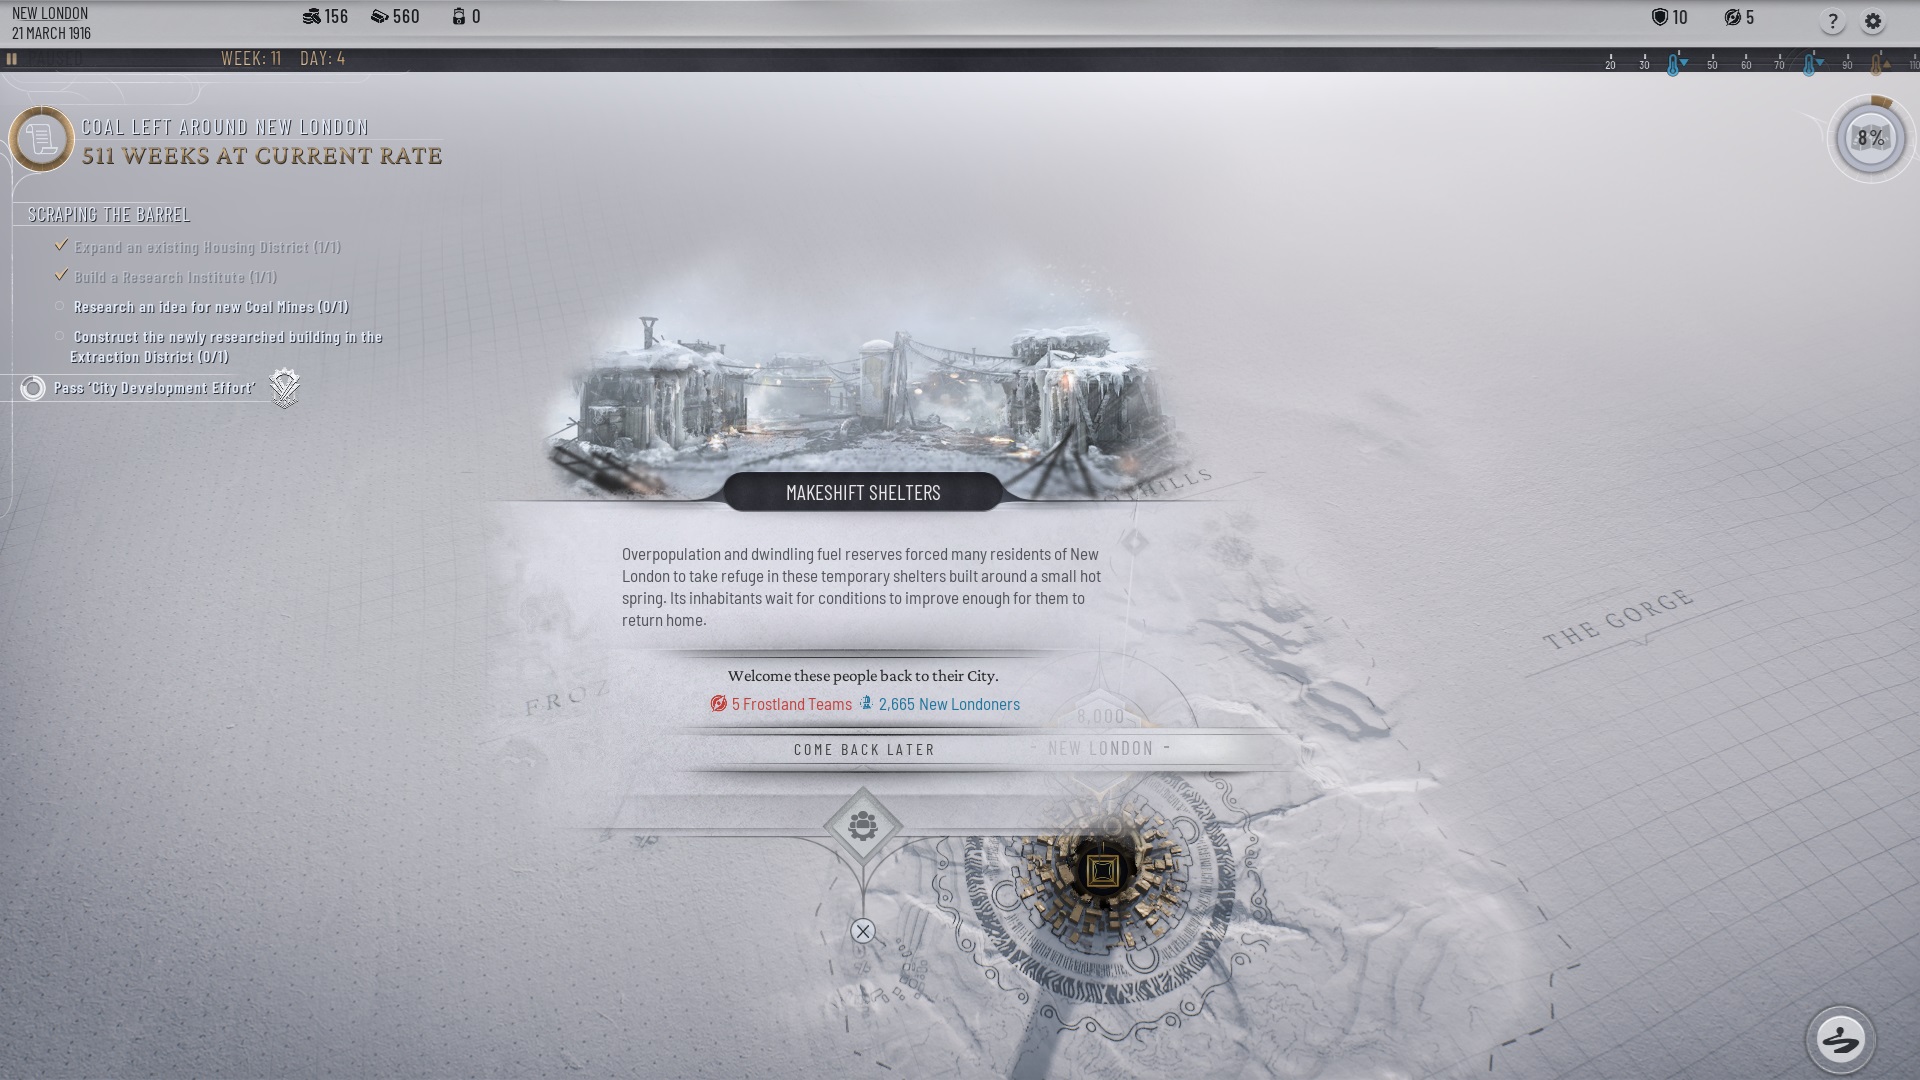
In total this nets you 5 defenders and an additional 45 heatstamps.

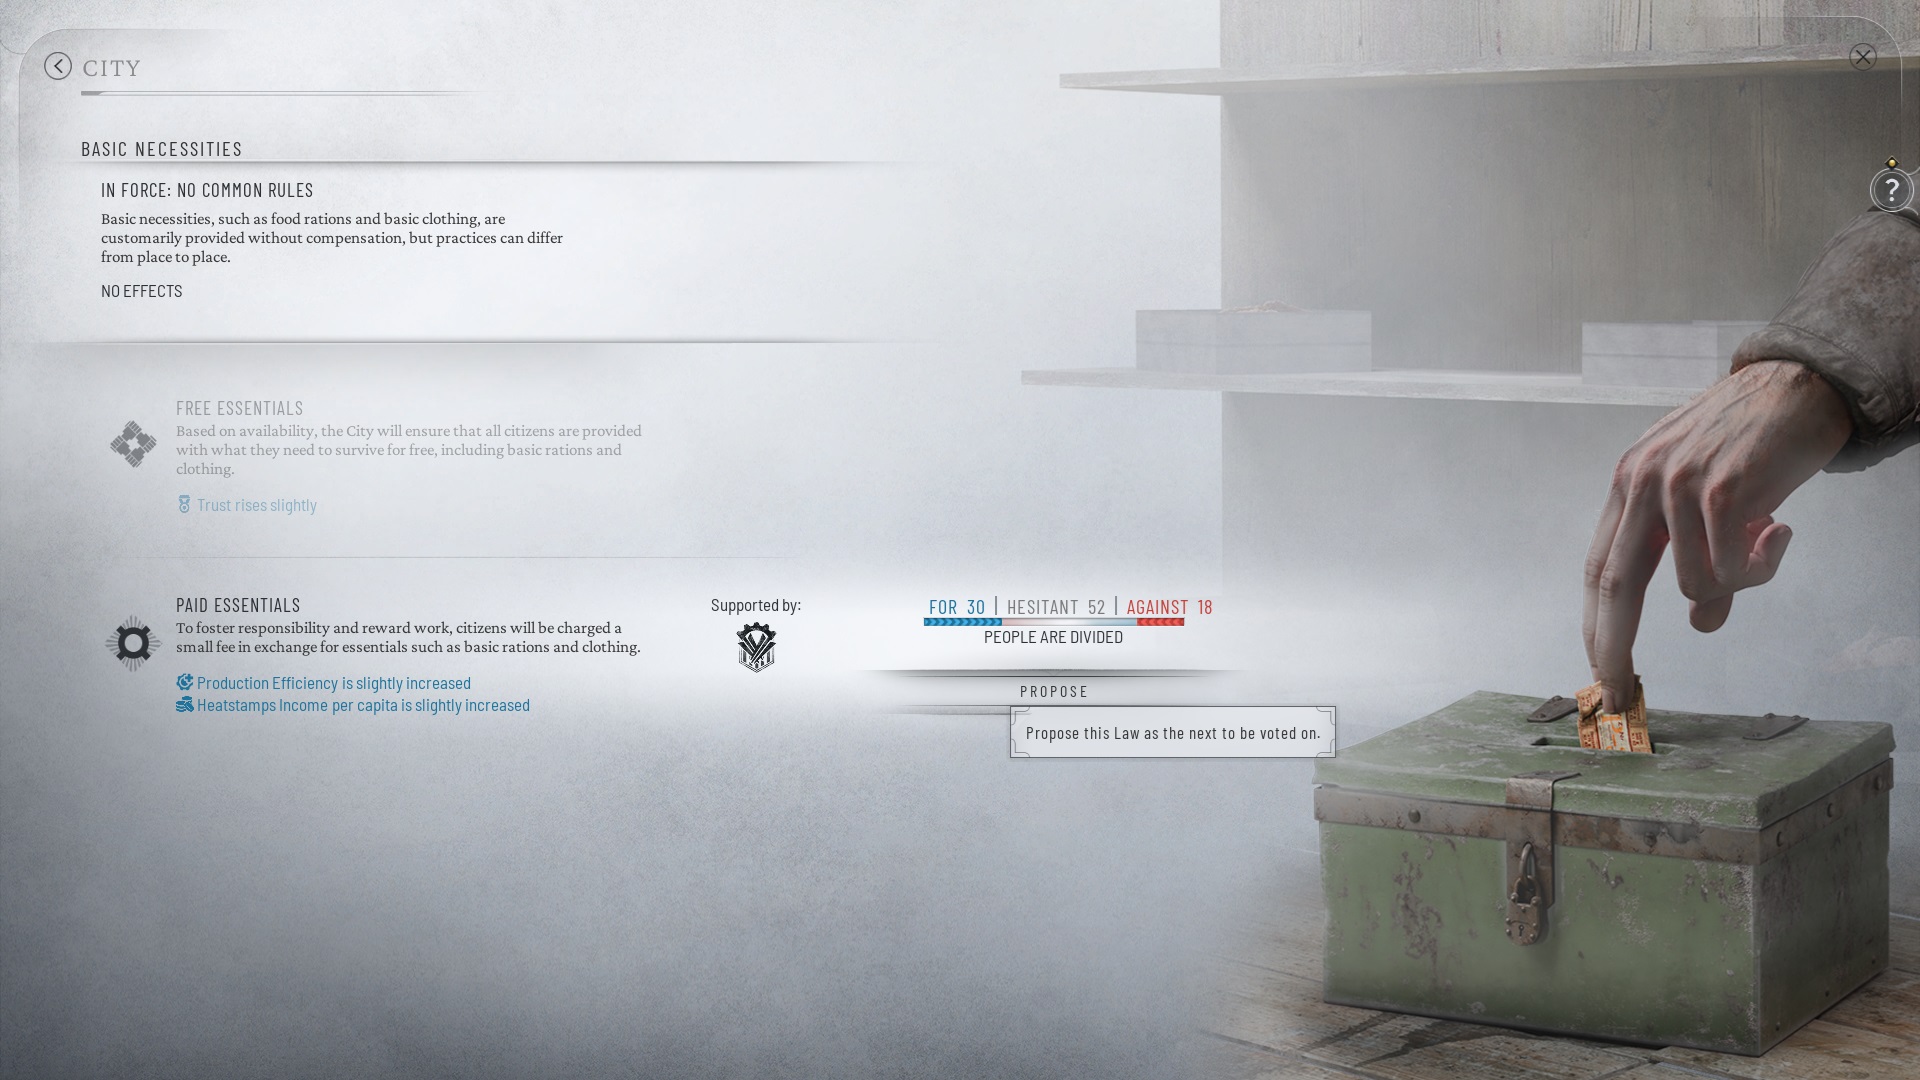
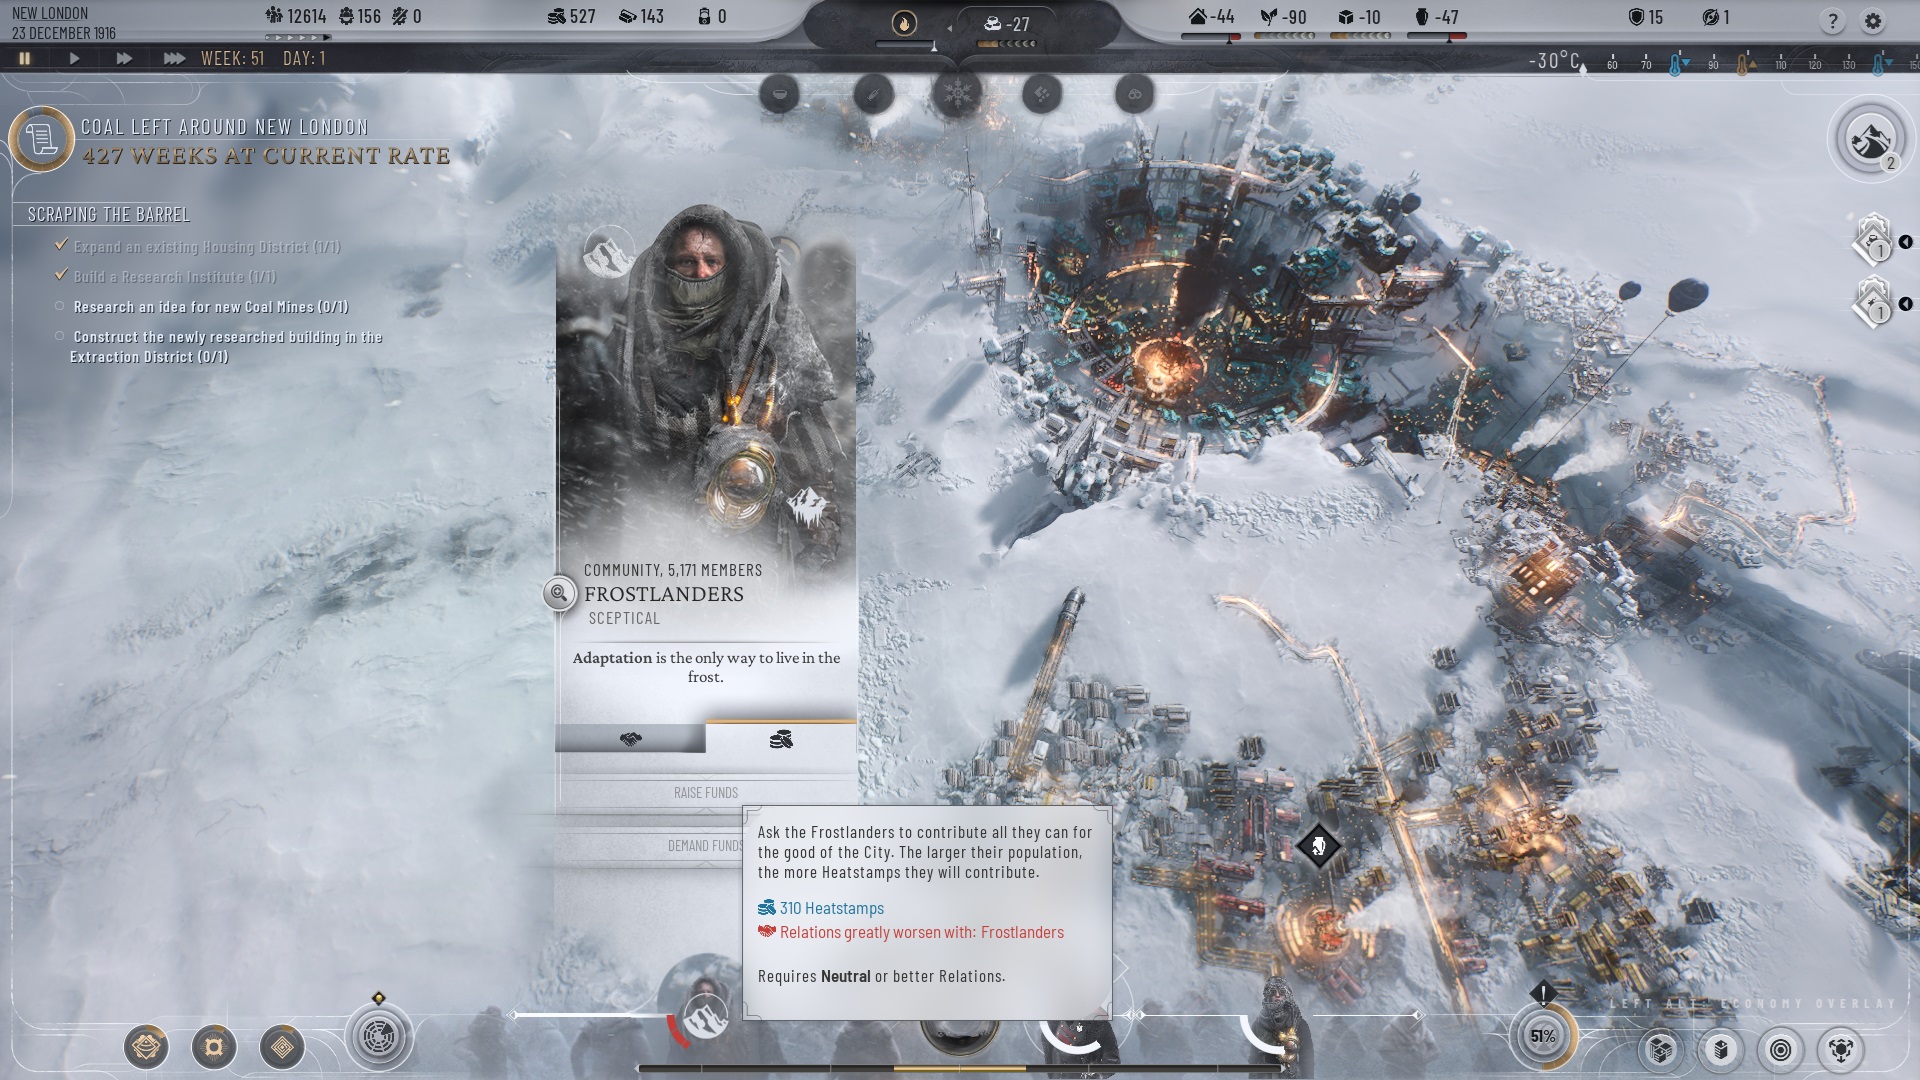
I would not rush another law though, that got me into trust issues.
OnePunchWrench 21 Oct, 2024 @ 6:58am 
If you chose Stalwarts, then at the beginning you should first support this faction, then mobilize 5 defenders and only then take money. More money and additional protection from crime. After the first vote, you can immediately call a second one and pass an additional law. It works well.
jeremy5-7-10 20 Oct, 2024 @ 11:31am 
Has there been a balance patch? I seem to die every time i follow this guide on captain difficulty.
Fortune  [author] 8 Oct, 2024 @ 7:57am 
If it costs less from day 1, then I would love to see your design. The layouts for Housing Districts in this guide are far from perfect and could use an upgrade. They are, however, focused on minimizing expenses at the beginning of the game.
Gamefever 5 Oct, 2024 @ 3:54pm 
You didnt plan on putting in hubs, seriously its not that hard. Easily I can make sure that all my initially placed districts will make full use of a set of 3 hubs in a pocket.
Fortune  [author] 3 Oct, 2024 @ 8:25am 
@MicS
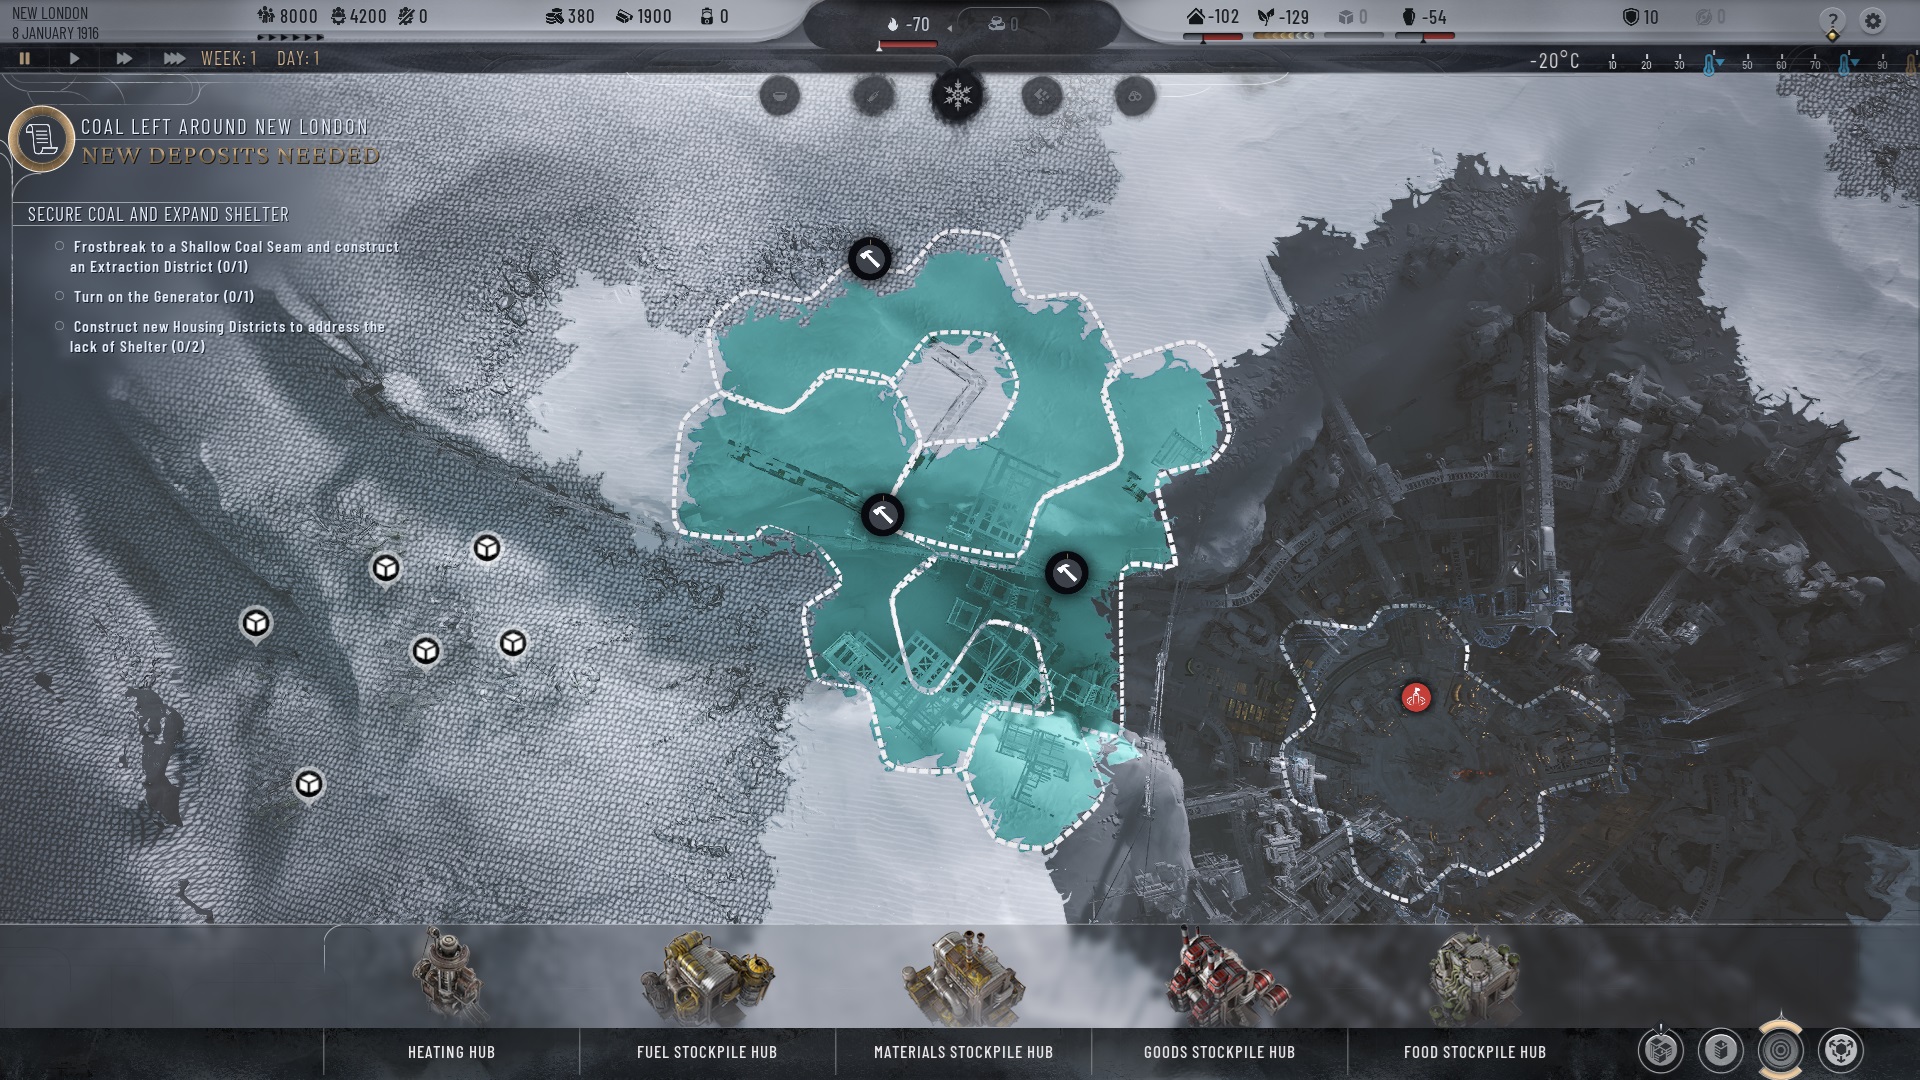
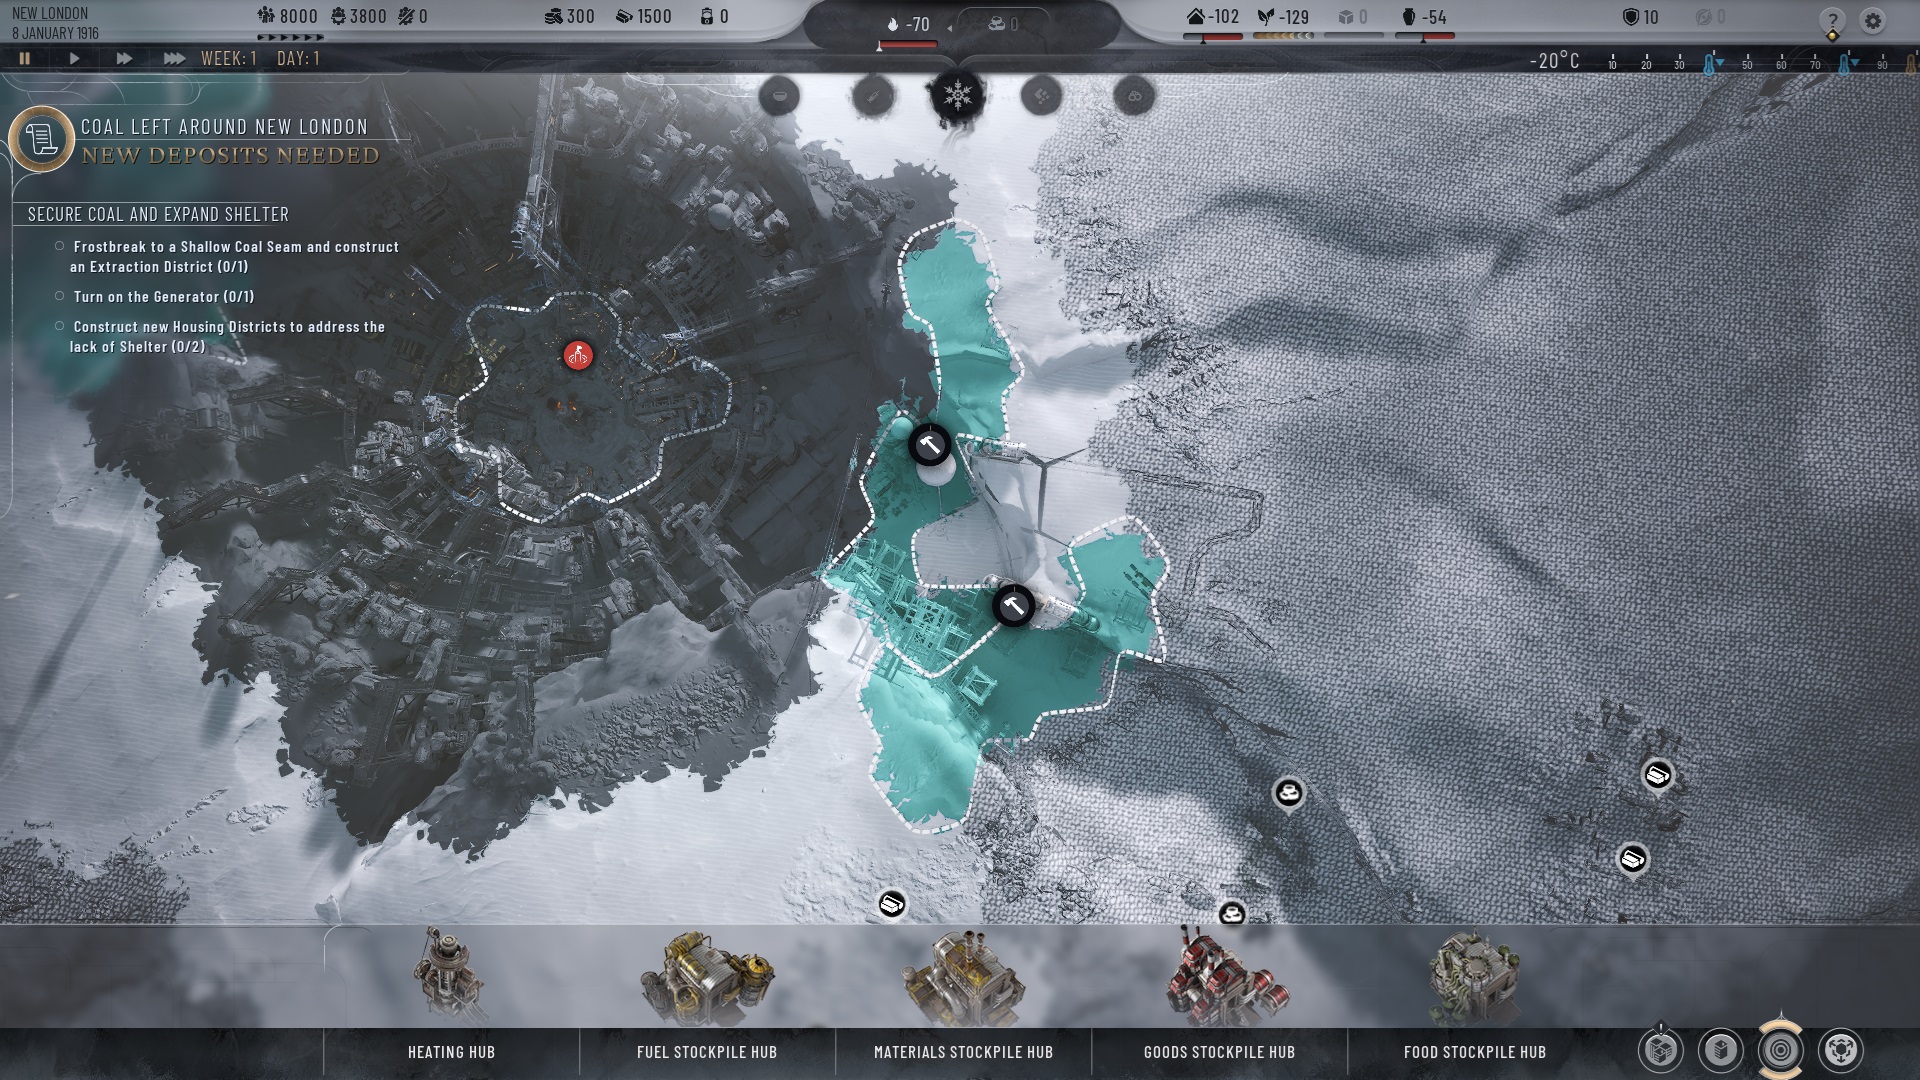
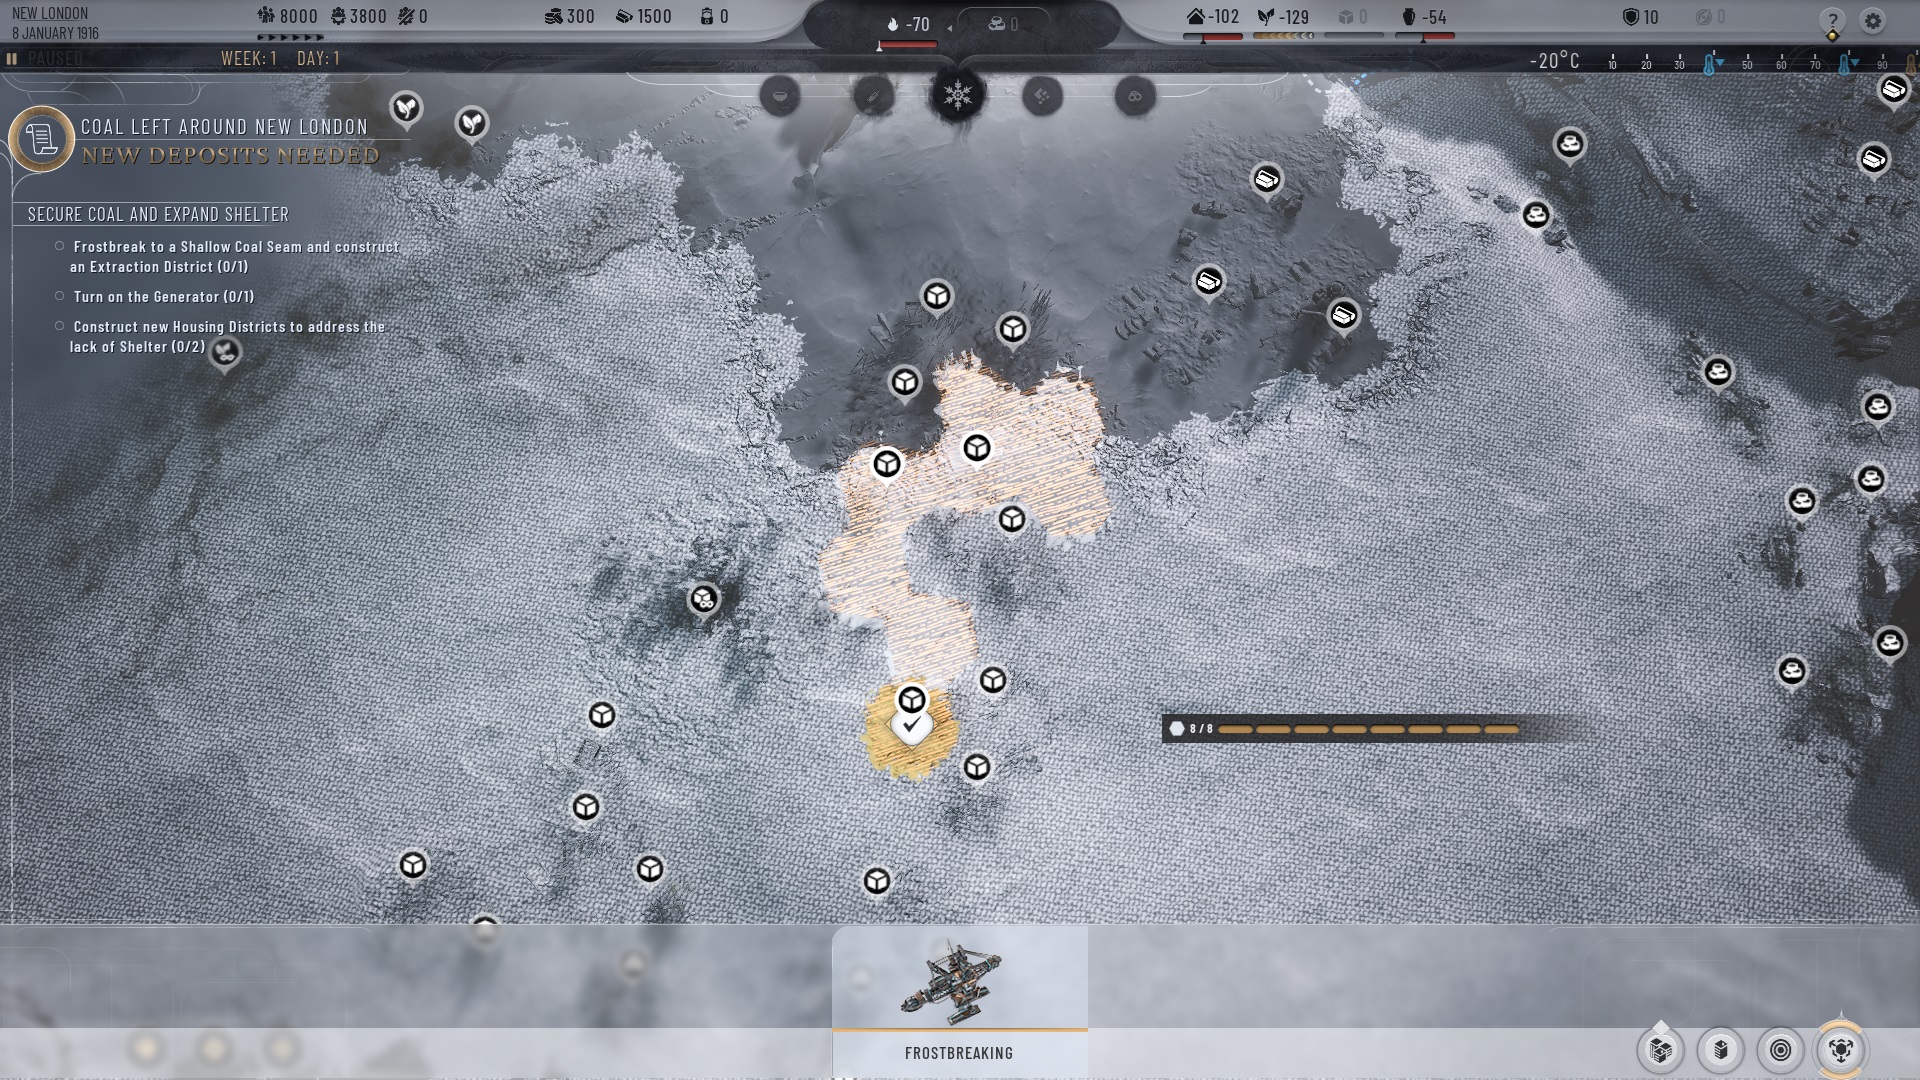
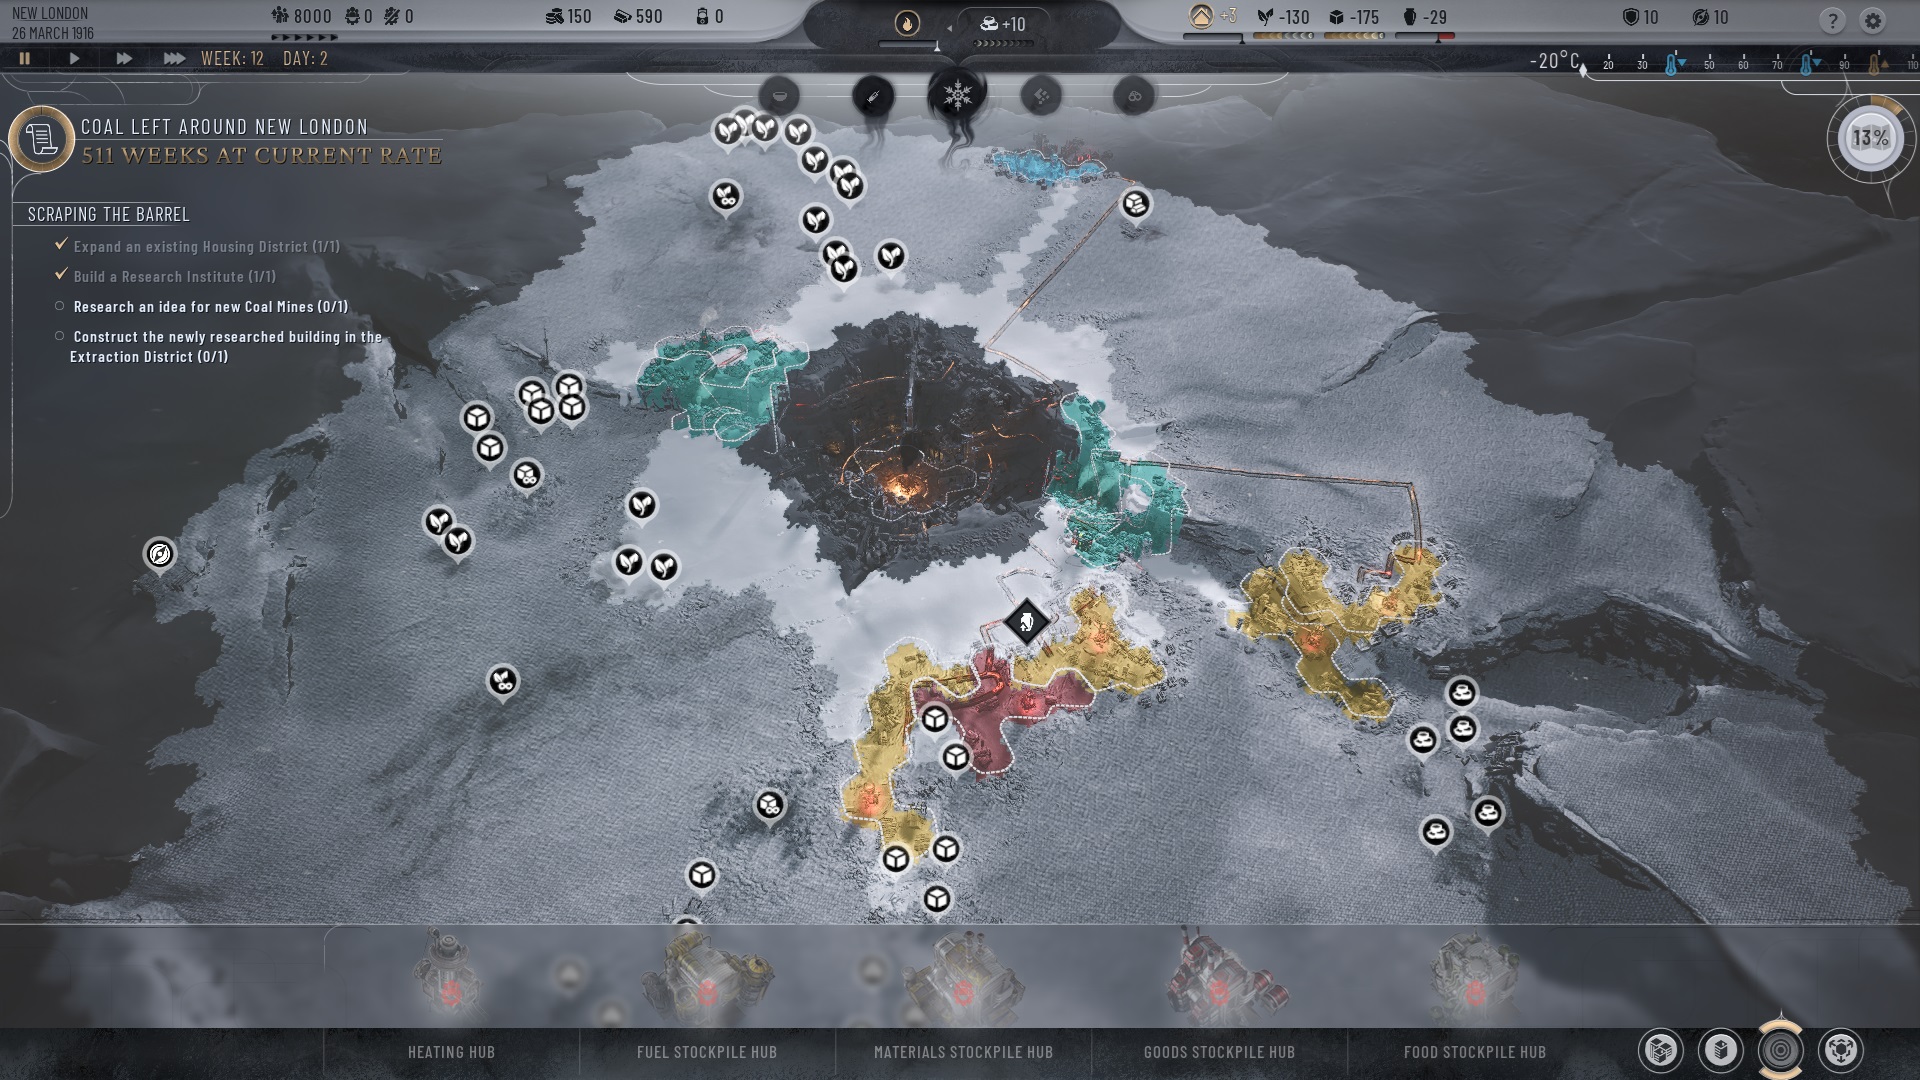
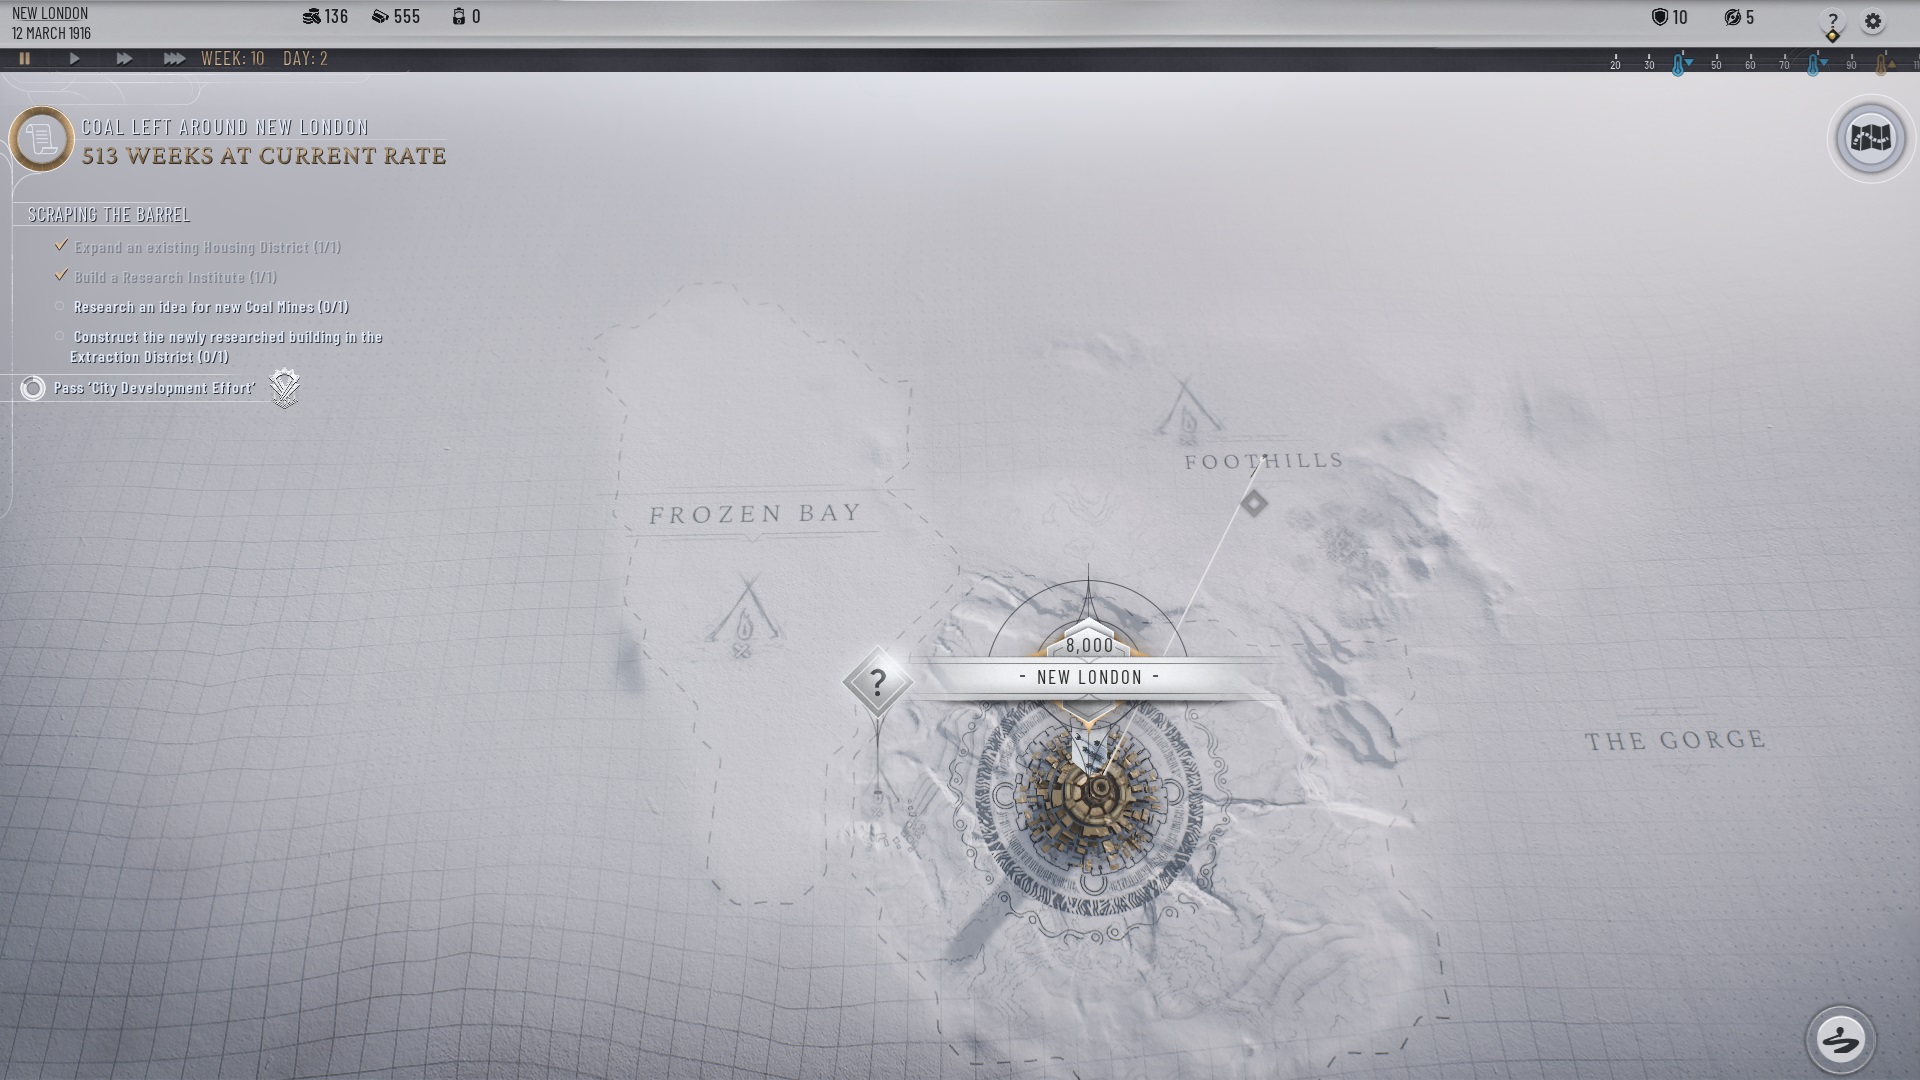
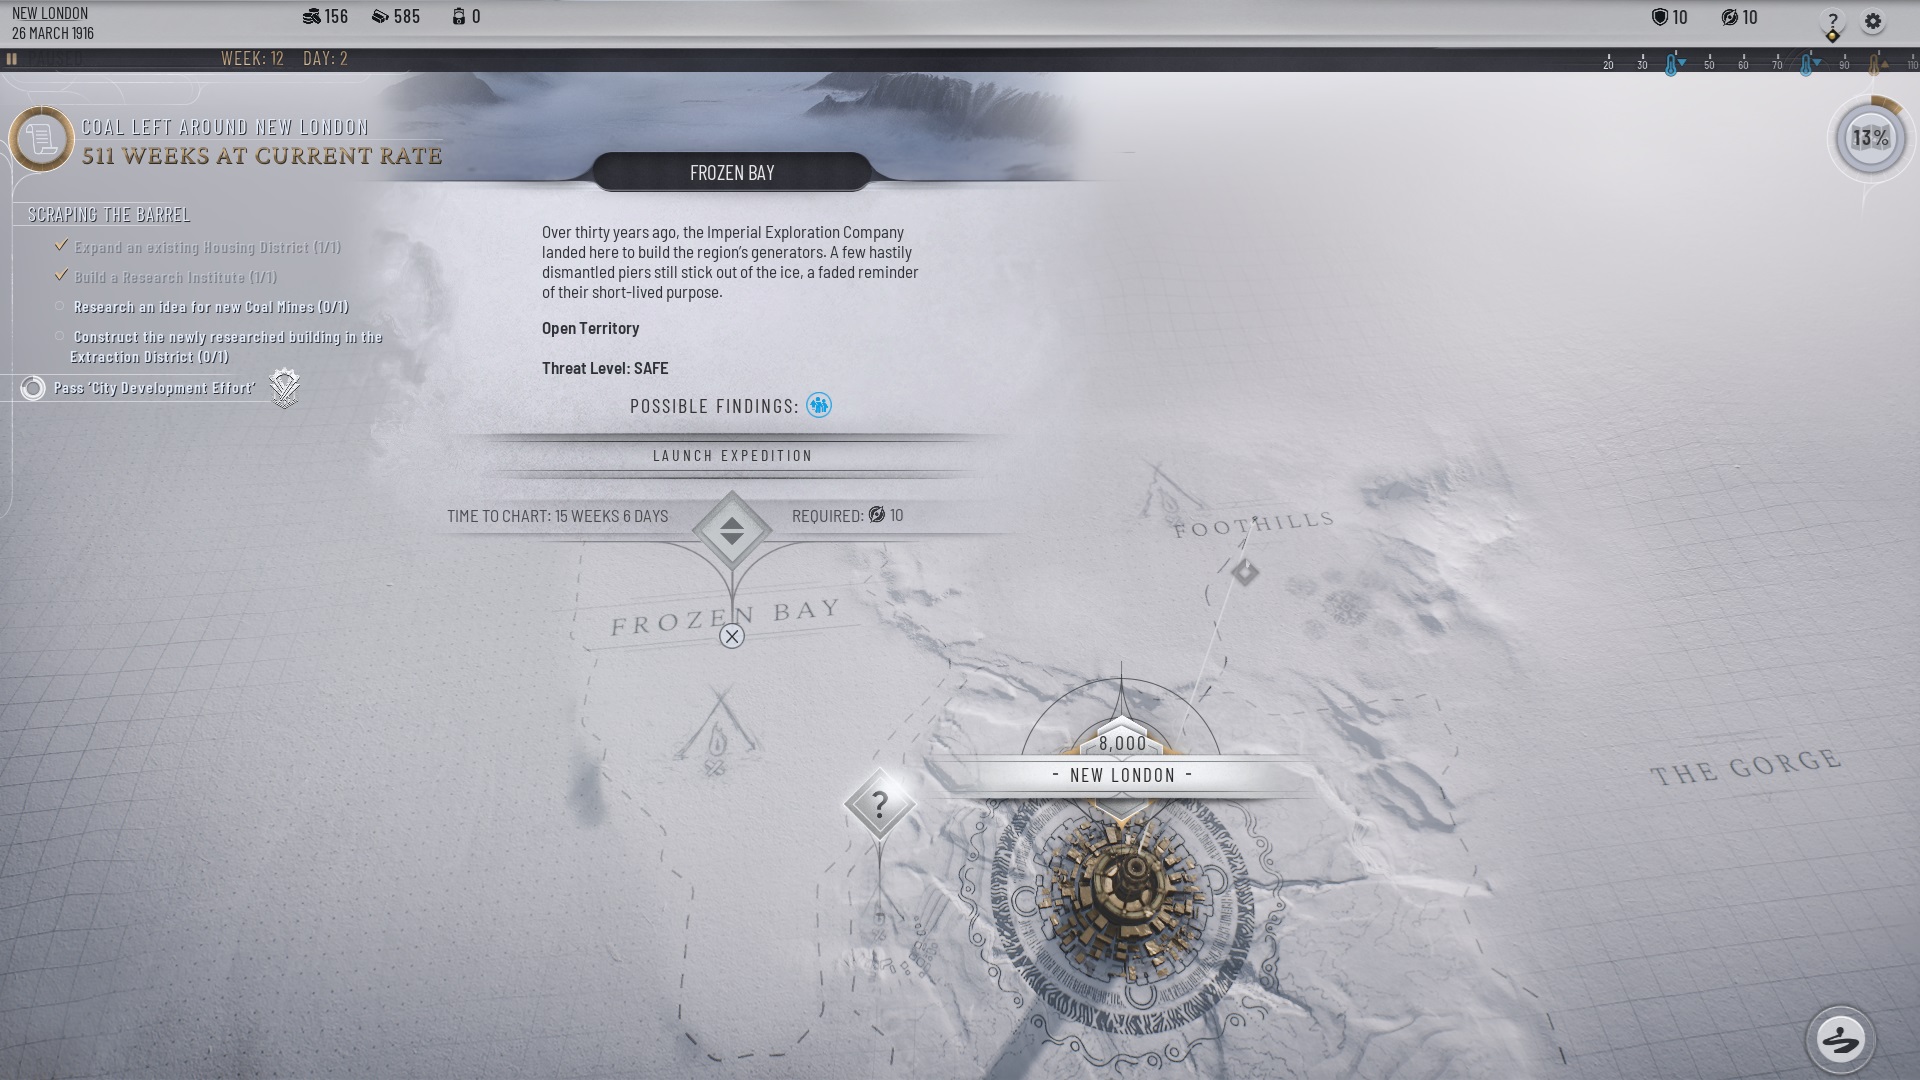
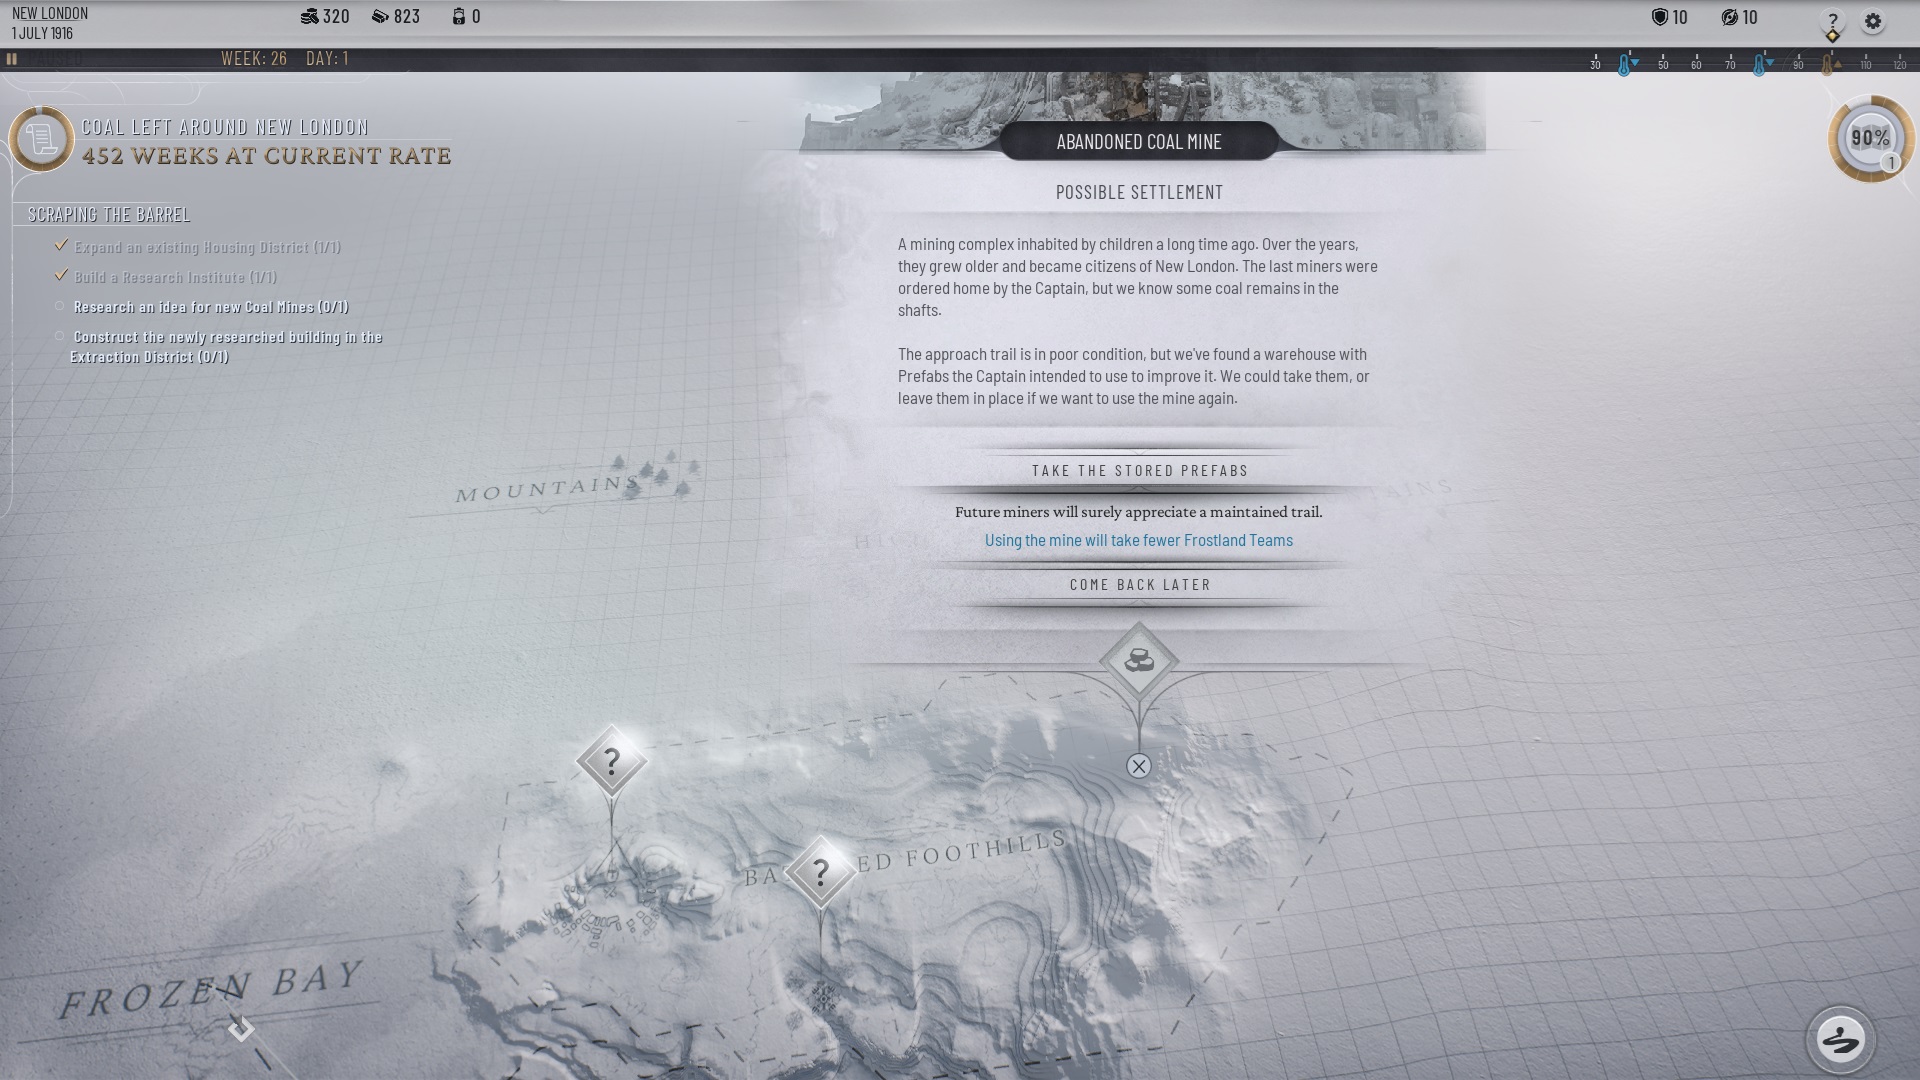
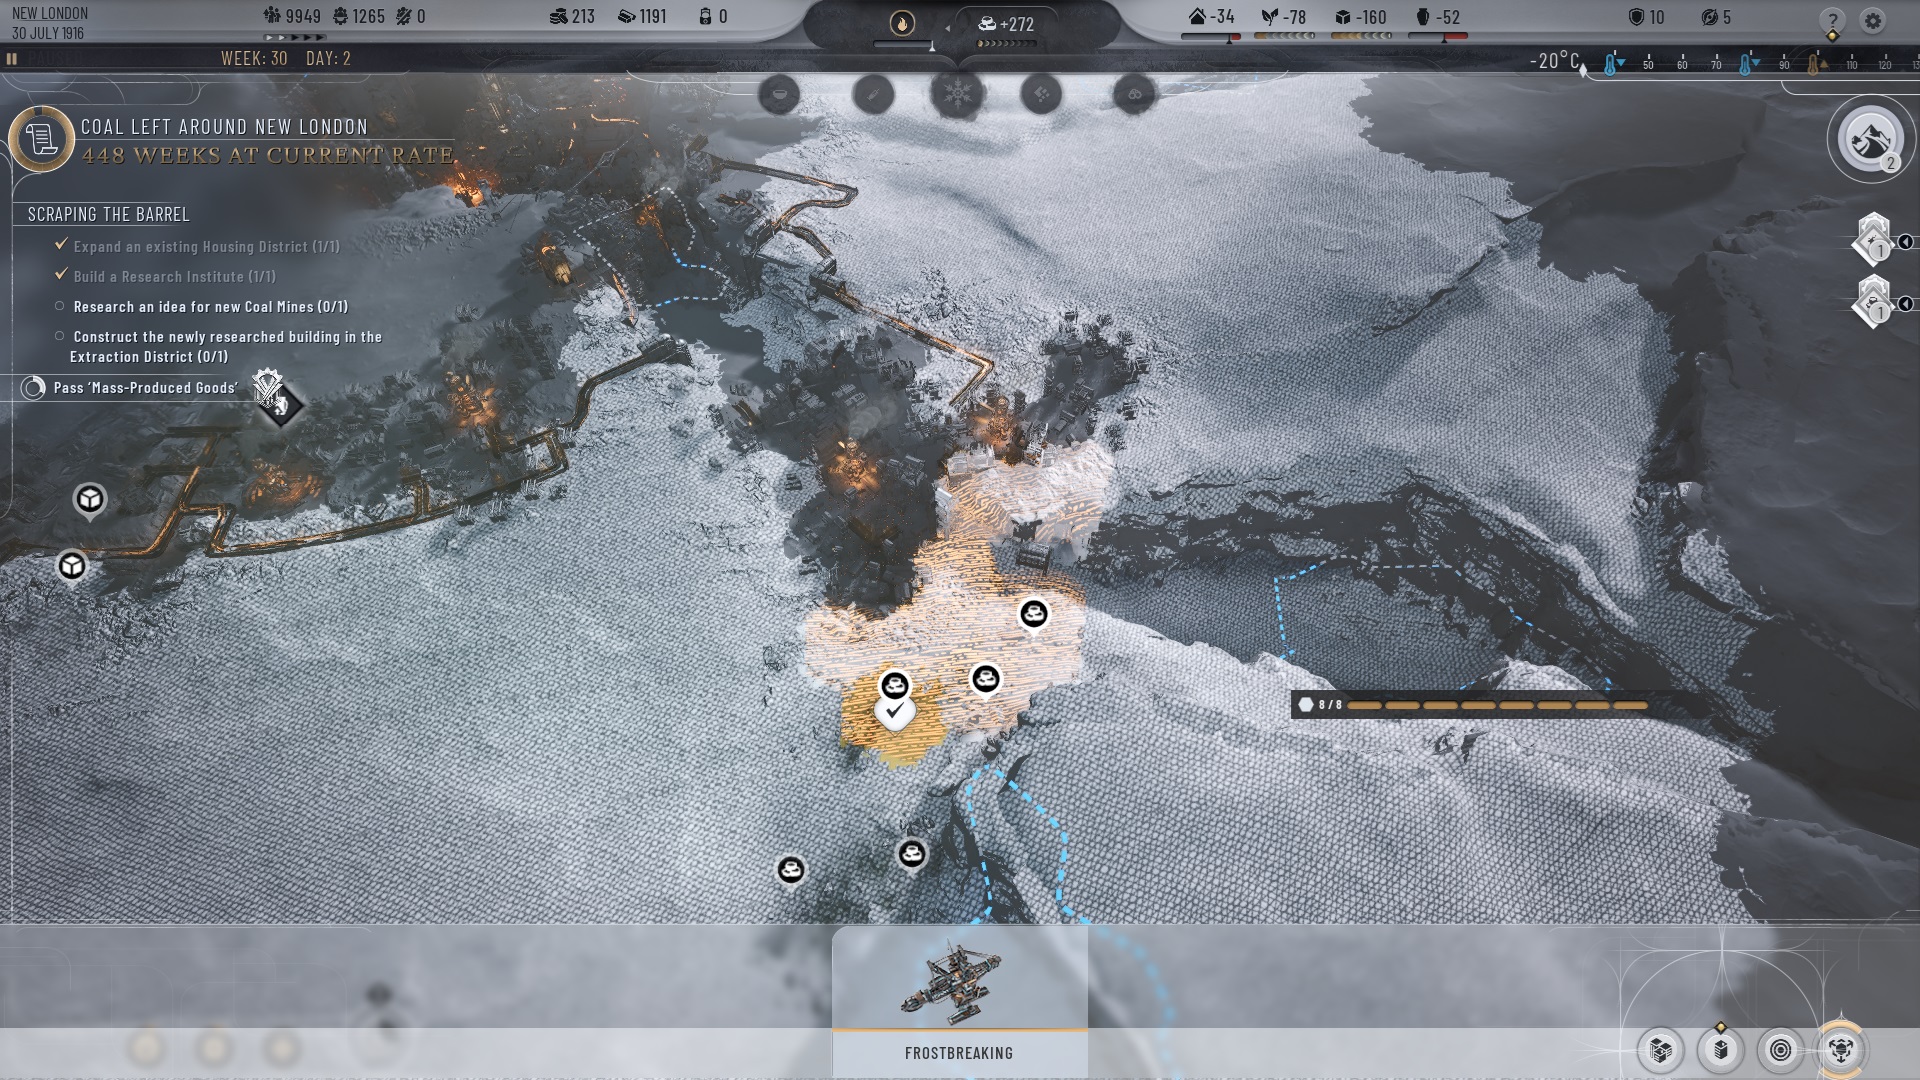
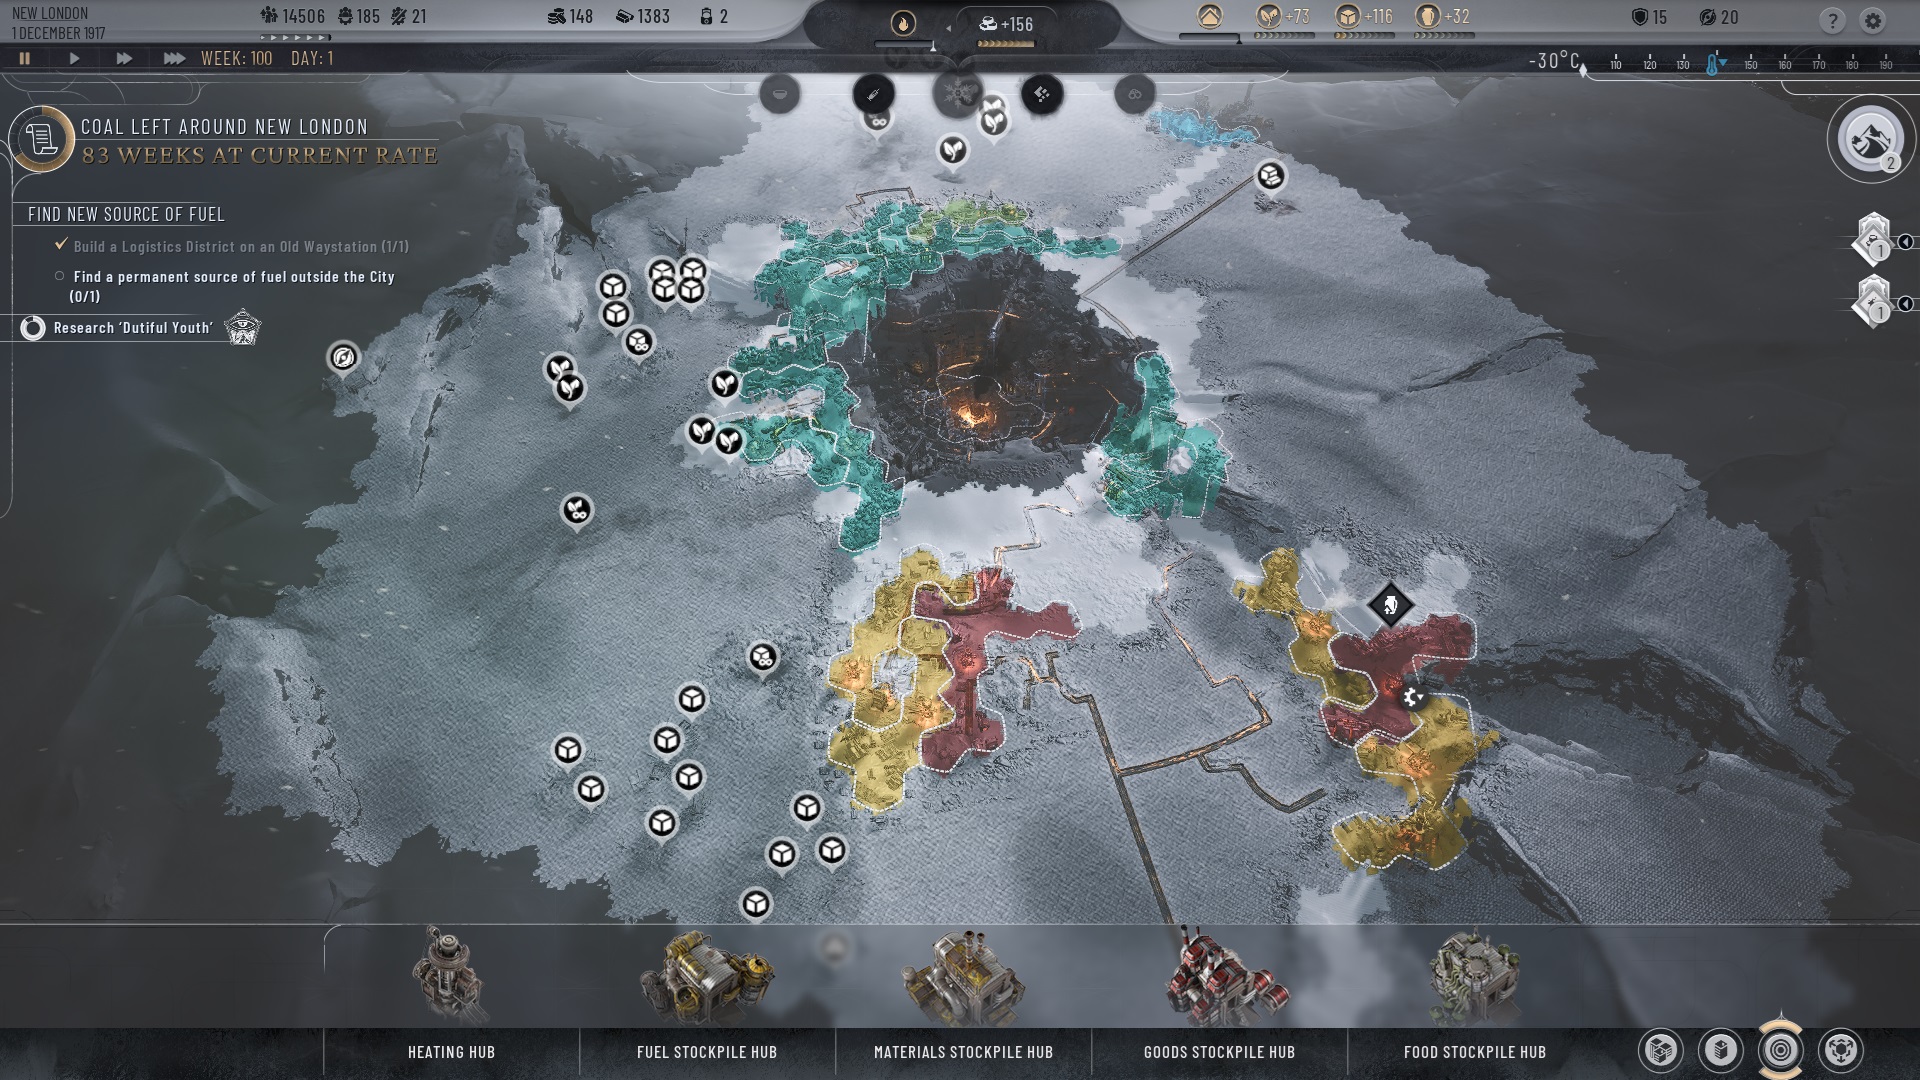
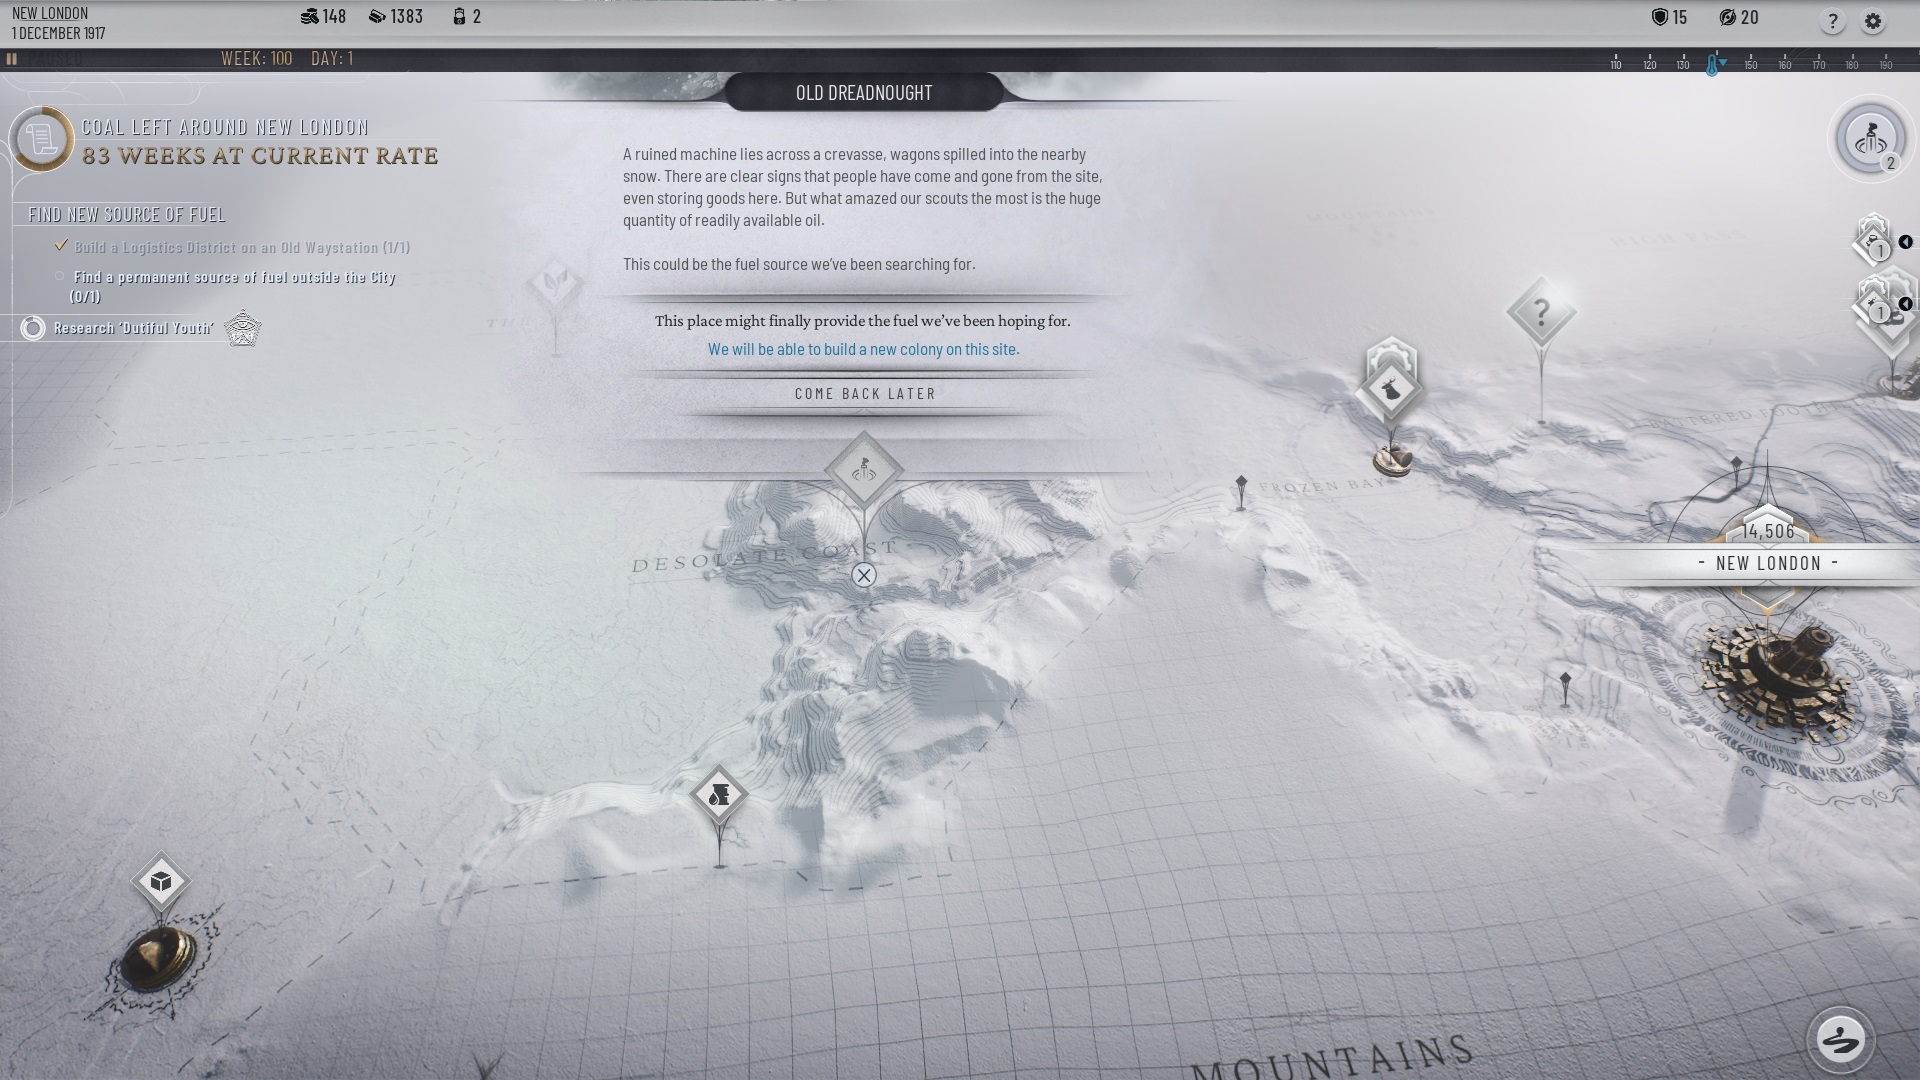
I contemplated settling the crevasse in this guide, but since it is a very peculiar settling location, I went with showing how to efficiently settle the areas immediately available. The thing about the areas settled in this guide is that they build into supporting the Food Districts later on.
General.Aubrey.Smith 1 Oct, 2024 @ 10:23am 
Paid Essentials
I kept the law, as a Albertan Canadian where ya if you want your propane so you don't freeze at minus 50... yes we Albertans actually work and live in minus 50 for a few weeks in Jan. Feb.... YOU get off your ass and you work.
I smiled and laughed as the father said to his son in the game
"get a haircut son, its time you find work"
so far and its been weeks there has been nothing bad happened... go figure...
MicS 28 Sep, 2024 @ 4:36pm 
The crevasse next to the coal mines is reachable immediately, but of course not as the housing you build on week 1.

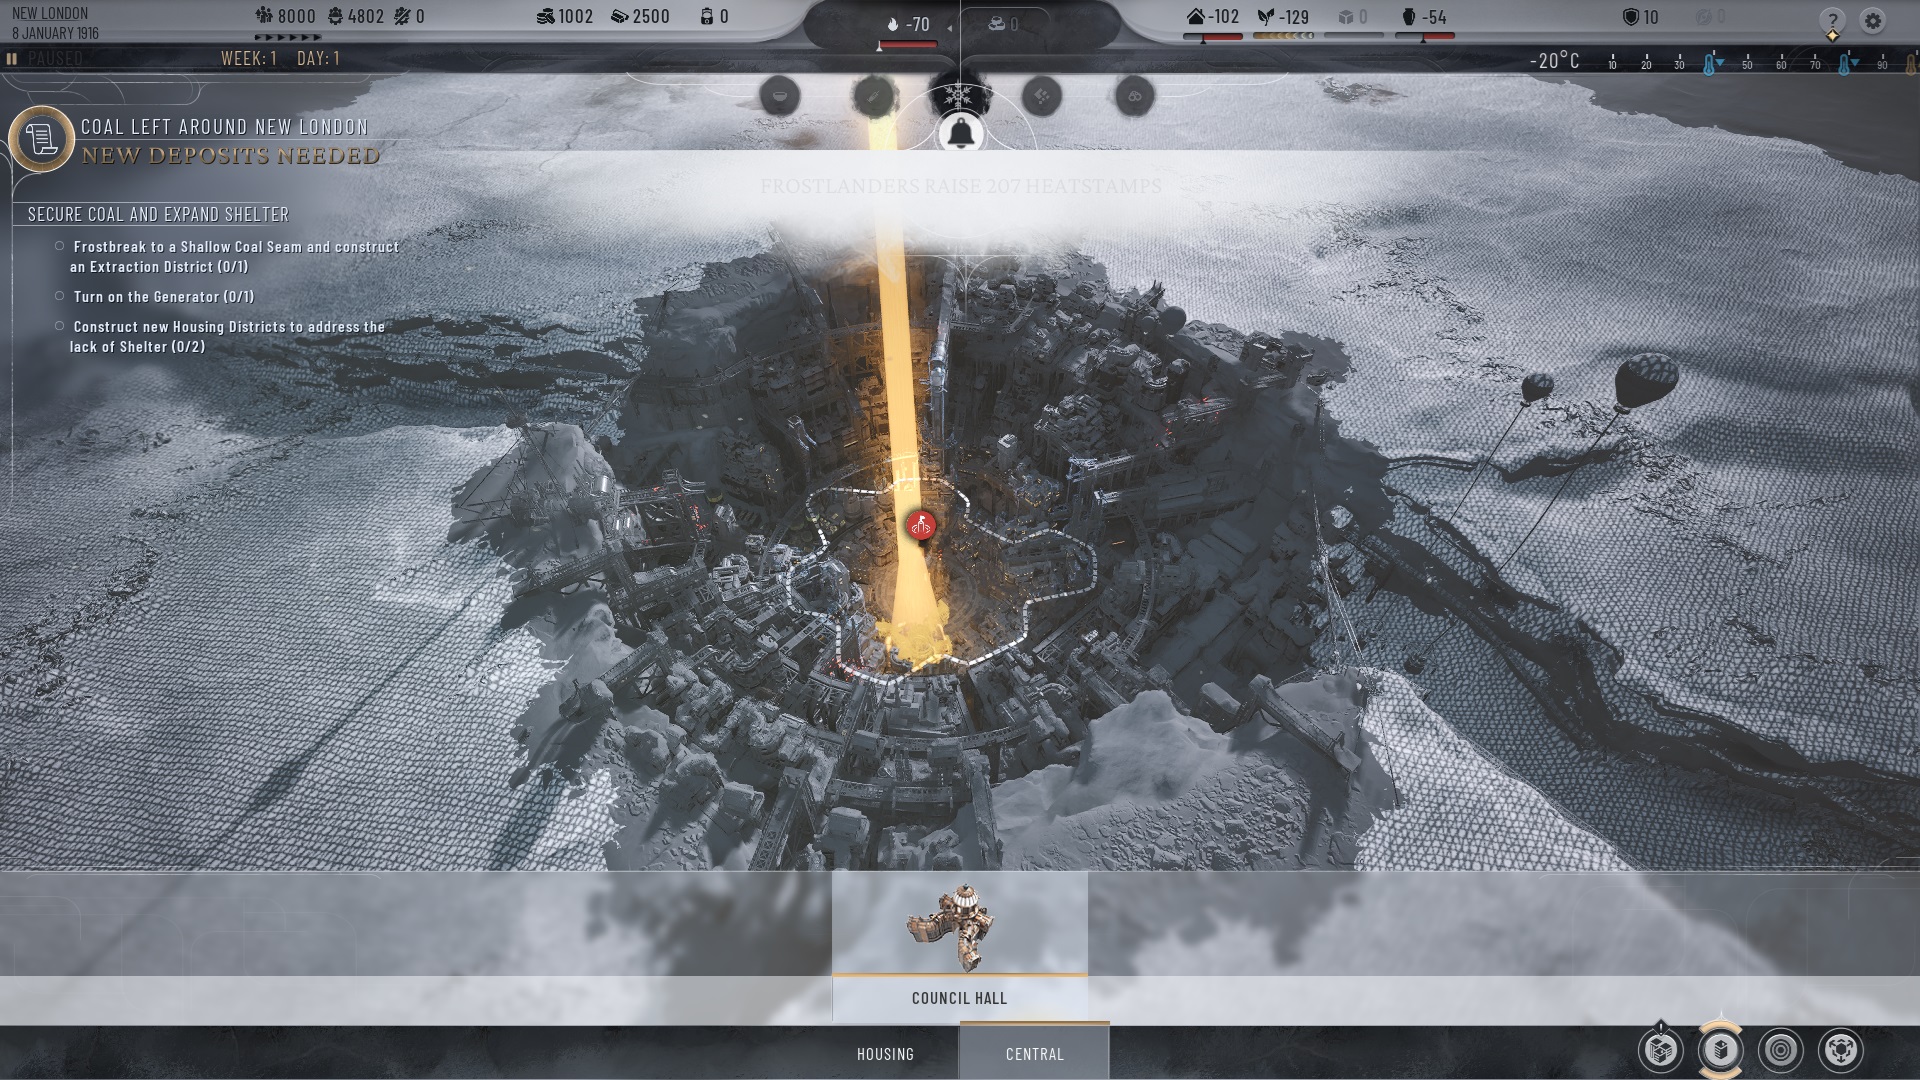
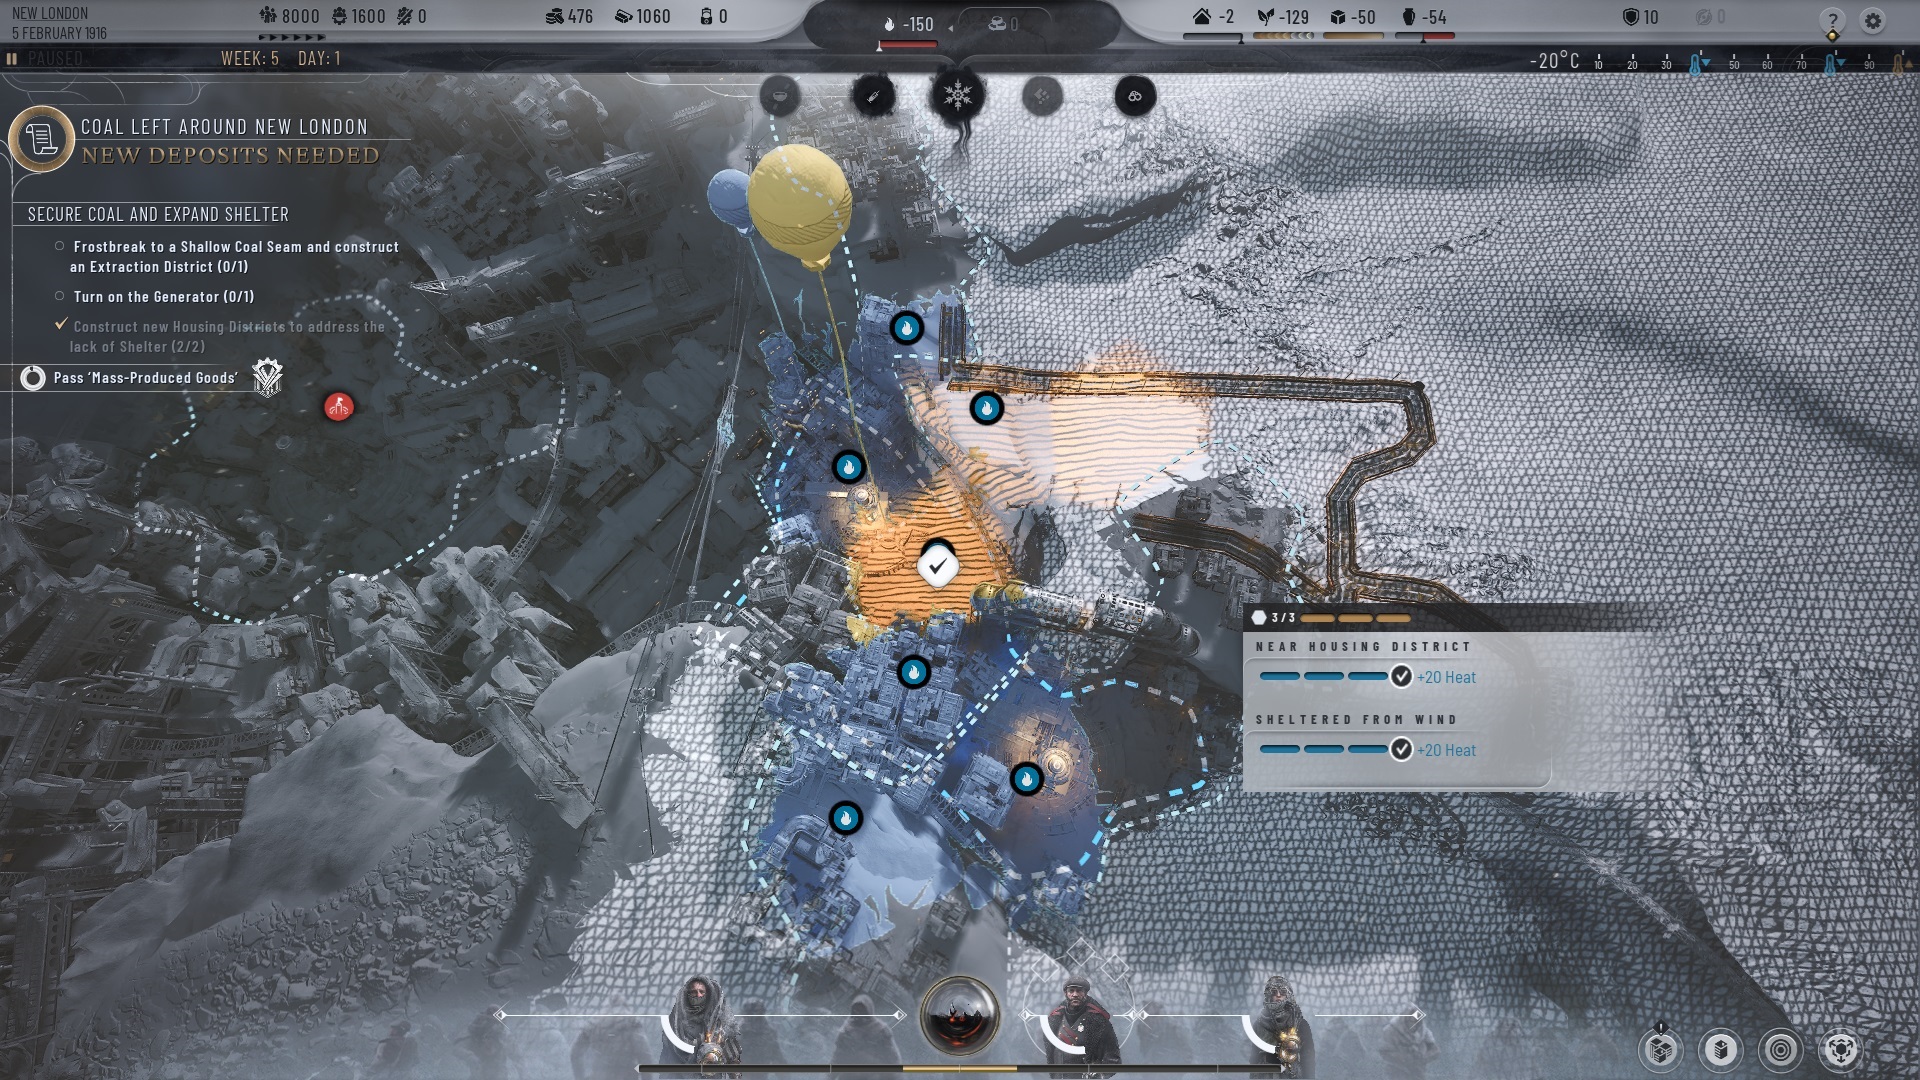
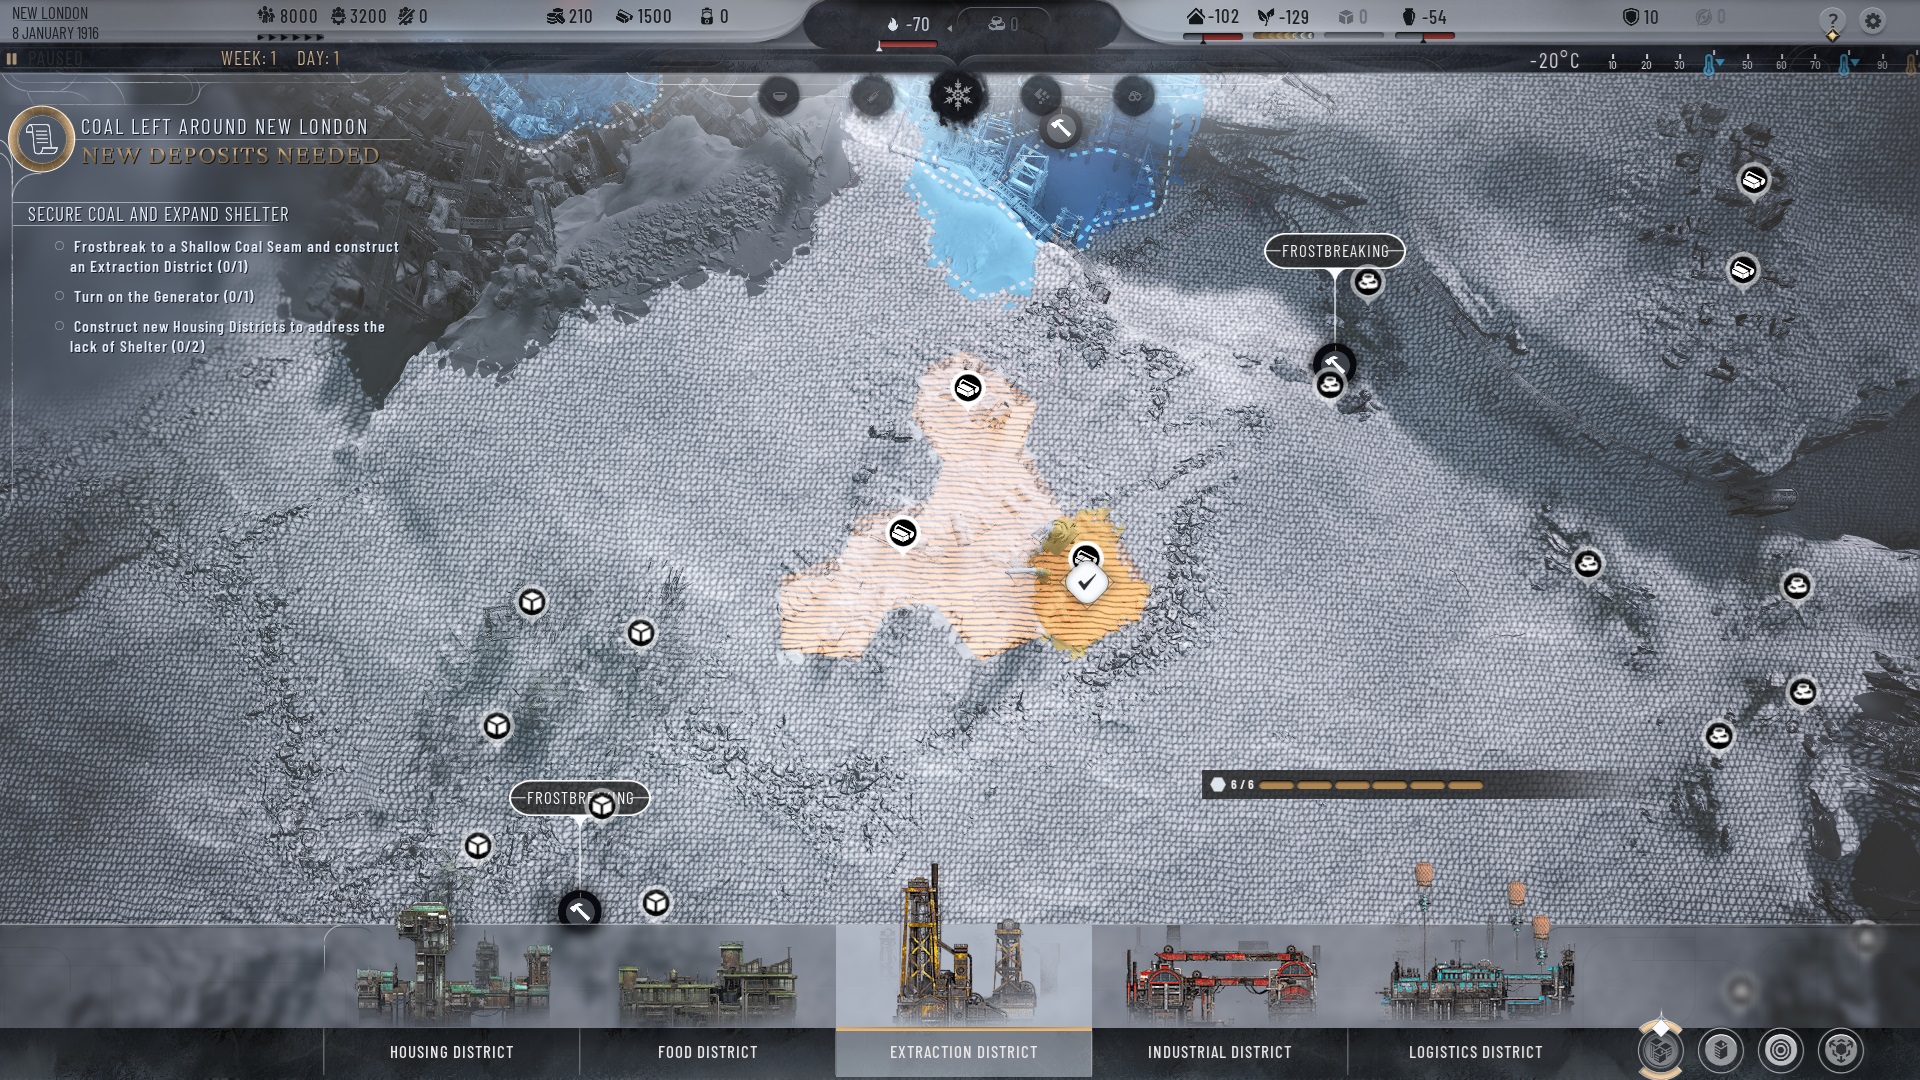
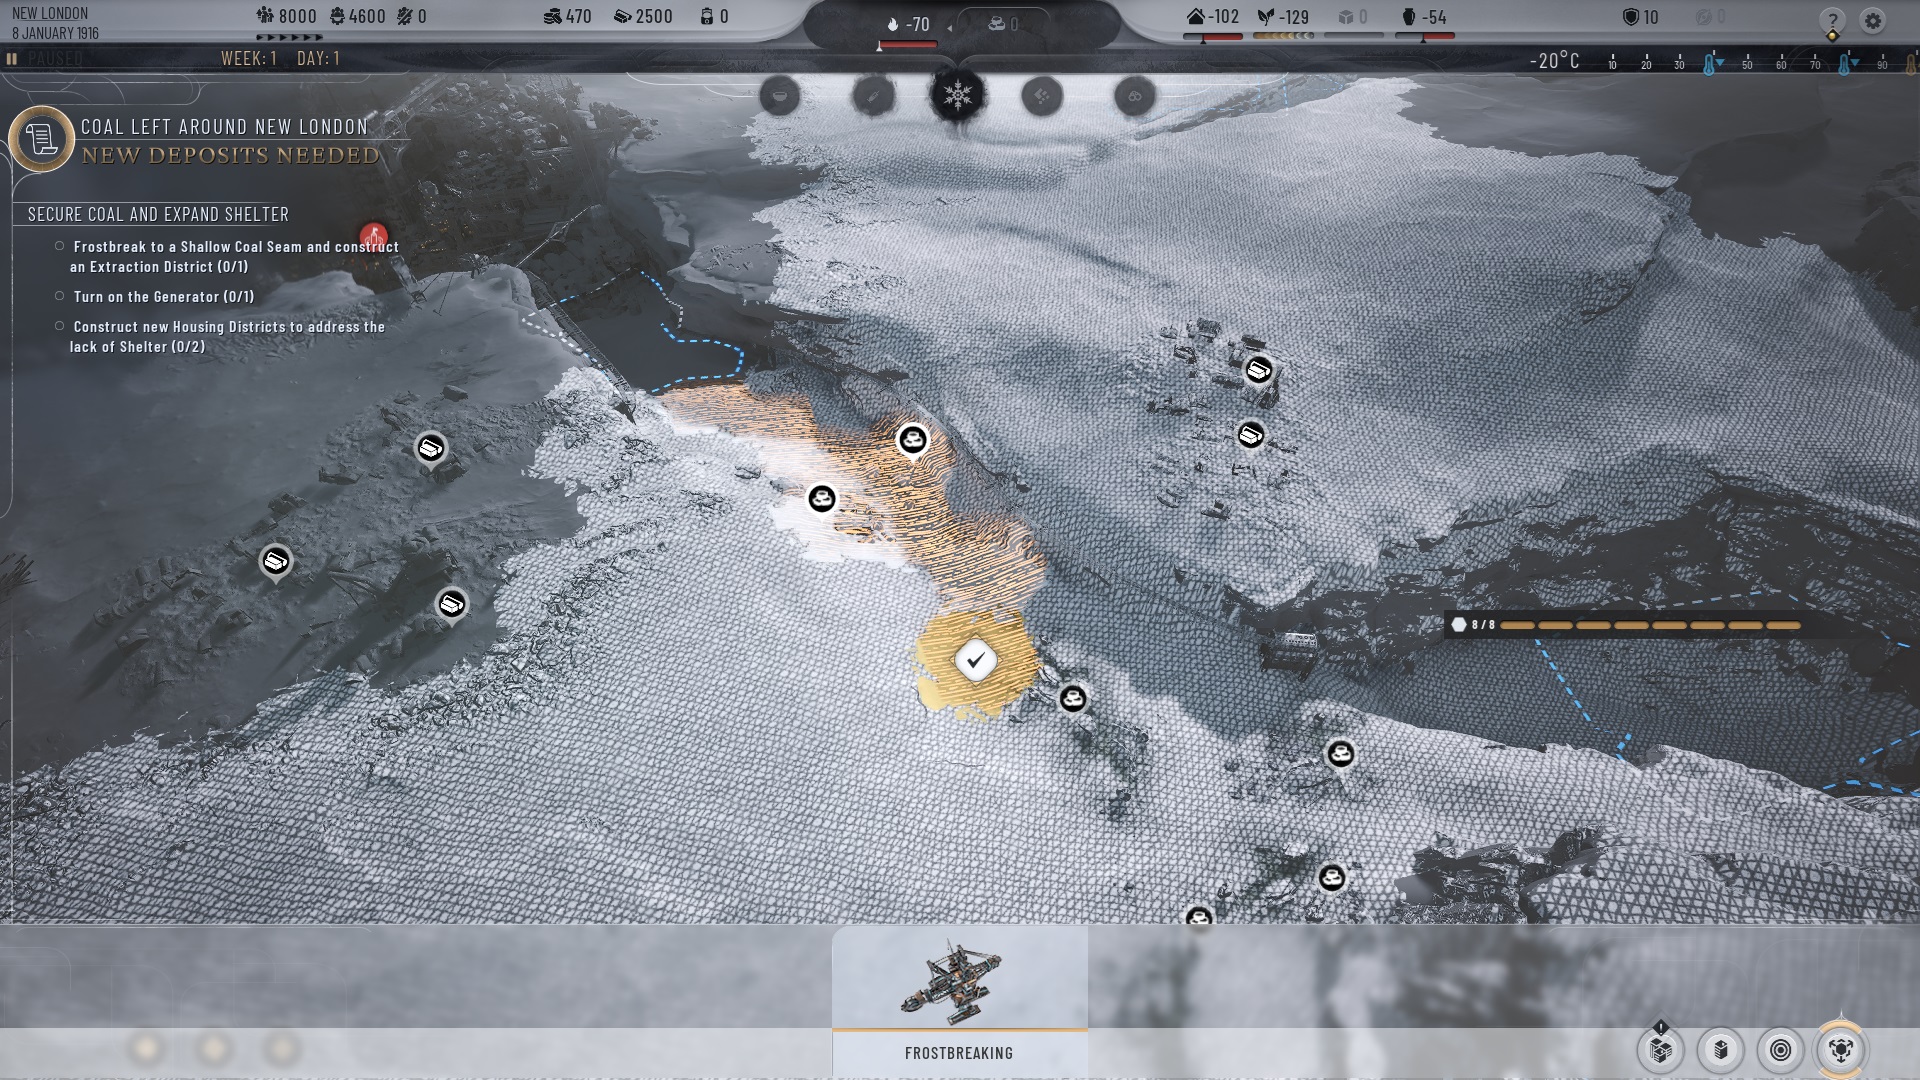
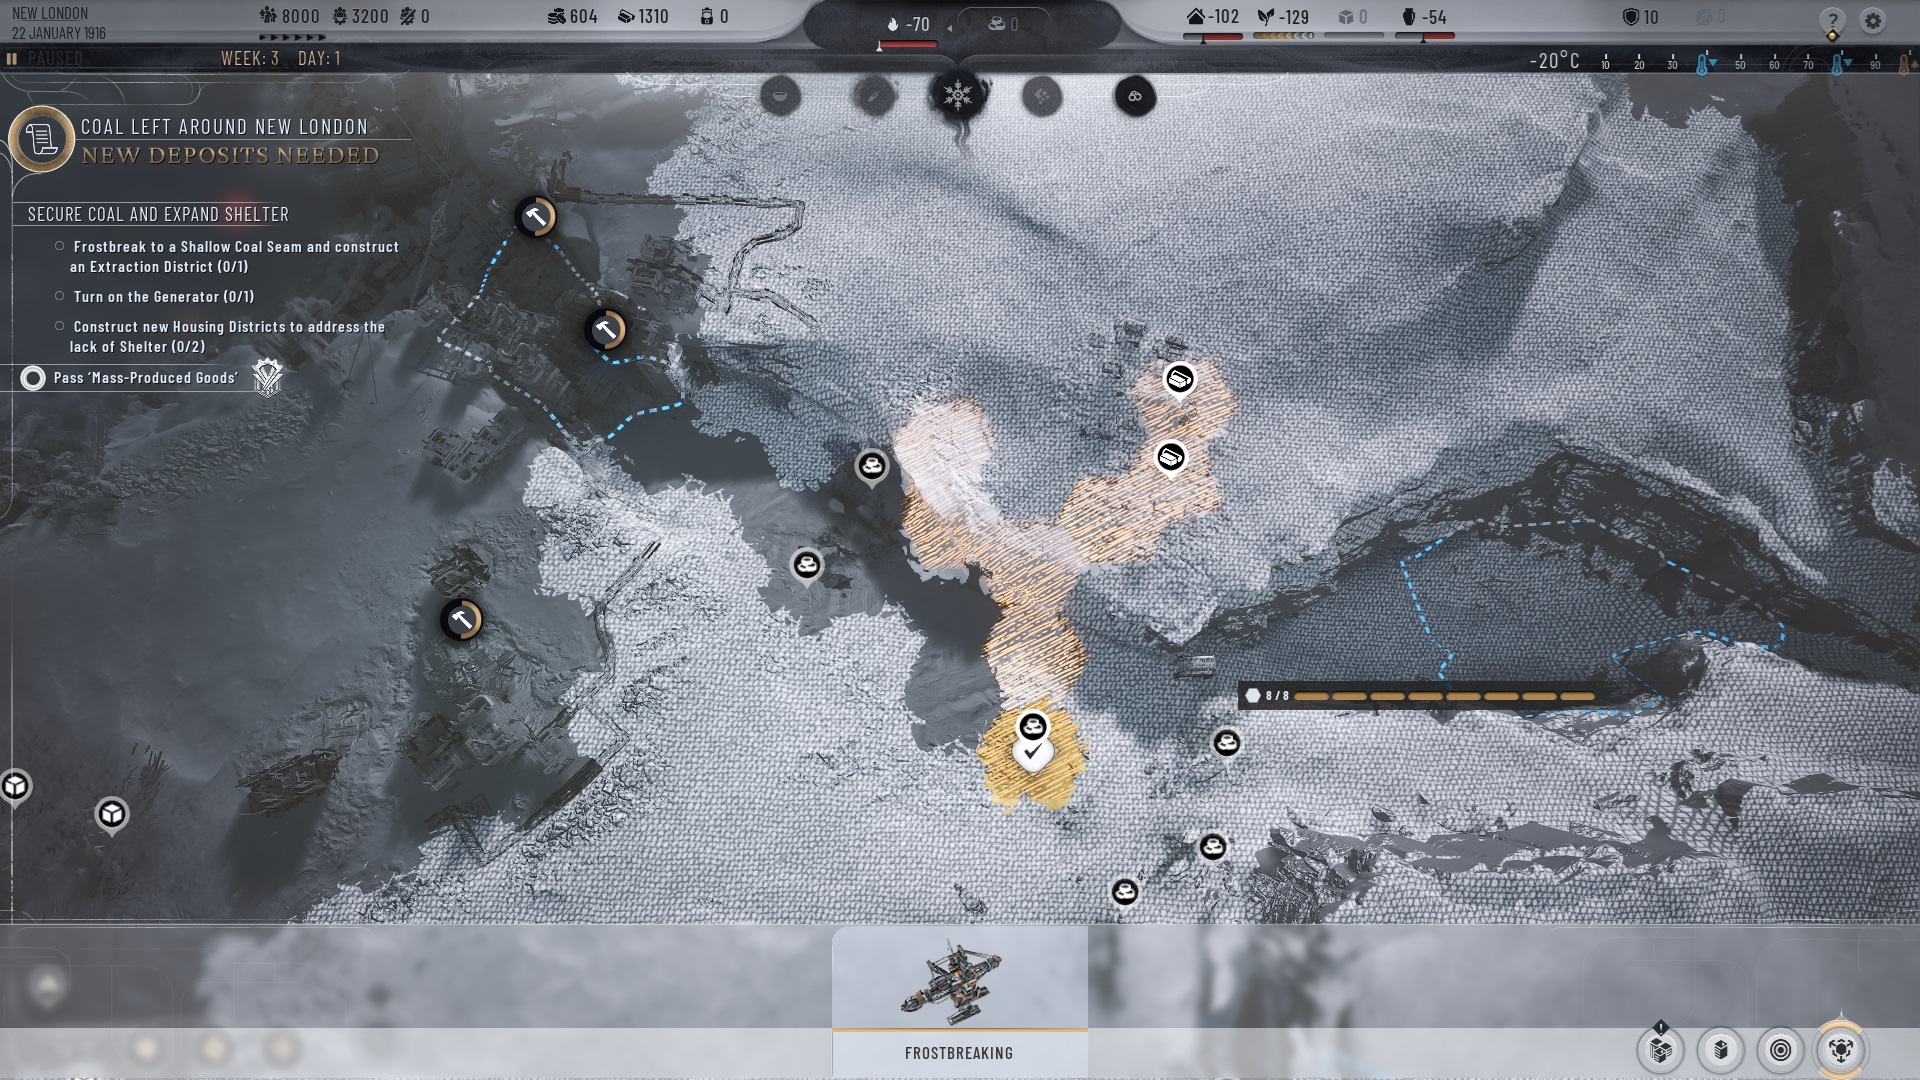
Two frostbreaks can clear the space for two housing districts, but provide the shelter like three. I would argue the savings from not building a 3rd housing district are already significant for the very early game, when you need to house the very first group you invite in around week 50, compared to building more districts in the already cleared area around the generator.

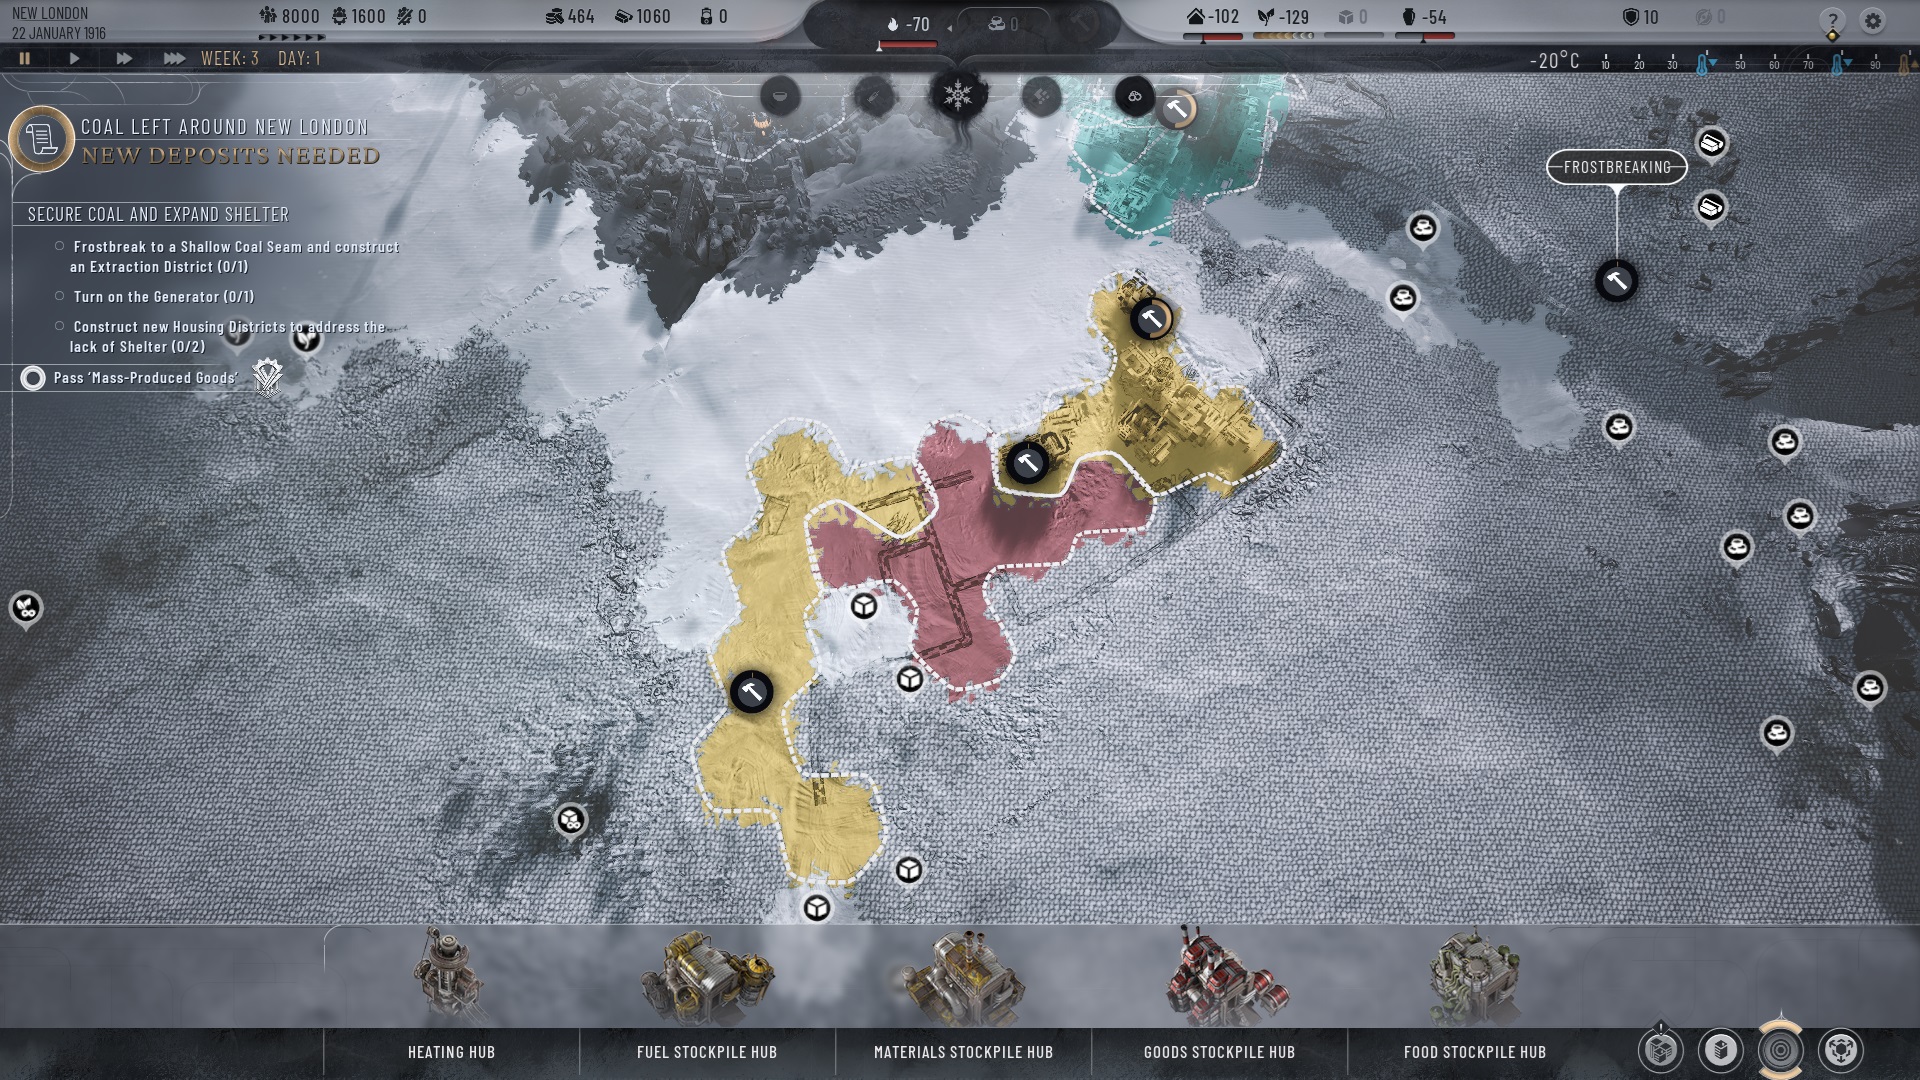
As for the week 1, only 4 housing districts, all of them in the initial sheltered places are enough to get down to minor cold. And those on the left can immediately be expanded to get adjacent to the food district.

All the rest of initial builds are perfect, thanks for advice.
Fortune  [author] 27 Sep, 2024 @ 9:15pm 
Since I focused on the opening weeks of the campaign, I decided not to include such long-term synergies, since they would be of little help when digesting this guide.
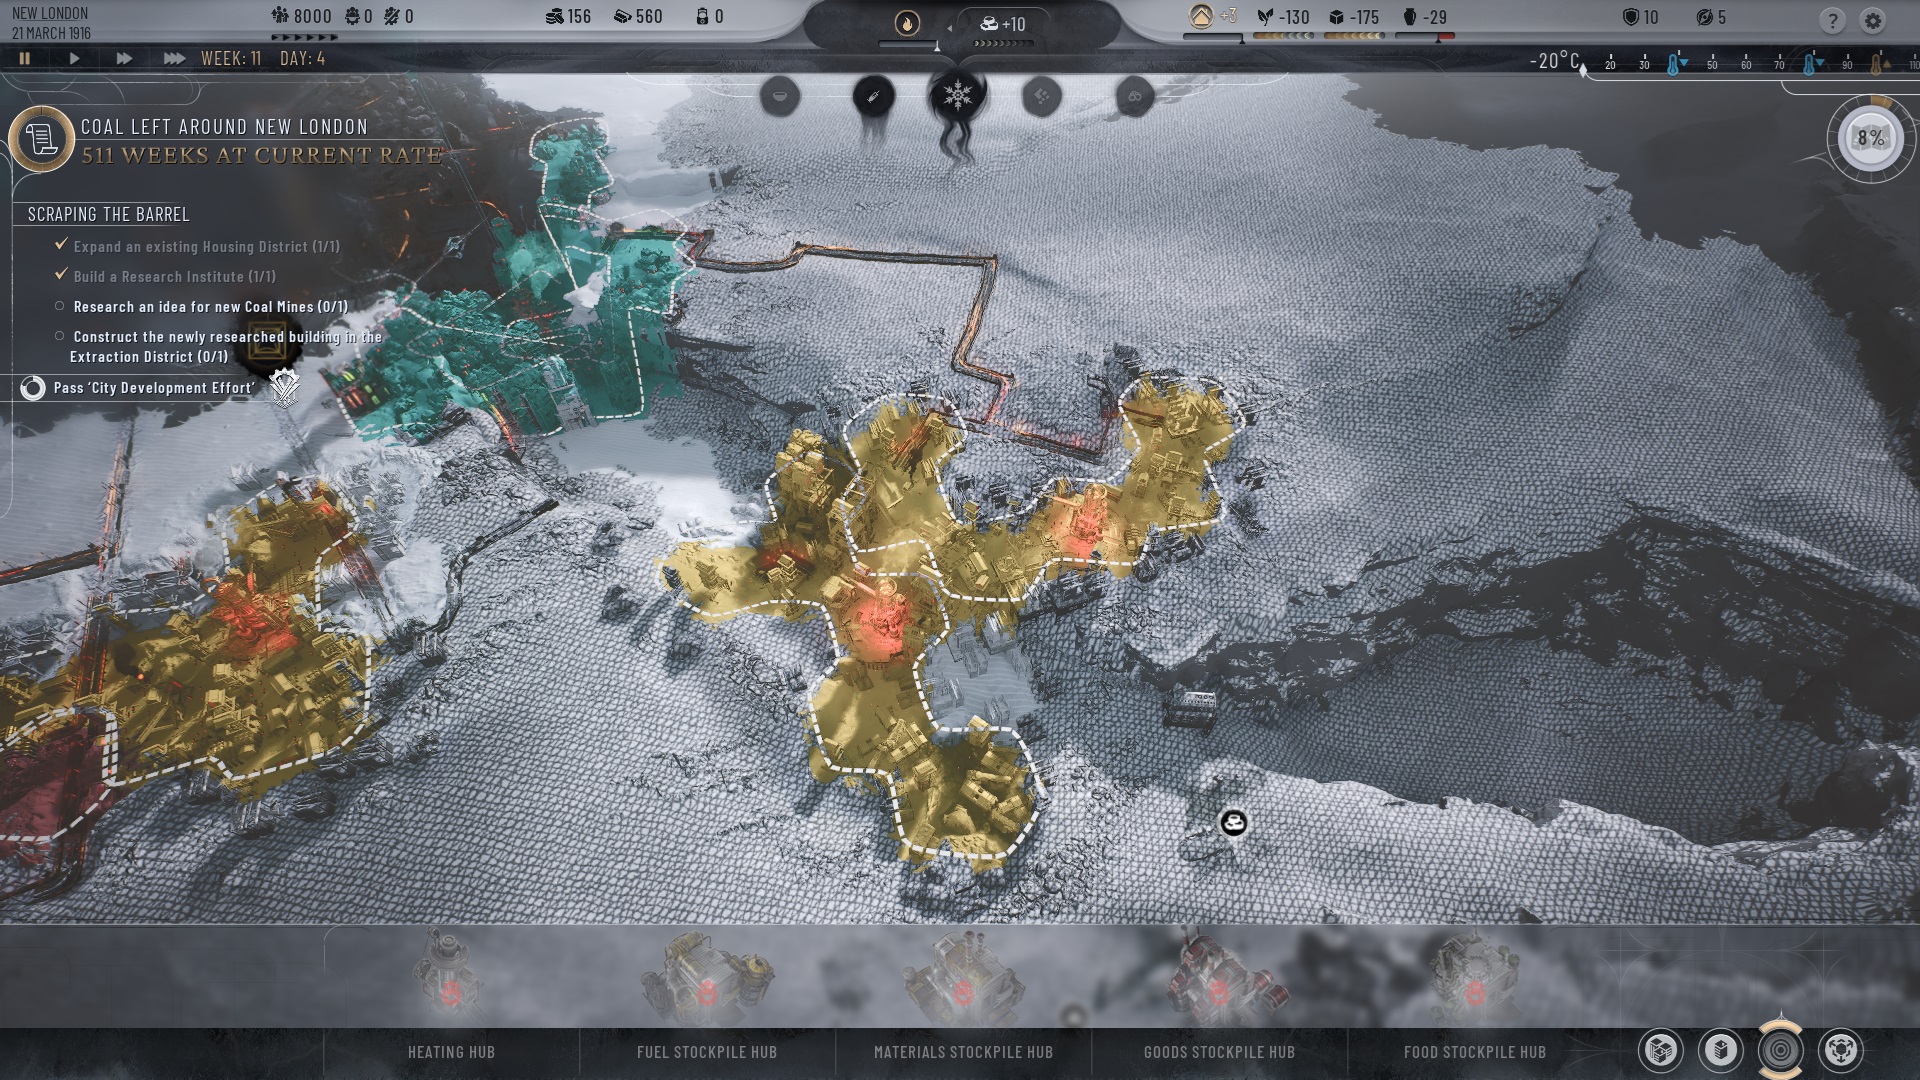
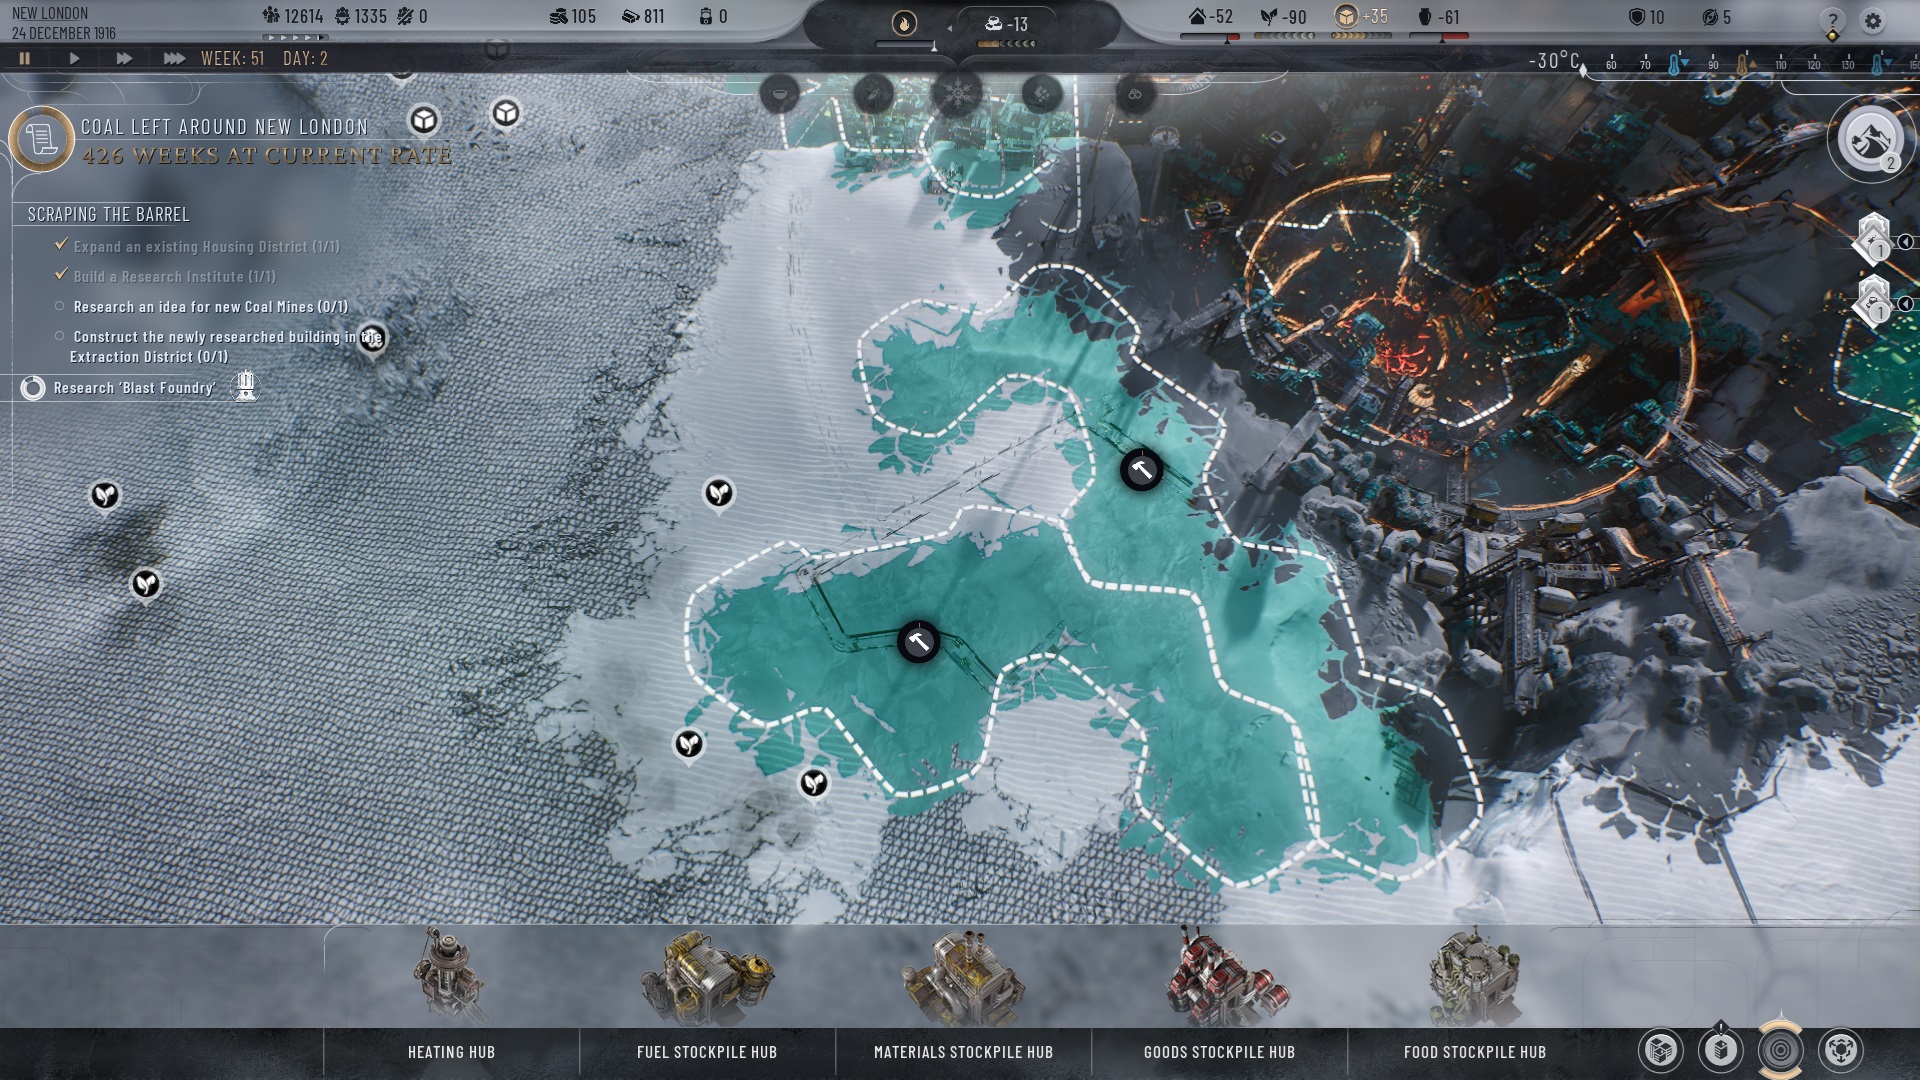
Same goes for the heat and population bonus locations. They should be obvious even to a first-time player, so I don't want to include them. Those locations are expensive to reach before week 100 on Captain difficulty.
Hamalisk 27 Sep, 2024 @ 8:23pm 
Good guide but I disagree slightly with the logistics placement. It should be a bit clockwise to enable heating synergy with the iron mine later on in the game.