Pirates, Vikings, & Knights II

Pirates, Vikings, & Knights II

95 ratings
PVKII Complete Strategy Guide
By The Strategist and 2 collaborators
How to make the best of any situation.
   
Award
Favorite
Favorited
Unfavorite
Introduction
Unoffical fan-made possibly-incorrect Pirates, VIKINGS, and Knights II Strategy Guide

Full time, part time, in time, on time, all the time, every time. Strategy. It's my pastime.

Not everything in this guide is absolutely guaranteed to work 100% of the time. Unknown variables must be approximated "on the fly" and, if they are approximated incorrectly, can lead to what would appear to be unfortunate circumstances.

These tactics and strategies are supposed to get the maximum effect with the least risk in a reasonable amount of time.
Emphasis on least risk and maximum effect.
Patience is a virtue but carelessness is not.

This is not a basic tutorial.

Screenshots and diagrams are not necessarily hard to come across, but I haven't had a reason to take pictures of standard gameplay until this guide. As such, it will lack screenshots for some time. Turns out that I'm lazy and cannot bring myself to fabricate the elaborate sort of screenshots I would be willing to post.

Basic Tactics

Some wisdom applicable to all classes and scenarios.

Blocking, no matter the size of the weapon or the direction you choose, is more effective at preventing your death than not blocking. Unless your slower speed means you get hit by somebody else.

That said, blocking to the wrong direction can get you stunned.

Run away before you become out-matched.
If an additional enemy showing up to the fight could realistically spell your doom, you should seriously consider withdrawing.

Even if you don't need them, deny the enemy health and armor pick-ups if there are no injured teammates nearby.

While on the subject, be considerate, and regularly assess the status of your teammates.

Don't mess about near environmental hazards.
Crossbows, javelins, kegs, bashes, kicks and the rifle have considerable knockback, and can come out of nowhere.
Even somebody dropping a chest in your way can send you skipping into oblivion.

There is a range (determined by your speed, and the speed of the incoming projectile) at which being hit is determined by how well you dodge, not by how well your enemy aims. Wasting enemy ammo by maintaining distance can sometimes be more effective than closing the distance and being shot.

Targets move across more of your screen faster when they're close.
Pay careful attention to this acceleration to accurately track your targets.

Being underwater makes you very hard to see at certain angles. (That, or it's my graphics settings)

Attacking an objective (such as a chest or territory) controlled by an enemy is more effective than attacking a neutral objective.
Unless you die.
Don't die.
Also, stop attacking MY objectives, eh? You owe me one for compiling this guide.

Armor absorbs 60% of incoming damage, and the remaining 40% goes straight to your health.
If your armor exceeds 150% of your health, you have too much and need a sandwich.
If you have 100 hit points, only 150 armor will be useful. Anything more is wasteful.

While on the subject, if you have full health and no armor, opponents may see "Not A Scratch" and believe you to be at full strength anyway. Tactical suicide charge?

Using the chest special to escape from fast classes only annoys them. Using it against slow classes annoys them AND leaves them in the dust.
Ranged classes can only be evaded if you turn a corner and escape their influence.

A poorly-timed attack will fail to damage the enemy, and allow them to heavily damage you.
A well-timed attack will maximize your potential damage, while minimizing theirs.
Many uncharged attacks are deadlier than fewer charged attacks.
Uncharged attacks can be blocked, but three out of four block directions fail to match your attack direction. Good odds, yeah?
A larger weapon than yours cannot be perfectly parried, but if they strike your accurate block without a fully charged attack, you will not be stunned and can launch a regular attack while they're still recovering.

Avoid "jousting" with enemies. It is largely inneffective, and offers them more opportunites to turn the fight around with decidedly un-slick tricks.
Instead, move with them. No escape! No mercy! Not one step back!

Special attacks are not one-hit-kills. Endeavor to damage your target beforehand.

Flanking can make your attack harder to predict.

Flanking during quiet moments can make your attack easier to predict, as your opponents will notice that you haven't attacked from the front, and become suspicious.

One's angle of attack is important. Traversing a wide open area is liable to leave one cut off and exposed to all kinds of attacks.
The only advantages are travel time and room to dodge. If you can't dodge and there's no need to save time, avoid open spaces, especially ones you know have enemy ranged classes in them.
Even if your target retreats into an open space after you flank them, you're still fighting at full strength because you weren't worn down during your approach.

Footsteps are often a dead give-away for your position. The same goes for enemy positions.

Flankers WILL try to flank you. Classes that flank best are the Skrimisher, the Berserker, and the Man-At-Arms.
Classes that aren't so good at it, but might try anyway are the Sharpshooter, the Gestir, and the Archer.
Captains, Huscarls, and Heavy Knights flanking you are troublesome, but wasting time given their combat prowess.
Keep an eye out for where they are, where they're going, where they aren't, and where you think they think you will be.

Tactical Withdrawl: if I tell you to run away, it's not because an enemy saw you or because you lost a smidge of health already. I will tell you to run if and when there's a serious possibility that you're about to wind up in a tight spot.

Shepherding: certain classes have an effect on other classes. Gestirs, Skirmishers, and sometimes Archers all typically run away from healthy Heavy Knights, Vikings, and sometimes Captains. Sheparding people into corners doesn't usually work, because people know what will happen if it does. Nevertheless, it places your opponent in a difficult spot, and impedes their ability to dodge.

Blocking: have you ever thought the game would be better if you could just grab a pesky enemy and hold them still while you kill them? Well you can't hold them for yourself, but you can keep them still for a teammate.
Get in their way as they try to strafe or retreat, and you'll reduce their movement speed to 0.

Don't ignore that annoying hissing sound. Find the Skirmisher responsible for it and kill him.

Do NOT hit the keg.

Avoid dashing into enemy territory to recover the Grail/Grog/Horn alone. Even if there are only a couple of enemies one moment, more could respawn in the next. If you've got your team, you can all make an effort to get the Trinket, but sometimes it's better just to get the team back together in a quiet corner of the map for another charge towards victory later.
A Word On Tactical Suicides
Despite many similarities to Team Fortress 2, one thing unique to PVKII is a complete lack of respawn/resupply rooms, as well as two kinds of pick-up that take some three times as long to respawn.

But there is a way that you, yes you, can avoid long and potentially-dangerous trips around/back-and-forth across the map trying to patch yourself up, and that's by killing yourself!

No no no, I'm not being toxic, really! I'm talking about the TACTICAL SUICIDE.

Just leap off a cliff or into a hazard, or bind a key to "kill" via the console so you can spend 5-20 seconds respawning with full health and some spare ammunition (as well as a new keg) at your base so you can regroup with your teammates, fresh as daisies.

It also has the bonus effect of denying your enemies kills, damage for their special, and ticket points in Trinket Wars. It's almost as good as adding a point to their counter! Just make sure that you wait ~3 seconds without taking more damage before hitting the hazard, or they'll still get credit, and it has to be a hazard, too. Most, if not all servers have a delay on suicide via the kill command.

You could bind a key to disconnect to get around this, but that is utterly despicable. Getting out of a losing fight and avoiding damage is harder than it sounds, if you've never tried it before. I mean, why would you even need this trick if you were good at avoiding damage?


Warning: this technique is extremely un-recommended for Last Team Standing.
Pirates
The Pirates are weaker in fair fights than the other factions. To get around this, Pirates don't get into fair fights.

When in doubt, this motto may prove useful: A slap in the face and a stab in the back.

Generic Pirate Strategy

Pirates wield powerful gunpowder weapons, but lack the raw defensive power of the other teams, with no shields, weaker constitutions, and poorer blades. To overcome this, Pirates use their gunpowder to weaken and outright remove opponents to bring the fight's intensity down to their level, and quickly mop up to give themselves space to reload.

There's no sense in obliterating one team just for the other team to take advantage of your unprepared state, though.

Parrots, Skirmishers, and Sharpshooters can all manage a significant amount of ground to keep each other covered even when spread out. So spread out. A tightly-packed group of Pirates is known to most Vikings and Knights as a walking pile of corpses.

If you haven't got your gunpowder handy for a fight (evenly populated on all sides) leave it to your teammates instead.
If none of you have any gunpowder handy, it is wisest to RUN.

Drawing reckless enemies away from their groups is a cheap and dirty way to fight. Such shameful conduct is most unbecoming.
Of other people.

Terrain

Pirates prefer places with cover to hide behind, jump on, and corner people with.
Places with multiple exits are also preferred, as they allow the Pirate team to disperse in a variety of directions, thus scattering the enemies that chase them.

Wide open spaces are not particularly advantageous to Pirates. Always keep an escape route in mind and nearby; only cross open areas if you really have to.
Or if they're empty.
That said, cramped spaces offer little room to dodge, switching that with corners and doorways to get stuck in and on.
If the scenario is "Pirate Ambush In The Small Room With Only One Door" however...

Be wary of pick-ups, shooting first might not have the desired effect if your target/s recover before you reload.

A Note About Explosions

The best place to cause an explosion is inside a group of enemies. There are a number of reasons not to be in such a spot, not least of which is that you're going to blow it up.
Logical deduction indicates that the ideal spot for demolition work is near ground-zero.
Consider where you want to plant your bomb, and look for handy terrain nearby. Not all doorways and ledges are practical locations.
Skirmisher: Teamwork And Game Modes
Skirmisher

You are an itch. The Pirate's #1 rat. Rats are small, and not especially tough, but they're fast, and can chew through iron if given enough time and space.

You will be at your strongest when either distracting, or acting against distracted enemies. Beyond that, always find and exploit ♥♥♥♥♥♥, holes, and incapabilities in your enemies' defenses.

As part of a team, you make a good scout, vanguard, assassin, and demolition man.

You Are Alone: two main strategies come to mind:

Beat Up Enemy Wimps: if there is an undefended weak class, you can either sneak up on them, or prepare an ambush.
Damage or kill them to get a Lunge, which you can use on tougher enemies.

Be A Tiny Pest: if a tough class is defending their teammates, use your speed and guns to shoot them down and avoid counter-attacks.
This is more likely to get you killed.
If an opportunity arises, go for the wimps.

Vikings And Knights Are Fighting: kill them all with a keg.
If that fails, fall back on your pistol and speed to harass and pick off weakened enemies.

Teamwork

You can be useful regardless of the team's composition by distracting enemies, and attacking distracted enemies. Always try to get behind such enemies. If they are dug-in, or engaged in battle, throw out a keg. It's what it's for.

What're YOU Looking At?: keeping an enemy focused on you will allow teammates to sneak up on them.
Maintain close proximity, either by blocking their attacks or mere threatening movements, or else they will ignore you.

Captain Distraction: when a Captain attacks an enemy with his cutlass or parrot, you can consider the enemy distracted.
Avoid joining the Captain's side, or else neither of you can attack from behind unless your target is struck by a sudden and inexplicable urge to die.
If they target you, back away until the Captain gets their attention again. Shoot with the pistol to pass the time.
Enemies distracted by Parrots are vulnerable, unless they see you coming. They know you're a greater threat.
Distracting an enemy provides a great opportunity for the Captain to aim his blunderbuss.

Captain Diversion: alternatively, the Captain can divert enemy attention while you get to work on something else, such as lighting a keg or stealing Booty.

Keg Party: the last thing keg survivors want to deal with is another keg. Avoid using this tactic flippantly, that keg could be used for your NEXT fight instead.

Swarm Of Rats: multiple Skirmishers can shoot down the healthiest of enemies, or simply swarm them.
Enemies backing away while blocking are trying to get both you and your teammate on-screen at the same time.
Keep them sandwiched between the two of you.
Stay in melee range, and block attacks with your cutlass to keep enemies focused on you, otherwise they may simply target your teammate.

Combined Fire: the combined fire from a Sharpshooter's rifle and your flintlock is enough to take out anyone who doesn't have a shield.
If the Sharpshooter misses, you're not back to square one.
His fancy pistol is still deadly, and he can also be used as:

Bait: dagger-wielding Sharpshooters are easy targets.
Players attacking Sharpshooters are also easy targets.

A Psuedo-Skirmisher: the dagger is capable of a crippling amount of damage, if you can distract the target.
(If the Sharpshooter consistently misses, you can still rely on the Bait tactic.)

Game Modes

You Have All/Most Of The booty: stall enemy tickets.
If the enemy stops you, lead them in circles around their base.
When defending, maraud around the edges of your base, and prepare kegs for incoming enemies.
Warn your teammates with the "Incoming!" voice command to set the mood.

The Enemy Has All/Most Of The Booty: throw your keg into the chest zone (or where-ever the defenders are) as your teammates assault it.
The defenders will either be severely injured, or scattered.

Once the booty's on your side of the front line, you can take a stolen chest from whoever picked one up, be they a Captain (better at covering the retreat) another Skirmisher (may have another keg) or a Sharpshooter (has a better gun).
Alternatively, you can stay behind to stall their tickets and divert enemy aggression.

If nobody has picked up a chest, pick up a chest.

Booty Transport: move the Booty towards your base in-between enemy attacks.
Counter-attack if they refuse to back up.

Trinket Wars: attempt to distract the enemy's deadliest player, or pick off their weakest.
Look for opportunities to throw out kegs and cultivate your Lunge.

You Are Totally Wasted On Grog: skirt the edge of battle with the flintlock until intervention appears profitable.
Be careful when approaching enemy Trinket carriers; they can see you through walls and are hard to sneak up on.
If one is available, give the Grog to a capable Captain.

Another Skirmisher Is Totally Wasted On Grog: If he charges into battle, prepare a keg to back him up.
If he prepares a keg, charge into battle but don't scare enemies away from the blast zone.
Maintain proximity.
Defer armor pick-ups to him.

Your Captain Is Totally Wasted On Grog: let the Captain take on tough targets while you distract the weaker enemies.
Stab the tough targets in the back after they've engaged the Captain.

A Sharpshooter Is Totally Wasted On Grog: you and your team are all going to die, but while you wait for your inevitable defeat, you can intercept enemies closing in on him and give him breathing room to shoot, as well as finish off the enemies he's shooting.

Blessed Knights and Empowered Vikings Are Both Trying To Kill You: your teammates should provide enough time for you to light a keg and clear out attackers.
If there's no time, run away until there is.
If there is still no time, keep running.
You'll think of something.
Watch out for- HEADSHOT! -150!

Your Team Is Throwing Itself Onto Enemy Swords: pick off naturally weaker enemies like Archers while they're preoccupied with your suicidal shipmates.
Flank as far as necessary to attack from an unexpected angle.
Maintain your hold on the Grog.
Be wary of enemy specials.

An Enemy Team Is Throwing Itself Onto The Other Enemy Team's Swords: stalk the losing team until they engage the winning team, then eliminate them before they give the winning team an advantage.
Save the keg for the winning team.

You Have Sacked All The Territory: respond to invaded territories with haste.
If you're the only Pirate in the area, keep the keg back.
When attacking directly, harass attackers with the pistol.
Rush around the invaders to distract them for your teammates.

The Enemy Has Un-sacked All The Territory: as the first Pirate to reach your team's targeted territory, scout the area, position yourself to throw a keg inside it, and wait for an appropriate amount of back up.
If the enemy leaves the territory to attack you, lead them away from it.

Your Team Isn't Trying To Sack Any Territory: harass enemies until they follow you.
Lead them to your teammates and slip into their undefended territories.

Dragons Are Flying Around All Over The Place: Ignore the Dragons.

Last Coward Running: Save the keg for later.
Flank quickly, use cover to hide from sight and projectiles.
Backstab battling Vikings and Knights, then flee before they target you.
Keep enemies from skewering your Sharpshooters and cornering your Captains.
Take great care when lining up your Lunge.

Last Coward Running - Sudden Death: you should be able to run away from literally everything despite the close quarters.
If you still have your keg, this would be a good time to use it.
When running, be wary of the enviromental hazards.
Skirmisher: Counter-Counter-Measures, Lunge, Notes
Enemy Counter-measures and Counter-counter-measures

Everybody will make a bee-line for you, before attempting to head you off and off your head.

A Berserker Has A Vendetta Against You: he'll be using his axe. Need I offer more incentive to tread swiftly?.
Shoot him until he runs out of armor, or lead him to the Knights, or some Pirates. Avoiding his axe is possible, but dangerous.
If he is Berserk'd, run. Block his attacks if he catches you with more than one bullet's worth of health.
You cannot out-damage a Berserking Berserker.
Maintain distance.

You Have Regrettably Ticked Off A Huscarl: depending on how you engage him, he will adapt accordingly.
Use your cutlass against his throwing axes, your gun against his big axe, and your speed against his shield.
Your teammates are also useful against a Huscarl's shield.
He will not go down easily without support from your team. Be prepared to dedicate plenty of time to bringing him down if you're alone.

A Gestir Wants To Clean Your Mouth Out: he will attempt to poke at you from a safe distance with his spear, or strike you cut-for-cut with his langseax.
If he tries to start combat with a javelin, hide behind cover until he gets close (or dodge it).
His spear will out-range and out-damage your cutlass, but it won't out-range your pistols, which will tear his light armor apart.
His shield is weak, and won't withstand more than a few hits, but his langseax is deceptively deadly. Don't get hit by it.
Again, teammates are useful against shields.

A Bondi Is Experimenting With Various Ways To Calm You Down: he'll easily shoot you down if you run at him over open ground. Either run around cover or fall back, his arrows aren't as fast as an Archer's.
Seriously consider juggling your cutlass and pistols to exploit the weaknesses inherent in his bow and seax, respectively.
If he spots you before you're close enough to flank, fall back to cover. You can at least be a bothersome threat that he can't deal with while everybody else tries to pin him down.

An Archer Has You In His Sights: he'll try to nail you with one good arrow, at which point any more damage will likely kill you.
You're both quite capable of killing each other, but he's capable of killing you sooner than you're capable of killing him.
You have to be sneaky.
If you're too heavily damaged, fall back, resupply, and try again from another angle.

A Heavy Knight Won't Let Thou Pass: he'll attempt to hit you with fully-charged longsword strikes and parries to scare you off, as he knows he can't catch you if you run.
Shoot him until he blocks, hit him when he does.
Throw a keg at him if he's dug in.
If an Archer is backing him up, take out the Archer first.
Deny him pick-ups.
Especially armor pick-ups.

If you prefer more MANLY methods, consider dodging his swings and counter-attacking as he recovers, or striking fast to shake his block and cut him up.

A Man-At-Arms Is Farting In Your General Direction: he'll try to chase you down with the halberd. His other weapons will come out if you exploit his weaknesses.
The pistol can weaken him from a safe distance, and persuade him to block with his buckler.
Use your speed to dodge his halberd, and counter-attack while he recovers from the swing.
Keep the pressure on and/or up, matching him step for step.
He'll try to back up and take advantage of his own speed and his Halbard's range.
You cannot allow this to happen.

An Assassin Just Backstabbed Your Captain: over a short distance, rush her down before she can hit you with too many crossbow bolts.
Over longer distances, note her position and heading, but don't bother pursuing if she's fleeing.
Awareness of her intentions and your team's blind spots will allow you to position yourself better later.
Use your pistol while she tries to flee, and watch your step for caltrops.

In a straight melee fight, you're slightly tougher and stronger, but not by much. Your main advantage is chasing her down where other Pirates would have to give up the chase.

The Lunge

Skirmishers trying to line up their Lunge look extremely obvious.
Charge an attack while aiming to mask your intentions.

Take great care to hit your target. If you take more than a second to aim, they'll anticipate it and dodge.
Deny them a choice.
Threaten them with the idea of a lunge until they back themselves into a corner, then lunge in-between their dodges.

Be prepared to accurately block or dodge potential attacks after the Lunge.
The end of the Lunge leaves you vulnerable to anybody who saw it and possesses a weapon.
Especially a ranged weapon.

The Lunge tends to pierce right through other specials with its intense forward momentum, but it won't pierce through the Archer's Flaming Arrows from a distance.
You're significantly more likely to successfully pierce through an enemy special if you've got health, armor, and a good connection.

Be wary of using the Lunge directly before or after taking a heavy blow; they have the potential to shove you off course.

If the Lunge fails to kill its target, they may land very far away.
Switch to the pistol to kill them as they land.

Avoiding The Lunge: avoid getting stuck on props.
Move backwards to reduce the number of times you take damage from the Lunge.
Be wary of Skirmishers looking directly at you while trying to maintain some distance, as such behavior is not typically necessary in normal combat.
Hills are effective against the lunge.

Other Notes

Don't throw kegs at your teammates when friendly fire is on.
Even when it's off, it's still very disorienting.

Keep your guns loaded.

The flintlock deals considerable damage, and the bullet travels further than many give it credit for.

Stop moving to aim your gun, but remember to get out of your enemy's way as soon as you shoot.
Crouching doesn't do anything.

Taunt everyone.

Kegs can be bashed with shields.
Watch out for that.

Almost everyone will eventually complain that your constant running is "cowardly" and/or "noobish".
Ignore them, they're mad.
Unless you run, and run, and never fight, in which case, they're mad AND accurate.
Skirmisher: Common Weaknesses And How To Cure Them
How Not To Die

You Are A Veakling: your low health will get you killed by almost everything in two or three hits.

You Are A Fast, Opportunistic Veakling: your speed, pistol, and keg can extend your life considerably.

Run away from melee strikes, dash to cover from ranged attacks.
Block attacks with the cutlass to reduce damage, then run away.
Hit opponents in the back when possible. Finishing them off as they fight back, or not, is up to you.
Sweep the map for pistol ammo, and practice your pistol aim from your enemy's melee range + 1 inch.
Scout around for fighting opponents, and use the keg from a safe distance. Drop it and run if opponents single you out.

Your Cutlass Is Small, And Veak: the cutlass is easily parried, out-damaged, and out-ranged by other weapons.

Your Cutlass Is Small, And Thus Very Fast: the cutlass is easily parried in theory and it's out-damaged when used carelessly.

The cutlass is fast enough to go from attacking to blocking when necessary, and to charge, cancel, and charge again in a different direction when your opponent tries to block.
The combo damage is small, but worth the effort. Stick close to opponents and attack as fast and as accurately as you can to rack it up.
The short range is only a problem when trying to dodge back after an attack. Block and run away instead.
Use your Lunge to soften up or finish off enemies before they can try the same trick.

Your Pistol Is Woefully Inaccurate: the pistol is very likely to miss, takes forever to reload, and can't even get through shields. It also lacks starting ammo.

Your Pistol Is Woefully Inaccurate At Range When Running: even if its accuracy were ten times worse, it would still hit its target at point-blank.

Slow down enough to make landing the shot possible. You'll hit more shots by letting your opponent get a little distance on you as you stand still to aim, than you will by running after them and firing.
Reloading takes time. Reload at every opportunity. Reload while flanking, resupplying, retreating, or simply wandering around in the middle of melee combat if there's nothing else to worry about.
Avoid shooting shields. Always switch to the cutlass immediately. If you'd still rather fire a shot, switch to the cutlass, then switch back to the pistol when they switch away from their shield.

The Keg Is Too Situational: it takes ages to use, ages to respawn, and might not even hit anybody.

The Keg Is Awesome: as a frail and veak class, starting your fights with a giant explosion really evens the odds.

Avoid lighting it pre-emptively. First confirm that there are targets, and that you can toss a keg at them from relative safety, before even switching to the keg.
Throw it far enough away to avoid blowing yourself up.
Use it when it will matter. Using it on one Archer won't help anybody unless that Archer is the best player present. Use it instead to cripple as much of an enemy team as possible during important moments, such as defenses and assaults (this includes assaults and defenses only involving Vikings and Knights, but you should really wait until your team can take advantage of it).
While the keg is respawning, you'll have to rely on the enemies of your enemies and your friends to create openings for you.
Captain: Teamwork And Game Modes
Captain

Where the Skirmisher has a cutlass, you have a bigger cutlass. Where the Sharpshooter has a rifle, you have a blunderbuss. Where they have mobility, you has a parrot. A rallying point for the whole crew, you are their Captain.

You are at your strongest when striking hard and fast with your cutlass; your teammates and parrot can facilitate this.

As part of a team, you make a good fighter, rallying point, and aggravator.

You Are Alone: the distinctive sound of your peg-leg will give away your position when you flank, but whatever.
Though you lack a shield, you wield a blunderbuss. It can't block, but it's deadlier than a shield-bash-counter-attack.
Remember to aim.
Use your cutlass to soften up foes before ending the fight with buckshot, and resupplying.
Use the parrot if you need a quick distraction.
For your TEAMMATES, not YOURSELF.

The Vikings And Knights Are Fighting: attack the winning team to even the odds.
Use the parrot to momentarily distract them.
Save the blunderbuss for the winning team, and use the cutlass against the losing team.

Everyone Is Trying To Attack You: look for opportunities to fight in single combat.
Run away at the first sign of trouble.
Lead enemies into other enemies.
Stay alive until you can load a Cannonball.
If you run away for long enough, your pursuers may back off to resupply and/or regroup.

Teamwork

You are a great asset to any team. Your moderately tough nature and powerful cutlass make you an excellent distraction and formidable foe, while your blunderbuss can salvage a bad situation or secure a good one.

Captain Distraction: fight an enemy, and dodge or block everything they throw at you.
Skirmishers and Sharpshooters can take advantage of this distraction.
If your target tries to attack your teammates, run them through.

Blunderbuss Surprise: if a teammate is distracting and weakening an enemy, quickly blow them away with the blunderbuss.

(In the very next moment, that Huscarl took close-mid-range blunderbuss shot to the back and died. Though the Skirmisher had weakened him, the shield was still holding strong. Unfortunately the Huscarl had forgotten about the Captain he'd been fighting earlier, returned to aid his crewmate.)

Double Barreled: two Captains have two blunderbusses.
Enough to kill anyone who isn't a Heavy Knight or Huscarl.

Captain Distraction X2: like the Captain Distraction, but instead of a Skirmisher backstabbing the enemy, it's another Captain.
Captains are slower than Skirmishers, so both of you should circle the enemy in different directions to save time.

Combined Fire: Reloaded: the Sharpshooter's rifle is capable of sending healthy enemies directly into your blunderbuss's kill-threshold.
Keep enemies away from him as he riddles them with bullets; two shots are enough to be significant.

Game Modes

You Have All/Most Of The Booty: position yourself near base entrances to react quickly.
You should attack tough enemies as quickly as possible to discourage them from taking your chests, and distract them from your weak teammates.

The Enemy Has All/Most Of The Booty: provide cover for Skirmishers to get the booty by closing in on enemy defenders.
Use the parrot to distract enemies you're not fighting.
Block the enemies' paths to any Sharpshooters in the area.
Retreat as the chest carrier/s retreat/s.
Stay alive by leaving the enemy base. I cannot stress this enough, enemy bases are where Captains stay to die.

Booty Transport: use the blunderbuss to severely weaken attackers.
If they don't run away, finish them off.
Defer this task to a Skirmisher, if possible.

Trinket Wars: keep your gun loaded to use on healthy-yet-unarmored Trinket carriers.
Stick with your team to take advantage of the various distractions and opportunities they offer.

A Totally Wasted Skirmisher Is Running Around With The Grog: either follow him as best you can, or anticipate where he'll be, and go there to distract enemies for him.

You Are Totally Wasted On Grog: you shouldn't fight fairly, but you can pull it off with the extra health.
Don't get into fights that favour the enemy unless you're distracting them for teammates who have yet to arrive.

Your Dead Ringer Is Wasted On Grog: pair up.
Use your blunderbuss to weaken tough enemies so his blunderbuss can kill them (or vice versa) then advance on the weaker enemies under cover of the Parrot Attack Squadron.

A Sharpshooter Is Totally Wasted On Grog: keep enemies away from him, and he'll survive.
Use the blunderbuss on anyone who gets shot in the head.

Blessed Knights and Empowered Vikings Are Both Trying To Kill You: lead them into bottle-necks and wait for back up.

Your Team Is Throwing Itself Onto Enemy Swords: reach the enemy before your teammates can get themselves killed, and counter-attack anyone who attacks them.

An Enemy Team Is Throwing Itself Onto The Other Enemy Team's Swords: target the winning team.
Save the blunderbuss for securing kills against the losing team.

You Have Sacked All The Territory: stand in the doorway of one of your territories to halt invaders and force ranged opponents to use awkward angles (remember to dodge!)
If forced back, take advantage of the terrirorial regeneration.
Use whatever cover is available to defend against ranged attackers.
Either beat invaders out, or distract them for your teammates.

The Enemy Has Un-sacked All The Territory: lead defenders out of their territories.
If the defenders are dug-in, either use a Cannonball, wait for a keg, or simply employ teamwork to wear them down and drive them out.

Your Team Isn't Trying To Sack Any Territory: acquire a territory, then stall the tickets of other teams.
If your territory is attacked, try to take over a new one rather than protect your old one.

Dragons Are Flying Around All Over The Place: Ignore the Dragons.

Last Team Standing: pick a team mate and work with them, either by defending a Sharpshooter, supporting a Skirmisher, or going offensive with another Captain.
Distract enemies to give your teammates opportunities to get specials, but feel free to cultivate your own when enemies target your teammates.
Use the Blunderbuss as necessary, but keep a shot back for your Cannonball.
Be aware of where your teammates are, or you run the risk of losing them metaphorically AND literally.

Last Team Standing - Sudden Death: the close-quarters are ideal for the Cannonball, but not for your teammates. The time to rally the crew is nigh.
Captain: Counter-Counter-Measures, Cannonball, Notes
Enemy Counter-measures and Counter-counter-measures

A Berserker Believes You To Be A Poor Mariner: he'll be trying to dodge and block your cutlass until he out-healths you, at which point he'll get reckless.
The cutlass will deal about as much damage to him as his axe deals to you, if carefully aimed.
A close-range blunderbuss shot will kill him when he is Bleeding Profusely.

You Have Chosen To Fight A Huscarl Without Backup: his axe's raw size and damage are the biggest threats to you.
For every attack of his, you should attack twice.
If he blocks, fully charge your attacks until he tries to strike you, at which point you go back to striking twice.
If he uses his shield, you are in trouble. Block any bashes, counter-attack if possible, and try to break it down. It may take a while.
It's not perfect, but you haven't got much of a choice.
Shoot him once he's Pushing Up Daisies.

A Gestir Is Offended By Your Beard: he'll launch a javelin at your face, and follow up with mid-range pokery to keep you away from him.
A single javelin is enough to tilt the fight in his favour.
If you get hit by one, run away.
Use the cutlass to parry his spear, but be wary of his attempts to parry you right back.
If you can't do that because it's impossible, block through his attacks until you're close, then slice through his weak armor before he pokes through yours.

A Bondi Is Shooting At Your Parrot: running at him over open ground is even less effective than when a Skirmisher tries it. Stick to cover. He can't shoot through cover.
After a couple of cutlass swings, you can blow him away with the blunderbuss and avoid his pesky little knife.
Your parrot is as handy as ever when it comes to disrupting his aiming. Throw it out sideways to maximise the shot difficulty, and call it back before he snipes it. Stick to cover so he targets your parrot and not you.
Never underestimate the value of simply avoiding him. Stay out of sight, around corners, flanking him and bringing down his back-up. If he thinks it's safe to follow you blindly, he'll close the distance for you.

You Have Foolishly Engaged An Archer: his main method of beating you will involve running, and lots of it.
Advance on his position using as much cover as possible.
Back him into a corner.
A close-range blunderbuss shot will severely weaken him, even if he was healthy beforehand.
If his injuries are Just A Flesh Wound, he'll die.
Discretion is the better part of valor: if he's too far away, or too good a shot, stay safe and let him make the fatal mistake of walking into an ambush.

A Heavy Knight Denies You Passage: he'll be relying on his innate toughness to go toe-to-toe with you.
Block his sword, and start an attack; yours will charge before his.
When he's Pushing Up The Daisies, he's in the Blunderbuss's kill-range.

A Man-At-Arms Won't Raise A White Flag: he'll abuse his halberd's range to avoid your cutlass.
Use the cutlass to strike faster than he can fight back, blocking when he tries.
He'll be weak enough for the blunderbuss on the low end of Bleeding Profusely.
Shepherd him into a wall, corner, miscellaneous object, or cliff. You'll only have one chance to strike back (two if you payed attention in dance class) as he tries to dash past you, so focus!

An Assassin Just Backstabbed Your Sharpshooter: if she's escaped cutlass range, forget about hitting her with it.
Keep her away from your teammates by staying near them, and use your parrot to alert you of her ambush attempts, either around corners or coming up from behind.

Killing her teammates so she's forced to retreat might prompt her to launch an unexpected attack, so expect the unexpected.

The Cannonball

Fire it far enough away to avoid blowing yourself up, but not so far away that it takes an age to reach its target.

If fired at the ground behind an enemy, they'll be sent flying towards you and stunned.
Fire the Cannonball and begin an attack to take advantage of this.

If you stand still when loading it, you can hide it from the enemy.
Until the end of your gun catches fire...
Taunt the enemy while loading your special to mask the unique voice lines (and because it's fun to mess with people).

Your teammates won't be damaged, but they WILL be dazed.

Avoiding The Cannonball: the further you run, the more the Captain has to lead his shot, which gives you more time and space to dodge.
The more the Captain is leading his shot, the more the shot will miss if you change course just before he fires.
If you can't dodge it, try not to get hit in the feet, or jump.
Alternatively, stay as close to the Captain as possible.
He might not want to blow himself up.
Additionally, if you suspect that he has enough special juice but has yet to load it, deny him an opportunity.

Other Notes

You lack the tough armor and heavy weapons of the Huscarl and Heavy Knight, but you and your cutlass are faster and just as deadly.

If you want to get an enemy's attention, reload the blunderbuss out in the open.
Switch weapons to cancel the reload early.
If you don't get their attention, you get a loaded blunderbuss instead, so it's literally worth a "shot".

Start combat with the cutlass unless you need to quickly distract an enemy, or finish off a weakened enemy.
I am begging you not to start combat with the Parrot, or use the blunderbuss immediately afterwards! I cannot ask anymore sincerely than this!

There are no tactical or strategic advantages to using the hook over the cutlass, but it feels oh so good.
Unless you die because of it, obviously.

Wait until the enemy has lost some health and armor, then use the blunderbuss.

Alternatively, use the blunderbuss early, then whittle them down.
With lower health, they may attempt to play more defensively, giving you more space and time.

At 88 point-blank damage, the Blunderbuss is only slightly more effective than the cutlass for one attack, but at 55-66 just-outside-point-blank damage, it's just as effective with more range! Handy against runners such as Berserkers and Men-At-Arms that haven't got the armor to resist that last blast.

IMPORTANT: being a Captain will NOT guarantee your crew's cooperation! Always evaluate your teammates' tendency to watch your back before deliberately exposing it to the enemy!
Captain: Common Weaknesses And How To Cure Them
How Not To Die

Your Stats Are Just Average: average movement speed, health, armor. How is one supposed to stand up to the crazy damage of a Berserker, or the insane armor of a Heavy Knight?

Your Starts Are Just Good Enough At Everything: you've got enough health to take a few hits, enough speed to escape or chase most classes, and enough armor to take a few more hits. Berserkers won't last as long, while Heavy Knights are unable to keep up the assault.

Your Cutlass Is Only A One-Handed Weapon: it can't parry two-handed weapons, but it keeps being parried by them. It can't match their range either.

Your Cutlass Is The One-Handed Weapon: your cutlass is a weapon of above-average speed with plenty of lethal force and range.

Block two-handed weapons as best you can, and strike while your opponent's recovering.
Attack quickly, it'll deal more damage overall than charging your attacks would.
If backed up by a Skirmisher, hang around the edge of the fight until he gets an opponent's attention, and then enter the fight.

Your Blunderbuss Is Too Niche: it's only effective in close range, where everybody else has pointy sticks that hurt, and for some reason it's hard to aim. Reloading takes too long, it's not good enough at killing people, and it can't block projectiles!

Your Blunderbuss's Niche Is Quite A Common One: close range comes around quite often.

Use it on distracted opponents whenever possible. The extra time you have to aim translates into more damage, which translates into flaming balls of fire.
Use it to get the final strike on your opponent before your opponent gets the final strike on you.
Reloading is an undeniable weakness of this weapon, so try to use it to its full potential and nothing less.

It can't block, and thus it can't bash, but it just so happens to deal more damage than a shield-bash-counter-attack combination anyway, so there.

Your Hook Deals, Like, No Damage: it's not supposed to, like, deal damage. Dude.

Your Parrot Is A Poor Fighter: even if you release it towards distracted enemies, they whip around and snipe it out of the sky. If they fail that, the Parrot only inflicts minor damage.

Your Parrot Was Never Meant To Fight: the Parrot's more effective as a distraction, especially if you call it back before your target can strike it.

Maintain the distraction by releasing it, calling it back, releasing it again, and calling it back until your opponent just ignores it. Then run them through.
If your opponent snipes it out of the sky, they still had to waste an attack. If you suspect that they will intercept the Parrot, take advantage of their momentary vulnerability and rush them.
Parrot Strategy
Parrot

As a Parrot, you are the Pirate's hero. No other class matches your selflessness, your courageousness, your bodacity, or your irritability. Because you're so OP, your respawn time is approximately thirty seconds.

Vikings And Knights Are Fighting: too much heat. Stay back.

You Are Alone: silly Parrot, you're never alone.
You've always got your trusty Captain to back you up.
If it's just you and him, however, you can always buy him the time he needs to get to where he needs to be and achieve what he needs to achieve.

Everyone Is Trying To Attack You: this is normal.

Teamwork

You are an amazing warrior, and the only Pirate capable of pecking out your opponent's eyes. Your loud screeching and bright colours will be sure to get everyone's attention.
Your unmatched agility will be instrumental in your success, as your ability to survive after being obliterated is meager.

Parrot Distraction: seek out the closest enemy, and distract with your razor beak.
Skirmishers will opportunistically slice, Captains could do anything with the time you buy, and Sharpshooters will run away, though this cowardly behaviour is good in the long run.

Parrot Attack Squadron: if you find yourself paired with one or more other Parrot heroes, you should play off of each others screeching and pecking to compound your enemy's confusion, and buy your teammates even more time.

Guard Parrot: if you're assigned to guard the Booty, fly around the area until an enemy approaches.
Screech loudly and fly towards them at lightning speed to draw their, and your team's, attention.

Raiding Parrot: when assaulting the enemy base for Booty, find an enemy who's not being directly fought by your teammates, and heroically distract them, sacrificing yourself if necessary.

Parrot Diversion: if your team is trying to move Booty, or light a keg, or retreat, or some other task the enemy would like to stop, fly into their faces and stall them.
Your team will love you for your heroic efforts.

Drunk Parrot: enemy Trinket carriers are tough and have regenerative health, so there's not much point in attacking them unless you're trying to distract them.
Be sure to fly in the face of anyone trying to take down your Grog carrier, especially if that's your Captain.

Conquering Parrot work with your teammates to hold your territories, and blitz into enemy territories, but remember to fight only after your teammates have gotten their attention.

Dragon Parrot: compared to you, dragons are lame. Ignore them.

Last Parrot Standing don't fly off as soon as the round begins, bide your time.
When the time is right, distract tough enemies to give your team ates time to get the weaker targets.
If enemies are hiding during Sudden Death, hunt them down and flush them out.

Counter-Measures Parrot

Avoiding Being A Berserker's Lunch: you may be a heroic Parrot, bright and bold in your splendour, but he wears what remains of a wolf.
Best to attack him when he's not expecting it, then flee back to your Captain.

Avoiding Being Pizza'd: if you'd rather not selflessly sacrifice yourself for the good of your Captain, you can attempt to dodge his initial axe swing, and buy time for your Captain to close in and support you.
If he pulls out his shield, fly away or you'll be bashed.

Avoiding Being Shish-Kebab'd: if you approach a Gestir when he's doing anything other than directly attacking an enemy, he'll poke you out of the sky with ease.
Deny him that victory by being underhanded and unexpected.

Avoiding Being Sniped: fly high and fast, and Archers will have a much harder time shooting you.
If you can, take his crossbow bolt for your team, it'll leave the Archer at the mercy of your Captain.

Avoiding The Zweihander: fly towards it, then fly away from it as it swings, then fly back towards the Heavy Knight and go for his eyes, the only unarmored bits on him.

Avoiding The French: if the first clumsy swing from the halberd doesn't catch you, peck his face off.
Be wary of his buckler, it swings much faster.

Notes

Flying high is a good idea in general.

Damage dealt by you charges your Captain's Cannonball. Teamwork!

If enemies hear your screeches and prepare an attack before you reach them, disengage, or they'll swat you out of the sky.
Sharpshooter: Teamwork And Gamemodes
Sharpshooter

You are the Pirate's sniper. Out of sight until the time is right, a defeaning crack and a fallen foe, with nothing left behind but a cloud of smoke.

You're also the Pirate's crazed gunman.

You are at your strongest when you are NOT missing all of your shots from a safe distance to support teammates.

As part of a team, you make a good sniper and ranged-support.

You Are Alone: running away is your top priority.
Use the fancy pistol to wear enemies down.
The rifle is your strongest weapon, but it only has one shot; use it in dire situations.
Aim with care.

If you must use your fancy dagger, forget half of what you know about melee combat, and stick as close to your enemy as possible while slashing and blocking.

The Vikings And Knights Are Fighting: use your pistol to attack them, you need your rifle for enemies trying to attack you.

Everyone Is Trying To Attack You: basically the same as You Are Alone but with 100% more running, ABSOLUTELY FREE!

Teamwork

You are a "glass cannon".
Avoid attracting attention from enemies that aren't being engaged by your teammates.
Stay behind your teammates, and you'll be able to swing any fight in their favor.
(disclaimer: you won't be able to swing all fights in their favor)
Take great care to not miss.

Cowards With Guns: take turns at distracting enemies with a Skirmisher.
Expose your back while running away, and your pursuer will likely discount you as a threat, instead responding to your teammate.

Sharpshot And Buckshot: stay behind your Captain and use the rifle.
If a target is weak, the Captain may use his blunderbuss before you can fire.
If an enemy ignores him and goes for you, use the dagger to block attacks and retreat to the Captain.

Rapid Fire: a couple of rifle shots will obliterate most enemies (I'm not exaggerating, this tactic is extremely cheap and anti-fun and not-cool and I'd rather not go up against it again okay?).
If an enemy is using a shield, spread out and shoot him in the back.
If there are other enemies in the area, avoid the shield bearer first, spread out to counter him second.

Game Modes

You Have All/Most Of The Booty: keep your distance from entrances and chests. Enemies should be forced to make a choice between you and the objective.
Use the rifle to get the enemy vanguard down quickly.
If enemies manage to close in, run away with the pistol, or fight back with the dagger while you cry for help. Ideally, flee towards their base, drawing them away from your chests if they pursue, and setting them up for the ambush (that was your plan all along, right?) that you are now in a prime position to spring.

The Enemy Has All/Most Of The Booty: stay near the outer edge of the fight and use the rifle until your teammates have made it back through the enemy lines or you're attacked.
Retreat as your teammates reach you to provide more effective covering fire.

Booty Transport: if an enemy approaches, use your rifle.
Use the chest special if you have one.
If you don't, and they're still alive, abandon the chest.
You should defer the chest as soon as possible.

Trinket Wars: save the rifle for shots related to Trinket Carriers.
Stick with your teammates for support, and watch for flankers.
Use the Grenade to start your team's fights, not finish them.

A Totally Wasted Skirmisher Is Running Around With The Grog: he'll run ahead of you. Follow and provide fire support.
Target ranged enemies first, and fast enemies second.
Run away at the first sign of danger, seeking out a Skirmisher is not the best way to lose pursuers.
Aim with care.

Your Captain Is Totally Wasted On Grog: let him lead and keep enemies at bay as you shoot.
If you can weaken opponents, the Captain can finish them and vice versa.

You Have Had A Completely Reasonable Amount Of Grog And are Not Wasted: you are an exceptionally weak Grog carrier.
The only possible reasons for taking the Grog as a Sharpshooter are that your team is terrible, or you're Denshin.

Another Sharpshooter Is Totally Wasted On Grog: team up and shoot enemies down before they can close in on you.
If there's too many, fall back and shoot anyway, it's not like you were going to take my advice and use the dagger.
Maintain proximity.

Blessed Knights and Empowered Vikings Are Both Trying To Kill You: er... Run?
Use Grenades to scatter attackers, and deter them from following you through choke points.
While running, turn and shoot enemies to cultivate more Grenades.

Your Team Is Throwing Itself Onto Enemy Swords: you should take the Grog and whatever shots you can to get a Grenade ready.
Throw the Grenade and fire the rifle for quick kills.
Remember to aim.

An Enemy Team Is Throwing Itself Onto The Other Enemy Team's Swords: lay in wait for the right time to steal kills with the rifle (or maybe the pistol).
Once you've fired, run away and reposition for another steal.

You Have Sacked All The Territory: find a place to hide and shoot enemies when they try to take the territory.
They'll either try to dodge your shots or go after you directly.
If they go after you, they can't capture the territory.

The Enemy Has Un-sacked All The Territory: let your teammates attack the territory, provide support from afar.
Be wary of flankers.
Assist in the capture when resistance is eliminated, but stay away from entrances as best you can.

Your Team Isn't Trying To Sack Any Territory: prioritize killing enemies.
Once an area seems clear, attempt to take territories.
Abort if more enemies show up.

Dragons Are Flying Around All Over The Place: you think taking pot-shots at the riders is going to help?! Ignore the dragons!

Last Team Standing: hide behind anything and everything, enemies who aren't attacking you, teammates, walls, stairs, everything.
Be mindful of your surroundings when aiming and reloading the rifle.
Go for headshots on tough enemies, unless they're already weak.
Don't take risky headshots unless you're sure your target is going to die AND it's necessary.
Try to win before...

Last Team Standing - Sudden Death: reload your rifle BEFORE you reach this stage.
You won't have many opportunities to reload it afterwards.
The closer-quarters are not ideal for your role, but your targets will have less cover to hide behind.
If your teammates have all died, prepare to run and shoot like a Parthian.
Sharpshooter: Counter-Counter-Measures, Grenade, Notes
Enemy Counter-measures and Counter-counter-measures

Anybody trying to kill you will probably be using a shield or their own ranged weapon, and headin' straight for you.

A Berserker Wants Your Eyes: he'll try to avoid your rifle, but aside from that he won't back off.
If you see him coming from a mile away, shoot.
If he reaches you undetected, the only weapon you have that will deal enough damage in time to matter is the rifle.
Dodging around might prolong your life.
The dagger really is your best choice against his big axe, at least until you can kick him away and jump on something.
Against his sword & axe, the pistol will prevail if you can dodge it well enough. Avoid moving backwards in a straight line.
Stay near teammates to deter him from flanking you, and be wary of routes Berserkers may take to flank you.

You Have Foolishly Angered a Huscarl: he'll approach in one of two ways:

Flying Axes Are Blotting Out The Sun: if he's far, shoot and run.
If he's at medium range, dodge, run and shoot.
If he's near, charge him with the dagger to force a weapon switch.
Once he's switched, run and shoot.

The Holy Pineapple Pizza Of Odin Is Blocking Your Bullets: run away, while occasionally forcing him to slow down and block by shooting at him.
Seek out your team mates.
Keep the distance.

A Gestir Is Trying To Impale You In Strange And Long-Ranged Ways: he'll probably try to cut you up with the langseax.
If encountered at range, he may attempt to hit you with a javelin.
If you have your rifle loaded, shoot his predictable head and attempt to hide in the smoke.
If he isn't using javelins, shoot his shield down and avoid the spear.
Your pistol will take him out in six shots, or five shots and a 10-damage sneeze.

A Bondi Brandishes A More Better Knife: running at him over open ground is completely unnecessary, so stay behind teammates and cover while reloading and shoot back to even the score. With 200 total health, it'll take two rifle shots or a mere five pistol shots to put him down.
On the off chance you two get into a knife-fight, be sure to block his attacks. You can't perfectly parry him, but his overall damage will but cut down immensely
Alternatively, kick him away and shoot him until he dies.

You And An Archer Are In The Same General Area: he'll be relying on his bow. That's about it.
Your teammates are more likely to be harassing him than his teammates are to be harassing you.
If he's targeting you, dodge your way to cover and shoot his teammates.
If he's not targeting you, return fire until he is.

A Heavy Knight's Shiny Hat Is Obscuring Your Aim: if he tries to take you on at all, he probably won't give up.
He'll cover a very large distance before you kill him, even if he neglects his shield and you shoot him in the head.
Twice.
If there are no teammates in the area, kite him until there are, or he gives up.
If you must engage him in close quarters, block his strike with the dagger, then slice him until he tries to block kick him in the guts, at which point you run.

You Can No Longer Stand The Man-At-Arms's Outrageous Accent: he'll probably use his mace, but he's faster than you and can afford to dodge a bit.
Use the pistol to break either him, or his buckler.
Use the rifle once he's weak, or when his buckler breaks.
If he closes in, use the dagger to block his attacks, and counter-attack as much as possible.
He may try to soften you up with his crossbow if he feels you're too awkward to reach in a timely fashion.
Watch out for that.

An Assassin Just Backstabbed Your Buccaneer Even Though He's Not Implemented Yet: use your rifle if it's loaded, but try to stay aware of potential surprise attacks so this happens less often.
Four pistol shots and she's down, so you haven't got anything to worry about over medium distances, but anything closer and it'll come down to who's blade is more better.

The Grenade

Given it's obvious telegraphing, it's most effective as either a round-the-corner surprise, or as a supportive attack against enemies fighting your teammates. Much like the keg.

It has quite a downward arc. Aim up a little.

Avoid the splash damage; you're weak enough already.

Quickly charged from relative safety, it can be a significant boost to your overall damage output, if you've got the targets to throw it at and charge up off of.

It's most effective when followed up with a rifle shot; the burst damage is incredible.

Avoiding The Grenade: if you can't anticipate the Grenade, and you're not a Berserker or Man-At-Arms, you probably won't clear the area fast enough.
That being said, dodge it in the same way you'd dodge the Cannonball.
You can try to finish the Sharpshooter off before he lights it, but if he succeeds, it'll explode the moment you kill him anyway.

Other notes

If you wish to mask any reloading vocalizations you may make, say "no" and reload.
It's a quiet voice command, and will likely go unnoticed by enemies with better things to do.

Alternatively, kill everyone and then reload.

It IS possible to run out of ammunition for your guns, if you miss too much. This is why I keep telling you to aim.

Not every fight requires your rifle to be fired multiplie times, and for some the rifle need not be fired once. This is why you have a pistol; sometimes your teammates only need a little help.

That said, your rifle is the only thing putting you on par with the other classes. If you plan on taking any action alone, bring your rifle and make sure it's loaded!

Right click to aim. You'll miss less.

If Friendly Fire is on, aim away from teammates.
Sharpshooter: Common Weaknesses And How To Cure Them
How Not To Die

You're So Weak It's Not Even Funny: average movement speed, but poor health and armor. Almost everything kills you almost immediately.

You're Such A Pain To Catch It's Not Even Funny: your weaponry affords you the opportunity to fight and win from miles away, if you can hit your targets.

With your average movement speed and naturally irritating teammates, chasing you down is often fatally counter-productive for your enemies.
Try to stay as far away from combat as you can without sacrificing accuracy. Where other classes have shields, you only have distance to keep you safe.
Lead enemies into teammates if they close the distance.
If slowing down to aim means you'll get caught, shoot without aiming. Better to shoot, miss, and shoot again than aim, shoot, and die. Unless you only need one more shot to kill your target.

Your Dagger Is Pitifully Small And Weak: its range is about as great as its damage and capability to block.

Your Dagger Is Surprisingly Quick: its quick attacks, and the lack of downtime between them, make up for the low damage.

Block heavier weapons as best you can, and strike while your opponent's recovering.
Avoid moving back and forth. In the time it takes for you to reach your target again, they'll have prepared their next attack, while you might have missed as many as five.
The backwards attack deals as much damage as a pistol shot if fully charged.
Regular attacks only deal half as much as a pistol shot, but they're much faster and will quickly out-damage the pistol in close range.

The Pistol Is So Hard To Aim!: it's not as damaging as the longbow, and emits a smoke cloud that obscures your vision.

The Pistol Is So Hard To Dodge!: the bullets travel at around the speed of a speeding bullet and cannot be parried.

Fire and roll to dodge incoming projectiles while successfully landing your own.
The bullets can drop dramatically if unaimed, and even when they are aimed, they'll still drop.
Fire, and move sideways past the smoke cloud to observe the bullet's trajectory.
Best to aim at the head, for practice.
Always be on the lookout for ammunition.
It's easier to use this weapon at medium-range, but it's possible to use it at a medium-long range as well.
Nine shots will take down tough shields, and then your target will be defenseless. Three to four will take down weaker shields.

The Rifle Reloads Too Slowly: it reloads slowly, and headshots aren't instant kills!?

The Rifle Is Just Too Good: bodyshots are on par with the Heavy Knight's longsword, and headshots surpass it.

Aim for headshots against tougher, slower targets.
These bullets never drop, but can miss if unaimed.
If your targets are distracted by each other and your teammates, you can usually reload the rifle in peace. Be wary of enemies fond of their ranged attacks, however.
Shooting an enemy with the rifle drastically reduces the number of pistol shots required to finish them off. This helps to offset bullets wasted on misses and on forcing enemies to use shields.
Certain motivated (dominated) opponents can cover quite a lot of ground in a short amount of time if they see you reloading. Be wary of rush attacks.
VIKINGS
Vikings

The Vikings are consistantly better prepared for fights than the other teams.

When in doubt, the following motto may prove useful: Adaptable Killing Machine

Generic Viking Strategy

Vikings lack big, impressive attributes and equipment like giant swords, crossbows, light feet, parrots, and gunpowder. In their place, a versitile and flexible set of tools that can stymie the other teams' assets and attributes, and continue working at 100% efficiency whilst their enemies' falter.

The more Vikings are present, the harder and faster they can hit. No exceptions.

Never neglect, or fall in love with, a particular weapon.

Without any fancy-shmancy tricks or tack, Vikings have to rely on simply being better at melee combat than their opponents.

Vikings should avoid scattering (all teams should avoid scattering, but Vikings should make a special effort) due to how much less effective they become when alone and apart VS the other teams' ability to snuff them out one by one before they can regroup.

Terrain

Vikings prefer small areas that are large enough to surround a few players with enough room to stay out of their range if necessary.

Open spaces are bad news for Vikings. Using a shield slows them down, their ranged weapons are overall inferior, a lack of cover can end their battles before they begin, and too much room allows enemies to bug out whenever they feel like it.

Vikings should find an advantageous position to assault from, sweep into enemy territory, clear as best they can, and then leave. Relaxing Vkings are sitting ducks.

A Note About Viking Consistency

Vikings aren't as powerful as direct application of Pirate gunpowder, nor are they as unmatched in various areas as the Knights, but they can survive the gunpowder and fight the Pirates back, while temporarily defending themselves against the Knights' strengths before relentlessly exploiting their weaknesses.

You can run around without your shield if you want, but think twice before you come crying to me with an extra hole in your face, eh?
Berserker: Teamwork And Game Modes
Berserker

The Viking's wolf. Strong, fast, rabid, and effective as part of a group.

You Are Alone: either force enemies to come to you, or ambush them.
Maintain distance from ranged classes and dodge their long-range shots to take advantage of your speed.
Replenish your health and armor whenever you can, preferably as soon as you lose it.

The Pirates And Knights Are Fighting: you have the potential to kill them one by one.
Remain undetected or simply ignored until you reach your chosen veakling.

Everyone Is Trying To Attack You: you're tough, but not that tough.
Trying to fight in close quarters with arrows and bullets heading for your shieldless self is not going to work.
Draw quicker enemies away from their slower allies, and "lay the smack" upon flightly ranged classes post haste.

Teamwork

You are a useful addition to any Viking team. Your speed lets you chase where the others fall behind, while your large weapon makes you a threat to everyone, although your lack of ranged weapons and armor force you to take cover behind your teammates' shields, and be sneakier.

Rabies Is Contagious: whichever weapon your teammate is using, you should be using the alternative.
If he's moving in and out with the bearded axe, pressure the enemy with the lawnmower.
If he's diving in with the lawnmower, take advantage of the pressure to cleave his target in twain.
Surround your target.

Huscarl Distraction: Huscarls are both very deadly and very tough, so let them deal and take the brunt of the damage. You have a different set of strengths.
Apply pressure when enemies try to calmly deal with his two-handed axe, and smush them as he smashes them with his shield.

Huscarl Diversion: if your teammate is blocking a rain of arrows or a bullet storm with his shield, you should not charge ahead and die.
Instead, flank his enemies. If they respond to your ambush, keep them distracted so your teammate/s can advance.
If you glance over your shoulder and see a dying Huscarl valiently holding off a swarm of enemies, be polite, and secure the objective.

Spear Fishing In A Barrel: enemies engaged with a Gestir will try to avoid the spear by backing away and moving sideways, so deliver a solid ass-kicking to send them directly into the pointy end.
If they're actually trying to beat him down, beat them up to get their attention off of him and onto you.

Flawless Victory: you can pose a threat from a safer distance than usual, as can the Gestir.
Together, you can quickly defeat enemies without either of you getting hit.

Clean-up: your speed and weaponry make you a prime candidate for finishing off enemies struck by thrown axes and impaled by launched javelins.
Position yourself near and behind enemy lines, and wait for the *thunk* of a thrown weapon.
Then again, the "Ow that really, very hurts!" is often a more reliable indicator.

Game Modes

You Have All/Most Of The Gold: find a position from which to ambush invaders, and target the enemies that your teammates can't.
Sow chaos amongst enemy ranks, but be not so careless as to simply draw all their attacks.
Remember to stay alive. If the gold starts wandering off, it's up to you to get it back.

The Enemy Has All/Most Of The Gold: approach from behind teammates with shields, and deal with enemies that would try to flank them.
Once close, either slaughter enemy chasers to cover your escape, or assist your teammates
Alternatively you could get deep behind enemy lines at the start.

Gold Transport: if your pursuer is tough, move the gold towards your base in between their attacks.
If they're veak, kill them for the secret 4th pick-up "free special attack".
If there are multiple enemies, fight until you can use a chest special, then run.
Or activate the Red Mist, SLAUGHTER ALL WHO WOULD OPPOSE YOU, and then move the gold.

Trinket Wars: identify the deadliest enemy player on both teams, and use your speed to flank them as they engage your teammates.
Feel free to FEAST ON THE BONES OF VEAKLINGS for your BLOODLUST.
Retreat if you must. They can't kill your teammates if they're chasing you.

The Horn Empowers You: give the Horn to a competent Huscarl, he's significantly less prone to being wounded to the point of rout.
If that isn't an option, keep your armor up to endure retaliation. Stand shoulder to shoulder with your teammates, and refrain from WHOLESALE SLAUGHTER until the enemy shows VEAKNESS.
The Horn is too valuable to lose because you HEROICALLY FELL IN GLORIOUS BATTLE.

The Horn Empowers Your Rabid Doppleganger: stay near him. If you are pinned down avoid getting pinned down, but if it looks like you've ignored my advice, circle around and draw off enemy AGGRESSION (whoops, a little mis-placed zeal there).
If the enemy is disorganized, rush and surround the nearest VEAKLING.
Ranged classes can turn your carrier into a Swiss cheese. Charge at them directly if it will stop them shooting your carrier.

The Horn Empowers A Huscarl: run ahead of him to scout the way. Once he arrives, support him as best you can. How you should act depends on his actions, but as a general rule you should be watching his back and cutting off the enemies' retreat HEADS.

The Horn Empowers A Gestir: again, run ahead to scout the way. Once he catches up, assist him against his targets.
Keep ranged classes from pinchushioning him, and catch would-be runners.

Wasted Pirates And Blessed Knights Are Both Trying To Kill You: run away until the only classes keeping pace are Skirmishers and Men-At-Arms.
If they try to shoot you as you run, find a corner to hide behind. Either lead your opponents in a circle and MASSACRE THE SLOW AND THE VEAK, or get to your teammates.

Your Team Is Throwing Itself Onto Enemy Swords: distract enemies so your teammates die less often. Take advantage of the distractions your teammates provide and kill their attackers before they can charge a special attack.
If the enemies already have special attacks, let them use them on your teammates before engaging them.
Your teammates were dead anyway, it says so in the title of this scenario.

An Enemy Team Is Throwing Itself Onto The Other Enemy Team's Swords: stay close to the fight.
Use your speed to hang around without getting hit. Wait for enemies to start beating each other up, then swoop in for easy hits and free kills.

You Have Pillaged All The Territory: patrol the areas inbetween the territories. Intercept enemies before they reach them.
Ideally just before, so your teammates can help.

The Enemy Has Un-pillaged All The Territory: let your teammates go first, and back them up by surrounding defenders. Or go first, divert their attention, and surround them that way.
It depends on whether or not your teammates have specials to hit the enemy in the back with.

Your Team Isn't Trying To Pillage Any Territory: hunt down distracted enemies, kill them to build up the Red Mist, and use that to clear a territory.
Then take the territory.
Avoid fighting inside a territory.

Dragons Are Flying Around All Over The Place: Ignore the Dragons.

Ice Giants Are Running Around All Over The Place: Nope, they died.

Veakling Hunt: let Huscarls go first.
Watch your team's back.
Flank enemies while they're distracted.
Grab armor pick-ups to stretch your SUPERIOR VITALITY as far as possible.
Use cover liberally.

Veakling Hunt - Sudden Death: the Red Mist is particularly helpful here.
The restricted movement of the enemy hinders their attemps to kite you.
Do not scare enemies away from surviving teammates.
Berserker: Counter-Counter-Measures, Red Mist, Notes
Enemy Counter-measures and Counter-counter-measures

A Skirmisher Challenges Your Speed: maintain distance from his pistol, it will wear down your armor and kill you.
Even without it he will out-run you, so break off the chase.
If he tries to hit you, aim carefully, and hit back with the axe.
Scaring him away is a viable alternative to killing him if you're defending something.

A Captain Questions Your Bearded Gods: his blunderbuss is a significant threat to you when you're low on health and armor. Run away if he plans on ending the fight with a bang.
Stay healthy and armored up to avoid death by blunderbuss.
His cutlass is deadly enough to match you blow for blow. Be wary.
Perfectly parry his attacks to strike back harder and faster, or simply overpower him with your axe's naturally fast attack speed.
Use the big axe against him, and his little bird, too.

A Sharpshooter Is Sharpshooting You: flank him, engage him.
Use the lawnmower if he's not dodging very well.

An Archer Is Archershooting You: flank him, get around any bodyguards he may have, dodge his shots if you can (make a special effort to not get hit by the crossbow) and use the lawnmower if he's not dodging very well.

A Heavy Knight Is Clanking Towards You: use fully charged strikes from the big axe.
Use the sword and axe to ruin his shield. Attempt to block any bashes.
Dodge his attacks, the recovery time on the longsword is quite long.

A Man-At-Arms Challenges Your Speed: use the big axe to block his halberd, and its quick swing speed to out-strike and out-damage him.
Match him step-for-step, you're faster.

An Assassin Just Backstabbed Your Huscarl: she's just barely faster than you, so chase her away if you think it'll help, but abandon pursuit if you can't catch up by cutting corners.
Holding position in likely locations may yield a surprise attack AGAINST an Assassin, allowing you to cut them down before they can make enough distance to escape.
Other than that, your big axe is more than a match for her small stiletto.

The Red Mist

It gives you extra health, but no extra armor. If you've no armor when you use it, you'll probably die.

To use it, you have to give up everything except running for a second or two, and survive the animation.

Your attacks become unblockable, faster, deadlier, and you gain speed. If there was ever a good time to use the lawnmower, it's now. Shields, slow enemies, and unaware targets will go down in seconds under the onslaught.

If the enemy is seriously fighting back, use to the big axe to block their counter-attacks.

The extra speed is handy for chasing down Skirmishers.

It's also useful for running away.

If your opponent dodges and you don't react fast enough, you'll run right past them, so stay focused!

If you're going to die at the end, you have two options. Run for a food pick-up, or fight to the death.
The best choice depends on the enemy you're fighting, how healthy they are, the proximity of the food, the likelihood of it being there, and the relative importance of your life vs their life given the context of the situation.

It only lasts for 15 seconds.

No Berserker ever got anywhere by going insane several feet from the enemy and getting shot down in moments. Get close to your enemy while remaining more-or-less undetected, and then go nuts.

Avoiding The Red Mist: kill the Berserker before he uses it.
Dodge his attacks, and strike back rather than block.
Most Berserkers using the Red Mist are low on armor, given that it's acquired via fighting, and it's best used while fighting.
Draw him away from his and your teammates, if you're feeling sacrificial.

Other Notes

Sneak around, employ hit-and-run tactics to pick off weaker, unaware or distracted enemies. Once you get enough damage for the Red Mist, you can engage more directly. Remember to taunt your enemies while you do it.

The Sword & Axe combo attacks in an X shape when moving forwards, and in a | shape when attacking in any other direction. (Actually, it's been a while, they might have changed that.)

Shepherd enemies into corners when using the lawnmower. No wait, do that all the time.
Berserker: Common Weaknesses And How To Cure Them
How Not To Die

Berserkers Have No Armor: the pitifully low armor rating of the Berserker's manly chest muscles means that more often that not, you'll take full damage from enemy attacks!

Berserkers Have Plenty Of Health: while they're not so good for turning swords, manly chest muscles are vital for both hitting and running. Your strategy should include plenty of both.

Avoid charging ranged attackers and shield walls head-on. Find a way to approach inconspicuously.
Unless you plan to go down in history as the deadliest distraction the Norsemen had ever seen, avoid straying too far from cover. You've got speed, but not much armor. If you lose it, your speed may not be enough to carry you to safety.

The Big Axe Is Bad Because... Er...: the Big Axe is brilliant in almost every way. Medium-heavy damage, two-handed, quick swings. Even its range is pretty good.
The only problem is that the guy swinging it around is wearing no armor!

The Sword & Axe Are So Weak And Unwieldly: their range is short, their damage is low, and it's more likely that you'll run past your target than carve them up.

The Sword & Axe Are So Fast And Unstoppable: if you refrain from charging madly and swining them non-stop, they can quickly overpower unprepared opponents.

Instead of turning around to face your target when you pass them, simply move backwards or sideways.
Enemies that try to block your attacks won't know which direction to block in if you hold back your attack until they reflexively block, or try to counter-attack.
Landing multiple consecutive hits for combo damage is important with these weapons. Avoid swining at thin air by breaking off the attack to reposition and refocus. The combo should persist for several seconds.
Ultimately, the main reason these weapons can be awe-inspiring is that when you're enraged, they deal a lot more damage a lot more often, and your victims can't escape.
Huscarl: Teamwork And Game Modes
Huscarl

You are a fundamental constant of the Vikings, surviving through what kills the others, and killing those who would otherwise survive.

You Are Alone: use the big axe to score the first hit and secure a position of strength; block to maintain it.
Use the shield to close in on ranged classes and bash down tough enemies while maintaining your health and armor.
Use the throwing axes to force a tactic-shift or catch an enemy off-guard, fleeing or not.

The Pirates And Knights Are Fighting: either harass them with throwing axes (you're doomed to die in an unfair fight with 3-4 enemies) or jump in with the big axe to charge a Shield Dash.

Attack enemies that falter under pressure, and avoid taking it off of enemies that like the breathing room.

Everyone Is Trying To Attack You: parry and counter as best you can with the axe, hiding behind the shield will only be effective against heavy ranged damage which you ought to be taking hard cover from.

Use high ground, bottle necks and throwing axes to manage the movements of your enemies, and use small looping paths (e.g. walk up some stairs, jump off of them sideways) to catch enemies trying keep up while staying out of your range.

Teamwork

You are the core of your team. Your balance of offensive and defensive characteristics will be sure to keep enemies focused on killing you for a while. This provides ample opportunity for your teammates to get into position.

Berserker Escort: hold up a shield for a Berserker to him get closer to the enemy without making him an easy target.
Shield bash nearby enemies for him.
Note: random Berserkers probably won't use you as a shield.

Huscarl Distraction: existing on the battlefield will draw all eyes and arrows to you.
This allows your teammates to flank the enemy.
Your shield will allow you to survive until they do.

Huscarl Diversion: some enemies may focus on tearing you down, and forget about their teammates further back.
Your axe will pressure enemies into defending against you, as well as trying to counter-attack you, even while their team dies around them. Stay alive until your teammates are finished, and they'll come to your aid.
Use your shield if attacked by ranged classes, but if that's the case, your diversion ain't workin' son!

House Of Carls: when paired up with another Huscarl, use the right weapon for the job as you normally would, though only one shield should be needed for both of you.

Gestir Support: use your shield to get him close, and provide cover if he's using javelins. Circle your enemies to make his job easier.
One good hit with the two-handed axe will make his job a LOT easier. After that, focus on supporting (grabbing attention, watching for reinforcements) rather than sticking your neck out.

Game Modes

You Have All/Most Of The Gold: stay by the gold.
Your throwing axes and shield make you an effective distraction for your speedier teammates.
Your axe is excellent for dealing with the sneakier enemies who slip by everyone else.

The Enemy Has All/Most Of The Gold: hold up your shield if you're facing heavy ranged resistance, and pull out your throwing axes if you're not, but you should end up chopping people down either way.
Get your teammates to the gold, and cover their retreat with your shield. Use choke points to facilitate this, but be aware of alternate routes enemies may take, and fall back if you're flanked.

Gold Transport: let somebody else carry the gold while you defend them.
If you're under attack, make the enemy back off, then move the gold before they return.

Trinket Wars: the objective is killing people, and you are in the business of killing people.

The Horn Empowers You: use your augmented game sense to avoid Pirate ambushes, and head-off battalions of Knights.
Engage from the front, and stay there.
Avoid getting surrounded, but don't back yourself into a wall either; your ability to retreat from a dedicated onslaught is quite poor enough without a space to back into for a breather.

The Horn Empowers A Berserker: it is unlikely that he will successfully ambush the enemy.
If he rushes ahead of you, support him with throwing axes.
If he becomes consumed with rage, cut off the retreat of the veaklings, with more throwing axes if necessary.
As a general plan of attack, suppress the Heavy Knights and Captains who would otherwise get in his way.

The Horn Empowers Your Extremely Handsome And Gloriously Bearded Twin:
Double the number of thrown axes, double the axe strikes, or one shield and one something else.
Converge on the same target at the same time with whichever weapons are most appropriate for the situation.
Flow between this focused target and nearby troublesome enemies to give your teammate more room.

The Horn Empowers A Gestir: he'll stay alive not because he has extra health, but because he avoids getting hit. Reduce the number of attacks heading his way to aid him.
Move aggressively towards any enemy reinforcements, and tank their projectiles with your shield.
Occassionally turn around to whack his target, then go back to warding off the others. Gestirs love room to maneuver.

Wasted Pirates And Blessed Knights Are Both Trying To Kill You: run away, parry, and throw axes until you get a Shield-Dash.
Get your enemies in a bottle-neck, use it, and mop up the survivors

Your Team Is Throwing Itself Onto Enemy Swords: reach the enemy swords first, and break them.

An Enemy Team Is Throwing Itself Onto The Other Enemy Team's Swords: take on the winning team (either wait for them to waste their specials on the losers, or take one for the team and force them to use their specials on you instead).
Odds are, they'll prioritize their survival over the death of the losing team.
With your help, the losing enemy team might defeat the winning enemy team.
Then you can kill the losing team and become the winning team.

You Have Pillaged All The Territory: sit in your team's territory and stay there unless you plan to return with more health, armor, and axes; or your team as a whole is on the move.

The Enemy Has Un-pillaged All The Territory: throw axes at defenders, or advance and attack with your shield while your teammates flank and use you for cover.

Your Team Isn't Trying To Pillage Any Territory: harass enemies with your throwing axes to build up a Shield-Dash while avoiding damage, and attack the least-contested territories.
Stay strong, as the Huscarl says. Use the terrain to that end.

Dragons Are Flying Around All Over The Place: Ignore the Dragons.

A Distinct Lack Of Ice Giants: Odin killed 'em all, remember?

Last Team Standing: get out in front.
Either hold up a shield against Archers, or hold up a shield against Sharpshooters.
Avoid holding a shield up against both of them.
Alternately, you could avoid those two altogether, and engage Heavy Knights and Captains.
Bash them to stall for time, and preserve your endurance.
Use your throwing axes sparingly, you've only got four.

You can't actually catch anybody trying to flee, so if all of your teammates die, you'll need to preserve as much health as you can. Avoid debilitating one team over another.

Last Team Standing - Sudden Death: keep doing what you're doing.
Huscarl: Counter-Counter-Measures, Shield Dash, Notes
Enemy Counter-measures and Counter-counter-measures

You can't bring all of your strengths to bear simultaneously; a weakness that can be constantly exploited.

A Skirmisher Offers A Shave: he probably won't be able to kill you by himself. If he uses his pistol, use your shield.
Thrown axes will either entice him closer, or scare him off completely.

A Captain Questions Your Beard: his cutlass will swing quickly, but you'll deal more damage with your axe.
Use your shield to bash his cutlass away, and defend against his blunderbuss. Captains hate this kind of thing.
He's wide open against thrown axes.

A Sharpshooter Is Miles Away: bring your shield up, and if possible, take his rifle shot on it.
You won't be able to catch him, but you can force him to retreat.
While he's retreating, he'll be vulnerable to your throwing axes.
Regardless, your teammates are better equipped for this. Try sneaking around a bit.

An Archer Is Shooting The Fleas Right Out Of Your Beard: same as before, but instead of a rifle shot, it's a crossbow bolt that you should take on your shield, for your team

A Heavy Knight Thinks He's Invincible: throw axes while he uses his sword, break his shield with your axe, bash in response to charged longsword strikes, distract him for your teammates, or parry his attacks.
Assail him with fully-charged attacks from the axe if he's inclined to block, but be wary of counter-bashes.

A Challenger With Another Blade On A Stick Approaches: start combat with a throwing axe, then use the big axe against him.
When he tries to retreat, use another throwing axe.
His movement speed and range are a tad too great for you to reliably exploit, but he is weak, if only you can hit him.

An Assassin Just Backstabbed Your Gestir: use throwing axes to keep her focused on dodging. Actually hitting her may be difficult due to her speed, but she's so weak that she can't afford to sustain any axe hits, so aim your axes where you'll be able to recover them if they fail to connect, and pressure her out of range.

If she decides to be aggressive, a few fully-charged axe swings will change her mind. If she tries evasive slides, your sword won't be so easily avoided.

The Shield Dash

Get close to enemies before using it, if you can.

It only takes one hit to disorient and stun an enemy.

Your Shield Dash works like a shield usually does.
That means Archers, Sharpshooters, Skirmishers, Captains, and Parrots won't get through the shield.

You're still vulnerable from the sides and back.
Make sure you're dashing towards the greatest threat, or else the greatest threat will kill you.

Being hit by an enemy special will likely nullify your special.
Dashing towards a Lunging Skirmisher might work, if he's got less health than you.

Your Shield Dash is most effective is situations where the shield is effective by itself, and near hazards. Always try to send enemies into something dangerous, including your teammates.

If your Dash will send an opponent flying away from your teammates, only execute it if it's absolutely necessary!

Avoiding The Shield Dash: if the Huscarl uses his shield to block attacks, you may be able to break it and render his Dash unusable.
Like the Lunge, Huscarls trying to line it up look extremely obvious.
Move back and dodge to the side as he approaches, or jump on something.
Actually, keep something to jump on handy at all times.

Other Notes

Bullets and arrows travel faster than thrown axes.
Get closer before throwing.
Be wary of enemies trying to rush you while you can't block.
Keep a full supply of throwing axes as often as possible.
If they rush you, stop aiming your throwing axe and switch weapons.
It's faster.
Charging a throwing axe slows you down considerably, and you're already quite slow.
Although I've advised using throwing axes to harass, I advise against throwing more than two or three for this purpose.

Your sword is the weakest in the game, but that matters little when every other class save one is weaker than you are, and can't hit back because of all the bashing.

Consider advancing upon the enemy while holding your shield.
Nobody wants to be bashed.
Huscarl: Common Weaknesses And How To Cure Them
How Not To Die

Huscarls Are Slow: a tough melee weapon, but a slow run. A tough shield, but a slow walk when blocking. Ranged weapons, but they fly slowly, and one moves slower when trying to throw them.

Huscarls Are Survivors: Huscarls are not the sort to give up without a long, grueling fight that requires an enemy's A-game.

Adaptation and teamwork are essential for all Huscarl strategies.
Avoid engaging when outnumbered two to one. Two to three is fine.
Pull back to draw fighters away from shooters.
If you're a good shot, charge head-on at shooters while throwing axes. If not, use the shield.
Forge ahead and provide cover for your teammates with your shield, or demand your opponent's attention with your two-handed axe.

Note: given that Huscarls are the slowest Vikings, they will reach the fight after the other members of a bloodthirsty pack. If your teammates have eschewed teamwork, you can still take advantage of their distraction by landing at least one fully-charged two-handed axe attack.

The Two-Handed Axe... Is Pretty Good: A little deadlier than the Berserker's axe, a little slower than the Berserker's axe. Two-handed. Similar range. The primary difference is the class wielding the weapon. That and the elegant engravings. How fancy.

That said, your slow movement speed and greater resiliance tend more towards defense than offense. Get your enemies' attention, and block their strikes to waste their time.

The Sword Is veak!: it is literally the weakest sword in the game. No joke.

The Shield Is strong: it's a strong source of defense and utility (and offense, in this case).

Blocking attacks is possible, but it won't work forever. Bash your opponents before they strike you. This is important.
Counter-attacks aren't always possible, but you can maximize your chances by bashing people into walls, props, and teammates.
Back yourself into a wall or corner, and try to circle around your opponent.
The shield is resistant to arrows, but it's not indestructible. If you're facing more than one shooter, or trying to cover too much ground, disengage before your shield breaks.

In the event that you successfully counter-attack an enemy, you may as well go for the combo bonus damage.
If you can start the combo with a regular attack, you can probably take a moment to shield-bash the target first.
Alternate between counter-attacks and regular attacks to avoid the counter-attack cooldown.

These Throwing Axes Are Useless!: they fly at a leisurely pace, slow one down when charging, take a while to re-arm, deal average damage and one can only carry six at a time!?

Those Throwing Axes Are, Well... Sort Of, Yeah But Not Completely: their slower speed shortens their effective range, but they still have an effective range and within it, they are effective.

Enemy ranged classes are usually deadlier at range than you, but you have much more survivability against such attacks.
Throwing axes are effective at weakening more melee-oriented fighters, forcing them to use shields, supplementing teammates from a safe distance, and taking down runners that forget to dodge.
In order to switch, charge, and throw an axe before a runner escapes, it is necessary to anticipate their flight, and switch before they get too far away.
Avoid throwing axes at teammates as they fight enemies.
Refrain from relying too heavily on throwing axes. Remember to fight like man once in a while!
Gestir: Teamwork And Game Modes
Gestir

Old and weak, but with a spear that can poke away the world and javelins to pin it down, you are the Vikings' front line offensive support unit.

You Are Alone: use the spear to keep enemies back, and to out-range them.
If they get past the spear more often than not, block and kick to get them out of your face.
Use the shield and langseax to bash down tough enemies, to attack from side to side, or to overpower reckless enemies.
Use the javelins as often as you can to avoid losing your mediocre health in a proper melee fight.

The Pirates And Knights Are fighting: attempt to steal kills with javelins. Be aware, javelins have a long refire time.
Dance around the edge of combat and poke enemies until you get a Spear Charge.

Everyone Is Trying To Attack You: start combat off with a javelin. Try to engage and eliminate each target before the others show up. Your spear isn't great against multiple opponents.

Teamwork

You're an excellent support unit, and the deadliest ranged fighter the Vikings have. At the moment. I'm gonna have to edit this. Tsk.

Berserker Escort: you can hold up a shield for him to hide behind.
Use this sparingly, your shield can't take the strain and you need it to bash people.
Maybe take advantage of his threatening demeanour by readying some javelins?
Take care to dodge any poorly-aimed projectiles that miss him and sail towards you.

Berserker Diversion: enemies fighting your teammates are less able to dodge your javelins, and the teammate they're most likely to fight is a Berserker.
Either wait for the Berserker to draw your opponents' eyes away from you and get out of your way, or just put the javelin down.
Wasted javelins make Odin cry.

Flawless Victory: your range and his speed together have the potential to kill without either of you taking damage.
Blocking and bashing is also effective, but your shield is veak! Preserve it!

Huscarl Support: get behind him, and ready your javelins.
If the Huscarl isn't crouching when your javelin is ready, jump and throw it.
Once you reach your opponent/s, note the Huscarl's weapon.
If he uses throwing axes or his two-handed axe, use your shield and suppress the enemy.
If he's using his own shield, use your spear and swiss-cheesify the enemy towards him.

Old Folks: you should use your spears simultaneously.
One to force a block/counter, and another to pierce their defense completely.
That or one to block/counter, and another to make them feel stupid.
One of you may shield-bash opponents, but you're usually better off with multiple spears, they strike fast and true.

One javelin is usually devastating.
Two is almost always lethal.
With two Gestirs, you save ten seconds of getting the second one ready.

Game Modes

You Have All/Most Of The Gold: camp out on one side of your base with a javelin.
If enemies appear on the far side, toss the javelin and engage.
If enemies appear on the near side, put it away and engage stealthily.

The Enemy Has All/Most Of The Gold: fall in behind teammates heading for enemy gold and launch javelins at defenders.
Keep defenders on their toes with the spear to make space for axe-wielding teammates, but do so from a safe angle, one cannot take on an entire team at once as a lone Gestir.

Gold Transport: when fighting over a chest, your first attack should be with a javelin.
Be it in pursuit of a thief, or after "running away" from a pursuer.
You're better off as a bodyguard though.

Trinket Wars: pull away from intense fights to charge up javelins.
Support your teammates with the spear, shoulder to shoulder.
Use the Spear-Charge to plow through enemy lines.
Resupply on the other side.
Return to the fight to form a pincer maneuver with your teammates.

The Horn Empowers You: give it to a Huscarl; they can use the extra health.
If that's not a viable option, use your enhanced game-sense to line up javelins on enemy carriers.
Stay in the fight with your teammates for support, to support, and for honor and glory.

There are two kinds of target to relentlessly attack: enemy carriers and any enemy engaged with your teammates.
Attack enemies engaged with your teammates to thin the enemy ranks, and unfocus the enemies' attention (unless they're all focused on you).
Attack enemy carriers to keep them from killing your teammates, and receive divine blessings of health and armor.

Note: if the above advice requires you to charge after Archers and the like, consider running away and approaching from a different angle instead.

The Horn Empowers A Berserker: he's gonna be sowin' some serious chaos, so approach enemies from unexpected angles, even if it means taking a long walk.
This should cut off the escape routes of your enemies.

The Horn Empowers A Huscarl: get behind him, poke enemies in range, and retreat to let him tank the retaliation.
Pursue enemies fond of their personal space, but not too far, or the throwing axe support will fall short.
As always, start fights with a javelin if possible.
Bash tougher enemies (Heavy Knights) to stop them from countering him.

If ranged classes are being troublesome, take cover and try another angle. A Berserker could try something daring, but you're neither as fast nor as tough. Be not a foolish child!

The Horn Empowers Your Extremely Badass Twin: let him go in first.
Regardless of which weapon he's using, use a javelin to start fights.
Focus on his target, and undermine their strengths however you can.

Wasted Pirates And Blessed Knights Are Both Trying To Kill You: run away and poke pursuers if they catch up.
If they fall behind instead, ready a javelin, turn around, throw it, and continue running.
If you survive long enough to achieve a Spear Charge, use it.
Preferably after rounding a corner.
Avoid open areas.

Your Team Is Throwing Itself Onto Enemy Swords: play defensively.
Poke enemies on the front lines, and move aggressively towards enemies trying to hang back.
Archers may use their crossbows on your teammates, Pirates may retreat to reload, and Heavy Knights may be low on armor.
You can and should take advantage of these circumstances, but be wary of specials and combination attacks.

An Enemy Team Is Throwing Itself Onto The Other Enemy Team's Swords: the spear and javelins are good for stealing kills.
Target people who aren't already under attack.

You Have Pillaged All The Territory: hide near a territory.
If it's invaded, use a javelin against the invaders, then use your spear to out-range the enemies and block their capture.

The Enemy Has Un-pillaged All The Territory: wait for back-up.
Launch a javelin at the defenders and engage with your teammates.
If back-up isn't coming, keep launching javelins at defenders until you get a Spear Charge.

Your Team Isn't Trying To Pillage Any Territory: damage people to get Spear Charges, then use those Spear Charges to run around the map and impale everybody with extreme prejudice.

Dragons Are Flying Around All Over The Place: Ignore the Dragons.

A Distinct Lack Of Ice Giants: They melted.

Last Team Standing: against melee fighters and with a full frontal assault, you should be in front with your spear and the Huscarls.
Against ranged opponents and balanced set-ups, use your shield and create diversions for Berserkers.
Try to keep the javelins reserved for-

Last Team Standing - Sudden Death: with the reduced mobility, the spear has become deadlier.
Enemy special attacks will destroy you, so don't directly engage if you suspect they have one.
This is where the javelins come in handy.
If you still have your shield, use it to bash isolated enemies while your teammates cut them down.
Gestir: Counter-Counter-Measures, Spear Charge, Notes
Enemy Counter-measures and Counter-counter-measures

You can keep enemies back with the spear and the shield, or keep close to teammates, or toss javelins, but you'll never beat your greatest foe: old age.

A Skirmisher Must Have His Mouth Cleaned: he'll probably use his pistol, but you can absorb a bunch of its shots with the shield.
If he switches to his cutlass, your langseax will kill him faster than his cutlass will kill you.
With a charged thrust and a little footwork, the spear can be used to keep him and his light feet back, but beware, failure to shove him off will result in many painful cuts along your face.
Kick him if you miss your poke.

A Captain Insults Your Beard: start the fight with a javelin.
His cutlass is fast and sharp, but short. Out-range it, or bash it away.
If you lose too much health, his blunderbuss will kill you if you aren't using your shield.
He can perfectly parry your spear, but you can perfectly parry his cutlass.

A Sharpshooter Exists: if he hasn't seen you first, get him with a javelin.
Use your shield to advance across short distances.
Attempt to shepherd him into a corner.
If he pulls away, consider exploiting his poor constitution with a medium-range javelin.

An Archer Will Not Shut Up: if he hasn't seen you first, get him with a javelin.
Use your shield to advance across short distances.
If he has a bolt loaded, force him to use it on your shield. Preferably in close range.
Attempt to shepherd him into a corner.
If he pulls away, consider exploiting his poor constitution with a medium-range javelin.

A Heavy Knight's Sword Is Looking For Thine Beard: start with a javelin, engage with the spear.
Any javelin that hits his shield is wasted. Use the langseax to deal damage through it, or the spear to avoid counter-attacks.
The spear is faster than the longsword, and allows you to stay as far from him as possible.
If you try to bash him, stay as close as you can.
You can push him out of range with your spear before he hits you.
Attempt to strike him at the furthest possible distance.
Anything less will get you hit, hard.

There Can Only Be One Stick-based Weapon: bash his halberd down with the shield, and slice him up with the langseax. He's weak, it's deadly.
Your spear is capable of perfectly parrying his halberd, and is significantly faster.
He is faster than you, so if you're trying to run and he's not right behind you, he's trying to get you with his crossbow.

An Assassin Just Backstabbed Your Bondi: this is the only fight that you can win fair and square without landing a javelin to level the playing field, statistically speaking. You may still need one to finish her off as she runs away.

If she's too aggressive to keep back with the spear, use the langseax's superior damage output to slice her low health pool to ribbons.

The Spear Charge

The Charge has a relatively long wind-up. Get close, but not too close.

It only takes one hit to disorient and stun an enemy.

The Charge is faster than regular walking.
If you absolutely must, use it to close in on an enemy.
Only do this if you can't use a javelin instead.
It's a lot of damage to waste.
You should seriously consider running away and approaching from a different angle.
Do not use it to chase down SKirmishers that are already fleeing. They'll pull away while you're winding up.

You can aim downwards to hit the ground and end the charge quickly. Good for follow-up attacks.

Enemies may be sent flying backwards, though probably not far enough to warrant a javelin.

Avoiding The Spear Charge: try to make the Gestir hit a wall; they prefer not to prematurely end the Charge.
Dodge to the side.
Moving backwards doesn't work as well as with other specials, as the Spear Charge reaches further.
You can kill the Gestir as he begins the Charge.

Other Notes

"Gestir" means "Badass" in Old Norse, according to the developer team. If you look it up, you'll probably find it means "Guests".

Don't use the spear religiously.
The langseax is good too.

When charging a javelin, look forward and move forward.
Looking up, or down, or strafing will not charge the javelin as much.

Running away from pursuers while charging a javelin, and turning 180 degrees to throw it, is an effective way to use javelins against pursuers.

Start fights with javelins.
Consider keeping one back for runners.
Gestir: Common Weaknesses And How To Cure Them
How Not To Die

Gestirs Are So Old And Weak...: his armor's more like cloth than iron, and he hardly ever deals any serious damage!

Gestirs Are So Good At Killing People!: their armor is cloth, yes, but it's considerably more substantial than the Berserker's scarred exterior when it comes to not-dyin'.
(This is because he has a shield)
While Gestirs lack heavy burst damage outside of their javelins, they excel at dealing more moderate damage over time without taking as much in return.
(Again, because of the shield, though the spear's range is good too)

As a generally-equipped, weak-ish, and moderately mobile Viking, teamwork and adaptability enhance the Gestir's strengths and minimize his weaknesses.
If you absolutely irrefutably necessarily fundamentally foolishly and downright anti-socially must press on alone as a Gestir, be sure to make the most of your javelins. You need that heavy damage to bring enemies down to your rather humble level.

The Spear Is Just A Glorified Stick: medium damage with a medium attack speed on a medium-sized weapon. Where's the point?

No Glorified Stick Is Quite This Long: the point's on the end of the very long spear.

Properly employing the spear's range requires fancy footwork and practice.
The side jabs are faster than the forward and backward jabs, and thus are better for racking up combo damage.
The range offered by your spear is offset by its other, poorer statistics. If an enemy gets past the spear, its range is useless. Switch to the shield and langseax instead.

The Shield Is veak!: it can only survive a few hits and then it's just gone?

The Langseax Is strong: if used decisively, the shield's poor resiliance will be made up for by the powerful knife.

The shield is not for hiding behind, it's for hitting people with.
The langseax isn't deadly because it hurts (although it is painful) it's deadly because it's usually preceeded by a stunning bash from the shield.
Enemies with some form of impaired mobility (slow movement speed, trying to move through a doorway, engaged with a teammate, etc.) are not only susceptible to shield bashing, but are extremely susceptible to the following impalement due to your speed.
Once an enemy has been sufficiently weakened, a reckless barrage of attacks can catch them off guard.

Javelins? Great, More Useless Spears: only three? ONLY THREE?

Javelins? Awesome!: three? You only need one.

One javelin can bring even a Heavy Knight down to a managable level.
An enemy aware of your javelin may dodge, and waste a (relatively) expensive asset. Avoid throwing them at enemies that can see you and thereby focus on dodging.
Always endeavour to retrieve missed javelins.
Always endeavour to not miss thrown javelins.
Knights with shields are not worth wasting your javelins on. Close in while they hide, but switch to another weapon instead of actually throwing one.
Javelins deal heavy damage even in close range. If your target is hard to hit, close in and take the time necessary to aim.

When walking around aimlessly, carefully consider the likelihood of ranged opponents spotting and shooting you, before you put your shield away to pre-emptively charge javelins.
Pinpointing their location and keeping your strength up at a distance is more valuable than being spotted, shot, and maybe dealing massive damage that you could deal just as effectively up close.
Bondi: Teamwork and Game Modes
Bondi

A well-rounded ranger, you are the Vikings' amorphous long/mid/close range pointman/support unit/back-up brawler.

It matters little what the situation is. Unless you're out of atlatl ammunition (or health) you're good for pretty much anything.

You Are Alone: simply shoot or stab your enemies until they stop following you around.
That said, use your atlatl to dispatch approaching enemies before they bring their friends.

The Pirates And Knights Are fighting: charge your special while you have the time, and deploy your atlatl and special to accomplish whatever the current objective is.

Everyone Is Trying To Attack You: I distinctly recall telling you to use your atlatl to prevent this, but here we are regardless.
Use your atlatl (seriously this time) to start the fight with a giant dart in your attacker's face, and follow up with your bow and seax as necessary. Juggle between the two and keep your enemies from fully adapting to your techniques with either weapon.
If an opportunity presents itself, back off and use your bow.
The seax is good, but the bow dismisses potential retaliation.

Teamwork

The threat you pose at range is great for scattering enemy forces for your teammates, or expediting their deaths if they decide to stand fast.

You may be primarly ranged, but if your aim's not the best or your teammates are getting in your way, jump in with the seax and slash, block, and bodyblock.

Hunting Dogs: a free-man-on-the-land's best friend indeed, a classic combination.
Let him lead, while you follow behind and take easy shots at anybody desperately jumping around to avoid him.

For some reason, this strategy also increases the rate at which villagers gather food from animals by a marginal amount.

Bait And Switch: shooting arrows at people might annoy them to the point that they charge directly at you.
This can draw some enemies away from the others, and if a Berserker should suddenly leap to your defense, or appear amidst the enemies who stayed behind, they've only got each other to blame.

Well-Rounded - Heavy: let your Huscarl pal take point, and pick off whoever his current melee rival is. He can then use his shield to get the two of you closer to any ranged opponents.
If you end up embroiled in the melee, make more of an effort to defend yourself and distract enemies for him.

Well-Rounded - Medium: if it's a Gestir you're rolling with, pay attention and he might show you a trick or two. Again, let the tougher one of you go first.
Using your atlatl to absolutely destroy whoever's in your way is more important here, neither of you have the spare vitality to be throwing your blood and organs around carelssly.

Well-Rounded - Ranged: multiple Bondis should spread out to send their opponents into further disarry as you all juggle your weapons as you see fit.
The greater volume of arrows will suffice for most scenarios, so you can keep your darts back in case of trouble.

Game Modes

You Have All/Most Of The Gold: pick a nice quiet out-of-the-way spot overlooking the gold and wait for enemies to launch their assault.
If the defense consists of skirmishes at choke points further out, you can support from behind whoever's holding back the thieves.
Jump to give your arrows more clearance over teammates' heads.

The Enemy Has All/Most Of The Gold: consider sending atlatl darts to enemy ranged classes, as those will be a serious problem when both assaulting and retrieving the gold.
You're better suited to leveraging your ranged abilities against anybody trying to stop your teammates from getting their hands on the gold, but if they've already cleared a path, nip in and get the gold back to your side of the field.
If your teammates notice and fall back with you, lay down the gold for them and get back to laying down arrows for your enemies.

Gold Transport: your teammates can hold the enemy back in the various choke points while you put some distance between the gold and your enemies. If you see the defensive line break, you might be able to launch a cheeky dart at pursuers to finish off your special and escape.

Trinket Wars: look for opportunities to pick off veak targets, followed by whichever enemy veakened them in the first place.
Use your atlatl to severely impede opponents exposing themselves as they target your Horn carrier.

The Horn Empowers You: hand it off to a Berserker or Huscarl before you do something that will get your 200-HP self killed.
If that's not viable, forget finding a hard-to-reach spot. Keep moving, grabbing ammo pick-ups, and atlatling your enemies down at a steady rhythm.
Let your teammates handle the melee combat.

The Horn Empowers A Berserker: find some cover and make yourself useful by loosing arrows and darts at ranged opponents.

The Horn Empowers A Huscarl: if his targets are avoiding him, take advantage of their more predictable pathing. If not, see above.

The Horn Empowers A Gestir: prioritise tough targets that could deal lethal damage to him.

The Horn Empowers A Fellow Bondi: follow his lead, and pay attention, he can easily identify the enemy trinket carriers and target them. Pick 'em out and pick 'em off.
If he's not doing that, just be mindful or your positioning. It only takes one Skirmisher to cull either of you if you forget to watch your backs.

Wasted Pirates And Blessed Knights Are Both Trying To Kill You: unlike previous scenarios, you'll want the mobility your bow offers to stay ahead of the pack while you send bursts of arrows back into it.

Your Team Is Throwing Itself Onto Enemy Swords: get whatever kills you can while they're still up, and make sure you're gone when they drop.

An Enemy Team Is Throwing Itself Onto The Other Enemy Team's Swords: if they're evenly matched, use the bow to weaken whichever one is winning. If one team is clearly winning, use whatever you can to snag the kills for your own team and escape.

You Have Pillaged All The Territory: unlike Archers and Sharpshooters, you're fairly capable of defending your territories with melee combat if ranged attacks don't immediately slay any opposition.
Avoid standing in the territories initially. Position yourself in their peripheral zones, or between them, and encroach if the invaders threaten to wrest the territory from you.

The Enemy Has Un-pillaged All The Territory: you might be able to provide cover for your teammates, but who's going to cover you from enemy reinforcements?
Start with your atlatl, shoot as many arrows as you dare, and finally draw your seax to join your teammates in capturing the territory post-haste.
If enemy reinforcements make the situation too dicey, hop out and deliver more ranged support between waves.

Your Team Isn't Trying To Pillage Any Territory: you'll be limited to territories with fewer enemies in them unless you can bring the full force of your weapons to bear.
Destabalize enemy territories by supporting whichever team is trying to capture them, but once neutralized, try to keep them that way for as long as possible.

Dragons Are Flying Around All Over The Place: Ignore the Dragons.

A Distinct Lack Of Ice Giants: You're not in Scandinavia anymore, sonny.

Last Team Standing: unless you're prepared to go chasing after stray atlatl darts, or you're just that confident in your aim, refrain from using the atlatl.
Use your copious amount of arrows to deal damage while staying safe and charging specials.
Keep your seax in its sheath for...

Last Team Standing - Sudden Death: if the battle goes on for this long and you still need to clean up, you'll perform better if you still have enough health to leverage your seax's damage against the stragglers.
If the battle has decidedly NOT gone in your favor, break out the atlatl and get to charging that special.
Bondi: Counter-Counter-Measures, Speed Shooting, Notes
Enemy Counter-measures and Counter-counter-measures

A Skirmisher's Stink Is Distracting: if a Skrimisher's hunting you down, it's not him charging at you over a wide area that you need to worry about. It's the sudden ambush.
Always watch your corners, and your back.
You can overpower a Skirmisher in a fair melee fight, but you'll still die if the Skirmisher starts the scuffle with his cutlass in your back.
If he tries to back off and use his pistol, that's a mistake. Overpower him at range with your bow.
An atlatl dart will take off almost half his health, but that only gives him more reason to dodge it completely.
Simply pulling the atlatl out may persuade him to dodge, giving you room to breathe for free.
Be mindful of his damage output, or you'll be finding yourself the one needing to dodge his Lunge; something that locks him on a straight path, perfect for last-ditch atlatl shots.

A Captain Insinuates That Ye Be Flatfooted: not only is he tougher than you and his weapon more powerful, his blunderbuss can finish you off after only a couple of hits.
The parrot has 1 hit point, uncharged arrows will take it down just fine.
Be mindful of your position, stay away from areas where he can appear and close in before you can shoot him down, unless you've got teammates to snare him, of course.

You're In A Sharpshooter's Sights: take cover, or you'll take 100-150 damage.
Your bow will beat his pistol if you're in range, same with your seax and his dagger.
Your atlatl might reload faster than his rifle, but unless you get at least one headshot, it won't kill him before he can reload himself.
If possible, attack while he's busy shooting at somebody else.
Other than that, it's not about tactics as much as it's about being more accurate.

A Heavy Knight Is... Well...: run away and shoot arrows at him. If he pulls up his shield, shoot that too. It'll be down in six shots, he'll be down in another six.
If you absolutely must engage him in melee combat, and you cannot afford to flee, start the fight with an atlatl dart through his head.

Your Rival Has Initiated A Bow-Duel: a slight deviation from previous scenarios, his bow will actually kill you at approximately the same time yours kills him.
As long as you shoot first (preferably with your atlatl) you'll out-damage him even if he's 100% accurate.
As with Sharpshooters, unless you want to get tactical with your navigation of the environment, shoot him and don't stop until he stops dead.

A Man-At-Arms Is Blocking Everything With His Tiny Buckler: that's actually a serious problem, if he gets into melee range his halberd will have a significant edge over your seax.
Look for opportunities to put distance between the two of you via the map geometry while you pick his shield apart.
He's only got so much health to use in a melee fight against you, and the atlatl can make short work of it if you can catch him with his buckler down.

An Assassin Just Backstabbed Your Beserker: your health, damage, and reach are all a little better than hers, even if she has significantly more speed.
Speed which won't help her if she tries to flee.

Stay alert for potential assassination attempts, or you won't have enough raw vitality left over to endure the ensuing melee, or her stepping back and finishing you off with her crossbow.

Speed-Shooting

It's the only special attack that can deal 300 damage to a single target all by itself.

Although it shoots four arrows, you only need one in the quiver to use it, and you can even pick up the missed arrows for a tiny ammo boost.
The special arrows travel further, faster. By all means, take long shots.

These arrows lack the stunning and knockback forces of other specials, you need to sink them into your target consistently to approximate those effects by killing them.
They even pierce, making them not only effective at nullifying Heavy Knights, but their shields, too.

Great for picking off pursuers, thieves, trinket carriers, and anybody that you don't like.

Speedily Avoiding Being Shot:

Use hard cover. Anything from an incidental crate to a small fence is better than nothing.

Where other specials can either be dodged entirely, or not at all, you can usually dodge half of this special with a roll and a cheeky crouch-jump.

He slows down his legs to speed up his arms, maybe go all in with a kamikaze charge to cut him down once and for all?

If you put your faith in moving unpredictably, save jumping and rolling for the last couple of arrows, else you'll be a sitting duck for the third and possibly the fourth arrows.

If you've pressured a Bondi enough to use it when he was trying to save it, you can probably use whatever cover he was trying to put between the two of you against him.

Other Notes

With the ability to carry 40 arrows maximum, ammunition shouldn't be much of a problem. Not even with slightly reduced damage compared to the Archer's arrows.

With superior burst and sustained damage capabilities, and both comparable health and speed to most average enemies, ranged potential to contest other shooters and exploit the short range of the tanks, and without the threat of angry Berserkers, you're pretty much set to handle any situation with little real risk to yourself save that which you allow to occur through negligence and inaccuracy.

That means you're overpowered, so feel free to exploit that if you're the sort of heartless monster that undermines the spirit of games for their own petty "victories".

Despite being overpowered, you're not game-breaking, so don't expect every fight to go your way implictly.

If your entire team is made up of Bondis, despite your overall power, the sheer attention that must be dedicated to positioning and targetting will undermine your collective ability to handle both teams uniting against you moreso than if you had melee classes that could switch targets and afford to tank a few hits.

And it is "Speed-shooting". Rapid fire is something that applies to FIREarms. There is no "firing" involved with bows.
Bondi: Common Weaknesses And How To Cure Them
How Not To Die

Youthful, But Far From Inexperienced: in addition to the viable ranged weaponry that comes with his role, the Bondi also has good vital statistics.
It's actually more efficient to list the few things that actually pose a credible threat to you, than to go over the pros and cons of each aspect of his equipment.

Poor Positioning: as you move around the various maps, you're going to end up out of position sooner or later.
However, this is only a problem because it results in you being-

Obviously Outnumbered: too many targets will give any shooter a headache, even if you kill a few, it won't give you enough room to make much progress, especially if one or more of your opponents are-

Surreptitious Skirmishers And Malicious Men-At-Arms: if the former shows up, you're in trouble unless you react immediately.
Get him off of you with whichever weapon you're most comfortable with, parries, headshots, or maybe just your special.

If it's a Frenchman encroaching on your position from behind a buckler, you've got to shoot that thing down before the fight (and your face) get real ugly real fast.
With nothing but his halberd to rely on, you might be able to keep step and slice him to bits. Insert clever segue to next bullet.

Ranged Retaliation: so, this is the one area where you're not quite so hot. Your atlatl hasn't got much ammo, and your arrows arc downward alarmingly.
Aiming up merely gives your targets more time to simply walk away from your projectiles, while you won't get any special treatment from any shooters who've spotted you.
Use hard cover to render their counter-attacks moot, and shoot at their teammates until you can get a better shot against your rivals.

Unless your special's ready, in which case you can probably catch them completely off-guard, and if they duck behind cover, you can still use it against their teammates and put more pressure on your rivals anyway.
Knights
Knights

The Knights are usually tough to take down, more-so when they work together to cover each others' weaknesses.

When in doubt, the following motto may prove useful: The best offense is a good defense.

Generic Knight Strategy

Teamwork is good, as usual, but with serious exploitable weaknesses, the Knights need it more than ever to get anything done in a reasonable amount of time.

Every Knight weapon is custom-built for a very specific purpose, and each attribute finely tuned for maximum effectiveness in a given area. This comes at the cost of flexibility, however.
Proper positioning is essential.

Knights generally have the upper hand until something goes horribly wrong, and seeing as how the best defense is a good offense, taking that upper hand and using it to brush the competition aside before they finish strategizing minimizes their opportunity to strike back.
Losing the upper hand by failing to out-fight Vikings, or by having a crafty Pirate or two remind you of your frailty should be met with a quick regroup and a smart retreat.

Terrain

A Knight's opinion of open ground depends on whether or not they are an/are accompanied by an Archer.
If positive, open areas are great until somebody closes in.
If negative, open areas aren't particularly dangerous, but aren't particularly beneficial either. Be not agoraphobic.

That said, tight spaces aren't much good either, as Archers become significantly more vulnerable.

Different Knights perform better than others depending on the terrain, and it's up to the players to decide which Knights they need, and where.
Knights that aren't being useful should seek out advantageous positions.

Knights are experts in hill-defense. It's such a shame that there aren't many hills to defend,

A Note About Knight Defensivnessivity

The various weaknesses of the Knights can all be offset by playing to their respective strengths. More often than not this necessitates a defensive playstyle, but retreating into some kind of defensive shell won't work forever.
Draw an opponent into a space where you are in control, and counter as they over-extend, like those freaky trapdoor spiders.
If your opponent is still going strong as they over-extend (perhaps they brought too many enemies to handle?) the problem lies with your skills more than your strategy. Blame lag, not me.
Heavy Knight: Teamwork
Heavy Knight

A heavily-armored elite soldier, you are the Knight's primary defense against literally everything.

You Are Alone: go offensive (I know what I just said!) If you let both teams reach you at the same time, you'll be a casualty.

The Pirates And Vikings Are Fighting: instead of scaring your opponents away from you and into the other team, let the other team scare enemies into your ambush.

Everyone Is Trying To Attack You: use perfect parries and the shield to charge your special without losing all of your health.
Fight in the most cramped quarters you can find.

Teamwork

Your defensive and offensive stats are exceptional. Your only weaknesses are the recovery time of the longsword, and your speed. Even then, your speed shouldn't be a problem if you can fight and win when it counts.

Shield Wall: two Heavy Knights defending an area are difficult to approach. The usual counter-measures won't work so well.
Stick together, and be difficult to approach, or spread out, and be difficult to surround.
Watch your back, and use corners and small doorways.

Best Offense: two Heavy Knights advancing on an area while watching each other's backs are difficult to stop.
The usual counter-measures work, but not fast enough.
Spread out to Shepherd opponents into walls, corners and props.
Come together to deliver devastating one-two longsword combos.
The shield could be used to bash cornered opponents, but there's only one class in the game that can hope to stand up to such power, and such an opponent need not be cornered to be caught.

Archer Defense - Bodyguard: stand guard in front of your chosen Archer. Note how many arrows he has, and if he's fired his crossbow.
Listen for the bow being pulled back, and duck when he's about to fire.
Use the shield to defend him from projectiles. If the enemy takes additional time to aim around you, you're performing adequately.
Note which enemies are alive, and who you've seen recently, to anticipate ambushes.

Archer Defense - Orbit: run in moderately-sized circles around your chosen Archer, alternating between threatening enemies in front of him and watching for flankers behind him.
Take care not to fall behind, Archers can often be somewhat gung-ho.

Archer Support: stay behind your Archer to watch for flankers. Trust your Archer to notify you and to retreat if he needs help, and to support you otherwise.
I recommend any strategy but this one, as Archers prefer to retreat AWAY from you, instead of towards you.

In all of the above, your job is to start the melee combat that your Archer would have to deal with; his job is to finish it.

Rubber Offense: Men-At-Arms are faster than you, and will naturally flank enemies engaged in duels with you.
After that, they will even chase down your fleeing opponent for you.
This is acceptable and you need not resort to anything special, but when a Man-At-Arms charges ahead and gets beaten up and retreats to you for protection, stick with him until he resupplies and
re-engage together.

Attention Diversion: forcing enemies to engage with you opens up their backs for Assassins to open up their vital organs.
You're only a more viable candidate for this due to your durability and your lethality, blocking is acceptable but you have to give them a reason to focus on you exclusively.
Move backwards at a gentle rate to encourage your opponent to stay facing the same direction.
Don't kick or bash them, and be careful about parrying them; parried enemies tend to dodge in a panic.

Ambush Inversion: a fleeing Assassin invites enemies to pursue, and in their haste, they may forget that Heavy Knights can also stage ambushes.
Works best when the Assassin is deliberately leading enemies to you, so you can stand still to hide your clanking.

Light & Heavy Metal: enemies snared by caltrops can no longer outrun you. Time for revenge.
Be on the lookout for caltrops, and Assassins deploying them, and lead enemies over to them. If you have to lead them too far, your trick will be obvious.
Not all caltrop deployments are viable for this, either because you're got more important places to be, it's not a good spot for you to be in anyway, or they're just not hidden.

The Timely Arrival Of The Cavalry: sometimes it's enough that you just show up to bail her out before she gets turned into the secret 4th pick-up "free special attack".
Presumably she did something useful before you arrived.
Heavy Knight: Game Modes
Game Modes

You Have All/Most Of The Treasure: stay near the Treasure.
Move towards invaders, but not so far that you can't respond to more invaders.
Defend yourself and your teammates from ranged attacks with the shield.
Reserve the sword for particularly determined enemies who close the distance, and threaten to either break your shield (not everyone is going to break it) or cut down a teammate.

The Enemy Has All/Most Of The Treasure: simply by walking towards the enemy base, you will likely redirect enemy attention towards your good self, sire.
Keep the nearest chokepoint in mind if you expect to be swarmed.
If they hang back to draw you out, stand your ground. Over-extending will end badly. Try flanking them, if back-up is not forthcoming.
If back-up is forthcoming, let it pick off the enemies; your job is to stop the enemy from picking off your back-up.
If your backup consists of other Heavy Knights, engage the enemy, but kill them all before stealing a chest.
Because pursuers will simply ignore your Heavy back-up to chase after you, the speed boost of the chest special should leave them behind with your angry teammates (that are perfectly capable of defending themselves, unlike Archers).

Treasure Transport: defer the chest to an Archer if one is available.
If the chest you want is in enemy territory, go and retrive it for him.
If a chest is stolen, defer its retrival to him (though you should defend him while he retrives it).
If you must carry a chest, be prepared to lose it to thieves in the face of overwhelming odds.

Trinket Wars: keep moving to avoid being surrounded and keg'd. While travelling, use pick-ups to restore your health and armor. You need lots of it to repair yourself, and you'll need every bit of it to survive.

The Grail Blesses You: use your enhanced game-sense to see where the enemy is, and lead your Archers to a good vantage point.
Maintain a position between Heavy Knights on the front line and Archers at the back.
Support surrounded Heavy Knights, and stalked Archers.

The Grail Blesses Another Tin Soldier: support him as you would support an Archer in a melee. A capable teammate, but somewhat vulnerable.

The Grail Blesses An Archer: demand the Grail. If he refuses to give it, get out in front. Stay out of his firing path. He'll get what's coming to him...
Until then, get in the way of enemies charging head-on, and be wary of enemies trying to flank.

The Grail Blesses A Man-At-Arms: above all, stay alive (use the tips a couple of sections ahead).
Furthermore, as enemies attack you, they become vulnerable to him.
Stay between him and the enemy reinforcements, and close to his target, but avoid standing between him and his target, or getting surrounded by enemy reinforcements.
If he is suddenly obliterated, you need to get your iron mitts on that cup.

Wasted Pirates And Empowered Vikings Are Both Trying To Kill You: if you have capable Archers, focus more on surviving than on fighting back.
Attack enemies who aren't targeting you to gain a special, and save it for those times when you're surrounded by 3-4 enemies.
Prevent enemies from getting the most out of their specials by pressuring them into using them early, or outright wasting them before they can use them on your entire team.
This should give your teammates time, space, and opportunity.

Your Team Is Throwing Itself Onto Enemy Swords: You Are Alone.

An Enemy Team Is Throwing Itself Onto The Other Enemy Team's Swords: You Are Still Alone. Target the winning team.

You Have Secured All The Territory: defend it with your shield, or defend Archers who are defending it.
So long as the enemy isn't capturing it, you're still winning.

The Enemy Has Un-secured All The Territory: engage defenders, but only to keep them back. Getting too far from your Archers will cause them to die.

Your Team Isn't Trying To Secure Any Territory: follow your teammates around and capture territories while they fight.

Dragons Are Flying Around All Over The Place: Slay them in the name of the king!

Last Stand: get out in front of the Archers, but not too far. Use the shield to mitigate incoming ranged damage. Do NOT block your Archers' arrows.
Enemies will try to sneak around to attack your Archers. These are your targets.
Of course, if there seem to be no flankers, stick to surviving while your teammates whittle your opponents down.

Last Stand - Sudden Death: the closer-quarters will prevent your targets from fleeing as easily as usual, but they will still flee.
Enemies on the outskirts will seek to re-enter the central safe zone.
Cut them off.
Heavy Knight: Counter-Counter-Measures, Chopper, Notes
Enemy Counter-measures And Counter-counter-measures

A Skirmisher Is Over The Royal Speed Limit: he'll probably use his pistol.
Use the shield to block his shots, or else he WILL kill you.
If he switches to the cutlass in close range, switch to the longsword.
If he tries to run, let him. You can't catch him. Try an ambush instead. ¦:¬>
If he's trying to get you while you're distracted, pretend to attack another enemy, but turn to strike the Skirmisher when he least expects it.

A Captain Refuses To Drown Himself: smash his parrot out of the air if he uses it first. Aim directly at the parrot, the arc can be unreliable here.
Use the longsword's range to your advantage when fighting the Captain's Cutlass.
If he's cautious and backing up, get close and shepard him into a corner.

A Sharpshooter Is Gunning For You: use your shield to advance on his position.
If he can be cornered, continue.
If he has teammates, disengage until he's out of sight, and then fight.
Once cornered, continue using the shield.
If he can not be cornered, rely on teammates to supress him.
If back-up isn't coming, keep advancing on him with the shield. He'll run out of ammunition eventually.

Your Clanking Drove A Berserker Mad: out-damage and parry him.
He's liable to turn and run when weak. If he returns after a plate of chicken, you may need to use your special attack to bring him down.

If he is overcome by the Red Mist at full strength, consider blocking, dodging, and running away until it wears off.

A Huscarl Believes He Is The Tankiest: use your shield against his throwing axes. Once he switches to another weapon, prepare the longsword.
If he uses his shield, back up and use your sword's range to strike before you're struck.
If you can't back up, blocking will stop the bash.
Continue to block until you can increase the distance.

If he attempts to strike through your block with the short sword, prepare a regular attack of your own. Use it quick, or he'll bash you.

Unlike other classes, the Huscarl is quite slow. Consider bashing and counter-attacking if he uses his axe. If you'd rather not, parry and counter as best you can.

A Gestir Is Poking You: if he starts with a javelin, use the shield. Once he closes in, he'll probably use the spear.
Consider blocking his initial strike to close the distance, and match him step-for-step to keep him in range.

If he tries to bash you, block to prevent him from succeeding.
Back up, and hit him before he can bash you.
Fully charge your attacks to get through his shield.

Ultimately, Gestirs are weak, and have roughly the same reaction to being hit as Skirmishers.

A Bondi Implies Your Crusade Is Hopeless: if he has a special prepared, he can use it to completely bypass your shield, so be aware of cover you can dive behind to wait it out.
If he's limited to regular attacks, use your shield to stop him from charging the special, and fight his teammates instead by planting yourself firmly out of his line-of-sight and not exposing yourself.
With any luck, he'll get involved in a melee with some of your teammates, letting you safely close in and put a swift end to the conflict.
If for some reason this never occurs, you won't catch him with sheer persistence (although you'll certainly keep him occupied). You'll need to catch him out, though this will likely come at the cost of managing his teammates.
When in doubt, consider the objective, and your particular Bondi-nemesis's proclivity towards achieveing it, and exploit that by preparing ambushes, cutting off avenues of retreat, and denying him easy access to certain areas.

The Chopper

(Personally, I prefer to use it as a reverse-backstab against people I know are about to hit me in the back, by pretending to target somebody in front of me. It's quite effective.)

Blocking is a common move for Heavy Knights, and it's quick and easy to cancel. Use it to conceal your intentions.

Be careful, if your target backs up as you use it, you'll be left wide open afterwards.

If an enemy should find themselves stuck, or otherwise forced to rush past you, the Chopper can be used to deal insane damage. Useful against Trinket carriers.

Avoiding The Chopper: don't stand too close to Heavy Knights.

One often sees the Lunge coming just before it starts. The longsword's animations take so long to return to the idle pose that the next attack takes over before that happens, meaning that a Heavy Knight in full idle during combat is almost gauranteed to use his special.

Rolling might take one out of range, if one is quick.

Other Notes

Your footsteps are very distinct.

Avoid tanking damge unless it's absolutely necessary. Enemies will get specials, and use those to strike through you.

It takes about 4-5 armor pick-ups to fully replenish your armor. Be prepared to fall back for quite a distance to resupply properly.

Stick close to your targets, especially when trying to bash them. They may be faster than you, but it takes a litte time for that to make a difference.

Archers regularly shoot arrows into Heavy Knights who are chasing after fleeing enemies. Stay out of their way if you can help it.

Archers move faster than Heavy Knights. If your chosen Archer gets too far away from you, consider anticipating his next location and taking a shortcut, instead of following him directly.

When fighting against Viking shields, you can usually deal a few ticks of damage before their bash stuns you. This can be effective against Gestirs, but Huscarls have significantly more health.
Employ this tactic wisely.
Heavy Knight: Common Weaknesses And How To Cure Them
How Not To Die

It Takes So Long To Get Anywhere: everybody backs away slowly, and in doing so become impossible to catch!

It Takes So Long To Get Killed: the ones backing away slowly need not be caught.

You're tough, but slow. Although it takes longer to die, it also takes longer to move, and thus it is easier than ever to over-extend or wait too long.
However, it is easier to survive on the front line (without over-extending) and thus to be the first to know of and respond to new developments.
I cannot stress this point enough. Control yourself. Never follow a cowardly enemy into the heart of enemy territory unless you know all the other enemies are on vacation in Hawaii.

The Longsword Is Excruciatingly Slow: I finally got close enough to swing, and they ran away before I could hit them again!

The Longsword Is Excruciating: that one swing is more than powerful enough (note: not tryin' to say it's overpowered) to leave them so badly wounded that their own sneeze might finish them off.

The longsword's range compensates somewhat for your slow speed, but the wide arc won't magically fix blatant misses.
Counter-attacks are quick to activate, sometimes too quick. Keep moving with your target, put your crosshair on them, and then initiate it to avoid reflexively swinging at the thin air where your opponent was when they hit you, because they won't politely stand still.
The recovery time of the longsword makes following up an attack with a block somewhat difficult.
Block and follow that up with an attack instead.
If attacks are coming too fast to block, hit back harder.

The Sword is Too Short: no speed, no reach, no impact!

The Shield Is Too Strong: no swords, no axes, no damage!

The shield is not for fighting, it is for defending, but the best defense is a good offense, and a bash-counter-attack combo is capable of respectable damage.
Due to your slow speed, chasing people around with the sword is not going to work, despite the acceptable damage on the sword. Two charged strikes are almost equal to a charged longsword strike. Not bad.
An enemy focusing on you will have a tough time getting through the shield. So tough they might just kick you out of the way and go after your teammates. If that happens, either you were too cowardly or they were too smart.
Regardless, if you're not a threat (or near one) the shield won't perform any useful function.
Use the shield to defend yourself from the initial barrage of explosions and thrown weapons, and to stall for time when your teammates are dealing the damage, probably after you've dealt most of it with your longsword, to keep your health up.
Archer: Teamwork
Archer

You are the long arm of the Knights, effecting influence at ranges all players fear.

You Are Alone: consider switching to Heavy Knight. Maintain distance from places where enemies are likely to be, as much as possible.

Sitting on top of a hill in the middle of a wide open space might seem like a good idea, but you will eventually be forced to back up or press on, and when that happens, ambushing can and will occur. Probably.

You will likely find yourself in a melee regardless of the previous advice.
When this happens, dodge, and fight back with the most appropriate weapon.
Regardless of your choice, don't miss.

The Pirates And Vikings Are Fighting: shoot the fastest target. If enemies break off to chase you, either use flaming arrows or run away.

Showing up will likely trigger the following scenario...

Everyone Is Trying To Attack You: you should seriously consider switching to Heavy Knight. Avoid areas where enemies are likely to appear in anticipation of their arrival.
Plan your retreats with unseen flankers in mind.
Kill visible enemies as quickly as possible, with the crossbow if necessary.
With the shortsword if necessary.

Teamwork

Your greatest advantage is your unmatched range, and consistency at that range.
You're significantly worse off in close-quarters.

Metal Meat Shield: any oblivious Heavy Knight will fill this role. Put him between you and the enemy for instant results.

Elite Guard: a Heavy Knight dedicated to your survival is a great asset, but can be wasted if treated poorly. Avoid the following:

-Treachery: don't shoot him in the back. Jump to shoot over him.

-Silence: use voice commands to keep in touch. Listen for his, as well.

-Abandonment: don't stray too far from your guard for too long, especially not in combat. If getting back to him means going through an enemy, block past them.

-Theft: unless you're in a critical condition yourself, let him take the pick-ups.

-Insanity: he protects you from harm as best he can, but he can't make you invincible, nor is he invincible himself. Stay back and stay alive, otherwise you'll only leave him surrounded with nothing but a dead Archer for company.

Arrows To Blot Out The Sun: multiple Archers have plenty of ranged power to keep enemies back, and take attackers down.
They can also look in multiple directions at once, and keep more than one crossbow loaded.
Spread out to get better coverage of areas behind cover and beyond doorways, and to avoid both of you being cut down in a single swing.
Two crossbows contain a lot of power, sometimes enough to waste. Avoid using both bolts on a single target, especially if they're using a shield.
The shield may break, but they will be healthy enough to injure one or both of you.
If an opponent closes in and does not immediately die, you'll both be left wide open to attack from other angles.

Hound Support: enemies hiding behind cover can effectively be flushed out by a Man-At-Arms.
In addition, Men-At-Arms can quickly respond to threats against you, if you can get their attention.
Soften up an opponent, and they won't be able to survive or escape a fellow Man-At-Arms, or at least, his crossbow.
Although a Man-At-Arms is faster than you, retreat towards him if engaged in melee combat, not away.

Shield Stalker: targets behind shields can't block you and face Assassins at the same time, but they'll try their best, so time your shots carefully.
Though they can't face you simultaneously, they can still dodge, so this isn't foolproof, or rather, missproof.

Baited Ambush: attackers in close range have to focus on pursuing and targeting you, lest you escape and continue shooting them, which sets them up perfectly for an ambush.
Use your shortsword to block and keep the enemy as static as possible.
Aim your crossbow, but hold your nerve and wait for them to dodge. Wait for the Assassin to catch up and stab them if possible, terminate your victim with the bolt. If no dodge occurs, shoot them towards the Assassin.
Archer: Game Modes
Game Modes

You Have All/Most Of The Treasure: find a location between all possible entrances to your base, and camp there until enemies arrive.
Note the positions of your teammates so you don't block other Archers, and can fall back to Heavy Knights.
If Heavy Knights are going to block you when they converge on invaders, either find another spot or deal with it.
If thieves thieve your treasure and lure you away, you won't be of much use if you leave your remaining treasure behind and out of sight and they get around another corner.
Either be prepared to pursue before they escape or let them go, make no half-hearted attempts.

The Enemy Has All/Most Of The Treasure: let Heavy Knights go first. If multiple enemies rally together to fight back, focus on thinning them out.
If you are flanked, and the flanker is not immediately killed, the battle is likely a lost cause, either because you die, or because the teammates you were supposed to support falter without you. Retreat.

Alternatively, as a fast-ish class, you may consider trying to sneak past defenders and grab the gold while Heavy Knights distract and fight back your pursuers.

Treasure Transport: drop your chest the moment you see an enemy, and loose arrows.
Take care when chasing thieves, as they may trick you into following them around corners into ambushes.

Trinket Wars: stay with your team for defense, and watch carefully for flankers and incoming special attacks.
Your range, and damage at that range, are vital to the cause. Focus on enemies targeted by your teammates to quickly finish them off, focus on the others to (hopefully) keep them from overwhelming your teammates when they're outnumbered.

The Grail Blesses You: give it to a capable Heavy Knight if you can.
If that's not an option, use your Grail-vision to line up shots on, and avoid, incoming enemies.
Be sure of your shots when picking off battling Pirates and Vikings, you wouldn't want them to rush you without a couple of arrows sticking out of them.
Run away to keep the Grail safe.

Note: Any kill made by you, no matter the range, counts as a Grail kill.

The Grail Blesses A Heavy Knight: stay behind him. Close enough to be protected, but not so close that shooting his attackers becomes difficult, or potentially lethal.
Shoot people trying to keep their distance, especially after they've been hit by the longsword, and are focusing on avoiding that rather than you.

The Grail Blesses Another Fine Marksman: let him lead, he's got the Grail-vision. Other than that, you're just two Archers, as vulnerable as you ever were.
Spread your arrows over all available targets.

Wasted Pirates And Empowered Vikings Are Both Trying To Kill You: run, shoot the fastest enemies, use the crossbow on people either in your way or about to catch you, and use Flaming Arrows liberally.

Your Team Is Throwing Itself Onto Enemy Swords: unless your team is full of Archers, this is not a particularly problematic problem.
If your team IS full of Archers, seriously consider switching to Heavy Knight.

An Enemy Team Is Throwing Itself Onto The Other Enemy Team's Swords: you have the range you need to safely pick people off. Target the winning team, they're more likely to go after you.

You Have Secured All The Territory: find a good vantage point and shoot would-be invaders.
Keep your escape and teammates in mind.
Never stand in an owned territory.

The Enemy Has Un-secured All The Territory: find a hard-to-reach spot to harass defenders from.
Once they're out of the territory, secure it. If they leave to attack you, hide behind teammates.
If you can't hit any enemies from your position because they're behind cover, teammates can flush them out.

Your Team Isn't Trying To Secure Any Territory: slip into undefended territories and take down responding attackers before they reach you.
Avoid territories that lack sightlines.

Dragons Are Flying Around All Over The Place: appreciate their model, but otherwise ignore them.

Last Team Standing: you should move from your spawn, but not so far that you're easily surrounded or keg'd. It's best to go with a teammate. Target enemies approaching from the front.

Last Team Standing - Sudden Death: there's less cover for your enemies. There's less cover for you.
Spread out from other Archers, but stay close to back-up.
Archer: Counter-Counter-Measures, Fire Arrows, Notes
Enemy Counter-measures and Counter-counter-measures

A Skirmisher Is Running Towards You At The Speed Of Sound: consider the routes he may take to reach you, and get into a position to shoot him. One good arrow will mess him up, another will render him dead on his feet.
If this tactic fails, you have a few options:

Run For Your Life: fire your crossbow (don't miss) pull out your deterrent weapon of choice and fall back to favorable territory and teammates.
Frankly, you should already be in such territory.

Fight For Your Life: use the short sword, and attempt to out-fight him. Use the crossbow to quickly shoot him if he backs away.

Stall For Your Life: block with the short sword, and simply hold your position until help arrives. Useful for defending territories, chests, and the Grail.

One last thing about Skirmishers: their keg might not mess you up, but it can be very deadly for your teammates, often pitting you against the only Pirate fast enough to catch you.

A Captain's Parrot Is Eating Your Face: if you can take out the Parrot with an arrow, you'll probably take no damage.
If you've got enough time, hit the Captain himself with an arrow, and use the short sword on the parrot.
Deal with the parrot quickly, or else the Captain will close in on you and force you back, securing territory for his teammates.

A Sharpshooter Is Unreasonably Upset With You: He'll shoot you before you can shoot him, but you can shoot him from further away.
Try to avoid engaging Sharpshooters, and focus on the enemies he's using as meat shields.
If you must engage him, be aware that he can kill you with a headshot and a pistol bullet, although you can also kill him with such a combination attack.

A Berserker Is Running Towards You At The Speed Of Sound: similar to the Skirmisher scenario, only you're less likely to survive.
On one hand, he doesn't have guns.
On the OTHER hand, he doesn't NEED guns.

A Huscarl Is Hiding Behind His Dark Matter Shield: do NOT use you crossbow, shield or no, unless it will kill him.
If he's closing with the shield, make sure he keeps it up and slows down.
If he gets close enough to use throwing axes, hit him with a crossbow bolt and run away before he wounds you.
If he gets close enough to use the axe, either stall and hope for a teammate or dodge.

A Gestir Is Hiding Behind His Paper Shield: if you can dodge his first javelin, you'll probably be fine.
The javelin's mechanics betray his forward trajectory, usually.
If you're still alive and he's pulled up his shield, a few arrows will take it out.
Try to get rid of the shield before using the crossbow.
If he gets close enough for the spear, hit him with the crossbow and engage with the short sword. If you miss, or if engaging would be suicide, run away.

A Bondi Presumes Himself To Be On A New Level: stick to cover and shoot when you can; preferably when he's occupied. Three shots will take him out.
Alternatively, after one longbow shot, surprise him with a crossbow bolt to the head for a combined total of 225 damage, more than enough to stop him.
Should you find yourself knife-to-butterknife, you'll want to work in your crossbow somewhere to tilt the statistics in your favor.
Also, parry him. Your shortsword is large enough to do it and if he fully charges his attacks, you'll have more time to hop onto some enviromental junk and kick him away so you can get back to shooting him full of arrows.

The Fire Arrows

Given that an Archer who's knocked Fire Arrows is extremely obvious, it's best to hide yourself, rather than the fact you have a special ready, if you wish to conceal your intentions.

Each arrow can only hit, move, and disorient one enemy each.

Best used at a medium range against multiple enemies.

The damage isn't spectacular if the target still has their armor

It goes right through shields.

Watch out for people trying to jump over the arrows.

Try to use them as quickly as possible. Your arrows deal quite a bit of damage by themselves, and you can't store extra damage for future specials.

Avoiding The Fire Arrows: If you can dodge a regular arrow, you can dodge these. In fact, if you dodge arrows well, you may never need to dodge these ones.
Archers may use these when under pressure, or when trying to break up a tough fight.

Other Notes

Though you can't draw the bow while jumping, you can still SHOOT while jumping. Use this to shoot over teammates if they're in your way.

The further away your target, the more you need to lead.
You need not lead them very much with a fully charged arrow.
Beware of excessive leading, if your arrows go so wide that your target couldn't dodge into them if they tried, you need to take a breath, focus, be patient, and ideally find an enemy while they're typing.

Avoid using the crossbow if you've no need to deal massive damage instantly, push somebody back, or get through a shield.
You've only got one loaded bolt, and it's not powerful enough to justify using in place of the longbow.

Retreat for ammunition every now and again. Take the opportunity to heal up.

The damage dealt through shields by the crossbow is low, be not over-zealous.
Archer: Common Weaknesses And How To Cure Them
How Not To Die

Archers Are Such Pansies!: is there anything more to this class than constant fear-driven backpedaling?!

Archers Are Professionals: they practice every sunday, you know.

Where other Knights have good armor, you have the most effective armor of all: distance.
Teammates between you and incoming attackers effectively increase the distance between you and them, moreso if they help deal damage.
Jumping on top of props can often give you a little extra distance. Sometimes a lot of extra distance.
Surprising enemies by shooting from unexpected spots can buy you additional time before you're attacked.
Dangerous terrain can also effectively increase the distance between you and incoming enemies, but beware, it's a double-edged short sword.

I Fired Like A Bajillion Arrows And It Didn't Work!: I'm going to be frank, the longbow only performs poorly when:
-you miss (shouldn't need an explanation)
-try to engage in melee combat with it (deals less damage close up)
-take on too many enemies (unless you can bring the number of assailants down to one before they reach you)
-or pick a bad spot (generally leads to one or more of the above).

Even a good spot according to the terrain can become a bad spot according to the situation, so keep moving to stay a step ahead of pursuers.

Reload, Come On, RELOAD!: only one bolt, and it missed!

Closer, Come On, Just A Little Closer!: one carefully-aimed bolt is all one needs for most encounters.

At range, it deals more damage than the longbow, but requires a standing reload. Not worth it under most circumstances.
If you find yourself with no opportunity to aim before you fire, go back in time and draw the crossbow sooner.
Staying with teammates reduces the number of times you're likely to need the crossbow, and increases the number of opportunities you can use to reload it.
Using the knockback reflexively can work, but using it tactically can be more effective.
Why fight tooth and nail when you can knock an enemy off of a ledge, for instance? Keep your eyes open for such opportunities.
Occasionally, the knockback can be used to keep an enemy away from a teammate, which often translates into keeping them away from you.
Against multiple opponents (why are you in this situation!?) the crossbow should be used on the deadliest of them in order to quickly bring them down and/or knock them back while you deal with the weaker one/s (more than two!? Find a teammate already!)

Archers Are Too Weak To Use A Tiny Sword!: this sword, it is so tiny!

Archers Have No Need Of A Tiny Sword: this sword, it is not your weapon of choice.

If you find yourself using this weapon, something has gone terribly wrong, but the situation is not hopeless.
Ideally, enemies that engage (or are engaged by) you should be considerably injured, putting you on even footing (or even superior footing) with them.
Block and kick to buy yourself a little time to retreat to teammates.
Pretty much every weapon you'll likely face can parry your sword, however, a sword-wielding Archer isn't often considered a threat that needs to be parried.
If you find yourself with some space between you and your opponent (happens far too often amongst the melee classes) switch to a ranged weapon and get back in your element.

One Last Thing: some people just plain despise Archers. I am one of them, and trust me, it's not enough to avoid melee in a general sense, you'll need to avoid people like me specifically if you want to survive.
Man-At-Arms: Teamwork
Man-At-Arms

A horrific amalgamation of the French, the Knights, and Monty python references, you are the perpetually-annoying multi-purpose hound of the Knights.

You Are Alone: save the crossbow for fleeing enemies.
Use the Buckler to bash down the strikes of large weapons, and the Halberd to bat smaller weapons aside before they bring your weak self down.

The Pirates And Vikings Are Fighting: shoot the enemy most likely to die, and engage the remaining enemy/s with the appropriate weapon.

Everyone Is Trying To Attack You: shoot a light enemy to encourage them to retreat, and use the Halberd for either Perfect Parries or simply for its range.
Stay well out of reach, the Halberd takes a while to recover from swings.
Use your speed to draw faster classes away from their tougher teammates.

Waaah, The Crossbow Deals No Damage: aiming for the head upgrades the damage from "some" to "enough."

Teamwork

Speed and range to aid Heavy Knights at range, adequate armaments to aid Archers in close-quarters, and a loud mouth to divert attention from Assassins behind enemy lines.
If a Knight requires assistance, thine providence shall prevail.

Big Scary Metal Man: rely on a Heavy Knight to keep enemies occupied as you chip in with the mace and buckler.
When enemies flee for their lives, you can either chase them down, pick them off, or both.
Refrain from abandoning your teammate is the enemy is beyond your reach, however.
Not because he'll get into trouble, no no.
Because you will get into trouble.

Sneaky Little French Man: run ahead of a Heavy Knight, flank your enemies, and try to Shepherd them towards him.
You may have to body-block, kick and bash; Men-At-Arms are not particularly intimidating next to a Heavy Knight.
Try to employ this when your target has no warning of your back-up.

A Very Small Barrage: your crossbow can assist an Archer in his archery.
You can't carry many arrows, so make your shots count.

A Very Small Shield: alternatively, you can defend him from attacks in the absence of a Heavy Knight.
If a Heavy Knight is present, use one of the Heavy Knight strategies described above.

Archer Support: rely on an Archer to support you from a safe distance as you stall potential attackers, hunt down and flush out cowards, and secure objectives.
Avoid getting yourself killed, there's no sense in taking damage to deal damage when your teammate need not take any damage at all.

The French Combination: while you both possess crossbows, you should only use one at a time to ensure you still have ammunition after one fight.
Combine your/his Halberd with his/your Buckler for heavier hits and less resistance.
In larger fights, one of you should aim to bait and block enemy attacks so the other can strike safely.

Double-Time Harassment: in a similar fashion to a Gestir fighting alongside a Berserker, both of you have your own way of stepping in, dealing damage, and stepping out again.
Although your crossbow shots can be combined to weaken an enemy at range before engaging, neither of you have the ammunition to perform this consistently.
You can be a diversion, but likely not for long if you attract too much attention.
For larger battles, you'll need the following:

Smokescreen: the critical vulnerability inflicted by your special alleviates two of the Stiletto's weaknesses, parryability and low front-facing damage.
You're not obligated to help her cut down your enemies, but it would be nice.
Man-At-Arms: Game Modes
Game Modes

You Have All/Most Of The Treasure: patrol the edges of your base, but avoid engaging immediately.
Alert your teammates to incoming threats, and let them make the first move, then use your speed to either flank if necessary, to counter-ambush ambushers, take down thieves, or to stall what would otherwise be overwhelming reinforcements.
The most appropriate action depends on a variety of factors, but if in doubt, aid your teammates.

The Enemy Has All/Most Of The Treasure: keep your teammates' flanks safe en-route to the enemy base.
Once Heavy Knights have engaged the enemy, push past the front line to flank light enemies or backstab tough ones.
As the class with the best blend of speed and toughness, you should steal enemy chests and transport them to your Archers.

Treasure Transport: give it to an Archer as soon as possible. If no Archer turns up, use your crossbow to dissuade pursuers.

Trinket Wars: wander around the edges of combat and whack distracted opponents until your teammates weaken enemies that you can chase down.
If you haven't got a bolt loaded, garb one and stick it in your crossbow.
You need that edge to maintain distance, yet still finish off weakened enemies before they either get away, or lead you away.
Be mindful of combat, you're quick, but not that tough and not all that quick.

The Grail Blesses A Heavy Knight: stay behind him, use him as a living wall of metal.
In fact, let him fight as many battles as possible.
When somebody tries to flank him, run away from him, shoot him from afar, or just generally stay out of his range, hunt them down.
This can be accomplished from afar, where enemies won't consider you much of a threat, but while you'll avoid the melee the Heavy Knight is in alongside him, you may find yourself suddenly targeted without him.
Should this happen, remember to retreat towards him.

The Grail Blesses An Archer: march in front to inform him of enemies up ahead, but stay close enough to respond to ambushes.
Focus more on distracting and stalling enemies than chasing and hunting.
Unless they're a Trinket carrier, in which case take them down at all costs.
Kick enemies away from him if they get too close.

The Grail Blesses You: hand it over to a capable Heavy Knight.
If one is not available, use the Halberd to charge your special, and use that to weaken, disorient, and take down tough enemies.
Chase down and clean up the weaker enemies to cultivate and chain together more specials.
Keep your distance from the heart of the kerfuffle, you're not equipped to handle that kind of pressure under normal circumstances, but if enemies see you with the Grail, they're liable to absorb you into a fracas you can't run from.

Pay attention to your teammates to ensure that you can take advantage of enemies they've weakened (if they're good) or enemies they've distracted (if they're not).

The Grail Blesses Your French Cousin: as the only Knight fast enough to follow him around, follow him around.
Use the crossbow liberally to bring enemies down to his level, he'll likely finish them off himself.

Wasted Pirates and Empowered Vikings Are Both Trying To Kill You: run away.
Occasionally try to hit somebody with the Halberd.
Preferably as they round a corner, when their back-up can't see you.
Use the crossbow to quickly finish charging your special.

Your Team Is Throwing Itself Onto Enemy Swords: usually, even the most suicidal Archers and Heavy Knights survive for a while.
Take advantage of this, and whack enemies with quick mace strikes while they're distracted by your teammates, and fend them off with the buckler when they focus on you.

An Enemy Team Is Throwing Itself Onto The Other Enemy Team's Swords: hang around the fight. Leap into battle to snatch kills with the Halberd.

You Have Secured All The Territory: stay in the same general area as your teammates, but prioritize flanking invaders. Especially invaders that are flanking.

The Enemy Has Un-secured All The Territory: as the fastest and most mobile Knight, you should rush to undefended territories and contest them.
If there are no undefended territories, act as combat support for your teammates.

Your Team Isn't Trying To Secure Any Territory: capture the least defended territories.
Avoid Pirate/Viking battles, if you're on your own, winning them won't net you a territory.
Quickly clear small groups of enemies/individual enemies from territories with your special, it was made for this sort of thing.

Dragons Are Flying Around All Over The Place: run away from the Dragons.

Last Team Standing: Allow Heavy Knights to lead until you've got a good idea of where the other teams are, then distract the enemies flanking your team by luring them to the other team, hopefully flanking them in the process.
If you've no teammates to use as cover, use the other teams as distractions instead.
Keep your crossbow back until later.

Last Team Standing - Sudden Death: use your crossbow on the weakened enemies, and your special to catch any other survivors.
It'll slow them down for your teammates as a bonus.
Man-At-Arms: Counter-Counter-Measures, Fart, Notes
Enemy Counter-measures and Counter-counter-measures

A Skirmisher is More Insulting Than You: avoid allowing him to shoot you up.
Ambush him around corners (when he is NOT expecting you) and cut off his retreat.
Shepherd him into corners, and smack him as he tries to flee.
Use the crossbow to finish him off.
If he tries to get inside your personal bubble, crush his skull with the mace.

A Captain's Parrot Is More Insulting Than You: your speed combined with the Halberd's range are an effective combination, and just the thing to avoid the Captain's Cutlass and cut down his health pool.
Back away fastly from the blunderbuss to avoid the pellets. If you were already keeping the Captain at arm's length, you'll be well out of its effective range.
Use the mace against the Parrot.

A Sharpshooter Laughs At Your Tiny Crossbow: the buckler can block a handful of shots, but you should try to flank and ambush him, and use the buckler once he's noticed you.
Alternatively, rush him across a short distance and cut off his head.
A move best employed when you know his rifle is empty.

A Berserker Thinks Your Halberd Is a Pike: not only is he faster than you, he's also tougher than you.
He has no way to block your crossbow.
Use the buckler to bash him away when he tries the big axe.
Use the Halberd to parry his sword & axe combination.
The most devastating action you can take against him, is to nullify his special with your own.

A Huscarl Cannot Bear Your Stench Any Longer: use your speed to dodge and/or mitigate the damage his axe deals.
Charge your attacks. Your halberd swings slowly and there's no point in leaving yourself open to parries.
You'll have to surprise him to hit him with the crossbow.

A Gestir Is the Only One With A Two-Handed Medium Weapon Around Here: use the mace to strike faster than his spear.
Use your speed and halberd to avoid his langseax.
Disengage if struck with a javelin, unless you can pierce his face with a bolt.

A Bondi Is Trying To Break you!: alright, listen up. You are the single best-equipped class to take on a Bondi on his own terms. Close in using cover to avoid his atlatl, your speed to avoid his teammates, and your buckler to block his arrows.
Once close, exploit your halberd's reach to make mincemeat out of him. Three good hits will do it.
The biggest problem is his teammates, so make sure you're not alone if they're present. Fall back and pick a more opportune moment if they're not going away and your guys aren't showing up.

The Fart

The cloud deals minor damage over time.
More important than that, it obscures an opponent's vision of your attack direction.

More important that that, it slows them down while speeding you up.
More important than that, it prevents them from blocking your attacks.

Oh, it also increases the damage enemies take, from your teammates and each other.
Use it in large fights that your teammates aren't winning fast enough.

Avoiding The Fart: Men-At-Arms are veaklings, and will probably neglect to block while this special is active. Aim carefully to turn the tables and strike them down.
To use it without being killed, Men-At-Arms often retreat a short distance. If you retreat at the same time, you may clear the zone entirely.

Blocking is useless against it. Shield-bashing, on the other hand...

Other Notes

You can only carry 4 bolts at a time. Should have worn something with pockets.

Your halberd is a medium weapon with a ponderous swing speed. The damage is up there with the Captain's cutlass, though.

Your mace and buckler are similar to the Gestir's shield and langseax, good for supporting teammates and quickly dealing more damage than with your main weapon, but not so good for actual defense.

Your crossbow deals poor damage without headshots, but it can easily come out of nowhere, and finish off enemies injured by your teammates even without a headshot.

Bonus image.
Man-At-Arms: Common Weaknesses And How To Cure Them
How Not To Die

Men-At-Arms Are Vitally Insubstantial: they may have words, but the other teams have sticks and stones and they hurt!

Men-At-Arms Are Virtually Invulnerable: due to a complex balance of speed, weapon mechanics and teammates, Men-At-Arms are capable of staying just out of reach from within the middle of a fight.

With Heavy Knights that can barely be stopped, and Archers that can't be ignored, Men-At-Arms can afford to hover around fights and be annoying, but only with teammates.
As a Man-At-Arms you have average health and armor, but many opponents have devastating power. Use your arsenal wisely to deflect and avoid enemy attacks.
Once you've helped out one teammate, back away from danger and check on the rest of your team. Your teammates are either slow or defenseless, and they need your help (and you need their deadlier weapons)!

The Halberd's Attack Time Is So Long!: It takes forever to hit them once!

The Halberd's Attack Range Is So Long!: They'll be lucky to hit you more than that.

As a medium weapon with a slow swing speed, the halberd can be parried quite regularly, thusly fully charging the weapon is, on multiple levels, more effective than swinging as fast as possible.
Be aware, though they may be unable to reach you, enemies can still parry and stun you if you strike them as they block.
Always use your attack range and speed to your advantage.
If you're being hit strike-for-strike by anything other than the Gestir's spear (and you're not being run down by a Skirmisher) you're going in too close.
Striking at range and backing away is one strategy, but a safer one is to avoid an enemy strike and quickly step into your halberd's generous range to deliver your own.
Even better if a melee-oriented teammate can take that first strike.
If an opponent is rushing you and laying down a barrage of attacks, the only way to survive is to parry.
If your assailant is a Berserker, switch to your bludgeony side-arm and bash him away.

The Buckler Goes Down In Seconds!: This shield was not built to withstand giant axes and high-caliber rifle shot!

The Mace Comes Up Swingin': it wasn't built for it, no, but it can withstand enough of it to give the mace time for what it most certainly was built for.

The mace is great for hitting people in the head, specifically the back of it, when they're distracted and can't hit you while you're in close range.
Bashing enemies can stop most of their attacks from harming you, but it's only a matter of time before they break the buckler anyway, and you need that glorified dinner plate to be versatile!
Use it wisely.
If you take a large burst of ranged damage on your buckler it will be, like a crash helmet, structually comprimised. Any more punishment and it'll be gone by the time you close the distance; be aware of this when charging into rifles, kegs, and javelins.

The Crossbow Is... Pretty Handy, Actually: although one of the worst ranged weapons in the game due its poor combination of reload time, damage, and ammunition capacity, it is nonetheless a valuable asset for a melee-based combat support such as yourself.

It's great for quickly supporting teammates from a distance, but avoid standing around in the shadows, your melee weapons are also great for supporting teammates.
As I've already pointed out, the damage is low without headshots. Scoring headshots can be somewhat difficult from a distance, what with the tiny target and travel time, so try to shoot from a medium range.
If you take a moment out of an intense fight to shoot a distant enemy, you probably won't have a chance to reload, which means when (if) you start winning said intense fight, you won't be able to clean up with the crossbow.
Be prepared to chase, but not too far from safe ground.
I'd tell you that four bolts is very few, but ammunition is everywhere-
-Except in Last Team Standing, in which case you should reserve the only two bolts you'll ever have for finishing off tricky opponents.
Assassin: Teamwork
Assassin

As inexorable as the grave and almost as quiet, you are the ace (or blade) up the Knights' sleeve.

You Are Alone: I hope you've got a good reason to be alone; enemies might not be looking for you deep behind their lines, but if you're in so deep that your teammates can't capitalise on your potential, you're a liability.
If you're not behind enemy lines, keep the crossbow pistol handy for charging your special, but get back to your teammates or back behind the enemy as soon as you can.

The Pirates And Vikings Are Fighting: Good! Stab at will.
Backstabs are nice but not necessary if you can land a couple of surprise slashes.
You may want to avoid terminating whomsoever's losing via backstab, if the surviving enemy is still strong enough to terminate you right after.

Everyone Is Trying To Attack You: deploy caltrops and flee.
Use the crossbow pistol if you get enough distance, but be aware of incoming counter-projectiles.
You can also use the smoke bomb, but ideally that should be saved to make quick stabs, more than quick escapes.

Teamwork

Your speed makes you a good scout, but your reliance on subtlety disincentivises revealing yourself.
Patrol your base, call out attackers, and back off to let teammates take the lead while you sprint away to come back from another angle.
Attacking a base might call for direct infiltration via side-path, or supporting a teammate by staying out of sight until an enemy attacks them, and promptly ambushing them.

Teamwork Espionage Armaments: Heavy Knights are always a welcome sight for any Knight.

Backstab Style: it's hard enough for your enemies to bring down your Heavy Knights without you stabbing them in the back every time they try.
Laying down caltrops (and making sure your teammate knows about them) can make a Heavy Knight infinitely more threatening, moving aggression and attention to him so you can get back to stabbing.
Kick opponents towards him, and stay nearby yourself if they persist in trying to kill you instead.

Clothsline Style: Assassins are technically impossible to catch for most classes, slow as they are, but pursuers haven't got much else to do.
They might just blindly follow you to Heavy Knights waiting around corners.

Totally Evasive Arrows: Archers are less helpful, but still capable.
Under most circumstances, your crossbow pistol isn't strong enough to justify helping him out at range, so you'll want to help him out with melee in some form.

The Runner And The Tortoise: when trying to backstab, be aware that players attacking Archers are prone to dodging sideways, being stalled by arrows, and knocked back by bolts.
Lay caltrops down before enemies show up (and make sure your teammate knows about them) to ensure that they never reach your Archer in the first place.

Stiletto At A Bow Fight: in the interests of expediency, you should try to fight back against anybody fighting you, even if you want to let the Archer do most of the work.
It's too easy for an enemy to move erratically and dodge your teammate's attacks if you're not forcing them to respond to your own.

Troupe Et Assassin: Unusually mobile for a couple of Knights, and lacking in unconditional damage output. I can't recommend teaming up with a Man-at-Arms explicitly, since you're both tuned for supportive roles, and would both benefit more from supporting a different teammate. That said...

2 For 1 Deal On Bolts: your crossbows can conspire to significantly weaken approaching enemies, which is particularly good since both of you are faster than you are durable.

Arcid Smoke: there is one "critical" facet of this combination, that being the swift, imparriable strikes from your stiletto while fighting within a fart cloud.

Tactical Espionage Assassins: again, I can't recommend this.

Ambush!: take up ambush positions on opposite sides of a given pathway, and then no matter which way a passing enemy turns, their back should be exposed to at least one one of you.

Scatter!: with both of you faster than most pursuers, you can put distance between the two of you to put double that distance between (one of) you and the target, leaving them vulnerable to crossbow pistol shots.
Assassin: Game Modes
Game Modes

A quick word about Booty, specifically. Your evasiveness combined with your underwhelming combat potential suggest that avoiding enemies and stalling their chest zone is a viable use of your time.

You Have All/Most Of The Treasure: find teammates and support them from a sideways angle.
If a large fight breaks out close to the chests, consider breaking away and hiding along an escape route.
Desperate thieves have no desire to spend their special on a speedy get-away only to find caltrops in their feet and your stiletto in their back.

The Enemy Has All/Most Of The Treasure: if there is more than one route into the enemy base, use the one without enemies in it, then wrap around to stab defenders in the back as they try to repel your teammates.
If there are no teammates yet, cultivate a special and save it for when your backup arrives.
If there are more enemies than teammates directly in your escape route, clear a path before grabbing a chest.

Treasure Transport: pursuers tend to leave themselves open to backstabs as they pursue thieves, so let a teammate be the bait.
If YOU are the thief, abandon the chest and fight for a special if you're attacked en-route.

Trinket Wars: enemy Trinket-carriers won't be terminated by a single backstab, sticking with and relying on your teammates for opportunities is as crucial as ever.

The Grail Blesses A Heavy Knight: ensnare enemies avoiding him with caltrops, and backstab everybody else.
Employ subtlety when approaching enemy shooters; if no opportunity presents itself for you or your teammate, you are likely both out of position and should retreat.
If a weakened enemy runs out of Grail range, consider asking for the Grail so you can chase them down.
Give it back afterwards.

The Grail Blesses An Archer: scout ahead to draw attention away from him.
If you're too far away, your kills won't get points towards victory unless he gets at least an assist.
If you're already in a good spot, deploy caltrops in flanking routes in case the fight down range becomes the fight close up.

The Grail Blesses A Man-at-Arms: prioritise tougher enemies, and use his specials to take down anybody else.
If he raises his buckler to approach ranged classes over short distances, fall in behind him.
Over longer distances, draw their attention away from him by flanking, either in plain sight along a wider path (try to dodge) or take a hidden route to cut off their escape or backstab them wholesale.

The Grail Blesses You: if you absolutely MUST hold the Grail, use your speed and precognition to avoid compromising your insubstantial health pool.
The Grail icon above your head will give away your position to the other carriers, so avoid flanking and backstabbing like usual.
Look for enemies low on health that AREN'T already being targeted by ten other enemies looking for the same thing.

The Grail Blesses Your Evil Twin: focus on assassinating the enemy trinket carriers alongside your other teammates.
Two Assassins might work when you both execute an ambush, but when one of you is being called out through walls and throwing lightning? Not a chance.

Wasted Pirates and Empowered Vikings Are Both Trying To Kill You: it's too hot to handle, run away and buy some time for your team to regroup.
Once your team is all gathered together, stab as you see fit.

Your Team Is Throwing Itself Onto Enemy Swords: grab the Grail, with a special if necessary, and retreat so your team can respawn and regroup.
Backstab enemies as they go for the "easy" kills.

An Enemy Team Is Throwing Itself Onto The Other Enemy Team's Swords: trying to backstab anybody involved is dangerous due to the 100% chance that your victim's opponent will see you coming.
If you were tougher, I'd suggest stealing the winning team's kills, but you're not so I won't. Stab the winning team so mistakes and random chance don't immediately hand them victory.

You Have Secured All The Territory: harass enemies on their way to your territories to simultaneously keep them away from the objective and to charge your special, which serves as the safest way to approach contested territories.

If an enemy should reach your territory before you can stop them, or if you're the only one in a territory when it's attacked, harass with the crossbow pistol from a safe distance (be mindful of enemy reinforcements) and await teammates, put pressure on a different territory, or cut your losses and intercept their reinforcements, anything so long as it's not standing your ground.

Lying in wait to intercept the attackers as they leave (if they leave) might backfire if they keep an eye out for you; consider simply sneaking back into the territory when they leave (if they leave).

The Enemy Has Un-secured All The Territory: rushing off to a territory is pointless if you can't secure it, bring teammates to bring down defenders; draw the attention of one or two enemies away from approaching teammates, or let your teammates engage stronger resistance.

Your Team Isn't Trying To Secure Any Territory: if your team is merely split up, intercepting reinforcements can help them secure one territory at a time, but if they're being pushed back to your base, you might be able to slip away and put pressure on the territories yourself, or at least draw some enemies away.

Other than that, maybe switch to a more generally combat-ready class?

Dragons Are Flying Around All Over The Place: dragons can't burn what they can't see. Ignore the dragons.
Does anybody even play te_DragonHavoc anymore?

Last Team Standing: I haven't been able to get into a game of Last Team Standing as or against an Assassin, so I've had to make up what immediately follows.

Save the keg for later.
Flank quickly, use cover to hide from sight and projectiles.
Backstab battling Vikings and Knights, then flee before they target you.
Keep enemies from skewering your Sharpshooters and cornering your Captains.
Take great care when lining up your Lunge.

Wait a minute, this is just the Skirmisher's section. T_T

Last Coward Running: The Reprisal

Seriously though, find enemies avoiding your team's Heavy Knights and put extra pressure on them so your Knights get kills rather than get killed.
You're not tough enough to handle direct fights without breathing room. Waiting to spring an ambush might work, so long as your teammates aren't actively pushing enemies away from your hiding spot.
Try not to be the last Knight alive during Sudden Death, where your evasiveness is less useful, unless you're on Cathedral, in which case it may be even MORE useful.
Assassin: Counter-Counter-Measures, Smoke Bomb, Notes
Enemy Counter-measures and Counter-counter-measures

The traditional counter to being stabbed in the back is to turn around, which is so easy a windmill can do it. You'll need more creative methods to prevail consistently.

A Skirmisher Is Catching You Up: in the battle between crossbow pistol versus flintlock pistol, the flintlock pistol wins due to exerting more pressure more often. That is, the Skirmisher can switch to his cutlass to cut-a-lass, and back to his remaining flintlocks if you try to stab him. Refrain from being cheeky with the crossbow.

It can be difficult to accurately hit a Skirmisher with a backstab due to his speed, but it's also difficult for him to hit you with a keg for the same reason, so it's balanced.

What really undercuts a Skirmisher is slowing him down with caltrops so he can't evade your teammates.

A Captain's Parrot Is Following You: if you try to annoy him with your crossbow pistol, he'll annoy you right back with the parrot while you're reloading.
Once the parrot is down, the pistol becomes more efficient.

Captains should be avoided until an opportunity to backstab them presents itself; you can attempt to parry his cutlass, but you won't make any significant headway into his health pool unless he was already weakened.

A Sharpshooter Is Being a Stealth Game NPC: when played sensibly, a Sharpshooter can be impossible to approach safely.
If a teammate holds up a shield for you, you might reach them, but they might still shoot you bodily with their rifle and obliterate your ally with a special.
In such a circumstance, however, they are most likely going to be attacked from a different angle by a Viking (eventually) giving you an opportunity to rush them.

Speaking of ambush, Sharpshooters playing recklessly are far more susceptible to flanking, but if you attack them before they take a shot at somebody, they might STILL shoot you bodily with their rifle. Consider stalking them until they start aiming at somebody else (although don't consider it too much, they can turn around at any time).

A Sharpshooter without his rifle is extremely vulnerable to a surprise attack from any angle, even if he uses his pistol/dagger/dodges well, compared to one who also has a rifle shot ready, so use your speed to seize the moment.

If you're reading this because a Sharpshooter has already seen you... Duck?

A Berserker Is Tracking Your Scent: you're only just barely faster than him, use the crossbow to finish him off or not at all.

His big axe will devastate your small health pool, so avoid his notice whenever possible, and attempt backstabs while he fights somebody else. Use caltrops to mitigate the effects of his speed, especially during his special.

A Huscarl's Name Is... Carl..?: you're significantly faster than him, so so use the crossbow pistol to wear him down, but be mindful of retaliatory axes which can cut you down faster than you can respond in kind.

His two-handed axe will UTTERLY devastate your one-handed health pool, so avoid his notice at all costs if you want to attempt backstabs while he fights somebody else, or while he's traveling since he's slow enough for that.

Huscarls are the type to sometimes hold down doorways with shields. It would be such a shame if you were already in position to stab him in the back, no?

Long Pokey Spear Versus Short Stabby Stiletto: you're somewhat faster than him, so shoot him with the crossbow pistol a few times and dodge the javelins.

His long spear poses a significant threat if you can't close in and start slashing before he stops you with a poke from it, and your stiletto isn't half as deadly as his langseax even if you succeed. A backstab will tear him apart, but ambushing him while he's weakened from a previous fight and has less health to slice through will work too, just remember to dodge his spear charge.

VERY IMPORTANT: THE SPEAR CHARGE IS EASY TO GET, GESTIR'S WEAKENED BY PREVIOUS FIGHTS ALMOST ALWAYS HAVE ONE, REMEMBER TO DODGE THE SPEAR CHARGE.

Odin Ratted You Out To A Bondi: the Bondi's bow is less effective than the Archer's but it's still more effective than yours. His seax is also more effective than your stiletto, so get the first hit via ambush, and whatever you do, don't get hit by an atlatl dart or your promising career in professional murder will be over.

Fortunately, all this means Bondur usually shoot from closer range than Sharpshooters, meaning there's less ground you need to cover and his peripheral vision will be narrower; you have a better chance at a surprise attack when alone, and you'll be closer to reinforcements otherwise.

Smoke Bomb

This is what really makes you difficult to pin down, but if you ever want to execute any real assassinations, you'll have to learn how to charge it up and get away without using it. I recommend traditional guerrilla tactics and teamwork.

Like the keg, the effective range of this ability is limited, so make sure you have a target in mind to avoid wasting it.

The extra movement speed makes reaching people easier, but also makes accurate stabs more difficult. It's easiest to target people simply walking along a path without dodging anything, shooters standing still, and anybody fighting cautiously (keeping their back towards "safety" instead of jumping in circles).

If all else fails, you can still be very surprising, even without backstabs. You're almost invisible, after all.

Use it for an escape before the second or so it takes to deploy gets you killed.

The invisibility persists even when you're carrying a chest. The chest will not be invisible, and will give away your position, but you still retain some of the speed boost. Same with the Grail and Territories.

You can (and probably should) use it to escape a Berserker's rage, just make sure you're out of sight and dashing down a twisted path when it wears off or you'll be seeing him again shortly.

Even if you can't benefit from surprising an enemy with it, the smoke bomb's stun effect can benefit your teammates, which is almost the same thing.

Sometimes, if you stand incredibly still (and in poor light) enemies arriving on the scene will overlook you completely.

Avoiding the Smoke Bomb

You uh, you don't avoid the smoke bomb.

Watch carefully for a cloaked Assassin's distortion.
Since this thing often comes as a surprise, you'll have to note the state of the game as a whole to intuit the probability of any live Assassins having specials. The frequency of enemy engagements, player skill, the push and pull of objectives, deaths in the kill-feed, that sort of thing.

If ambushed, you might want to put your back to a wall, but that might just make it impossible to dodge a flurry of unseen strikes. Locating the Assassin is still your best shot at survival.

Traveling in a group makes ambushes more dangerous, even for almost-invisible Assassins.

Notes

Ah nuts, I forgot to write any notes!

Uh...

Notes!

Coming soon to a guide near you..?

Ah, of course, I animated all of this class's animations, save the first-person crossbow and caltrop animations. That's a good note, right? Don't blame me for the lack of a third-person caltrop throw animation, I made two of them.
Assassin: Common Weakness And How To Cure Them
How Not To Die

You're Frail And Weak: how many times have I mentioned that your health pool may as well not exist?

You're An Assassin: better make sure your opponents have no idea that it exists at all.

Taking damage is (usually) inevitable, meaning you'll probably die if you ever get into a fair fight.
You've got the speed to disengage and reposition as often as it takes to get a good angle on your opponents. The only limiting factor is how long before you actually start losing the entire round.
The fewer players on your team, the fewer distractions and meatshields you have to work with.
The Knight faction is strongest when it fights as a team, and that goes double for you as an Assassin.

The Stiletto is appalling in combat: short, weak, everything parries it, even its speed isn't enough to compensate!

The Stiletto is astounding out of combat: sometimes, one backstab is all you need.

Backstabs are somewhat unreliable due to the erratic movements of your targets, and the stiletto's short range. They're easier to land when your target is fighting a teammate, or at least it's not as bad if you miss.

While generally unsuited for combat, reacting to the Stiletto's quick strikes can be fatally difficult.

An overhead stab deals the most damage out of all the possible directions, but a quick horizontal slash to the back followed by an overhead stab before your victim realises what's happening deals the most overall backstab damage.

Sometimes, just being unexpected is enough to defeat an opponent, no backstab required, but that's less fun.

The Crossbow Pistol Is Barely Functional: a short effective ranged combined with low overall damage and ammunition. How are you supposed to kill anybody with this?

At Least The Crossbow Pistol Is Reliable...: all of its shots go where you aim, and your opponents can't simply turn around to negate them.

If no means of positioning for a backstab or flank presents itself, you can still take a few potshots while you wait for your teammates to create an opening for you.

Although you can move while reloading, you can't run away while committed to it; effective deployment of caltrops should afford you a free reload, but you'll likely have to resort to the Stiletto to finish the job.

A note about the crossbow pistol's usefulness. If at any point I have said or implied that you shouldn't use it for something, I am talking about bodyshots. Headshots make this thing far more efficient.

Stab a tough target and back up out of range to wear down their remaining health safely.

The Caltrops Are Too Obvious To Be Stepped On: and even if by some miracle they get stepped on, they deal low damage and an annoying snare effect.

Everybody's Going To Step On Them Anyway: and that annoying snare effect brings virtually every class below the speed of a Heavy Knight.
Not helpful by itself, but critical in the midst of a battle.

You might think that nobody's going to stop on them, but you know exactly where they are; enemies aren't always paying attention to what's under their feet around every corner, and can blunder into them for a variety of reasons.

They're particularly difficult to detect in the dark.

Even if nobody's around to capitalise on them, trodden caltrops still make a hitsound, giving away an enemy's position to you; particularly valuable information for a Knight class reliant on good positioning.

If you like being evil, deploy them on a food pick-up.
Map Specific: BT_Island
Overview
By far the most played map, but not necessarily the most popular; the Island can seem quite open and exposed, but its nuanced distribution of cover and obstacles can be turned to one's advantage by a savvy, cautious, patient, and team-oriented operator.

Which is to say of course, nobody ten seconds after a mélee breaks out.

The Knights start with 480 tickets, while the Pirates and Vikings have 240 each. That's eight minutes 'till victory if the Knights keep all the chests, and four for whichever team steals all six at once (technically only three and a half minutes, due to the capture bonuses).

Losing two chests brings the Knights up to twelve minutes, while capturing two sets either of the other teams up to win in nine, so the Knights have to keep a stranglehold on those chests for a good while if they want to remain relevant. Meanwhile, the attackers have to make sure they get a decent haul if they want to become relevant in the first place.
Pirate Raids
Who's idea was it to beach the Raft on the only spit of land possible in the midst of so much perfectly sailable water?

Boarding the Longship:
The Pirates access the Vikings base through a cramped room and a narrow choke point before a columned platform facing, and in full view of, the Viking spawn point. Despite this, it is a good location for Sharpshooters to shoot from. Although one CAN move toward the Longship from here, it may be more advantageous to meet any freshly-spawned Vikings head-on in an attempt to move them back behind their building, as far away from their gold as possible. Running to the ship would expose the platform, and potentially leave one caught in a pincer maneuver.

As for Vikings on or near the ship itself, there is no grand scheme beyond simply blowing them up.

It is best to be in a position to throw a keg BETWEEN the Vikings and the Knights, else the Vikings can productively avoid the keg and fend off the Knights at the same time.

The watch tower is the crux of the Pirate raid here, due to its function as an escape route, but it's also a handy spot to reload a gun or light a keg without immediately being spotted or shot while doing so. If the Vikings are wholly preoccupied with the Knights, it's also the next place in line to host Sharpshooters.

Knights too!?:
If the Knights are trying to fight on two fronts at once, consider bringing chests back to the columned platform, away from their entrance and its sightline.
Make full use of your gunpowder before committing to any 2:1 combat.

Escaping:
The trip from the ship to the tower is short, but obvious, and the tunnel beneath is long and mostly straight, but it's away from the greater conflict and puts the Vikings in a precarious position.

Dodging axes and javelins is difficult and much more reliant on unreliable feinting when carrying a chest, and it's the only option up until the rocks back at the Raft. Enemies should be dealt with at the few corners on the path before they have the opportunity to throw things at anybody in the open.
They are particularly vulnerable to being kicked off the bridge outside their base; off the side without the ladder is most inconvenient.

Sharpshooters, if they can predict the future, can set up on whichever end of the Café-exterior zone that their chest carrier is NOT using.

If a thief has a bit of a lead on the pursuing Vikings, they can drop from the mouth of the tower tunnel and carry the chest under the water to the opposite side of the Café, potentially confusing them.

Raiding the Throne Room:
The Pirate raid begins at the mouth of the cave leading to their lane, as the first obstacle is often Archers on the wall, or even crossing the bridge. The latter should be charged and killed so they stop wasting everybody's time. The team can regroup after everybody's gotten out of sight of the wall.
It should be noted that there is a grassy outcrop between the two tunnels here, offering a height advantage to Sharpshooters and improving their line of fire.

The Dungeon can be a veritable smuggler's den for the Pirates to regroup in, or a maximum security prison run by Knights, depending on how many players of each team are in it. The dungeon door should be left open, else its sound might give away an incoming thief. Too many Knights down there leave the Throne Room vulnerable to Vikings, so retreat and go through the courtyard if the Knights foolishly defend the wrong room.

The bridge itself is a bit of an obvious choke point, but air-strafing off the edge and landing back on it makes ranged attacks launched at it unreliable. The space beyond it has no cover, so approaching from this angle is dangerous when Archers are crawling all over the crenellations, but if it's clear then the Knight base at large is accessible without taking the potentially inaccessible turret. Refrain from lighting kegs here, one Knight coming over the wall can ruin everything, and walking to the Throne Room may take too long to throw it effectively. Get right up to the portcullis instead.

The ditch under the bridge can only lead to the Dungeon, making your path predictable. It makes a handy line-of-sight break against Archers, but any mélee Knight can easily head you off.
The brick in the wall and lever that activate the cell door cannot be used twice quickly, but they can be used in quick succession to rapidly open and close the door (once).

Knights are forever marching on the walls due to the nature of their spawn points, and unprepared Archers are a great way to charge a special for use in either clearing out the Throne Room of Knights or cleaning it out of treasure. The wall is also a decent enough place for kegs, and for Sharpshooters to stand while reloading, before dropping down to send the defenders a bullet and climbing right back up. Be wary of freshly-spawned Heavy Knights, however.

The turret may be further from the Vikings (briefly) but it's more cramped, more prone to Knight ambushes (what the heck is a "Knight ambush"?) and more blind, with no good angle on the courtyard or Throne Room proper until somebody face-checks it. Kegs lit here can be easily blocked, and are best saved for a quick trip to the wall unless Knights in the Throne Room are sufficiently engaged already. Sharpshooters shouldn't head up the stairs unless they're certain they won't be immediately split down the middle by a longsword.

The courtyard gives one more room to move, time to think, and things to see, but will clearly display any intrusion to the Knights while exposing it to the Vikings.

Enemies in the throne room can be attacked from the courtyard, though that's a dangerous spot to be in unless all or most of the server is already in the Throne Room (or partying at the disco, or whatever). This is a fair enough spot for throwing kegs to, or from.
Enemies in the courtyard can be attacked from upon the walls, which also serve as a handy escape route from any Throne Room defenders.

All Pirate raids ultimately culminate in the Throne Room; one wide entrance, no cover, no rear defense with only the prospect of enemy reinforcements to look forward to. Only assault when empty or nearly empty. Two mélee Knights and one Archer is the absolute limit on what is reasonable to take on alone. Ideally, or against greater odds, hit-and-run tactics should be employed to charge a special. The Dungeon and bridge have a health, armour and ammunition pick-up each that makes this work quite nicely.

It's tempting to take the food pick-up on the second floor, but like the ditch, it's obvious, and even if somebody hasn't seen you, they may yet patrol up there because it's just. So. Obvious.

Vikings too!?:
During quiet periods, Vikings may pop down to the Dungeon for a quick resupply due to the food pick-up down there (they haven't got one in the store room). Other than that, staying out of the courtyard will minimize unintentional encounters.

If the Vikings are making a point of preventing you from stealing anything, using a chest special to sprint into the turret (either up or down) should stall them as they get stuck on pursuing Knights, but if the Vikings are the only ones pursuing (seriously, the heck is going on here?) then the Dungeon is the furthest and most awkward route for Vikings to pursue through, while the bridge would prevent Knights from flanking over it and allow one to persist by dropping down and snatching the Dungeon's pick-ups.

Escaping:
Both escape routes have poor cover from Archers, but the bridge offers an opportunity to kick a pursuer into the ditch and better coverage for reinforcing Sharpshooters. Knights may flank a dungeoneering thief via the bridge, but the Dungeon itself has narrow archways that a pursuer can be body-blocked with.

Care should be taken when dropping a chest to respond to pursuers, being dropped into the ditch by a Knight adds several seconds onto its recovery time.
Pirate Defense
Defending the Raft:
The rocks and water offer hard and soft cover, respectively. The rocks allow mélee classes to stay close to the area's entrances to block invaders without being shot down, while the water is more useful for enemies trying to approach unaccosted, but there is no way to go under the surface without briefly allowing defenders to see them, however.

Both sets of enemies fighting at the Raft are the perfect target for explosions, but enemies fighting at the Raft is just shy of an utterly failed defense. If there is any chance it can prevent such an occourance, explosions should be used to break up concentrated enemy assaults.

Skirmishers in particular can leave the base and avoid incoming enemies, preparing to approach from behind later, or drawing attackers off.

Standing on the Raft is less than ideal, as one can only look in one direction at a time, and if enemies should approach simultaneously, they may be missed before it's too late. As a mélee class, one is useless on the Raft unless enemies actually have their hands ON the gold, while as a Sharpshooter, one is completely exposed and directly in the enemies' path, so raised shields are significantly more likely.

Ambushes can be set up at the Café or at the mouth of the Dungeon's tunnel to stall and weaken attackers before they have a chance to even see a chest.

Fighting at the mouth of either tunnel leaves the Raft vulnerable to the other team, unless other Pirates are also fighting that team. Be aware of who is fighting and where.
On the same note, feel free to back away from one team and surprise the other team instead.

If the Raft itself must be defended, bombing it can be very effective, but if one Pirate should respawn and use the water to sneak away, they may get far enough behind the front line to intercept a thief even if they activate a chest special at the Raft.

General Maneuvers:
Heading to the Dungeon at the start of a round is a safe bet (although thematically insane) but Archers may endeavour to push the team back before it can be reached. Parrots, third-person mode, and just waiting for a preemptive arrow to thud into the cave wall can alert one to their presence.

Using the water to lie in wait isn't particularly productive, but retreating into it can be a helpful way to draw a pursuer away from the chests and hide from ranged classes.

Pirates can perform well when spread out due to their mobility and gunpowder, but they can also perform well when staggered. If a Viking charges out of their base to attack a Sharpshooter crossing their bridge, they may well be so focused that they react too slowly to the second Sharpshooter coming up the stairs, while Skirmishers can quickly reach fights going on ahead of them. The team need not approach enemy bases as a unit (although the assault is another story).

Instead of being used for cover, the rocks surrounding the Raft can be jumped on to either gain some distance on an attacker, manipulate the path they take to jump up themselves, or surprise an enemy with their back turned.

The thatch roof above the jetty behind the rocks on the Knight's side of the beach can be accessed by standing on the very tip of the boat below it and crouch-jumping to the roof's lowest point.

The DJ's decks can help outfox an attacker by forcing them to a very small space, and possibly by catching them on its edge by kicking them back behind it as they attempt to move past.

The watch tower is a handy way to break up two sets of attackers, instead of letting them converge on you from both sides.

The back of the Viking's central building has an angled drawbridge that can greatly aid in one's survival as one attempts to distract the Vikings back there.
Viking Raids
With the Longship parked just outside the castle, the Vikings have stopped at the market to pick up a few groceries. Oh, and gold. Plenty of that stuff, too.

Boarding the Raft:
Approaching from the cave, the rock in front of the cave exit is the only cover for Berserkers and Boendur (that's apparently the plural of Bondi, I looked it up) from the inevitable gunfire; it's still quite far from the Raft, but it's closer than the cave at least. Beyond the rock, shields are necessary to prevent the Pirates from easily charging their specials via mere bullets. The water is less than ideal for fighting, as it conceals the uneven sand beneath, trapping careless player in a swim-state where their agility is impeded and specials are unusuable.

Approaching from the bar, one may find that none of the Pirates are paying attention, and that they can be reached without being intercepted. Regardless, the water and rocks offer soft and hard cover, respectively. Swimming around to the pier allows one to come up directly behind any defending Pirates and catch them completely by surprise. Swimming between the rocks is faster, but less surprising.

However one reaches the Raft, it remains an extremely exposed and dagerous area to hang around in. Splitting the Pirate's interest as soon as possible by moving a chest away from it is the most advantageous action one can take short of killing all the Pirates, but that's dangerously futile since they respawn. Never approach without enough teammates, a Knightly diversion, or at least a special.

Sharpshooters can retreat to the rock in front of their ship without losing effectiveness, and they can retreat further into the water in an attempt to draw off pursuers. Catching them may not be worth the effort.

Knights too!?:
Another reason the Raft is so dangerous: Archers loosing arrows into a mélee that's as much Viking as it is Pirate. Getting shot at from all sides is grossly counter-productive to both team's goals. Use a shield or keep an eye on the Knight's side.

But the problems with Archers are varied and numerous, if they really want to give you a hard time, they'll shoot into the mouth of your cave for easy hits in the narrow space. Forget about the arrow, it's impossible to see an Archer facing the cave if they're far enough away. Again, be safe, be shielded. Or take the other route.

Heavy Knights and Men-at-Arms aren't a huge problem in this area, they're caught in the same crossfire, and trying to fight them in any capacity will only result in ultimate failure.

Escaping:
Running a chest back to the tunnel can make a carrier an easy target, but they can have another Viking with a shield cover their back. Swimming off back to the bar provides some cover and prevents any pursuing mélee Pirates from using their specials, but the climb to the bar proper can again make one an easy target, and there's little room for a shield-bearer to help.

If the thief swims between the two rocks, and a shield-bearer floats between them to block the gap, pursuers may be completely prevented from giving chase at all until they have killed their obstruction. Sharpshooters may still aim at the exits, however. It is ideal to have at least one Viking available to attack any Sharpshooters while their shipmates are busy trying to float through the blocked gap.

If a chest can be brought back to the tunnel, that may be blocked by a shield too, and with some synchronized footwork, another Viking can move through the shield-bearer, attack, and move back to minimize sustained damage. Another version of that trick, if the Pirates pile up against the shield, a Berserker can charge through the shield-bearer and mow them down with his sword & axe.

Sacking the Throne Room:
Often the moment the Vikings leave the arched hallway, they're immediately under attack from Archers. Forging ahead with shields is good, while leaving via the house on the upper floor and heading for the rope on the cliff is another way to avoid the arrows.

However the team chooses to start, the waterfall tunnel is a great route to take next. Some Vikings with at least one shield should attack any Archers beyond their wall to charge specials for later.

Even standing before the wall, one can drop into the water for quick access to the Viking-side turret, either to bring pursuing Knights into a narrow choke point, or get closer to the gold than the pursuing Knights that should be trying to defend it.

There's nothing particularly noteworthy about the storeroom, save for its lack of a food pick-up, and it's trio of choke points (turret, arch, wall breach).

The courtyard is good for drawing the Knights away from the Throne Room if Boendur threaten to wear down their shields or if they're overly aggressive, but failing that, it's pointless for Vikings to be in it for any length of time.

The wall is a fair enough place for a Bondi to set up, but is primarily a way for Vikings in the courtyard to access the food pick-up on the second floor without getting too close to the Throne Room.

The turret skips a lot of places where health and players could be lost, and emerges directly adjacent to the Throne Room. Because of this, it is the spot most likely to be the most heavily guarded, and even if it's not, the Throne Room most certainly is. At least one Viking with a shield is preferable here. Fighting on the stairs isn't ideal, moving into the defenders to fight on level ground isn't ideal, and one cannot rely on Knights following one back to the turret choke point.

Overwhelming the defenders with numbers as they split up to counter the Pirate threat; quickly finishing the fight with specials is the ideal way to clear the Throne Room.

Pirates too!?:
Either at the wall or the turret, confronting Pirate gunpowder is a fundamental part of assaulting the castle, and gunpowder is best confronted with shields.

Aside from blithely wasting time in the courtyard going after anybody in it, Pirates are mostly likely to take an opportunistic slice at Vikings occupied with carrying a chest, or occupied with a Knight if they're About To Be Pushing Up The Daises. It helps to not spend all of one's health in a bitter confrontation for this reason, and to bring a teammate to fight while the chest carrier is unable to.

Escaping:
So long as the Knights aren't too thickly garrisoned, only a couple of Vikings need to pop up the steps, grab a chest, and retreat through a Huscarl valiantly blocking the turret for them, fending off pursuing Knights.

If the Knights are too thickly garrisoned for that, then you must have cleared them out anyway, if you've grabbed a chest and shift+tabbed to read this section. Dashing out into the courtyard is possible, but leaves one largely exposed to both teams and is not recommended. Taking the turret up is risky as fresh Knights may approach from that angle, but it will allow one to reach the armour pick-up beyond the wall in a timely fashion. Taking it down provides more cover, and from there can lead to the food pick-up further out. If neither are required, taking the turret down to the waterfall tunnel is the safest route out, though it gives Knights on the wall an opportunity to meet you at the stream.

It's not unusual for a fight to break out halfway between the bases, so toss any chests into the water to keep them out of Knight gauntlets. If a chest can be moved close to the house, one can quickly dash in, grab the food pick-up, and be back out before any combatants realize they can grab the chest, meaning it can be grabbed and moved into the hall where the armour pick-up can then be grabbed also, greatly aiding in the chest's recovery.
Vikings Defense
Defending the Longship:
If they are forced onto the defensive, Vikings should attempt to hold the Pirates off primarily by putting a shield in the archway by the bridge, preventing the usual surprise gunpowder assault from hitting the Longship. Secondly with a Viking in the arch leading to the platform to keep the Sharpshooters at bay a little longer, and finally by hitting them as hard as possible before they reach the Longship so any Sharpshooters are left unprotected (and to keep the chests safe). If that fails, a Viking in the tower will prevent any thieves from reaching the tunnel without a fight.

Sharpshooters on the platform ought to be dealt with, but it is more practical to focus on the actual chests, using the tunnel either to chase, or head off any thieves, and potentially to come up behind those Sharpshooters.

The Knights can be held off at the far end of the hallway, but they can easily take the stairs up to the house and get in that way. While they aren't right at the doors, the crenellations above the arch are a good spot for Boendur to shoot Knights at the bridge. Speaking of, the bridge isn't a reliable choke point, and somewhat exposed to Archers. However, even if they take the high road, they must still come down to reach the Longship and then make a return trip, along which they can be intercepted.

Alternatively, the inner balcony just before the two archways can act as a staging ground for a Viking defense, allowing Vikings to intercept high road Knights, or jump low road Knights from above. It's another good spot for Boendur.

The thatch roof above the single arch is more practical for Boendur to shoot from than for Berserkers or Huscarls when they could be keeping the Knights from moving forward, but it's prudent to keep Archers from taking it and becoming a nuisance.

If pushed back to the Longship, defenders shouldn't make it easy to pick the chests up, but more importantly they shouldn't make it easy to slide back and forth along the shields at the back. Players can stand on those and gain enough height to clear the heads (and weapons) of defending Vikings, keeping their attention away from other invaders and generally drawing the fight out for as long as possible. If there are lots of enemies and they look set to successfully pick up a chest, respawning Vikings should head the thieves off instead of waste time fighting the rear guard while the chests walk off uncontested.

General Maneuvers:
The boxes by the Longship can be used to take cover from one team's ranged classes, but only from one team at a time unless using a shield.

The arches opposite the Longship can make an attacker easier to track and target, if they get caught between them while recklessly charging a defending Viking.

Waiting in the water underneath the Pirate-side bridge can allow mélee Vikings to more effectively close the distance with Pirates and Sharpshooters than running straight across it.

The severely leaning palm tree can be walked on, most often by Pirates. It is wisest for Vikings on the bridge to switch to ranged attacks to force them to move; only a Viking within one second of the tree can reach them before they finish loading a special or lighting a keg if they took everybody by surprise with their maneuver.

The stairs leading up to the bridge can also be used as a choke point to hold off Pirates, but it's far out and the Pirates have easy access to a lot of room, pick-ups, and probably more prompt reinforcements. I personally only recommend it if the two teams are both assaulting each other at the same time for some reason.

The inner balcony actually extends along the seemingly-bare wall between the upper arches, one can jump to and hug the edge, and they'll stay up. There may as well be another wooden platform there.

Jumping off of the crenellations down to the arch is a classic and common move, it's not special, but it helps to remember that it's there.

Refrain from attacking your keyboard in an attempt to get out of the stream, it only makes the situation worse. Move toward the rocks, or perform a single crouch-jump at either bank.

The stream's span can be cleared with a straight crouch-jump on either side of the bridge, it's not a real choke point unless an enemy is actually ON the bridge and being blocked by a teammate.

The rope on the side of the cliff can aid ambushing Vikings in taking Knights by surprise, especially Berserkers. Nobody seems to expect Vikings back there.

The drop from the waterfall to the tunnel can cause fall damage if taken carelessly. Try to adhere to the ladder just before reaching the ground.

There is no food pick-up hovering on a spit model over the fire in the tunnel. Don't look at me, I don't know why not either.

When holding a shield in a choke point, be aware that one wants any enemies stuck on the wrong side to partially enter the choke, causing them to be stuck between the choke's sides, or else they may slide around and be difficult to hit, possibly allowing more of them to strike without wasting their hit-traces on each other (which can and often does happen when groups attack a shield in a choke point). With enemies collected in this way, it's always possible for a Berserker to pop in and mow them all down while the shield-bearer moves back.
Knight Crusades
Shouldn't that tough, impregnable-looking portcullis/door thing be closed? There's thieves everywhere, something ought to be done about it.

Boarding the Raft:
Archers are best left at the cave exit, or behind the big rock in front of it, although that position has less cover from Vikings.

For the mélee classes, immediately after exiting the cave is a rock that can be jumped on. Jumping on it is the signal for "Shoot me now" so one would likely be better served by rolling to the jetty behind the walls of rocks instead.

The jetty offers cover and concealment, but nothing solid at the end. One can dip into the sea for some soft cover, but a perceptive Pirate may still catch sight of such a maneuver before any attackers are fully submerged. The important thing is that it diverts attention as far away from the Viking entrances as possible, which can discombobulate the Pirate team somewhat.

If instead one opts for the big rock at the water's edge as one's cover, one had better bring a shield or else one will be none shortly.

Shields and numbers are important once at the Raft, without one or the other, mere gunfire may upset an otherwise promising assault.

Vikings too!?:
The most likely outcome of a joint assault is that one team threatens the Pirates and the other team decides that threat is quite enough, grabs the chests, and leaves. It is also likely that only one or two players feel this way, but that may still be more chests than the other team wants to pay with. If a team tries to make off with more gold than is sensible, the Pirates may well unite their efforts against the greediest team.

In a general mélee scuffle, all engaging with the Vikings can accomplish is giving the Pirates free time and space. Properly dealing with angry Vikings should be left to Archers. If nothing else, the fight should be brought behind the big rock at the water's edge for cover from the Pirates, to prevent them from freely accruing damage for their specials.

Escaping:
The greatest advantage the Knights have in this situation is that Pirates pursuing thieving Knights can easily allow their movement to become predictable, resulting in their death, or slow down to dodge arrows, resulting in the Knights' escape.

Once a chest has been brought to the level of the big rock, it can be put down while the carrier fends off attackers. Archers can move from the cave to the start of the jetty for a better angle on that position.

The rock in front of the cave is another spot available for temporarily dropping a chest behind. Archers should retreat back out of the cave to make themselves less of a liability, although anybody with a special should grab the chest and haul it back double-time. Or kill the Pirates with it, whatever.

Speaking of specials, it is important to ensure that the Pirates have as little opportunity to charge their specials as possible, else they may use them to grab any dropped chests and get them back to the raft, undoing all the effort spent to get them in the first place.

Dropping chests in the ditch makes things more awkward for any Pirates trying to recover them, especially as one can be used to block the tunnel and cell portcullis.

Boarding the Longship:
Approaching the Vikings' base from the upper floor provides a height advantage over any defenders too close to the balcony room, and allows access to the archway behind the boxes beneath the thatch. It is less likely that defending Vikings will be able to stop a Knight entering via this arch from reaching the thatch roof or their base in general.

The double arches are more direct, but obvious, body-blockable, and easy to aim at. Aggressive defenders can be drawn back from the arches into the arched hallway, where Archers may well be waiting.

The Longship is the worst possible place for a Knight to be, as it is clearly exposed to the Vikings' spawn. The only advantage to it is that Vikings are compelled to prioritize this zone over the thatch roof or the arches, allowing Archers to loose arrows freely. Backs should be to the sea, not to the Archers.

Pirates too!?:
Be mindful of explosions, yeah?

Getting too close to the watch tower may result in attracting the attention of bored Sharpshooters and opportunistic Pirates with no reservation about gutting hapless Knights to charge a special.

This entire zone is quite split down the middle. There should be very few random altercations occuring in places other than on the Longship.

Escaping:
A tricky order indeed, getting a chest off the Longship can seem impossible as a thief must retreat not only back through any irate defenders, but also freshly respawned defenders that can quickly head one off from out of sight. A special helps greatly, as does having teammates that can secure the upper floor of the balcony room.

The heist isn't quite over once the carrier makes it out of the arched hallway either, Vikings on the upper floor can launch projectiles from the crenellations above (or launch themselves onto the heads of any thieves) and the long straight-ish path can be turned against the Knights for once. One might consider taking the waterfall tunnel.

If caught out just before the bridge, toss any chests into the stream if the fight looks set to be protracted, else a Viking may special out of there with a chest uncontested.

Archers should retreat up to the cliff above the stream and the mouth of the waterfall tunnel to provide ranged support. The waterfall spot is a bit precarious, but better protected from mélee incursion. The top of the path just beyond the castle has a significantly narrower shooting angle available, and its distance precludes opportunistic chest-gathering.
Knight Defense
Defending the Throne Room:
Heavy Knights are by far the most effective at defending the Throne Room itself, but Archers and Men-at-Arms are still instrumental in keeping Pirates and Vikings from having free reign of the rest of the base to launch assaults at their leisure.

Heavy Knights and Men-at-Arms should move up and down and between the turrets to keep watch for attackers, and to catch them while they're stuck on the stairs if possible. Archers can stand in the doorway of one turret to aim at the other, but this is situational and dangerous.

Somebody should make sure that the Dungeon portcullis stays closed, meaning any Pirate using the ditch has to open it, giving away their position with a loud noise.

Archers are better protected while on the walls, and can retreat down the turrets if invaders scale the ladders, or hop into the courtyard and from there the Throne Room if attackers climb the turrets. Keep an ear out for unknightly footsteps. Also keep an ear out for the sounds of splashing, indicating an interloper en route from the water. That is, most likely approaching via the turret.

Preempting incoming attacks by waltzing off the walls and meeting it head-on is logistically flawed. Only half of the team can commit to each side, and in doing so become outnumbered 2:1 as a result, with no particular map-based advantage save that Archers can attack from range.

General Maneuvers:
Particular attention should be paid to Pirates and Vikings angling for the food pick-up above the Throne Room. Knights that are too slow to react will not be able to stop them from getting a free boost that could have been used by a Knight.

The straw dummies beyond the Viking-side wall aren't placed precisely on the cliff edge, meaning anybody could slip between them to frustrate pursuers.

The food pick-up atop the rock on the Viking-side can be reach from the sand below via a well-placed crouch jump and a little careful turning. Getting a little extra height from the ramp never hurts.

If one is extremely precise, one can jump from banana tree to banana tree to the top of the Pirate-side wall. This is so difficult to pull off that it's more of an Impossible Maneuver.

Jumping off the bridge above the ditch then air-strafing back onto it can sometimes catch opponents by surprise.

The water beyond the food pick-up on the boat just outside the dungeon hasn't got much practical use outside of two very specific scenarios, hiding a chest or hiding a player. Although there is a low bit of ground to facilitate leaving the water, the boat can be scaled from its long side as well.

The throne can be jumped on and crouched atop. This serves no practical purpose, but sends a powerful message.

It takes thieves longer to reach the third set of arches than the first, and putting recovered chests there can help keep control of the chests for a little longer (or a lot longer if a thief gets a longsword jammed into their back due to being out of position for too long) but it does look a tad unsightly. Standing directly in front of either chest zone, and aiming perpendicular to the wall and parallel to the ground when throwing the chest should ensure it lands smart and upright.

Jumping off of the walls incurs fall damage, but kicking somebody off of them will not. It's just kinda irritating.
In Conclusion
People who use voice commands a lot might be inclined to work with you if you "speak" with them.

Most teamwork in average matches happens through chance.
Watch carefully for opportunities to work with your teammates, and for indications of enemy teamwork (and how to undermine it).

The most appropriate tactic to use may change at the slightest shift in circumstances. Reinforcements, respawning trinkets and chests, pick-ups, or a team's retreat all require a re-evaluation of the situation.

It is best to have a reasonably thought-out idea of how to proceed in mind before you need it, that way you won't stand still in the middle of a fight for minutes at a time.
A good way to acquire this skill is to practice playing the game, seeing what happens after what, and thinking about what to do the next time something similar occurs

It is often necessary to combine the afore-mentioned tactics with other tactics.
How you combine them is up to you.
The most common actions are trying to hit an enemy, and trying not to be hit by an enemy. This is what will occupy 99% of your time, tactics or not. The difference is how you direct those actions. Are you trying to kill a Skirmisher, or support a Heavy Knight?
One path leads to fighting more Pirates, the other leads to teamwork and probably some Vikings.

I get the impression that Archers who fire crossbow bolts at my shield feel like they've actually made a difference in their favor.
Always makes me laugh on the inside feel contempt; I hate crossbows.

Turning away from your target, charging whatever sort of attack your class uses, and turning around to unleash it is one of the oldest tricks in the book.
Still works.

Whew, finished gathering data for and adding the Assassin's section. That took way too long.

People are apparently more likely to leave comments if you ask them to.
That means leave a comment.
Seriously, it's not a coded message.
32 Comments
The Strategist  [author] 16 Jun, 2024 @ 3:33am 
Bit late, I admit.
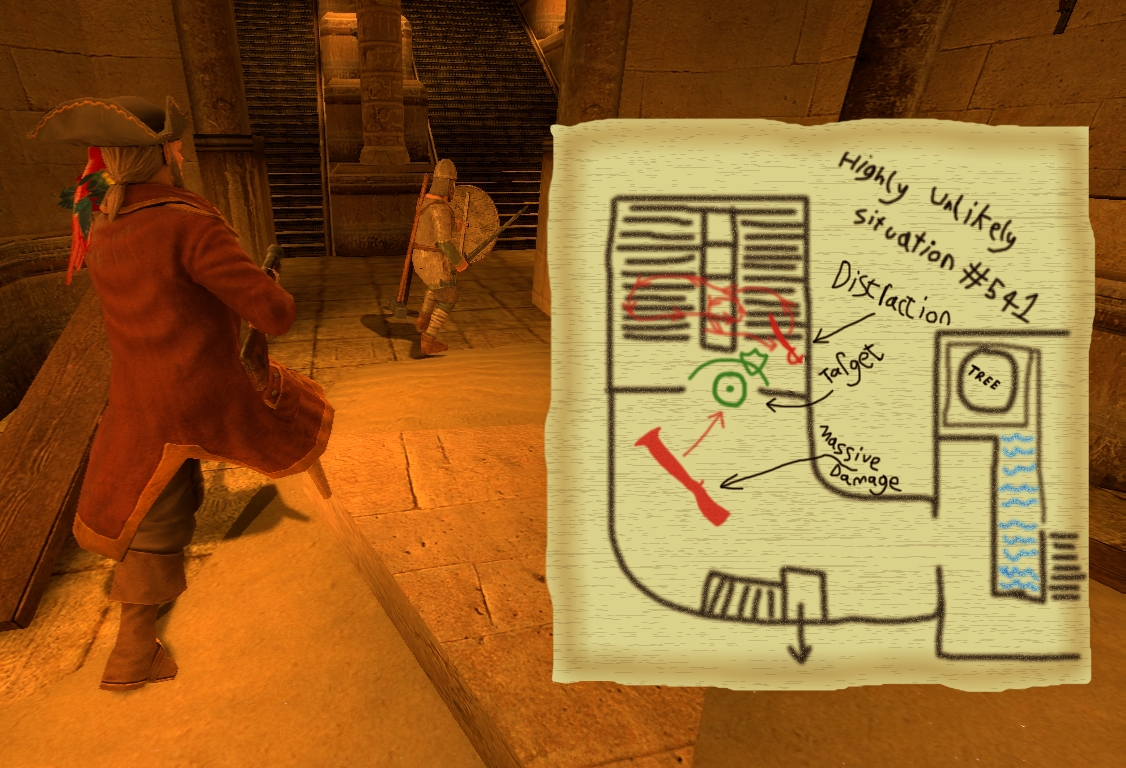
The blunderbuss deals 6 damage per pellet, and fires 15 pellets, making 90 damage in 1 shot possible, but the spread is quite large.

Health damage increases the knockback effect, so using it on an opponent with high health but low armor (a Berserker) may allow you to avoid taking damage in retaliation.
Aiming upward would also cause the target to lose contact with the ground, flying further away before overcoming the knockback force. Crouching at close range is the most reliable way to engineer this.

Personally I would fire it at enemies fighting somebody else.

The damage display only reports health damage, 60% of which may be absorbed by armor, so if you see that you dealt 20 health damage, you probably dealt 50, which is quite respectable.
Lightningcrush 31 May, 2024 @ 3:32pm 
How do you use the blunderbuss, its damage is incredibly awful, not even doing 20 per shot. And by the time you deplete the armor of who your fighting they are most likely going to die due to someone else.
The Strategist  [author] 15 Sep, 2020 @ 11:47am 
@okey
I mean, hitting the other guy until they fall over is important too. You're still going to lose overall if you're up against too many people better than you, even with keeping the relevant information in mind.
Such advice is most effective against people of your own technical skill level, so you can one-up them with gambits and tricks. Oh hey, I should put that in the actual guide.
okey 15 Sep, 2020 @ 8:34am 
This is one of the few guides for this game that's actually helpful and not the equivalent of saying 'to kill the cyberdemon shoot at it until it dies'
Chrimbob 11 Apr, 2020 @ 5:52pm 
Great stuff here
Momo 20 Feb, 2017 @ 6:26am 
Very in-depth and very helpful. Well done!
trap 5 Jan, 2017 @ 10:46am 
if ur playing LTS
trap 5 Jan, 2017 @ 10:46am 
btw you have to joust against a decent player
The Strategist  [author] 16 Aug, 2016 @ 2:50pm 
Apparently writing over 1000 characters of advice is not allowed.

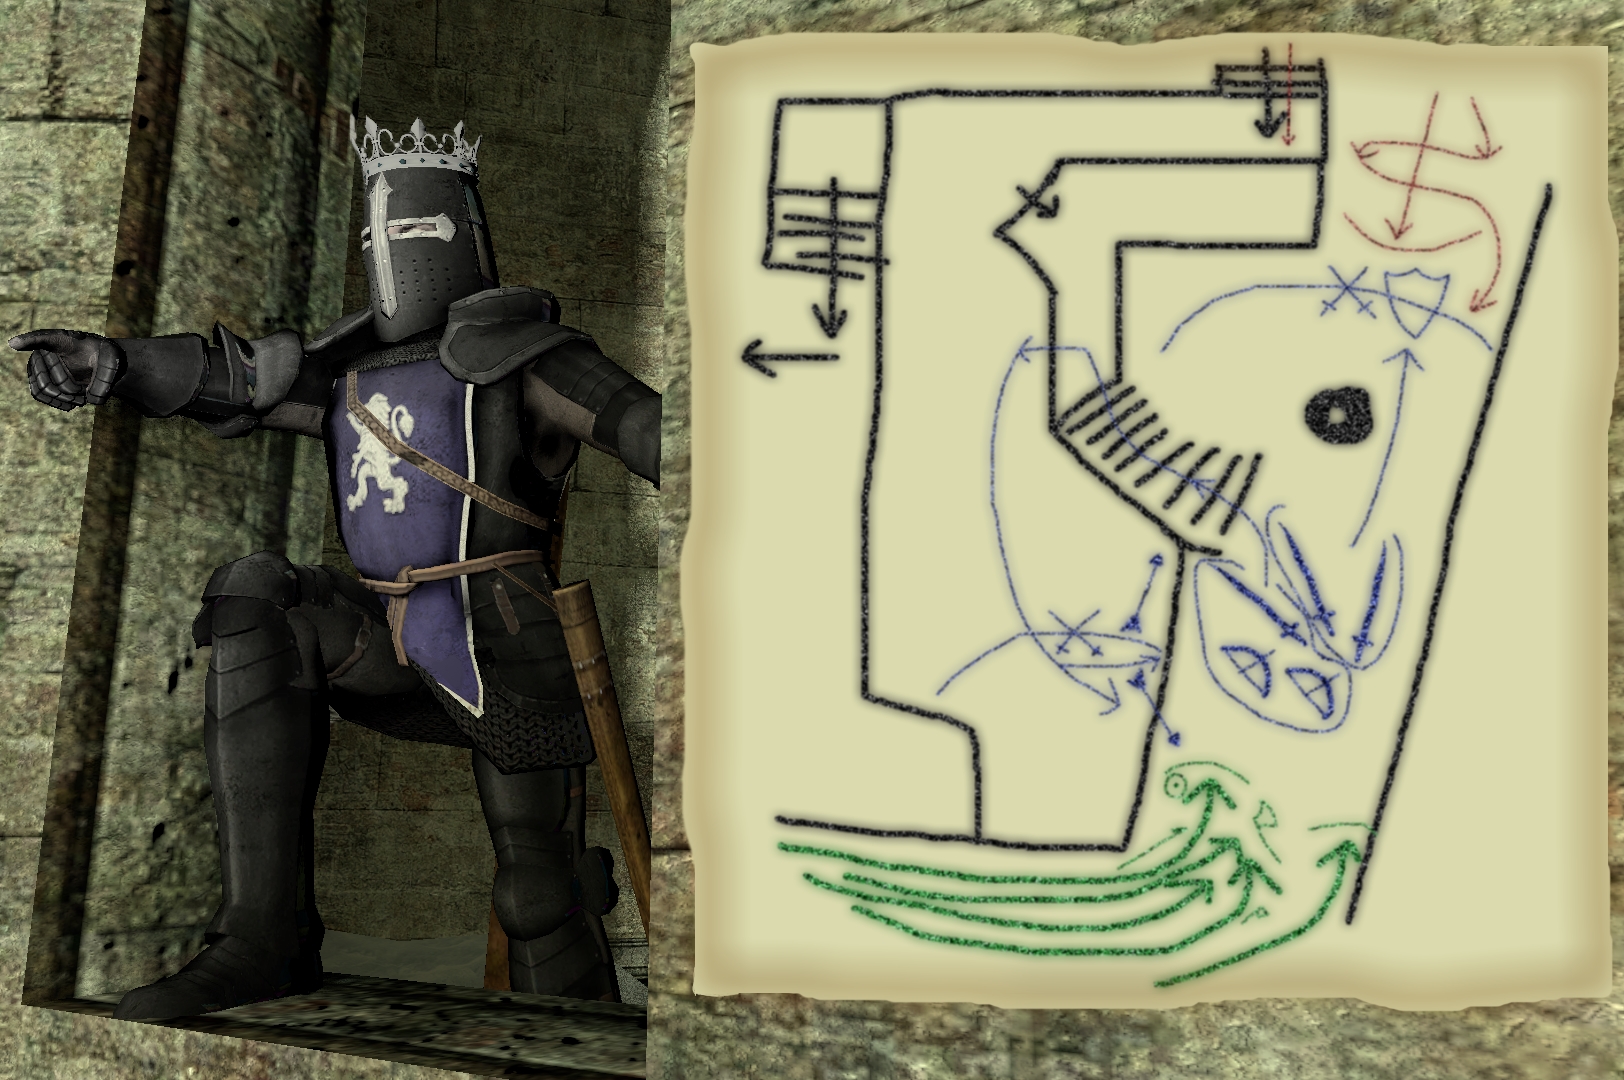
When a Gestir switches from his shield to his spear, you should be as close as possible and ready to strike. If you can deal enough damage initially, you can deal enough damage to finish him off in the ensuing scuffle, especially if you hit him with a pistol shot at the start, and finish him off with another.

As a Captain, straight-up out-damage him. Parrying is effective, baiting is not. Be wary, he can quickly work up a special if you let him. Use the Blunderbuss to shorten the fight.
好笑 16 Aug, 2016 @ 4:29am 
This guide is really helpfull, even though a lot of people already knew most of the "tactics" in it,
and while it's very amazing for new players,

I played this game for 800 hours and i still have no idea how to deal with amazing gestir players.

Unless im a MaA and can use the range of my halberd better than them, or just use the movement and shield against them, i can never beat a good gestir as a pirate.

They always outrange me, and do insane damage to me before i can approach them for a hit.
I always try to first parry someone to see if he knows or not, and if he doesn't he usually gets destroyed.

Though still, even if i bait them or dodge, i have no time to close the range and swing before they can hit me again.

Any tips? I tried using the pistol as skirmy lately, and they switch to shield, so i get close
but i can do usually one or 3 hits before they can start all over again.