Gravity Circuit

Gravity Circuit

99 ratings
Achievements, Items, and NPC Locations Guide
By duckfist
This covers obtaining every achievement in the game, including the locations of all robot NPCs and upgrades with screenshots for everything. I also share some of my favorite strategies to make things easier for you.
8
2
   
Award
Favorite
Favorited
Unfavorite
Introduction
If you're just here for locations of upgrades or the robot NPCs, scroll to the bottom and look at the HEROIC RESCUE achievement.

Note that everything can be done on Easy mode, including the New Game+ playthrough and the achievements requiring other restrictions.

Also, this is my first real guide on Steam, please let me know how I can improve it in the comments.

Playthroughs
For all achievements, you'll need to complete multiple playthroughs, because along with New Game+, some achievements require collectables that other achievements ban. However, you can combine these restrictions to get several in one playthrough, and it's not too tough.

  • First playthrough: New Game, find as much stuff as you want, and you can finish collecting everything in New Game+. You can get all achievements except the ones that I am about to list on this file alone. Don't worry about "missing anything" on this file.
  • Second playthrough: New Game+ for MISSION - ALL OVER AGAIN!.
  • Third playthrough: Circuit Mode for CIRCUIT STYLE FINISH!. This mode just means that you can Burst when out of energy, and it will instead consume 3 HP.
  • In your Circuit Mode run, if you also avoid collecting any burst energy upgrades (ALREADY ENERGETIC!), health upgrades (ALREADY HEALTHY!), or purchasing any additional enhancement chips (ALMOST CHIPLESS!) or burst techniques (ALMOST TECHNIQUELESS!), you only need these three playthroughs.
  • I can confirm that you unlock all 5 of these achievements at once after the game credits screen on Circuit Mode. The only truly challenging part was the final boss, which required me learning his pattern a bit more in-depth.

Tips
If you're struggling just getting through levels, besides enabling Easy Mode, collecting the optional equipment and unlocks will help you out considerably. The game doesn't tell you this up front, but on each of the 8 Rebel Circuit stages, in addition to the hidden NPCs, there is a permanent health or energy upgrade to find. See the following achievements for details:

  • HEROIC RESCUE! to find all the NPCs.
  • TRULY HEALTHY! to find all 4 of the health upgrades
  • TRULY ENERGETIC! to find all 4 of the energy upgrades.

Also, kill as many enemies as possible to get their Data Chip drops - you'll need one for each type of enemy. This is random, and it can be confusing which ones you missed later. Kill as much as you can every time you play to reduce the frustration around collecting these. You'll also get lots of cash this way for spending on Bursts and Enhancement Chips.

Recommended Burst Techniques
Defeating bosses will unlock new Burst Techniques at N's shop.
  • Screen Interrupt: Beat Highway stage to unlock. This automatically hits up to like 8 enemies on screen. Although, the fewer targets, the more damage it does. A great panic button, but it doesn't do as much damage as other techs.
  • Gravity Dash: Beat Highway stage to unlock. Hold a direction after activating, and you'll dash a decent distance in that direction while invincible. This is helpful to force your way out of a difficult situation, or skip certain platforming sections as a sort of triple-jump (and set the controls for this one to Up+Burst for Smash Bros. vibes).
  • Emergency Heal: Beat Junkyard stage to unlock. Obviously a backup heal is nice. This restores 2-4 bars of health, depending on which difficulty you're playing on, and increased by 1 if you equip the Repair Enhancer chip. There are other good energy-related Enhancement Chips (see below) to synergize with and improve your healing.
  • Current Arc: Beat Power Plant stage to unlock. This shoots like 12 projectiles in a fan pattern. It does a ton of damage against some enemies when fired point-blank, like the boss Crystal Circuit.
  • Heavenly Piledrive: Available from the start. Not only is the damage against bosses decent, you can actually grab their stunned corpse after hitting them with another Burst like Flying Strike. This combo seems to work on most Rebel Circuits.

There are several other decent Bursts, but those stood out the most to me.

Recommended Enhancement Chips
All chips are available to purchase at the start of the game at the Nurse. However, in addition to currency, you'll need Rescue Tokens to purchase these, which are awarded one for each NPC you rescue. Buy the following as soon as possible:
  • Air Jumper for 8 tokens and 2000 coins. A double-jump isn't required to beat the game, but it makes movement significantly easier, reducing your dependence on the Hookshot and dampening some trickier elements of the levels' designs.
  • Energy Absorber is the one given to you for free by the Nurse. This stays useful throughout the entire game, letting you depend on Bursts more. Combine with Energy Multiplier for even more, or Overflow Converter to essentially let you heal while attacking.
  • Power Extender and Frame Amplifier are nice melee passives that are always helpful; the increased melee range and speed are pretty significant.

If you have other good Chip or Burst recommendations, please leave a comment! I did not play with all of these equally and probably missed some good ones or synergies.
Number of Uses/Kills Achievements
Most of these will unlock while you play normally, but for like 250 enemy overkills, try to integrate this into your gameplay until it unlocks so you don't have to do it deliberately later.

CHUCK 'EM!'
Defeat 50 enemies with thrown objects. Look at them go!


PUGILIST!
Defeat 100 enemies in combat. Show them what you got!


FIGHTER!
Defeat 250 enemies in combat. Put some fear into them!


WARRIOR!
Defeat 1000 enemies in combat. Assert your dominance!


This should happen when going for 100% on your first file, or on New Game+.


BLAST 'EM!
Defeat 100 enemies with thrown objects. Send them to the moon!


As you play through the game, remember to use the Hookshot to grab projectiles or damaged enemies, and release the button to throw it into other enemies.
This is also very powerful in general, so work it into your playstyle.


RED-TINTED BEAT DOWN!
Overkill 250 enemies. No mercy!


"Overkill" enemies that you kill by continuing to punch their gray (stunned/hookshot-able) corpse until they turn red and explode.
There's not much else of a use for overkilling other than to get more energy if you have Energy Absorber equipped.


BURST THEM!
Use Burst Techniques 100 times. Energetic strikes!


This should happen naturally, likely by the time you complete the game, depending on your playstyle.


RETURN THE GIFT!
Grab an enemy's shield and throw it 10 times. Thank their generosity!


Grab and throw the shield of a Shielded Soldier 10 times. You'll have to grab the shield with the Hookshot as it bounces away.
You can find one near the beginning of the Warehouse Area stage.
Quickly respawn the enemy by scrolling the screen left a bit, and then returning.
NPC Interaction Achievements
SHOOT THE HOOP!
Score a goal with the training ball. Nice shot!


HOOP EXPERT!
Score ten points with the training ball in a row without touching the rim. Nice shooting!

  • At HQ, talk to K.I.D to get him to drop a ball. (See HEROIC RESCUE! achievement for the extra NPC locations.)
  • There is a sort of basketball hoop on the right side of the room. The idea is to grab the ball with the Hookshot and put it through the top of the hoop in the exact center. It will not count if it touches the side (it will make an obvious sound and a "hit" animation if so).
  • Activate the Air Jumper chip, grab the ball, stand directly beneath the net, double jump and throw the ball straight down - easy.
  • Do this 10 times and the achievement will unlock.


TAKE A BREATHER!
Rest with Fix for a while and contemplate things. Very comfy!


Back at HQ, stand by the sofa and press the Burst button to earn this achievement. Also, stay seated for a few seconds to receive Fix's data chip.


BARK BARK?
Rescue Yuki and Amadeus. Who are they, and why are they so cute?

  • Yuki can be found in the Mountains, immediately to the left of spawn.
  • Amadeus can be found in City Center, about halfway through the level (see HEROIC RESCUE! near the end of this guide for all NPC locations).


BARK BARK!
Pet Yuki or Amadeus. Even a hero has a soft side!


At HQ, pet either of the dog NPCs by pressing the Burst button while standing near them.
Boss & Stage Challenge Achievements
RETURN TO OWNER!
Throw any object spawned by a boss back at them. That'll show em!


This is easily done on Trace, the boss of the Junkyard stage.


FLASHY FINISH!
Defeat any boss, using a burst technique to finish them off. Put on a show!


Simply watch the boss's health meter, have some extra energy, and spam a damaging burst to end the fight.


OBJECTIVE: SURVIVE!
Survive the Burst Technique of any boss ten times in one fight. Slip by!

  • If this doesn't occur during your normal playthrough, simply don't kill a boss for a while and allow it to do its Burst pattern at least 10 times.
  • Consider doing it on the same boss you use for PERFECT FINISH! to leverage your knowledge of the boss's patterns.
  • You must defeat the boss to get the achievement, so try to keep count of the number of Bursts it does before you kill it.
  • It make it easier, equip healing and damage reduction chips, and recharge at the save point before your attempt.
  • UPDATE: This might be easier on Crystal Circuit (Ark - Machinery stage), as the burst techniques from all 8 Rebel Circuits might add up...?


SIMPLE FINISH!
Defeat any boss without using a Burst Technique. Teach them the basics!


SIMPLE CLEAR!
Clear any stage without using a Burst Technique. Strong fundamentals!


Self-explanitory, just avoid pressing your Burst button. Consider doing this on the stage you learn for FLAWLESS CLEAR! since you will be an expert at it.


PERFECT FINISH!
Defeat any boss without taking damage. Clean fight!

  • If you get hit, press start, left, then select the first option "Reload Last Checkpoint" to quickly retry the boss.
  • If you are struggling, consider waiting until you've unlocked some energy upgrades, and a good easy Burst like Screen Interrupt.
  • Study the boss's patterns a few times. Note that there are usually 2 phases, the second activating when it is below 50% HP. Reset to the checkpoint before killing it.
  • When you're ready for attempts, use a Burst that knocks the boss back, then punch it a few more times during the knockback to maximize the amount of damage before the boss becomes invulnerable.
  • Then back up, dodge until it is vulnerable again, then Burst again.
  • Good chips to use are Air Jumper, Power Extender, and Light Alloy. You can also use chips that give you Burst Energy, like Energy Absorber or Energy Multiplier, to squeeze in an extra Burst Technique in the fight.
  • I did this on Cable, the boss of the Power Plant stage, who isn't too tough.


FLAWLESS CLEAR!
Clear any stage without taking damage. Truly untouchable.

  • You need to complete an entire stage without taking damage, including the boss.
  • I did only the stage damageless twice on Ore Mines and did not get the achievement.
  • I did it again on Steelworks, cleared the boss, and the achievement dropped on the stage complete screen.

    UPDATE: I think this works on the Intro stage, which is much, much easier. You can select it on the Mission Select screen by selecting "Central Station" in the top-middle. Do that!

  • Abuse the Hookshot, carrying enemies to the next enemies and throwing constantly, and sniping dangerous enemies at range.
  • Drop a Screen Interrupt if things get dicey.
  • Save up full Burst energy for the boss.


HOOKSHOT ONLY!
Clear any stage with just your trusty hookshot and throws. It's all you need!


This includes defeating the boss with only the hookshot. Take your finger off of the attack button completely!


NO TIME FOR REPAIRS!
After reaching Guardian Corps HQ, clear any stage without using a repair station. Gotta keep moving!


This is referring to pressing Up at one of the checkpoints to heal and restore energy. Simply complete a mission without doing that at all to unlock this.


NO TIME FOR SPIKES!
After reaching Guardian Corps HQ, clear any stage without taking hazard damage. Safety first!


This will happen naturally when going for FLAWLESS CLEAR!.


FASTER THAN LIGHT!
Don't get hit by a laser in Steelworks. Outrun everything!


You don't have to speedrun, as you can often trigger a laser and then cling to a wall to wait it out, but learning the stage helps a lot here. Play it through a couple times, then go for attempts.


NO GOOP FOR ME!
Don't get caught in purple goop in the Junkyard. Stay clean!


This purple "goop" is the stuff that immobilizes you, and it comes from the following 2 sources:
  • Spider enemies, which are everywhere. They shoot quickly and often from a distance. Take them out at range, such as with a thrown enemy or projectile.
  • Droppers on the ceiling. These can't be defeated, and will drop the goop at regular intervals - stop and wait for when it's safe to move. They also have no hitbox, so you can safely touch them and pass through them.
  • The achievement will unlock when you enter the boss room (you do not need to defeat the boss).


NO ROBOT CREAM!
Don't get frozen in Mountains. Stay warm!


You must reach the end of the stage while avoiding any source of damage that causes you to get frozen. This includes these 4 enemies:
  • Ice sphere projectiles fired from the small "Dust Man" enemies. These guys tend to aim and shoot at you quickly from a long range. Rush up to them and hit them right away to interrupt them.
  • The cold smoke emitted by the wall proximity sensors. These can be really annoying near the end of the stage. Move by them quickly. Note that the enemies themselves do not have a hitbox, so you don't need to worry about touching them and taking damage while climbing - just go.
  • The ice crystals fired by the 2-way shooting mounted turrets. Also very annoying; be aware of their diagonal trajectories and take them out at range (Screen Interrupt is very good).
  • The ice crystals shot by the 3-way shooting floating propellor enemies. Just don't linger beneath these guys and move past them quickly.
The hardest part is definitely the final climb near the end, which has both the wall-mounted smoke shooters, and the 2-way turrets. I recommend doing a trial run to plan your route before doing it for real from the beginning.

The achievement will unlock when you enter the boss room (you do not need to defeat the boss).
Boss & Stage Challenge Achievements part 2
SHOCK HOPPER!
Don't get hit by electified surfaces in Power Plant. Bzzzt!

  • Reach the end of the Power Plant stage without taking damage from any electrified surface.
  • The more difficult part is in the middle of the stage with the fast moving pattern of vertical lasers that electrify the platforms beneath them, forcing you to carefully stay within the safe region of platforms as you proceed.
  • You can skip the precise back-and-forth climb at the end by holding Up and spamming Gravity Dash.
  • Equip double-jump, and move carefully and deliberately.
  • You must restart the level if you touch any electrified platform.


WATCH THE SIGNS!
Don't touch any road signs in Highway. Roam carefully!

  • Clear the Highway stage without ever getting hit by the green signs that fly by.
  • They always appear at the same vertical position, indicated by the flashing green indicator at the right side of the screen just before they appear.
  • These don't respawn, so simply move forward carefully, and when a warning indicator appears, back up, make sure you're not near the vertical position where it can hit you.
  • You do not need to defeat the boss.


PROTECT YOUR EARS!
Don't get hit by the sound waves emitted by Medley's giant speakers in City Center. Enjoy the silence!


As it says, complete the City Center stage while avoiding the damage caused by this particular hazard:


MECH A NEW FRIEND!
Don't let your mech get destroyed in Ore Mines. Safety first!

  • There are 2 mech armors in this stage to ride.
  • Proceed slowly, and abuse the long-ranged attack by pressing the Hookshot button to make things easier.
  • In particular, avoid touching the big Crush Jumper enemies, which do a ton of damage, and avoid the ceiling debris caused by their jumping.
  • This didn't unlock for me the first couple of times, even though I thought I had kept the mech alive. In the successful attempt, I did not take either of the alternate routes with the mech. Note that you have to leave the mech behind in both instances:
  • First mech: Take the top route at the end, leaving the mech to slide through the gap.
  • Second mech: At the very end, leave the mech in front of the boss gate; do not drop down into the hole.


NO JOKING AROUND!
Punish Hash for laughing at you in Cyberspace.


When the boss is laughing, deal pretty much any form of damage to knock them down. You will probably get this on the first try without realizing it!


BURST DODGER!
Avoid all of N's Burst Techniques. Move like a ninja!

  • This refers to the boss of Ark - Entrance (the 1st Ark stage).
  • It is a 3-phase fight; I believe it only uses Bursts during the 2nd and 3rd phases.
  • Practice, equip Air Jumper, and use your own Bursts often to end the fight asap. He is vulnerable quite often and can easily be knocked back.
  • Select "Restart from Last Checkpoint" in the menu if you get hit by any of his bursts.


CIRCUIT MASTER!
Defeat Circuit Crystal in one go without retries. Show who's the boss!

  • This refers to the boss of Ark - Machinery (the 2nd Ark stage).
  • Normally if you die during the fight, you do not have to start the fight from the beginning - the Rebel Circuits you've already defeated remain defeated. To get this achievement, simply don't die.
  • Unfortunately, even if you manually "Reload from Last Checkpoint", the Rebel Circuit simulations remain defeated, so you will need to restart from the beginning of the level to attempt the achievement again!
  • Equip Energy Multiplier, Energy Absorber, and Repair Enhancer Chips, and the Emergency Heal Burst to greatly improve your survivability.
  • You get a free health drop after every Rebel Circuit simulation you defeat, plus a good chunk of energy, so manage these two resources along with your Emergency Heal so that nothing goes to waste.


HANDS OFF!
Avoid Kernel's grab attack. No touching!


Like before, practice, equip Air Jumper, and dump all of your bursts to end the fight quickly to make it easier. You can use Flying Strike followed by Heavenly Drive for big damage.


AVOID THE HANDS!
Don't get crushed under Commander Circuit's hands. No slamming!


This will just take practice, but it's easy to identify the pattern. Just don't forget to reset to last checkpoint if you fail.
Game Completion Achievements
MISSION - ALL DONE?
Defeat the Rebel Circuits. Is it finally over?


Get this by beating the 8 primary missions and defeating all 8 of the Rebel Circuit bosses at the end of each. No, it's not over.


MISSION - ALL OVER!
Complete the game. Finally, peace.


GG


EVERYONE IS HERE!
Have everyone you have helped show up during the game's ending cinematic. Touching reunion!

  • Just re-select the final stage and defeat the final boss on your first file again, after finishing most of the collection achievements.
  • I'm not sure of the exact condition for this - I think you need to find all NPCs, and maybe all of their Data Chips as well. It'll happen after you've unlocked everything on your file, at the very least.
  • The achievement pops during the cutscene right after defeating the final boss.


MISSION - ALL OVER, AGAIN!
Complete the game in New Game+ mode. Time for another round?

  • This option appears on the file select screen after you have beaten the game at least once.
  • You'll start a new game and can choose a new difficulty, but keep all chips, techs, upgrades, and NPCs found.
  • It doesn't seem like there is anything otherwise different in this playthrough. Just beat the game again.


CIRCUIT STYLE FINISH!
Complete the game in Circuit Mode. Great job!

  • After having completed the game at least once on another file, this mode becomes available to choose from after selecting "New Game".
  • From what I can tell, the only difference between this and a normal game is that you can use your Burst Techniques even if you have no energy, and it will instead consume 3 HP.
  • I got this achievement in my 3rd playthrough, in combination with the following 4 achievements.
  • They all unlocked simultaneously on the "Game Clear" screen after defeating the final boss.


ALREADY HEALTHY!
Clear the game without collecting any Health Upgrades. Already in shape!


ALREADY ENERGETIC!
Clear the game without collecting any Burst Upgrades. Got enough energy!


ALMOST CHIPLESS!
Clear the game without purchasing additional Booster Chips. Don't need any more!


The Nurse cannot be avoided at the beginning of the game; you will always receive the Energy Absorber chip. It is okay to leave this equipped, you'll still receive this achievement. Just don't buy anything else.


ALMOST TECHNIQUELESS!
Clear the game without purchasing additional Burst Techniques. You only need one!


You will always receive Flying Strike for free during the intro stage. Feel free to use it throughout the run, the achievement will still unlock - just don't buy anything.


It's not too tough to do all 4 of these at once, play on Easy Mode if you need to. You'll have to get used to not having Air Jumper, for one. Use your Hookshot more. The hardest part will be the final boss - learn to dodge the hand slams, and on the final phase, quickly grab and throw each enemy that spawns to win.
Collection Achievements
TECHNIQUE PRACTITIONER!
Learn every Burst Technique in the game. Master of combat!

  • Burst Techniques can be purchased from N, and later from the Nurse.
  • More techs become available as you complete missions; once you complete the 8 base missions (defeating the 8 Rebel Circuit bosses), everything is available for purchase.
Burst Technique
Cost
Unlock Condition
Flying Strike
-
Purchased by default
Rising Upper
2000
Available from the start
Heavenly Piledrive
2000
Available from the start
Catch Interrupt
1500
Available from the start
Function Overload
2000
Beat Steelworks
Erupting Beam
1500
Beat Steelworks
Emergency Heal
1500
Beat Junkyard
Hardware Barrier
1500
Beat Junkyard
Gravity Freeze
1000
Beat Mountains
Support Platform
1500
Beat Mountains
Current Arc
1500
Beat Power Plant
Burst Spark
1500
Beat Power Plant
Gravity Dash
1500
Beat Highway
Screen Interrupt
1500
Beat Highway
Cycle Kick
2000
Beat City Center
Surface Render
2000
Beat City Center
Piercing Drill
1500
Beat Ore Mines
Distant Detonation
1500
Beat Ore Mines
Hologram Trap
1500
Beat Warehouse Area
Clone Array
2000
Beat Warehouse Area


CHIP COLLECTOR!
Purchase every Booster Chip in the game. One for every occasion!


All Enhancement (or is it "Booster"?) Chips are available to purchase at the start of the game at the Nurse. However, in addition to currency, you'll need Rescue Tokens to purchase these, which are awarded one for each NPC you rescue.

Name
Tokens
Coins
Description
Energy Absorber
-
-
Attacking and overkilling enemies restores energy
Air Jumper
8
2000
Double jump
Grip Enhancer
2
1000
Cling to walls
Light Alloy
3
1000
Float
Dodge Slider
3
1000
Invulnerable while sliding
Frame Amplifier
5
1500
Attack speed increased
Speed Basher
3
2000
Damaging shield while running
Chain Dasher
3
2000
Hookshot on non-stunned enemies to grapple towards them
Underflow Guard
3
1250
Prevent death when HP > 1
Surge Protector
2
1000
Damage from hazards decreased
Catch Block
4
1500
Prevent knockback
Emergency Accumulator
3
1250
Damage from enemies reduces energy first
Nullifying Layer
4
2000
Damage from enemies decreased
Magnet Chassis
1
1000
Pickup nearby objects
Power Extender
4
1000
Attack range increased
Chain Booster
5
2000
Hookshot attack and knockback increased
Energy Multiplier
3
1250
Energy gain increased
Overflow Converrter
3
1000
Energy gained overflows into HP
Protection Timer
3
1500
Damage I-frames increased
Repair Enhancer
2
750
Reduce repair cost, increased HP recovery


DATA HOARDER!
Collect and research all Data Chips. Very studious!


This can take a while. There are three categories of chips:
  • Enemies (45). The chips seem to drop randomly when you kill enemies. Even if you kill everything on your playthrough, you will probably not get all of the chips without replaying the stages.
  • Bosses (13). These will drop from a boss when you defeat them for the first time. Make sure to grab it quickly, before automatically exiting the level, or you'll need to replay the stage.
  • Characters (22). These will drop by each NPC after exhausting all of their dialog. Some won't drop until near the end of the game after certain story events play out. You must sit on the bench for a while to get Fix to drop their chip.
Keep your first playthrough file and hopefully you can make a good dent in this one as you complete the other achievements for the first file.[/list]

TODO I may update this guide with more details of the locations of each - in particular, the enemies, since the game doesn't make clear where to find the enemies you are missing.


TRULY ENERGETIC
Collect all burst energy upgrades! Keep your fists powered up!


TRULY HEALTHY!
Collect all health ugprades! Keep your chassis in good shape!


See HEROIC RESCUE below, which shows the location of all of these upgrades as well as NPCs in the order that they appear on each stage.


NO BOT LEFT BEHIND!
Rescue all bots in need of help in any stage. Help them out!


This is a subset of the next achievement.
HEROIC RESCUE! Achievement
HEROIC RESCUE!
Rescue all bots in need of help. Lend a helping hand!

  • The big one. Must find all 64 robot NPCs scattered throughout the 8 Rebel Circuit stages (8 on each).
  • The game keeps track of these on the Mission Select screen, in the order that they appear on stage, which you can use to tell roughly where you need to be looking to find one.
  • I've created a list of all of them with descriptions and screenshots of where to find them, along with all of the energy and health ugprades. Please leave a comment below if I have missed anything.

Level Name
Boss
Upgrade
Key NPCs
Steelworks
Ray - Optic Circuit
Health
Fix
Junkyard
Trace - Patch Circuit
Health
Shock
Mountains
Blade - Cooler Circuit
Health
Yuki
Power Plant
Cable - Power Circuit
Energy
Prim
Highway
Bit - Shift Circuit
Energy
K.I.D
City Center
Medley - Wave Circuit
Health
Amadeus
Ore Mines
Crash - Break Circuit
Energy
Mighty
Warehouse Area
Hash - Cipher Circuit
Energy
Tech

1. Steelworks
  • NPC 1: Not far from the beginning, there is a destroyable wall on the left after riding some platforms that descend into lava. Will need to Hookshot across more lava to reach the NPC.


  • NPC 2: At the end of the first checkpoint room, you can destroy the ceiling and go upward.


  • NPC 3: About halfway through the beam section, you'll pass by this NPC on the left.


  • NPC 4: Past the second checkpoint, you'll spot this NPC after the moving platforms and lasers section. Destroy the wall to their right to access them.


  • NPC 5: Just after the previous NPC, ride the moving platforms upwards where there is no ceiling to find the next NPC. You'll need to crouch while on the platform to avoid the spikes.


  • HEALTH UPGRADE: Immediately after the third checkpoint, you can break the floor.


  • NPC 6: Climbing the shaft after the health upgarde, you'll see this NPC between the laser sections.


  • NPC 7: In the section with the fast moving vertical platforms with spikes, laser, and lava (yikes), break the wall in the bottom-right corner.


  • NPC 8: Next to the boss gate, you can break the wall in the top-right to access another area.

2. Junkyard
  • HEALTH UPGRADE: At the end of the first room, destroy the wall on the right. In the next area, jump and hookshot the middle of the ceiling in between the slime dispensers, and swing from there.


  • NPC 1: Just after the health upgrade, break the wall to the left after dropping into the trash pit.


  • NPC 2: Proceeding right, you'll see the second NPC near the top of the screen. Bait the crane and then wall-climb up.


  • NPC 3: On the next screen, destroy the wall on the left.


  • NPC 4: On the following screen, after the treasure chest and before the long hookshot section, destroy the ceilling here.


  • NPC 5: Dropping down from that room, you'll see this NPC behind some boxes next to the drop through the pressers.


  • NPC 6: After the miniboss and checkpoint, this NPC is near the top of the screen.


  • NPC 7: At the end of the same room, destroy the wall on the rigth before dropping.


  • NPC 8: In the final room before the boss door, the NPC will be visible on the upper path, where you'll have to destroy the wall to its left.

3. Mountain
  • NPC 1 (Yuki): Destroy the wall to the left of your spawn point.


  • NPC 2: Much later, after the long wall-jumping section with the ice geysers, destroy the wall to the left here.


  • NPC 3: In the following room, you'll see the NPC above the platforms and spikes.


  • NPC 4: Shortly after, the next NPC will be above some fans blowing upward. Jump at an angle like this to dodge the spikes and reach them.


  • HEALTH UPGRADE: At the top of the same room, destroy the wall to the left. What follows is a tricky platforming section - dive kick downwards from enemy to enemy to make it across. Make sure to activate the dive kicks relatively low, to prevent bouncing too high right into the spikes. This may take a few tries.


  • NPC 5: Immediately on the next screen, you'll spot this guy near the bottom next to the fan.


  • NPC 6: After the second savepoint, destroy this wall to find a path leading upward.


  • NPC 7: The next NPC is visible near this downwards-blowing fan.


  • NPC 8: On the final screen, you'll spot these floating platforms in the corner. Grab one from below using the hookshot to pull it down so that you can climb up.


HEROIC RESCUE! Achievement part 2
4. Power Plant
  • NPC 1: To the left of the first save point, break the boxes to reach a new room.


  • NPC 2: After the second save point, slide beneath this gap on the bottom-right and destroy the narrow wall.


  • NPC 3: Not long after, you'll see this one in plain sight near the top of the screen that you can hookshot to.


  • NPC 4 (Prim): Further down, this one is also visible at the top of the screen. Press the button, and then quickly hookshot upwards near some spikes and slide to reach them.


  • NPC 5: You'll reach an obvious split of continuing right or upward. Go up to find the NPC.


  • NPC 6: After the hazardous climb with all the lasers, break the wall to the right here.


  • NPC 7: Shortly after, this NPC is plainly visible in the center. Break the right wall.


  • ENERGY UPGRADE: And again immediately after, there is a breakable wall to your right. Hookshot across for the upgrade.


  • NPC 8: At the top of the tricky back-and-forth jumping near the end, break the wall on the left here.


5. Highway
  • NPC 1 (K.I.D): After the vehicle you stand on takes off, go left to find the first NPC.


  • NPC 2: Just a few platforms away to the right, the next NPC is a bit lower on the screen.


  • NPC 3: A few cars down, after the green hazardous platforms zip by, you can wall jump up a few cars toward the top of the screen. The NPC will be on your left.


  • ENERGY UPGRADE: Right after the first checkpoint, you can spot some cars above you here. Use the hookshot and wall-jumping (or double-jumping) to reach the top, with the upgrade on your left.


  • NPC 4: A few more cars down, this NPC is along the bottom of the screen. You can either ride the platform from the next car to reach her, but you can also make it with some tight hookshots (or a double-jump).


  • NPC 5: After riding the moving platform right and dodging a few missiles, you'll spot the next NPC above you, and you'll have to quickly jump off to make it.


  • NPC 6: Riding this next moving platform, you'll glimpse the next NPC at the top-right that you'll have to jump off to.


  • NPC 7: After fighting the helicopter miniboss for the second time and riding another platform, climb one of the trucks to the top of the screen and go left for this NPC.


  • NPC 8: The last NPC is not far to the right, but at the bottom of the screen.


6. City Center
  • NPC 1: The first guy is plainly visible on the right while climbing the first section.


  • NPC 2: At the top of this room, break the wall on the left.


  • NPC 3: The next guy is also plainly on the left this time. Hookshot to reach.


  • NPC 4: At the very top of the same room, break the wall on the right.


  • NPC 5: The next is visible in the center of the screen while climbing.


  • NPC 6 (Amadeus): Further up after bouncing on many springs, break the wall on the left side before reaching the top.


  • HEALTH UPGRADE: Soon after, you'll reach an outside area. The hole in the ground doesn't damage you, it leads to the upgrade.


  • NPC 7: In the next area, this guy is plainly visible on the right. Ride the blue platform to reach him.


  • NPC 8: During the long speaker climb near the end, the last one is plainly visible on the right. Do some wall jumping to reach them.


7. Ore Mines
  • NPC 1: At the end of the first room, break the wall on the right.


  • NPC 2: A bit below the previous wall is another breakable wall on the right on the way down.


  • NPC 3: Keep the first rideable mech alive until the end of the section, then ride it across the spikes on the bottom path to reach the NPC.


  • NPC 4: When climbing the conveyor section with the falling blocks, break the ceiling in the upper-left.


  • NPC 5: After the second save point and hookshot section, climb up this gap in the ceiling by wall jumping off of the falling block (or double-jump).


  • ENERGY UPGRADE: When you reach the large array of breakable blocks, break the ceiling here. Complete the challenging breakable wall and spike room to receive the upgrade.


  • NPC 6: The next NPC is plainly visible on the right behind breakable blocks.


  • NPC 7 (Mighty): After getting the second mech armor, break these boxes on the left while decending to the final section. You only have one chance to make the jump, or else you need to checkpoint reset.


    NPC 8: At the very end just before the boss door, drop down in the pit for the last NPC.
HEROIC RESCUE! Achievement part 3
8. Warehouse Area
  • NPC 1: After taking the first portal, simply go left first to find them.


  • NPC 2: At the far right of that same room, re-active the red switch with your Hookshot and climb up here.


  • NPC 3: At the start of the blue block section, hit the second blue switch to remove the spikes from the bottom-right corner. Go down for the NPC.


  • ENERGY UPGRADE Just before the exit portal, there is a passage through the spikes below when crossing the gap.


  • NPC 4 (Tech): Bottom-Left portal: This one is plainly visible in the center as you descend. Hit the red switch and climb back up to grab him.


  • NPC 5: Bottom-Right portal: Just before the exit, break the wall on the right.


  • NPC 6: Top-Left portal: This guy is plainly visible in the center, hanigng from the ceiling here.


  • NPC 7: Top-Right portal: Swing past the exit key to find them.


  • NPC 8: When you emerge from the final exit portal, break the wall to the left here.
Misc Achievements
HEY, THAT'S FRAGILE!
Pay for the damages caused. It's only right.

  • At HQ, near the Nurse and Medic NPC, strike the yellow tube 4 times and the achievement will unlock.
  • This will cost you 100 coins!


FULL CLEAR!
Complete all of the game's other achievements. Skillful!


GG

33 Comments
ElectricAxel 20 Apr @ 5:36pm 
Do you know if I can get a paint job on my run with no health / energy / chips / bursts?
Ruhenot 13 Apr @ 7:35am 
Energy Upgrade for Highway is marked wrong. Its after the second checkpoint..
Syragar 11 Mar @ 1:22pm 
@BLJ2Neptune It doesn't matter if you hit the tank in the medical room. I got the "HEY! THAT'S FRAGILE!" achievement and "EVERYONE IS HERE" achievement on the same file. I wasn't sure what the requirements were until after I finished the game and came here.

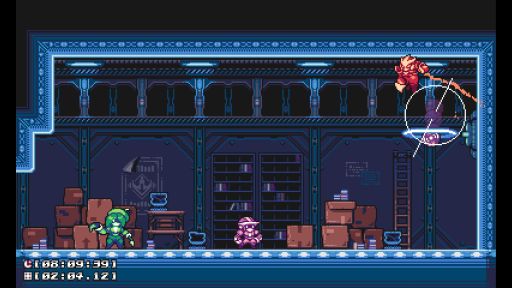
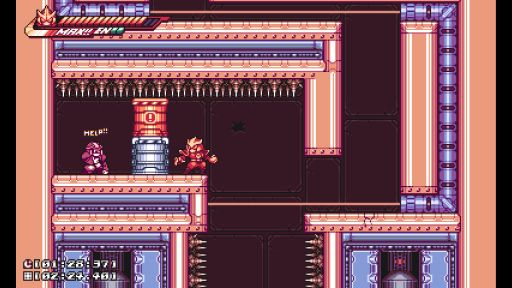
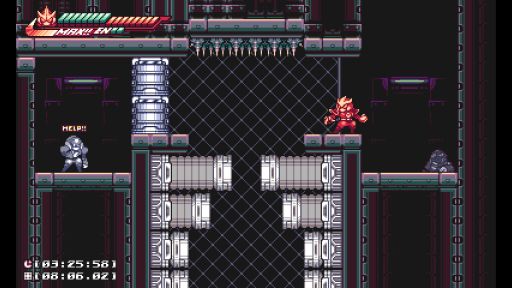
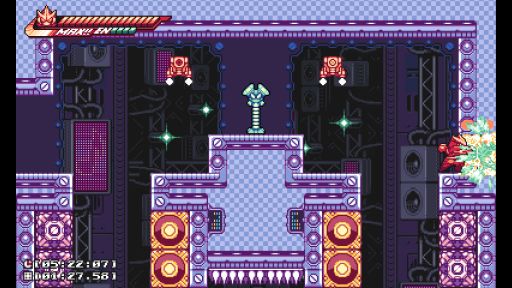
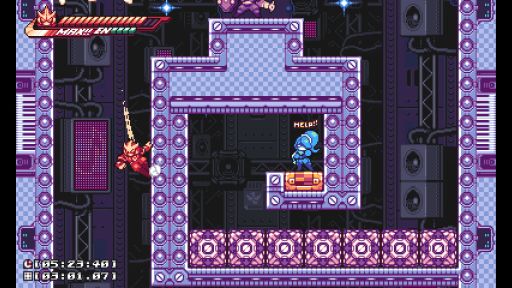
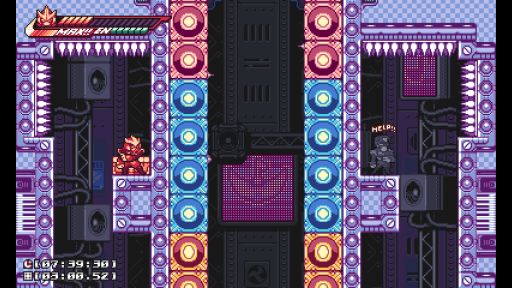
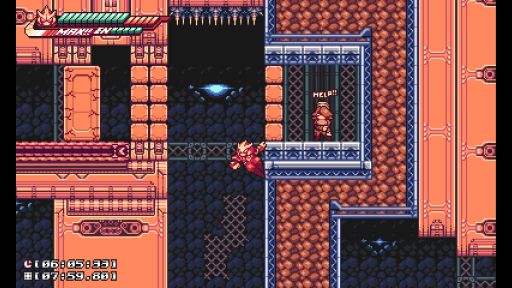
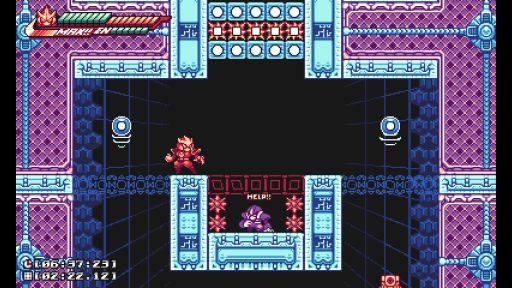
I broke the glass in the med bay, got all upgrades and boosters, rescued all NPCs, but was missing 3 NPC research chips... yet still managed to get the achievement. According to @DomAnt you don't need all of the research chips... only 73 or more.
BLJ2Neptune 8 Mar @ 8:40am 
Someone said that for the EVERYONE IS HERE achievement, you can't get it if you hit the medical tank inside the medical room. Would completing the new game plus be a workaround for this, or do I have to go and recollect every robot I rescued in a different save file?
PLMMJ 4 Mar @ 7:04pm 
The first NPC in the Highway stage is definitely not K.I.D, I rescued everyone but the first guy in my first clear of the level and he appeared.
ishisahh 2 Oct, 2024 @ 6:17pm 
guia bão
DUWANG 18 Sep, 2024 @ 10:37pm 
Note that you can use Hardware Barrier to negate hits taken and still get "FLAWLESS CLEAR!".
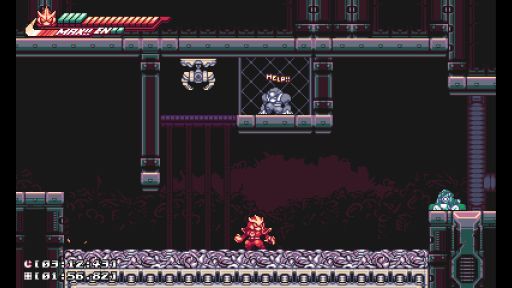
Also, the post below saying that you can't get "EVERYONE IS HERE!" if you break the medical tube is wrong.
Zolbrod 6 Aug, 2024 @ 6:23am 
One quick note for the FLAWLESS CLEAR achievement: if you're playing in Circuit Mode, damage taken by using a Burst attack does NOT count, so you can still get Flawless while abusing Burst moves.
Doggo Loko 27 May, 2024 @ 2:22pm 
if a rescue all the bots, do the upgrade they give prevent me to get "ALREADY HEALTHY!" and "ALREADY ENERGETIC!" ?
Aperture Science Prototype XR7 16 May, 2024 @ 6:05pm 
my personal favorite enhancement chip is speed basher. it's not really *that* useful as an attack (though it does allow the player to sprint through the goop from the patch circuit's stage), but it's useful as a safety cap to prevent the player from sprinting or sliding right into an enemy or destructible projectile

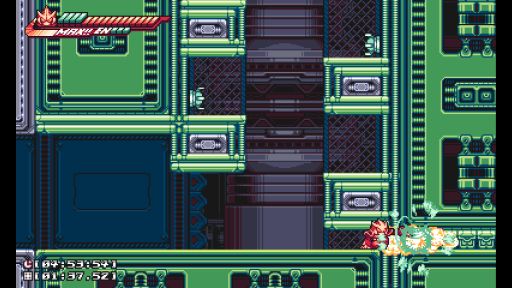
i pair it with the drift circuit's paint job