Warhammer: Vermintide 2

Warhammer: Vermintide 2

190 ratings
Complete Challenges Guide - Karak Azgaraz
By Hamdolsun
A complete guide for the challenges added to Vermintide 2 in Karak Azgaraz update.

If you want to point out a mistake or say something nice, please feel free to comment.
Hopefully this guide helps some people out.
3
2
5
8
2
2
   
Award
Favorite
Favorited
Unfavorite
Mission Of Mercy Challenges:
Vengeance
----
This challenge is completed when you complete the other map specific challenges under it.
- Difficulty Challenges
Scour The Halls:
Finish the mission on Recruit difficulty.

Scatter The Intruders:
Finish the mission on Veteran difficulty.

Drive Them Out:
Finish the mission on Champion difficulty.

No Stone Unturned:
Finish the mission on Legend difficulty.

Reclaim The Hearth:
Finish the mission on Cataclysm difficulty.
----
All of these can be completed by finishing the map on Cataclysm once.
You don't have to do every difficulty separately.
- Clear The Marks

To complete the challenge, you have to find all of the skaven markings in the map and interact with them.

Your marking locations will change depending on variations.
You need to find 10 of the markings in the same map to complete the challenge.
----> Mark 1 (Top Path)

At the start of the map, you will see one of the two doors open. If you have the top door open, you're on the top path.

After you go up the stairs, turn right. On the left wall, you will see a cave opening. Go in, the first mark is behind the crates.
----> Mark 2 (Top Path)

After you descend the stairs with the big hole in the middle, you will see a dropdown. Look behind you while dropping, you will see the second mark.
----> Mark 1 (Bottom Path)
At the start of the map, you will see one of the two doors open. If you have the bottom door open, you're on the bottom path.

After you get into the big room with lots of crates and some dead dwarves on the ground, walk towards the exit of the room. You will see the first mark on the top of the single shelf on the right. You have to go up the stairs and jump on the shelves to grab it.
----> Mark 2 (Bottom Path)
After you get out of the big room through the broken wall and see the flowing lava, turn right. You will see the second marking on the wooden door on the right wall.
----> Mark 3
After you enter the room with the Valaya statue, go to the wall behind the statue. Look behind the rock formation, you will see the third mark.
----> Mark 4 (Left Path)
Facing Valaya statue, if the left door is open you are on the left path.

After you get out of the room with food on the campfire, you will be back to the outside area. Jump over the railing to the left and look at the wall next to the portcullis. You will see the fourth mark.
----> Mark 4 (Right Path)
Facing Valaya statue, if the right door is open you are on the right path.

After you get out of the room with food on the campfire, you will be back to the outside area. Go up the stairs on the right and turn right. You will see the fourth mark on top of the wall to the right.
----> Mark 5
Just before the valve event, you will find a big dropdown with a beer mug attached to a pipe emitting green smokes, and toxic barrels on the bottom right. Before you drop down, turn around and look above the doorway you came through. You will see the fifth mark.
----> Mark 6
After the valve event, you will descend some stairs and find a big open space with lava below. Take the left path and drop down. You will find the sixth mark behind you on the wall.
----> Mark 7
After you cross the tight wooden bridge to get across the big open space with lava below, you will see big square pillars. Check behind the rightmost pillar, you will see the seventh mark.
----> Mark 8
After you descend the stairs, you will see a wooden platform next to a dropdown. Walk to the end of the platform, you will see the eighth mark on the wall next to the wooden door.
----> Mark 9 (Left Path)
Just after the eighth mark, after the dropdown, if the left door is open, you are on the left path.

After the dropdown, you will find a room with two shields on the ground and a small pillar in the middle. Take the path to the left. Follow the path, and turn left when you see the dropdown. Enter the room, you will see the ninth mark on a wooden door behind the banner.
----> Mark 9 (Right Path)
Just after the eighth mark, after the dropdown, if the right door is open, you are on the right path.

Keep following the path until you see a bifurcation with lava flowing down from the top on the left and a dropdown on the right. You will see the ninth mark on the wall next to the flowing lava.
----> Mark 10
Keep following the path and you will enter a room with a buzzing lightpole in the middle. The tenth mark is on the right wall.
- Bell Ban
To complete the challenge, you have to shoot/slash all the skaven bells down in the map.

Your bell locations will change depending on the variations.
There are 10 bells you can find in one run.
Finding 10 bells in one variation is enough, you don't have to collect them again.

IMPORTANT NOTE:
After the hotfix (21.06.2023), this challenge can now be completed. Thanks, Fatshark.

At the moment (14.06.2023), this challenge is bugged and CAN'T be completed. I will update this when Fatshark fixes this issue. (Fatshark has acknowledged this bug.)

Here is a video of me literally shooting ALL 14 BELLS on a run. Still doesn't complete the challenge.
----> Bell 1 (Top Path)

At the start of the map, you will see one of the two doors open. If you have the top door open, you're on the top path.

Keep following the path until you enter the room with the descending staircase with a giant hole in the middle. The first bell is on the corner.
----> Bell 1 (Bottom Path)

At the start of the map, you will see one of the two doors open. If you have the bottom door open, you're on the bottom path.

After you get into the big room with lots of crates and some dead dwarves on the ground, walk towards the exit of the room but don't go upstairs, instead go through one of the other doors. You will find the first bell next to a lava river.
----> Bell 2

Keep going and you will find the huge open area with lava and mining carts. You will see the second bell near the leftmost pillar across the chasm, just before the dwarf and rat corpses.
----> Bell 3 (Left Path)

Facing Valaya statue, if the left door is open you are on the left path.

After you exit the room with the Valaya statue, turn left and walk forward a bit. You will see the third bell hanging on top left.
----> Bell 3 (Right Path)

Facing Valaya statue, if the right door is open you are on the right path.

After you exit the room with the Valaya statue, turn right and move a bit forward. You will see the third bell hanging on the top left.
----> Bell 4

After the valve event, you will descend some stairs and find a big open space with lava below. Turn left and jump down. Jump on the crates to get on the wooden platform and you will see the fourth bell hanging in front of you.
----> Bell 5

Go back to the spot where you descended the stairs to find a big open space with lava below. Instead of turning left, turn right and follow the long path. You will find the fifth bell at the end of it.
(Wooden bridge in the picture for reference)
----> Bell 6

After you descend the stairs, you will see a wooden platform next to a dropdown. Walk on the platform, turn right and face the dropdown. You will see the sixth bell on your right.
----> Bell 7 (Left Path)

Just after the sixth bell, after the dropdown, if the left door is open, you are on the left path.

Keep going and you will find a room with two shields on the ground and a small pillar in the middle. Take the path to the right. You will find a room with a crack in the middle and a lava river going through it. The seventh bell will be hanging on the top left.
----> Bell 8 (Left Path)

Now turn back and go back to the room with two shields on the ground and a small pillar in the middle. Instead of going right, you will take the path to the left. Follow the green lamps and you will see a red banner hanging next to a huge hole. The eighth bell is right next to the banner.
----> Bell 7 (Right Path)

Just after the sixth bell, after the dropdown, if the right door is open, you are on the right path.

Keep going until you find a room with a red banner on top of a small pillar in the middle.
Look to your left, you will see the seventh bell.
----> Bell 8 (Right Path)

Take the right path after the seventh bell and you will find a dropdown. The eighth bell is just above the dropdown.
----> Bell 9

When you are in the long corridor leading to the end event, turn around. You will see two red banners hanging on your left and right. Look behind the banner on the right, you will see the ninth bell.
----> Bell 10

Make your way to the second floor made out of wooden platforms. The tenth bell is next to the giant sphere on the middle, on the highest wooden platforms.
- Fast Regulations

To complete this challenge, you have to interact with every pressure valve within 8 seconds.

The valves are in 4 spots, and these spots are always the same:

The easiest way to do this challenge is to do it on Recruit difficulty, with a 4 man team.

Each player goes to a valve. When the valve gets marked, the player responsible for the valve interacts with it.
When a player does their valve, they can leave their designated spot to help a teammate, because when you interact with one valve, that same valve won't be interacted with again.
Simply do this under 8 seconds and this challenge is very easily completed.
- Come Prepared

For this challenge, you have to bring 3 barrels to the end event as a team and use them on the final event to blow up the 3 objectives instead of the event spawned barrels.

Strategy:
This challenge is very similar to the "Powder Monkey" challenge in Helmgart category. The only difference is you can do this challenge on every difficulty, instead of Powder Monkey's Legend and Cataclysm only.

You can find a lot of barrels during the run in the map. Make sure you bring at least 3 of them to the final event.
Keep the barrels you are bringing along safe by fighting in a place away from where you chucked the barrels at.
Recruit is recommended for the lower spawns and weaker enemies. Getting hit by the enemies while carrying a barrel ignites it, so we are trying to keep the barrels safe.
Having 4 people in your team makes it easier to carry the barrels to the end.
Only explosive barrels count, you can't use fire barrels.

- Blessings Of Valaya
To complete this challenge, use the emote wheel to sit in front of the Valaya statue. It will take the challenge a couple of seconds to trigger.
If you see the challenge completed message in the chat, you did it correctly.
In my case, I used the "Sit (Ground)" emote.

You can use the statue unlimited times to heal yourself by sitting in front of it. It heals you for 60 full HP (clears wounds, scales with healing efficiency).

Example:
A Grudge Served Cold Challenges:
Scratch One From The Book
----
This challenge is completed when you complete the other map specific challenges under it.
- Difficulty Challenges
Icy Grudge:
Finish the mission on Recruit Difficulty.

Cold Grudge:
Finish the mission on Veteran difficulty.

Biting Grudge:
Finish the mission on Champion difficulty.

Frozen Grudge:
Finish the mission on Legend difficulty.

Glacial Grudge:
Finish the mission on Cataclysm difficulty.
----
All of these can be completed by finishing the map on Cataclysm once.
You don't have to do every difficulty separately.
- Dwarfs Eye View

This is a parkour challenge.
The vantage point is in the end event area.

Steps:
Get up to the door that opens to get the bomb vagon down. You will see a stone pillar next to you, you have to parkour around the stone pillar and planks to get up to the top.

Here are some pictures that may help you with the parkour:

When you reach the top, the challenge is completed.
- Chaingang

For this challenge, I highly recommend Recruit difficulty with a 4 man team.
Make sure you have 2 classes with high mobility that can dash/jump/teleport.
Chains may require a few extra hits to break.

Strategy:
Optimal team comp: Handmaiden + Slayer + 2 random players

One person counts down from 3, and everybody starts attacking the chains at 1.
Handmaiden breaks first chain, dashes into the second chain, breaks it.
Slayer breaks first chain, jumps into the second chain, breaks it.
Player 3 breaks their chain.
Player 4 breaks their chain.

If things go right, you should get it done under 6 seconds, and challenge will be completed.
- Wuthering Heights

To complete this challenge, you have to push 200 enemies off a ledge.
It doesn't have to be in one run, you can do multiple runs. The progress stacks.

There are ledges all over the map and the enemies you pushed of a cliff stacks up each time you win, so this challenge does eventually get completed by itself or with minimal effort over several runs.

But if you wanna speed things up and complete it in one run, here's how:

Step 1:
Get a 4 man team. Start a "Send in the next wave!" deed on recruit with the deed trick. Having a Handmaiden on the team makes pushing way easier.

Step 2:
Find a good ledging location. Here is the location I used:


Step 3:
Push the trash off the ledge until you see the "challenge completed" message in the chat.
Optional: If your teammates also need this challenge, take turns pushing skaven off the ledge until everybody gets it done.
- Tower Guard

To complete this challenge, you need to light up all 4 fires on top of the towers in the Wyr Migdahl event (first event area).

Tower Numbers:
I gave the towers numbers so they are easier to follow.
Follow the instructions and light them up one by one.

 
Tower #1:
Go in and ignite the flame on top.

Tower #2:
Look at the right side of the tower and you will see some crates. Jump on those crates and jump towards the backside of the tower from those crates. The backside of the tower doesn't have a wall.
When you're in, pull the lever and go up, ignite the flame.
Pulling the lever opens the doors of #3 and #4.

Tower #3:
Go in and ignite the flame on top.

Tower #4:
Go in and ignite the flame on top.
Khazukan Kazakit-ha! Challenges:
Karak Azgaraz Will Answer
----
This challenge is completed when you complete the other map specific challenges under it.
- Difficulty Challenges
Flint:
Finish the mission on Recruit difficulty.

Spark:
Finish the mission on Veteran difficulty.

Flame:
Finish the mission on Champion difficulty.

Pyre:
Finish the mission on Legend difficulty.

Inferno:
Finish the mission on Cataclysm difficulty.
----
All of these can be completed by finishing the map on Cataclysm once.
You don't have to do every difficulty separately.
- Aim For The What!?

After the tower event is complete, instead of taking the long way down, just jump on the hay bale on the ground. You won't take fall damage and you will complete the challenge.

- Eyes Of The Crowfather

To complete this challenge, you need to shoot 10 crows on the map.
If any player-bot comes close to the birds, they will fly, leaving you unable to complete the challenge.
Take your time. Missing your shots does not make them fly away.

I suggest using a hit-scan weapon or a Waystalker with the Moonfire bow (precise and you can zoom further) for this challenge.

IMPORTANT NOTE: Using a shotgun to kill the crows counts as more than one kill (3-4 kills from one bird for example). With a shotgun, you can complete this challenge killing only the first 2-3 crows.

Bolt staff no longer instantly completes this challenge.

Beam staff primary fire dot no longer completes the challenge instantly but left click into right click
spam can get you 4-5 crow kills from one crow.

If Fatshark fixes this i will update it.

Crow #1:
Just outside the spawn, Crow #1 is on the tree stump.

Crow #2:
Just after Crow #1, Crow #2 is on top of the house of the left.

Crow #3 + Crow #4:
A bit further, Crow #3 is next to the second milestone on a skeleton, while Crow #4 is on top of the tree to the right of the second milestone.

Crow #5:
Keep walking forward, drop down, get past the campfire and look behind the big rock in the middle. You will see Crow #5 on a tree stump.

Crow #6:
Just before the dropdown from the broken railing, Crow #6 is on the rope.

Crow #7:
After you go through the doorway to the bridge event, Crow #7 is between some stone tiles on the right side of the house.

Crow #8:
Just after the bridge event, Crow #8 is on top of the lantern on the fence.

Crow #9:
After climbing up the steep hill, you will see a pipe on the right side, Crow #9 is on it.

Crow #10:
Near the broken pipe objective, Crow #10 is on top of a wooden platform-tent.

After you shoot all 10 crows, you will complete the challenge.
- Frozen Footwork
To complete this challenge, you need to press the buttons on the milestones as fast as you can.
There are 7 milestone buttons to press.
Recruit difficulty is highly recommended for this challenge.
Time is more forgiving than you think, so even if you lose some time on the events you can still do this challenge easily.
Grab a career that can go fast (Handmaiden, Slayer, GK etc.) and press the buttons to complete the challenge.

Milestone #1
Just outside the spawn, next to Crow #1.

Milestone #2
A bit further ahead, before the dropdown, next to Crow #3 and #4.

Milestone #3
Just after the bridge event, near the big double doors.

Milestone #4
Just before you climb the steep hill, on the right.

Milestone #5
Just after you climbed the steep hill, in front of you.

Milestone #6
Just after the campfire, on the way going up to the tower.

Milestone #7
After the tower event, on the way to the waystone portal (end portal).

If you are too slow, it will say "Failed" on the chat.
If you are fast, you will complete the challenge.
- Stay On The Pad

To complete the challenge, you need at least one player to stand on the pressure pad for the entire event.
If you jump or move out of the pad, you fail the challenge.

Strategy:
Start a game on Recruit difficulty.
Have a 4 man team or bots.
Have everyone stand in the pressure pad together.
Stand your ground until the event is done.
Do not jump or go out of the pad.

Very easy challenge to complete.
48 Comments
Hallowen 12 Dec, 2024 @ 4:11am 
If your teammates also need this challenge, take turns pushing skaven off the ledge until everybody gets it done. for Wuthering Heights challange

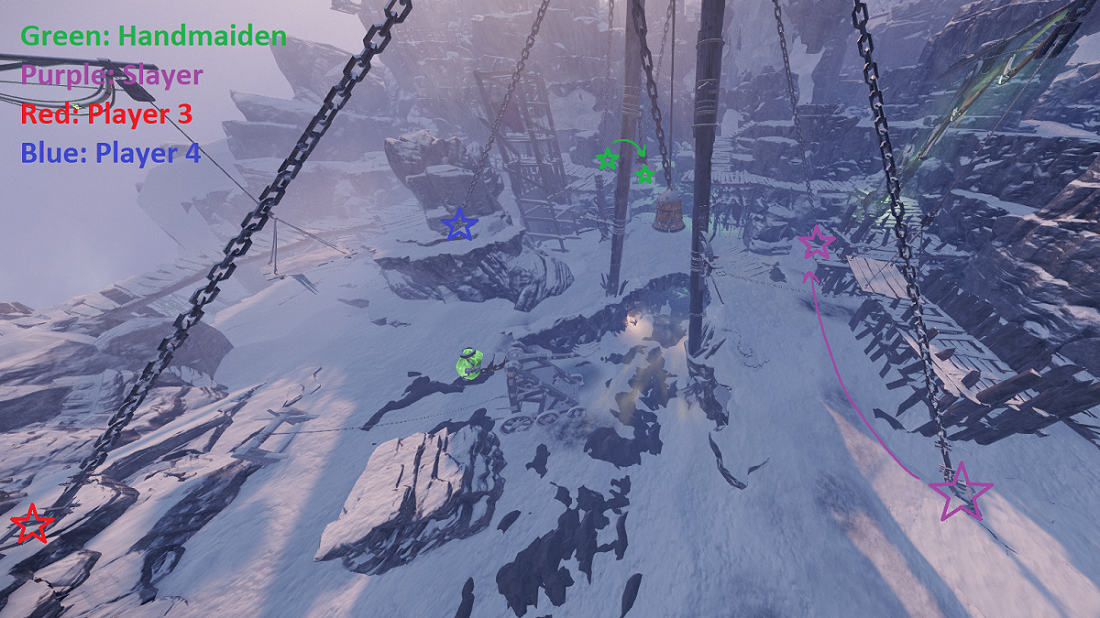
kanka atıyoruz atıyoruz olmuyor ne yapmamız lazım tekli partide mi çalışıyor?
opinion_less 1 Nov, 2024 @ 11:07am 
8 bell on first mission can be shotted from the left path, you just need to shot it "through" lava (Under the bell on the screen), i just saw it and thought i missed it xD
Hamdolsun  [author] 9 Jul, 2024 @ 7:51am 
It's been a year since I created this guide so I can't exactly remember but there was a time limit between button presses. It might be bugged.
Sotek 9 Jul, 2024 @ 7:27am 
@Ted Kaczynski Was Right

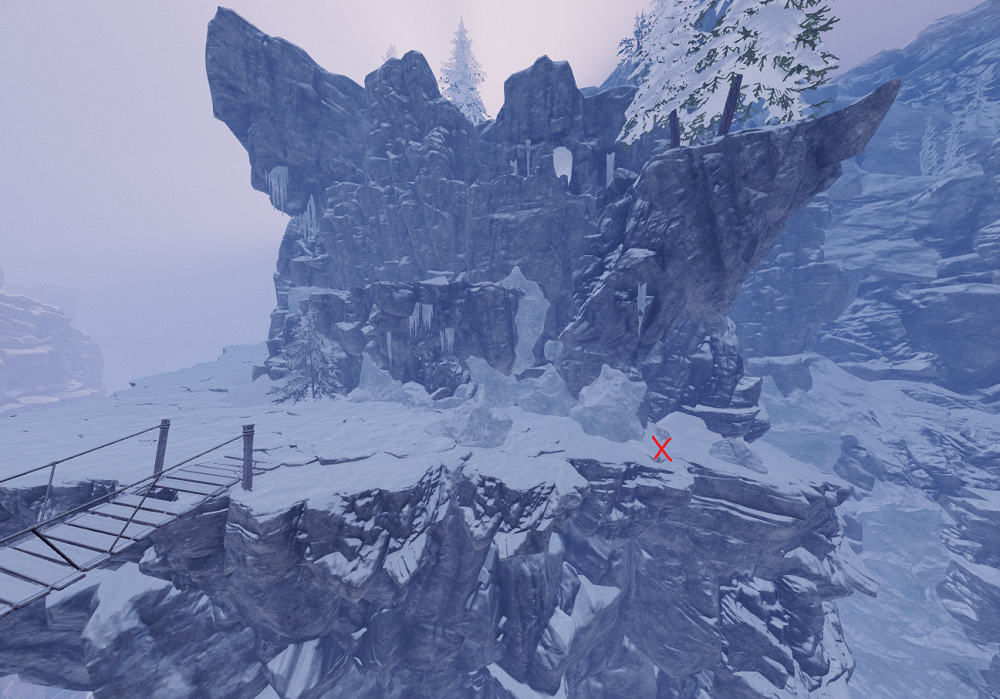
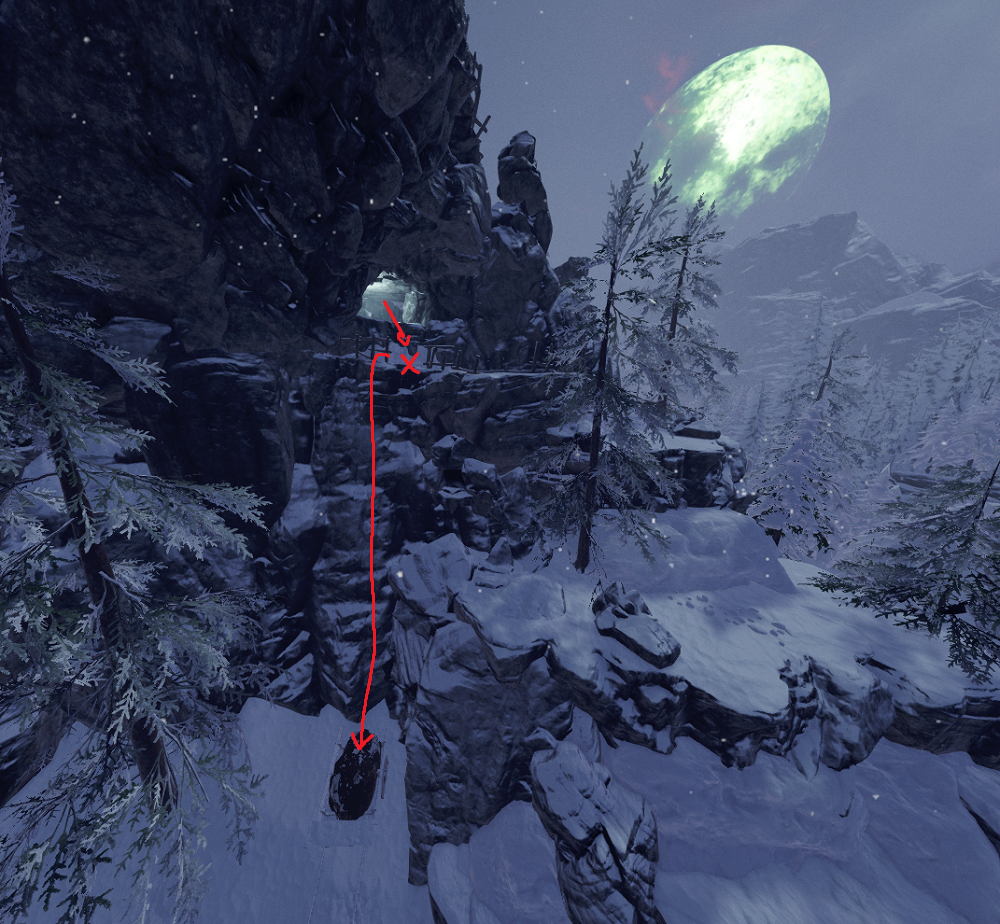
I have the same issue. Got Failed notification in chat twice trying to complete Frozen Footwork. After bridge event, once before and once after I hit the third milestone button. I had only played both runs about 3 minutes.

So what is the time limit? Is this bugged?
Noctua 21 Jun, 2024 @ 4:26pm 
Thanks for the help. Also Mark 9 (Right Path) and Bell 1 (Bottom Path) have the same issue.
Hamdolsun  [author] 21 Jun, 2024 @ 3:28pm 
Hey. Sorry about that Noctua. There used to be pictures for every single crow. I don't know what happened but some of the pictures got removed on their own. I'll see if I can fix that when I reinstall Vermintide 2.
Noctua 21 Jun, 2024 @ 3:26pm 
Would be nice to have pictures for Crows #5 and #8. Otherwise this is a very good guide.
Evilsod 16 Mar, 2024 @ 9:02am 
Looks like they've both fixed and broken Crowfather.
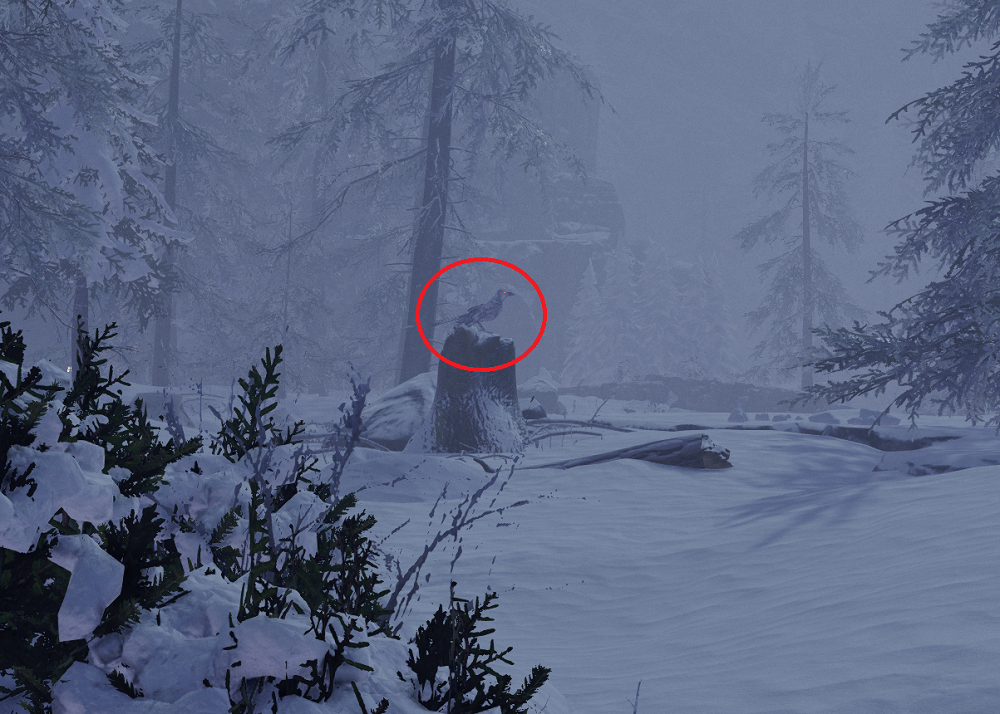
When I shoot the 10th crow by the burst pipe, it bursts into feathers and doesn't count for the achievement. Attempted Repeater Pistol, Deepwood Staff, Blunderbuss, none of them counted more than once. So currently it can't be completed.
H_a_n_s 20 Aug, 2023 @ 1:02pm 
Bolt staff kills just one crow now.
Unknown Traveller 4 Jul, 2023 @ 4:26am 
Please tell me if there are any Ravaged Art pieces on the Khazukan Kazakit-ha! map? It's a weird, but I haven't found even one so far.