Captain of Industry

Captain of Industry

198 ratings
Sustainable Start Guide
By Lucid
Now consistent with Update 3! This is a guide intended to get newer players up and running quickly. I'll cover just enough to set up the critical parts of your colony so you don't immediately death spiral once you run out of your starting resources. Intended to be executable on Captain difficulty, New Haven map.
15
8
2
12
3
2
   
Award
Favorite
Favorited
Unfavorite
First things first
This guide is written assuming the New Haven map is selected and the difficulty options are set to "Captain". I play with Ore sorting and realism features enabled but that should not impact too much in the guide itself. I'm also assuming the tutorial goals are enabled and none are skipped. They offer rewards for completion and I've accounted for those when routing the guide. You should be able to achieve what's set out in this guide on easier difficulites, but harder difficulties and custom settings that increase maintenance and fuel consumption and/or reduce starting amounts of these may run into issues or require different build orders.

Once the game loads in I recommend pausing the game to get the lay of the land and to set out you first construction orders.The first thing to do is to check out the abandoned communication station. Initially this is your source of scrap iron, which you'll need to smelt.

Smelting Setup
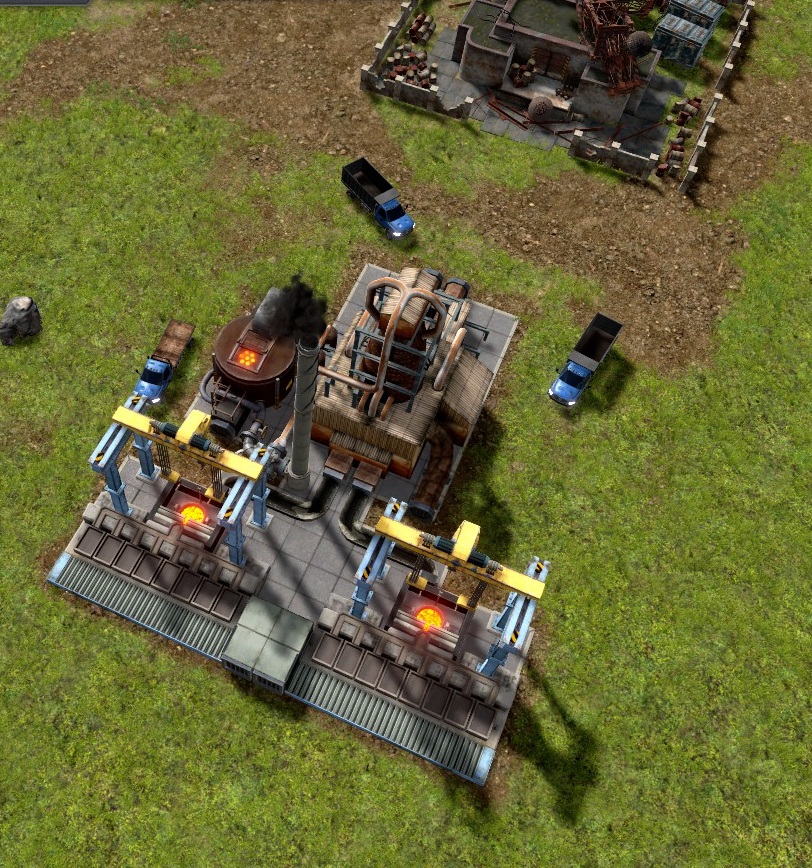
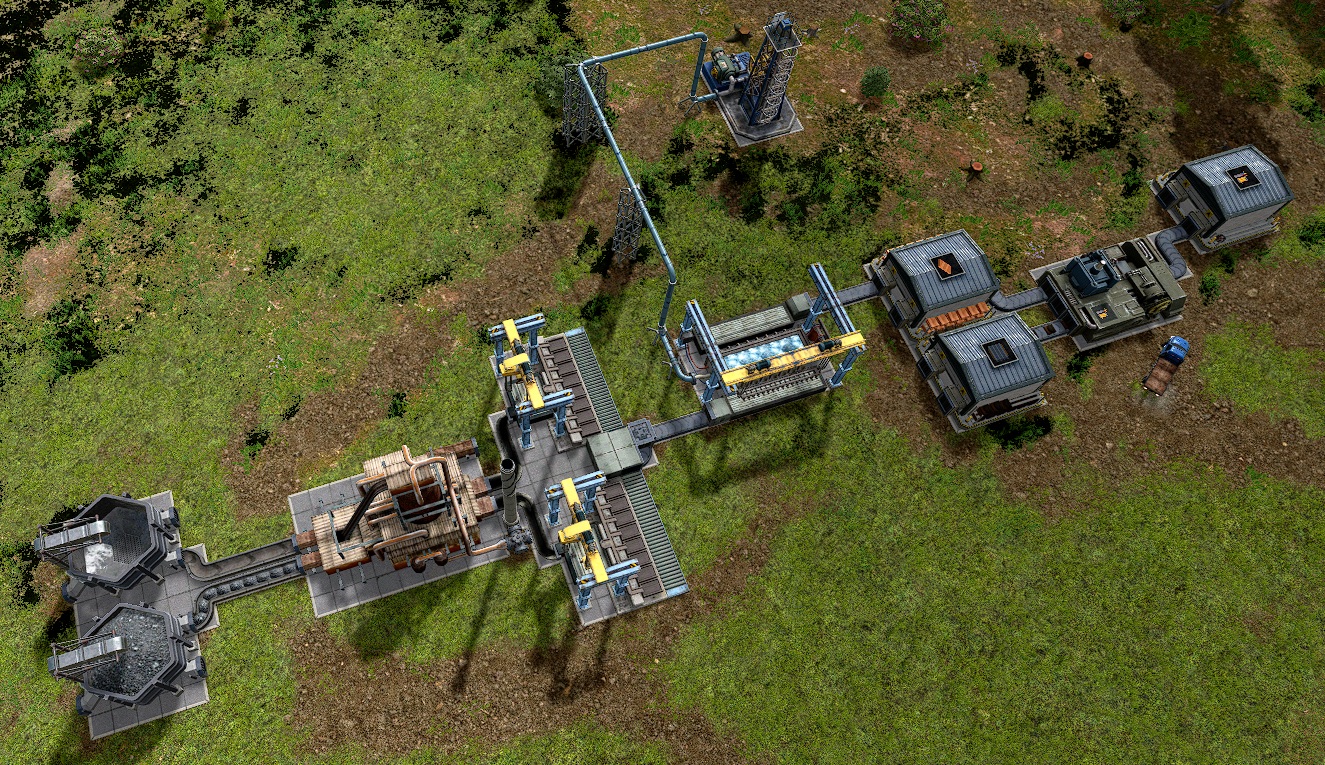
To process the scrap iron from the communication centre you will need 1 blast furnace and 2 metal casters. You can set these out any way you like but I've shown a good layout here which has a few benefits. First it's reasonably compact, with short travel distance for the molten metal (don't worry, it doesn't solidify in transit). Secondly, the outputs for the cast metal are right next to each other, which helps for when we want to use conveyor belts to shift it in future. Finally, the blast furnace's other outputs (for slag and exhaust) are accessible and allow the design to be flipped if you want to expand on either side. From now on I'll refer to this basic setup as a smelter.


Because the furnace creates exhaust, it needs to be connected to a smoke stack. You can share the same smoke stack among multiple machines and we're going to do that with a coal maker on this one as we don't yet have access to coal mining technology. This whole setup is temporary, and we'll keep it only while there is scrap iron to take from the abandoned communication station, so place it close (but leave room for your trucks to get through).

Research
On the topic of research, let's lay down 2 research labs and queue up our first techs. Here's the research order this guide will be using. You can queue them all up ahead of time. 2 labs is enough to complete research faster than you'll be able to build everything, but dropping to 1 may slow things down a little:

1. Construction
2. Maintenance
3. Trading Dock
4. Vehicles and Mining
5. Beacon
6. Tools
7. Basic Concrete
8. Basic Diesel
9. Synthetic Rubber
10. Copper Refinement
11. Construction II
12. Conveyor Belts
13. Ship Dock Repair
14. Groundwater Pump
15. Fuel Station

Our research labs also need power, and currently our only option is the diesel generator. If you use the Layers view you will see where oil sources are on the island (There's one patch not far northeast from the comm centre). You could place the diesel generator next to the dock where all your fuel is currently stored, or somewhere close to the oil supply, where we will eventually be extracting and processing the oil into diesel fuel. A single diesel generator supplies 800KW, which is more than enough for our immediate needs. But keep an eye on your power consumption as you scale up production.

Designations
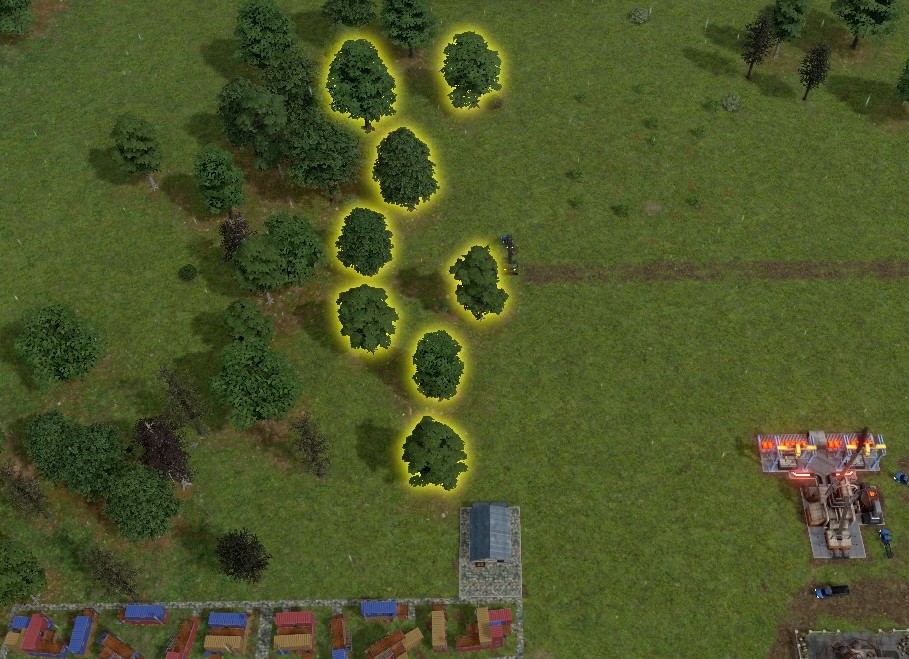
The last step is to set up a few designations. One of the vehicles we start with is a tree harvester. It will only remove the trees from areas we designate. Use the H key to set your cursor to tree removal designation and highlight a bunch of trees. I recommend clearing trees close to the settlement first, as this will free up room for expanding and you may want your first farm to be placed near the settlement too. Next, select your tree harvester and assign 2 pickup trucks to collect the wood it harvests.


Waste is produced by our settlements and we need to dispose of it. Use the Z key to switch the cursor to dumping designations. I usually set the dumping designation to Flat and extend the coast line by dumping into the ocean. This is preferable to creating a giant hill of waste that you can't build on. Don't set the dumping zone too close to where your ship is docked. It can interfere with your ship's ability to dock. Don't forget to build a waste collection centre for your settlement.

Now you can unpause and watch the action unfold! you'll complete the Iron Production goal (reward: 50 Diesel, 50 Construction Parts, 30 Engine Parts) as part of this step, claim it as it pops, and wait for the construction technology to unlock.
Construction, Maintenance and Farming
The construction technology unlocks the assembly building which lets us build our first basic components. For now we will focus on construction materials. Almost all buildings require construction materials and we're going to run short on those very quickly. The communications centre has a decent supply of Concrete Slab (600), we are starting to smelt iron and we are gathering wood, though we'll want to stop burning most of it soon!

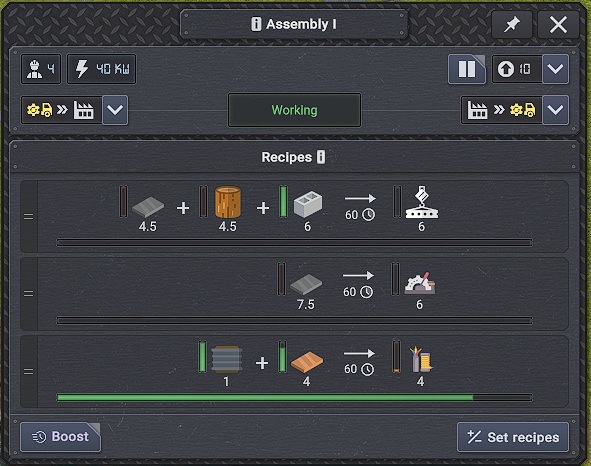
The way the assembly building works is that you can turn recipes on or off using the "Set Recipes" button in the bottom right of the UI when you have the building selected. You can arrange the priority by dragging the recipe up or down in the list. Here I've set construction materials to be priority 1, then mechanical parts, and electronics. This means trucks will deliver the ingredients to produce any of these. The workers will first try to make construction materials and if they don't have enough ingredients or the output is full, they'll shift to making mechanical parts, and finally electronics. They'll remain idle if there isn't enough ingredients for any recipes they have in the list.

We do have supplies of copper and rubber on the ship, and electronics are the only thing we really want copper for at this stage. We do need to leave some rubber to make vehicles but we won't use it all up too quickly. Our smelter is capable of producing 24 iron per minute if we're feeding it coal and scrap iron, so we can sustain a maximum of 5 assembly buildings off one smelter. I'm going to build just 4 for now though, since we do want some iron plates for mechanical parts. A quick tip, if want to avoid having the set the recipes on each assembler, just place one, set its recipes, then copy and paste it (ctrl+C and ctrl+V) so the additional assemblies will assume the same configuration.

Important point on Assembly
I'm recommending laying down these first assembly buildings side by side close to the iron smelter for simplicity. We haven't unlocked conveyor belts and won't for a little while yet. This whole setup is intentionally temporary as we'll eventually be mining iron and copper and making concrete elsewhere on the map. For now trucks will deliver all ingredients to the assembly buildings and take the construction parts directly to building sites. We will use storage buildings to stockpile because of a tutorial goal, but we'll be using construction parts faster than we can make them. It's messy, but it will work. We will unlock more recipes (such as Engine Parts) as we research more technologies and you should check and update the priorities for these assemblies with the products you need as things develop. Whilst later in the game you can set up dedicated production lines similar to other factory/automation games, I recommend using these "all purpose" assembly buildings by turning recipes on and off and letting trucks handle the logistics until you've got a steady supply of everything you need to build to your hearts content.

As soon as your assembly buildings start producing construction parts, you'll complete the construction parts quest (reward: 50 Wood, 60 Engine Parts, 30 Construction Parts)
Around this time you may also finally produce enough waste to complete the Waste Dumping quest (reward: 80 Concrete, 50 Construction Parts). If you haven't got this, check and make sure your waste collection building is working and you have a dumping designation defined.

Maintenace Depot
You will have already finished the Maintenance Research by this point, and we're going to quickly finish the Maintenance goal while we await Vehicles and Mining research to complete.

The Maintenance Depot is crucial to sustainability because all our vehicles and many of our buildings consume maintenance. If you run out of maintenance, everything starts to break and can represent a death spiral situation on higher difficulties. Maintenance consumes electronics (copper, rubber) and tools (iron) and the depot requires 100kW of power. Make sure to configure one or more of your assembly buildings to start making mechanical parts when they aren't making construction materials, and place the maintenance depot close by to your assembly buildings. Once you start producing maintenance, you'll complete the Maintenance goal (reward: 40 Electronics, 50 Construction Parts).

Farming
There's another goal we can tick off during this time, and that's getting food production up and running. 1 farm will be enough to keep our food supplies from dwindling and we don't actually need a second for a while. Your Tree Harvester has probably cleared enough room to fit a farm in close to the food market in town. We'll have to wait a little bit for the food production goal to complete, but when it does we'll get:
Food Production Goal (Reward: 40 Potatoes, 20 Construction Parts)

Trading Dock
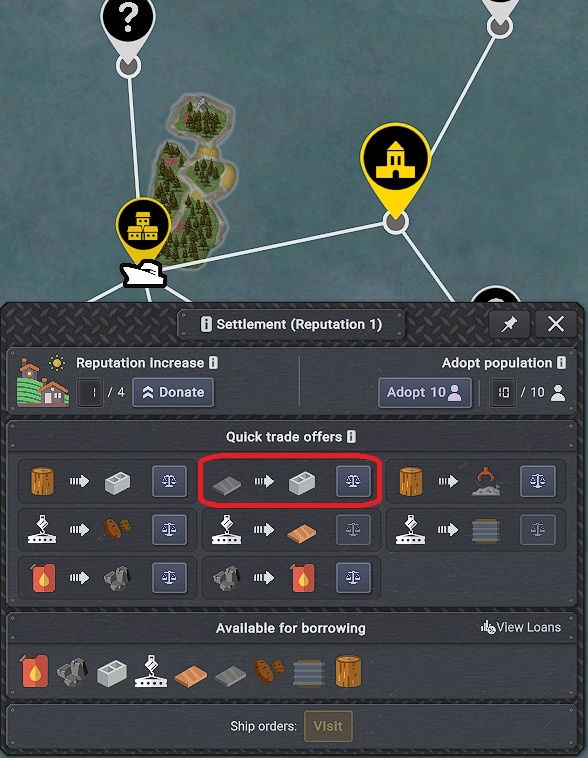
One last tech we snuck in before vehicles and mining was the Trading Dock. It may not build right away as it costs 100 wood. However the trading goal will give us some more construction parts and we recive wood in some of our upcoming rewards, so just keep an eye on when it's completed and do the iron for concrete trade to complete the goal
Vehicles and Mining
There isn't a whole lot else to do until we finish the vehicles and mining research. Just keep an eye that your tree harvester hasn't eaten through all the trees you designated. You can designate as much as you like or designate a little bit at a time if you want to clear specific areas for expansion (I still recommend focusing around the settlement for now).

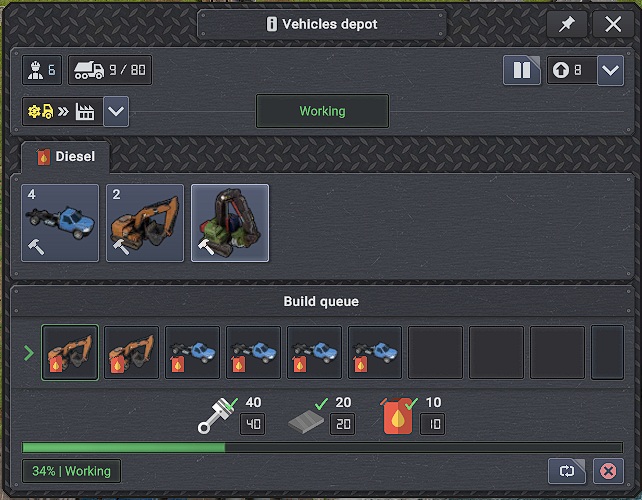
Vehicles and mining opens up everything we need to finally start mining coal instead of burning wood, and move on to mining actual iron ore. Place the Vehicle Depot right next to the docks. You can issue it orders before it has even been built, so create 2 small excavators and 4 pickups.

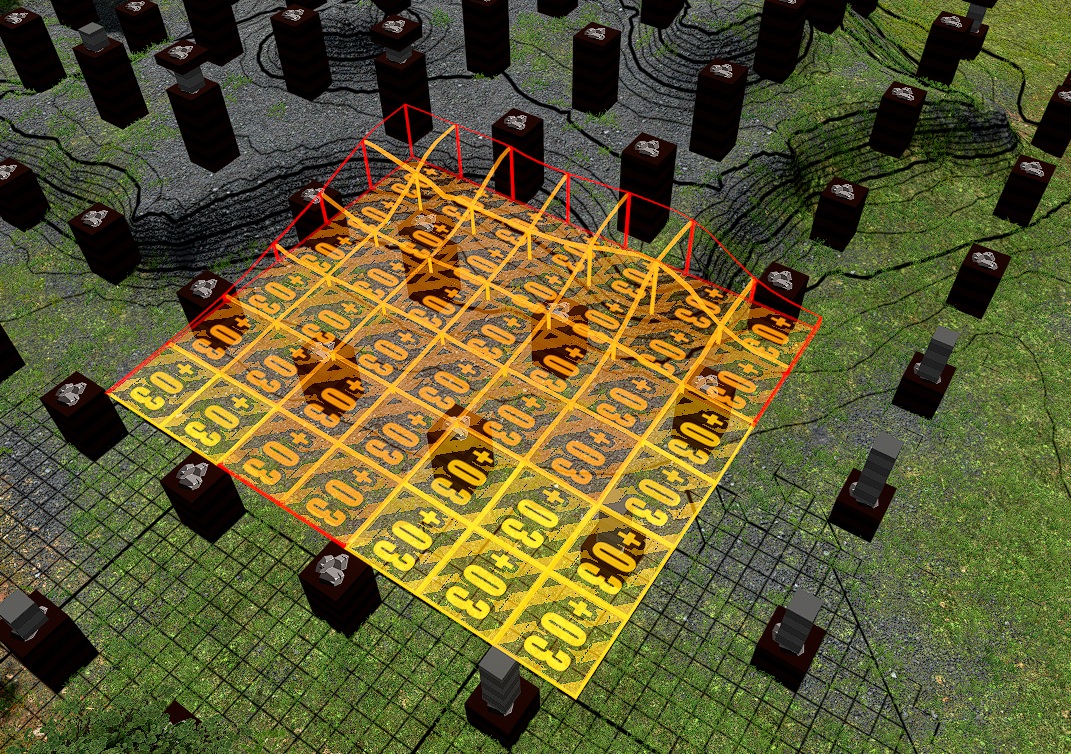
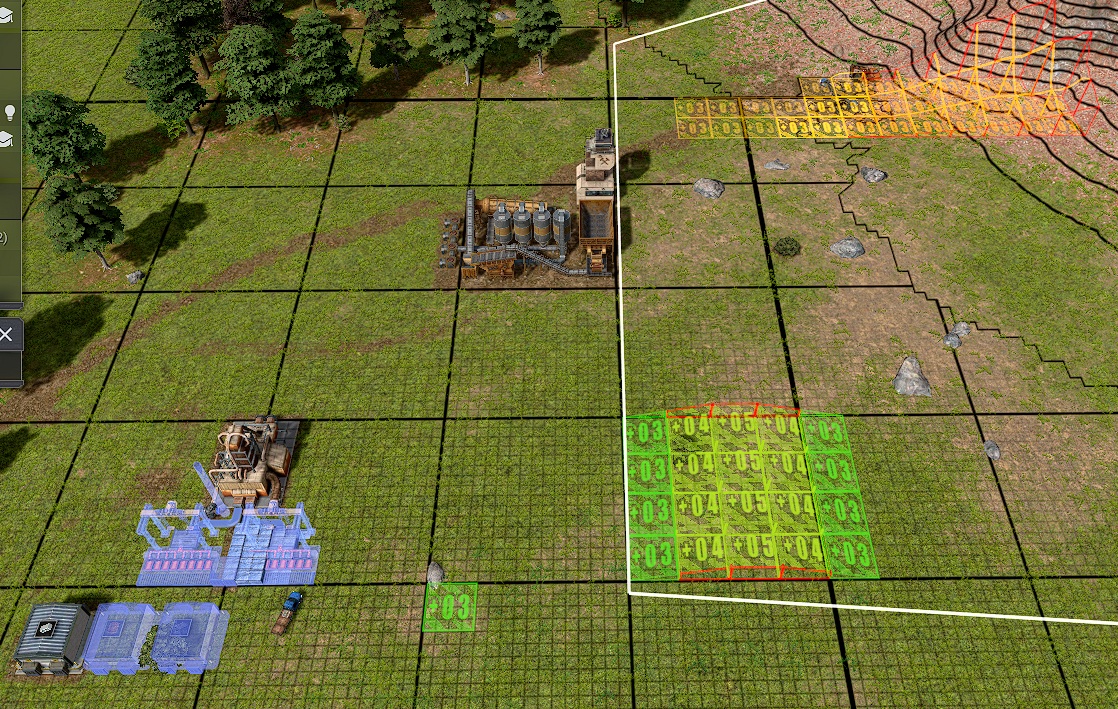
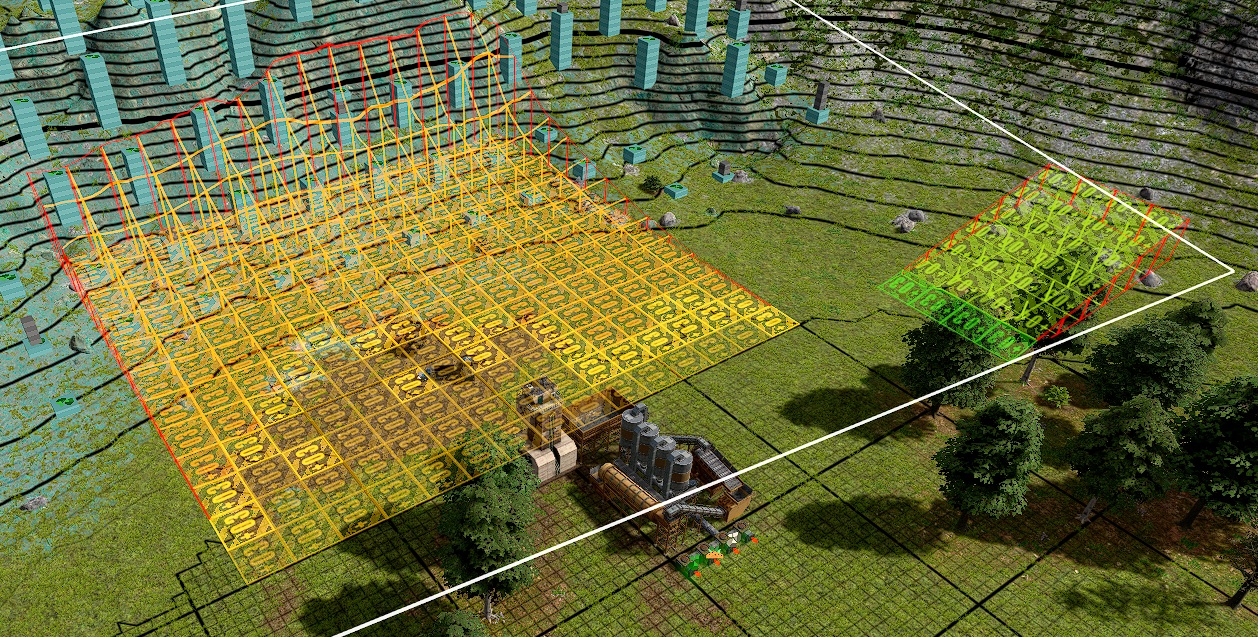
Next, place a Mining Control Tower and an Ore Sorting Plant somewhere close to our coal deposit. Not too close, as we'll be digging down to get at the coal at some point and land slippage will be an issue. use the Edit Area function in the mining control tower to surround a decent chunk of the coal mountain and use the (M)ining designation with the (F)lat tool to level off all the coal above ground level first. That will keep them busy for a while.

I won't go in depth on the details of mining as the Charlie Pryor has an excellent tutorial here


Once the small excavator is built, don't forget to assign it to the coal mine through the mine control tower interface. Also assign 2 pickups to ferry the coal to the smelter. If you've done all that, we're prepared to start shifting the coal supply to our smelter away from wood burning.

Decommissioning the Coal Maker

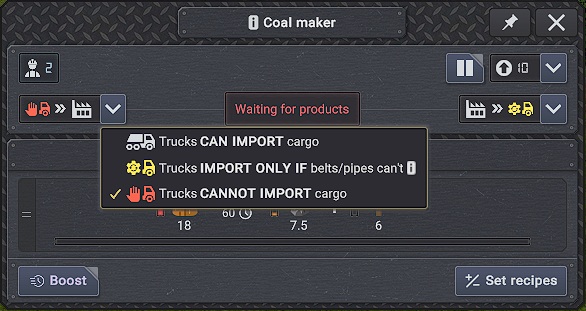
While you could wait until we're getting coal from the mine and then simply delete our coal maker, we can make a smoother transition than that. Select the coal maker and turn off truck imports. This prevents any more wood being delivered to the coal maker, so only the wood it has in the building can be used. By leaving exports on, the final loads of coal can still be delivered to the blast furnace.
You can watch the coal maker burn through its final supply or come back in a minute or two and then use the delete key to issue the deconstruction order. Trucks will come collect salvaged materials and drop them off in storage. You can control a lot of your logistics network by using import/export rules and this is just a simple example. This saves your trucks delivering wood to the coal maker only to have to collect it again when you deconstruct the building. We'll look at a few more examples of using import/export rules further on.
People and Priorities
Your research is likely charging ahead and you have completed the Beacon at this point. This is kind of important, because we're starting to run low on workers. If you have already, you can pause buildings to free up workers immediately, I recommend pausing one of your research labs if that's the case.

People
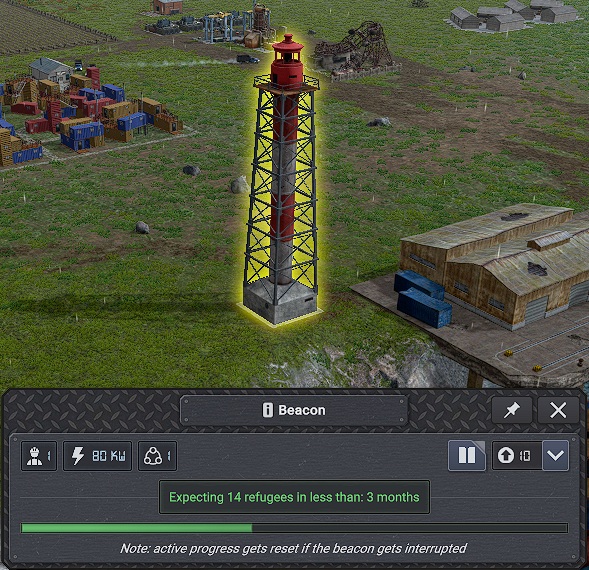
Once you've finished the Beacon research, place the beacon wherever you like, I'm picking a little section on the other side of the docks.

The Beacon brings in new pops in waves and you can turn it off whenever you wish if you want to save power, unity, or if you want to control population growth. Our starter settlement has 100 pops and room for 160 in those stylish shipping containers. Expanding our settlement costs 80 construction materials and although we are getting a lot from goals, that will dry up. Even if we had all 5 assembly buildings producing construction materials non-stop it would be almost 3 months before we could afford this.

So we're going to turn off the beacon once we get close to our maximum population. You get an alert with each new wave of refugees - so be sure to check your current and maximum population after every notification and stop if the next wave is going to push you over the maximum.

Tracking production
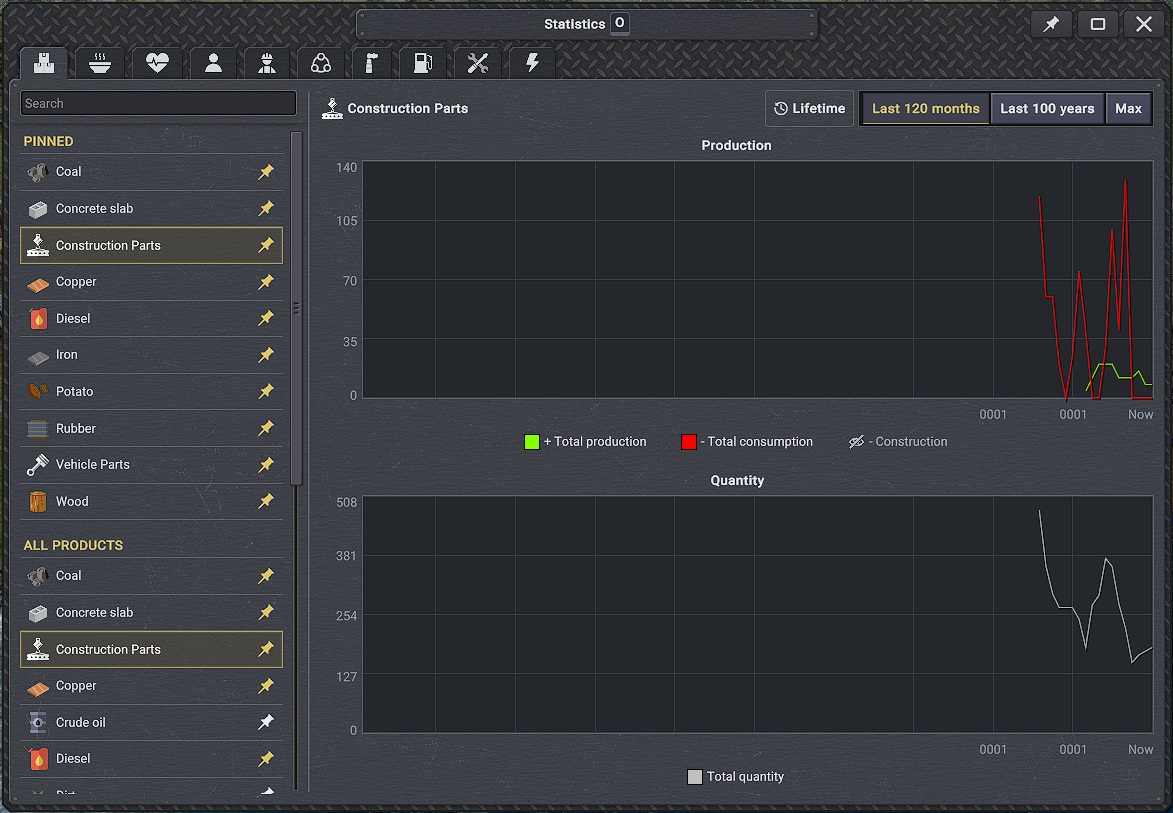
Let's take a moment to look closer at our construction parts production. You might have noticed a bunch of resources on the right hand side of your screen. You can click on these to bring up the statistics panel, or use the shortcut O. Select Construction Parts and you'll be presented with a graph showing that your settlement is consuming construction parts (red) much faster than they are being produced (green).

You can go back to the list of all products and see the same graph for all the products you have. For instance, you can check your potatoes and see that we are consuming about 4 potatoes a month, while our single farm brings in a harvest of about 25-30, depending on rainfall. It'll go down over time as soil fertility drops, but our consumption will also go up as more people join the settlement. You can make a habit of checking the statistics panel, or you can configure the resources you want to monitor by pinning them and arranging them on the right hand side UI element.

For example, coal is not a resource I'm stockpiling so I don't really need to know how much I have on hand at the moment. But electronics and mechanical parts are about to become vital, so I want to make sure they're tracked, as well as the rubber, copper, and iron that are ingredients for them.

Setting Priorities
Back to our worker shortage. We can manually pause and unpause buildings to manage shortages like this, but we can also set priorities to let our people handle this issue automatically. We do this through setting priorities in different buildings.
For instance, we want to make sure that no matter what happens, the power is on and our beacon is lit, because that's going to get us out of this problem. Select the Diesel Generator. In the top right corner, you'll see the pause button, as well as a drop down menu setting a number between 1 and 15. You can read the tooltips, but the key for us is to set the priority to a low number (between 1 and 5) for the Diesel Generator. Because the default for all buildings is 10, what this means is that if we ever run short of workers, we will be sure to have workers assigned to the diesel generator, so the power doesn't go out. Go ahead and set the Beacon to P5 as well.

Think about what you could do without during a worker shortage, power shortage, or other problem. My recommendation is to set the vehicle depot and research labs to priority 11-12. The vehicle depot could even be paused to free up the workers immediately if you aren't building anything in it, but at most if it is the first to be switched off you can re-arrange priority if you desperately want to build another truck during an outage. Research is similar, it can wait unless you're in a situation where a specific technology is going to solve your current problems. Between the vehicle depot and the labs we have 18 workers who can be redirected to other tasks. You can get really in depth with priorities, but for the most part having everything at its default setting shouldn't cause too many issues in the early game.

Don't forget! As refugees arrive, check the amount of space you have left. The top UI shows you how many months of food you have left, the overall health of your citizens, the total population, remaining workers available, free housing supply, and total vehicles. You get 16 pops every wave, so you don't want to accept another wave when the housing supply is less than the incoming wave. This comes with a Unity penalty and can really slow you down on top of forcing the construction of extra housing earlier than you planned.

A note about Unity
Unity is a resource that is generated by providing goods and services to your population, and is consumed operating research labs and the beacon. It can also be used on buildings to speed up production, or to instantly deliver resources to building sites (you still need the resources to build!). There is a maximum amount of Unity you can stockpile, so don't ignore it altogether, it can really help speed things up.
Concrete
We're still reliant on the comms centre for our scrap iron and concrete. We're going to run out of concrete first though, so that's our next challenge as soon as the technology is researched.

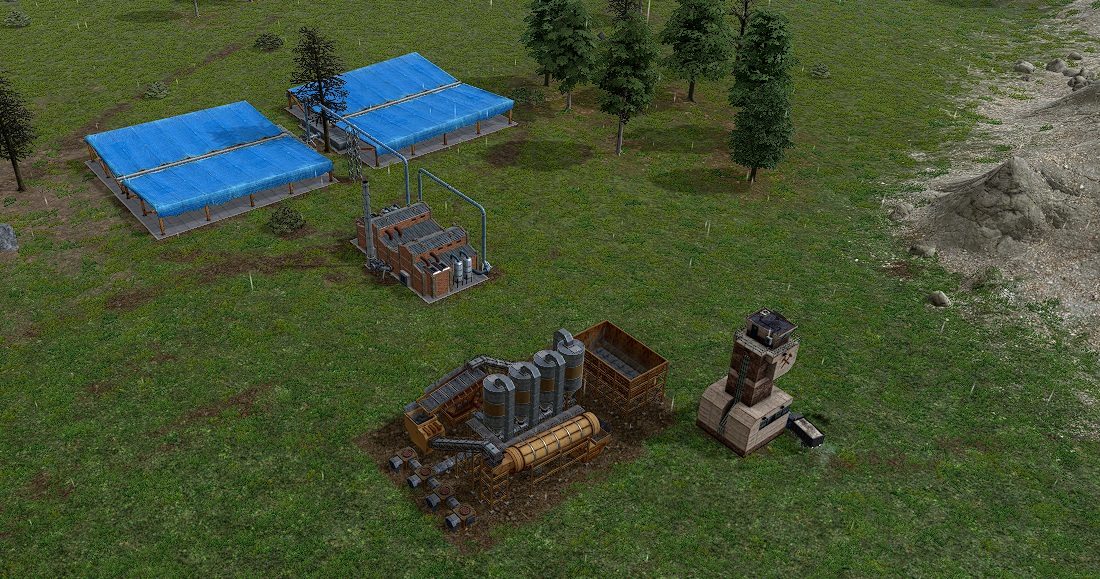
The initial recipe for concrete calls for 3 ingredients: Water, Coal and Limestone. We unlock a rainwater collector along with the kiln. These take up a fair amount of space, and rain is inconsistent, but they do have a bit of internal storage. It's up to you if you want to include a rainwater tank for those not so rainy days, but I've left it out of the build here. We already have coal production, and on the new haven map, there's a limestone deposit fairly close by. Queue up another excavator now, as well as a few more pickups. Then, lay down a new mine control tower, ore sorting plant, and set its area of operations on the limestone deposit.


With this setup, we'll shortly complet the Concrete Production goal (Reward: 80 Concrete, 60 Engine Parts)
Iron Mining and Smelting
Now that concrete production is underway, we'd best take care of the last thing we're relying on that comms station for. Iron is located a fair distance from where all our production is, but it's the next most important resource we want to guarantee supply for. You'll find that you still have several hundred units of copper, which are only used for electronics. We also have plenty of diesel. So lets start mining iron and get a second smelter going.

You can copy/paste the smelter setup to duplicate it (though we're going to need to update the recipe to use iron ore, not scrap). It's up to you if you want it close to where the iron mine is, close to the coal it'll also need, or somewhere else entirely. This iron smelter will be the beginning of a lot of production lines, so being thoughtful about where you place it is important. Once again set your mining designation and also a nearby dumping ground. If the dumping zone is within the mining area you can disable waste in the dumping ground. This will ensure byproducts from mining and smelting fill that area while your waste trucks stick to their own dumping zone.

Don't forget that you'll need another Small Excavator. It would be good to have a few extra pickups as well. This construction project will take us a while and we will likely jump ahead in a few research projects. Don't forget you can use unity to boost production if you want to speed things up.

Once we've finished construction of all that, be sure to check everything is starting to operate as planned (are you making maintenance? Is the iron mine getting ore deliveries?) and then we can move on to getting our fuel situation sorted.

Successfully mining iron ore will complete the Iron Ore Mining Goal (Reward: 50 Electronics, 100 Construction Parts, 50 Engine Parts)
Successfully processing that ore into plates in our new smelter setup will complete the Processing Iron Ore goal (Reward: 60 Engine Parts, 80 Diesel)

Storage
You'll note in the screenshot above I've included storage buildings for iron, wood, and concrete. This is going to be the beginnings of a more permanent construction parts assembly area, which I want to use conveyors to feed. Conveyors won't come around till assembly 2, but we're not too far from there at this point. Even though wood will be coming from all over, and concrete is being made quite a distance away, setting up storage like this and ensuring trucks keep it filled to a minimum will help buffer production. It's rare that everything you need will be conveniently located, so use minimum storage levels and truck import rules to keep things running smoothly. Don't forget priorities help you define what deliveries trucks are going to make, also!
Oil, Fuel and Rubber
We've still got plenty of critical resources left that we haven't even started any production of, but since it took us a while to ramp up our production of construction materials it's likely we've already researched Basic Diesel and Synthetic Rubber. These introduce the next major resource, oil. Using the (L)ayers overlay you will find an oil source in the bare earth patch between your coal mine and the coastline.

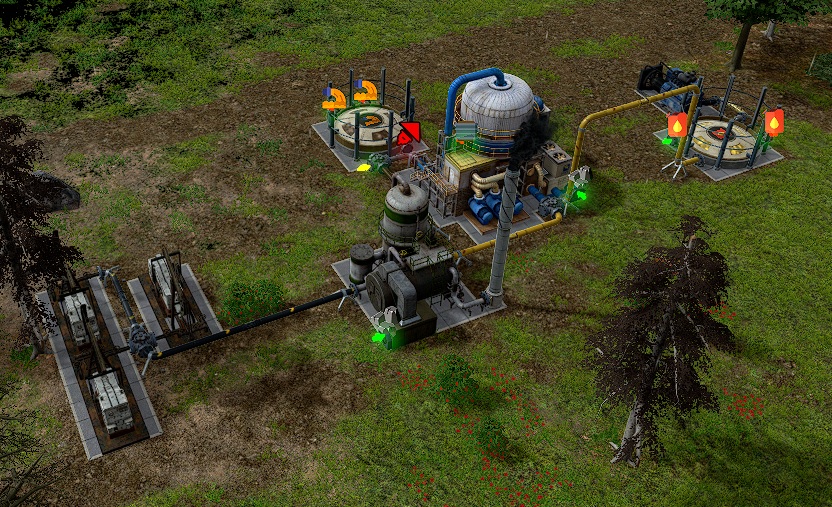
The basic diesel setup is 3 oil pumps connected to a single basic distiller by a pipe. The distiller needs to get coal delivered and that will happen via truck for the time being, so be sure to leave room for trucks to get through. It also outputs fuel, exhaust and wastewater. The Rubber Maker is also going to produce wastewater while consuming coal and diesel, so I've arranged the piping neatly inline. This isn't the most scalable design, but you'll wind up replacing this when you start experimenting with advanced diesel (not covered in this guide!).

The Fluid storage tanks are for wastewater and fuel. The diesel generator is placed on the output side of the storage tank. If you placed it on the input side you could run into power issues if there's ever a disruption to fuel production.
Remember that you can set alerts on your fuel storage so you're aware if you are running short. It's also a good idea to turn off truck imports for your fuel storage and generator - otherwise as soon as it's completed your trucks will rush over with fuel from the shipyard and you won't start producing anything until after that's all gone.

Dumping Wastewater
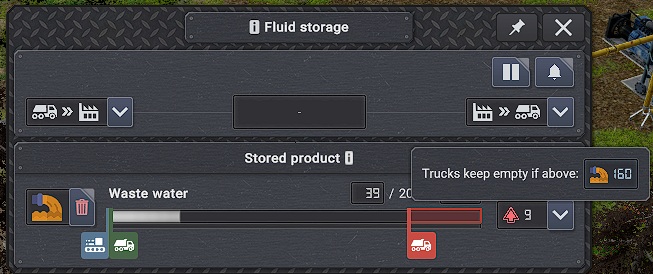
The Diesel Production goal will also task you with building a liquid dump and dumping wastewater. You can forego the waste water tank and just build a long pipe to the liquid dump so you don't have to haul waste water with trucks. Just be aware that if you don't raise the pipe a few levels, it will impact the pathing of your trucks. We're not actually producing massive amounts of waste water, however, so I have chosen to set my tank to be emptied when it's close to full. You could also set it to be emptied whenever it has at least a truckload of waste water, and set the priority of the building far lower, ensuring it gets emptied when nothing else is going on.

For all this you'll earn:
the Synthetic Rubber goal (reward: 50 Electronics, 80 Concrete)
the Diesel prouction goal (reward: 50 Construction Parts, 60 Concrete)
and the Stockpile diesel goal (reward:60 Diesel, 60 Cement)
Construction Material II - Jumping ahead a little
Just taking stock of where we are at, we are now mining iron ore to make iron plates, our wood harvester is continuing to provide plenty of wood for us, and we have a steady supply of concrete to sustain the manual assemblies making our construction parts.

We can trade wood or iron for concrete blocks through the trading post. These can help keep things moving if we run into shortages, but this guide is about a sustainable start, not a start reliant on imports! I'm going to quickly outline some infrastructure changes that are a precursor to making our own concrete.

Your research has likely unlocked Construction II and conveyor belts. This gives us access to the yellow construction parts and the electric assembly building. Electric assemblies have twice the production speed of manual assemblies (though they require a few extra workers, consume power and require maintenance). Conveyor belts require yellow construction parts to build and power to operate, but they'll start automating our production. So it's time to set up our first automated production line!

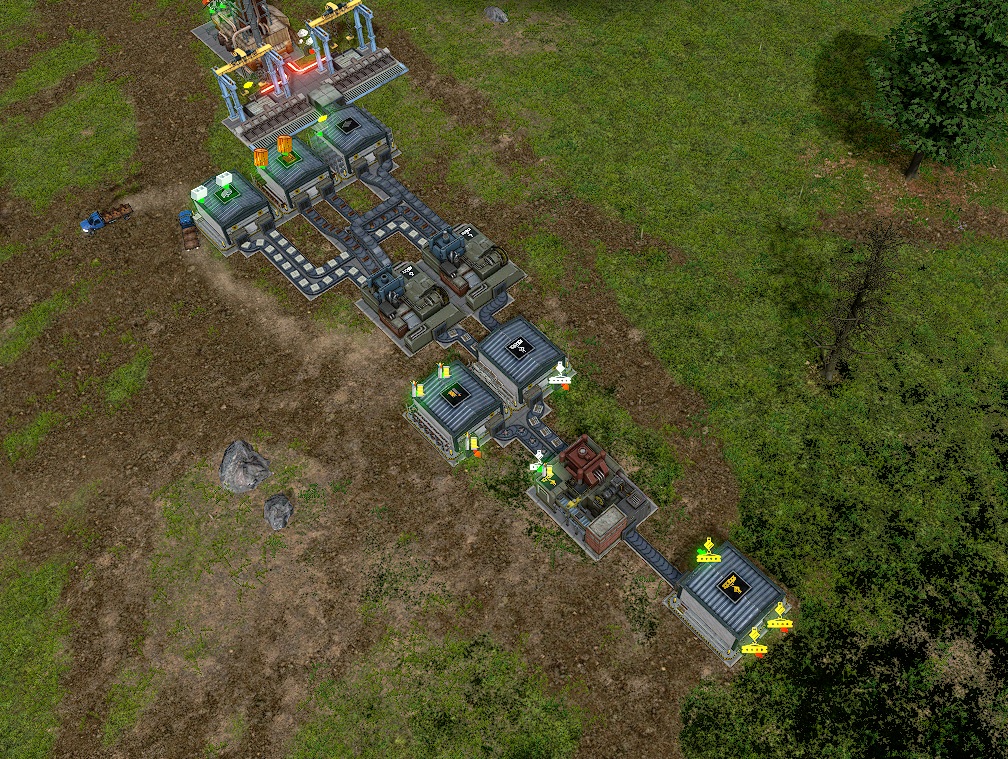
Starting with manual assemblies built close to unit stores for our ingredients, set the #1 recipe to yellow Construction Parts , then the #2 recipe to white Construction parts. The assemblies will make white construction parts, and whenever possible will slowly use those to make yellow construction parts. Use these to build conveyor belts to feed the ingredients you have in, lowering the amount of deliveries your trucks have to make.

Next, we can produce a unit storage for white construction parts and feed into that. Then, build one more assembly dedicated to making only yellow construction parts, fed by that unit storage (and another one for electronics). Remove the yellow construction parts recipes from the first two electric assemblies, so they are dedicated to just making white construction parts. Finally, make a storage unit for yellow construction parts and upgrade our yellow construction assembly to an electric version so it balances the 2 manual ones behind it. Trucks will still need to keep the unit storages topped up, but using the "keep full" import orders you can make sure there is a good buffer available at all times, and because the unit stores have greater capacity your trucks will always be able to load up completely, rather than being limited by the internal storage of the assembly buildings.


Automation
If you haven't changed the default import/export rules, trucks can still deliver and remove products directly from assembly buildings, however they should ideally be delivering to connected storage instead and letting the factories do their thing. You could automate a bunch of other processes right now, such as feeding coal and iron ore directly into the furnace, as well as setting up coal storage and conveyors to your kiln, diesel and rubber maker, but I'd recommend holding off on that as we still haven't secured sustainability - we need to take care of copper production.

You should unlock the following goals:
Construction II goal (reward: 50 Construction Parts, 60 Concrete)
Set up conveyor belts goal (80 Construction II Parts)
Copper Production
By this point you should be pretty familiar with setting up a new smelter and mining a new ore. Mining Control Tower, ore sorting facility, excavator and pickups for the mine:
And your basic smelter, now with ore and coal storage and conveyors in. The extra step with copper comes from the electrolysis process, which needs water and a LOT of power. You have probably already had to build a second diesel generator - now you'll want a third.
I've also used a groundwater pump instead of rain collectors. This research was probably finished a while ago and while it requires 40 construction II parts, it will scale better as we continue to increase copper production.

The Copper production goal will reward you with 80 Cement and 50 Concrete

I've gone ahead and set up the automation for turning that copper into electronics, a key ingredient for both maintenance, and our construction II parts. With that all set up and ready to go, we now have a baseline production of everything we're using. Iron for the mechanical parts we need for maintenance. Copper and Rubber for the electronics. Wood and concrete to create our basic construction parts, and fuel to maintain our power supply and keep everything running.

If you left the game running at this point, your oil would be the first resource that you run out of. So I would recommend researching advanced diesel processing, power generation, and the cargo dock. These 3 technologies help reduce your reliance on oil.
Power generation allows you to switch out diesel generators for a much more efficient coal boiler and steam turbine power generator.
Advanced Diesel processing allows you to replace the basic distiller with a multi-stage processing chain that will give you more fuel per litre of oil.
The Cargo ship will allow you to start using offshore oil rigs which on the default settings have a very large supply that will last far longer than the oil sources on your island.


Help! Something has gone terribly wrong!
While I've hopefully given you enough information to get you up and running, ultimately Captain of Industry is a game where a lot can go wrong suprisingly quickly. If your trucks are too busy for too long, critical deliveries might not occur and your maintenance or fuel production might seize up. Your excavators might finish digging out everything you've designated and suddenly there's no more iron or copper until you guide them to the next layer. Whilst the purpose of this guide is to get you out of the early game so you can start exploring what's possible, the trading dock is your best bet for escaping a death spiral if something starts getting out of hand.

Did you leave copper mining too late or use up all your rubber? You can trade construction materials for it. Are you all out of fuel? You can swap some coal. The trades are by no means cheap. It's always better to be producing all of this stuff yourself rather than trading for it. But for almost every shortage you come across in the early game, there's a trade that can get you out of trouble.

Everything is breaking down!
If you get a low maintenance warning, pause the game and immediately check out what the issue is. You always need to be producing electronics and mechanical parts. Sometimes your mining operations will need to dig through dirt or stone before getting to more ore, and that can leave a gap in your smelting, for example. You do not want to leave it to the point where facilities and trucks are literally breaking down before putting a fix in place. You cannot trade for maintenance. But there are a few panic buttons you can push.

1. Stop research. Beyond tier 1, research consumes the same ingredients as maintenance. It also consumes unity, and as a building it requires maintenance to operate.
2. Divert iron from construction materials. You can pause conveyor belts, or halt imports to assemblies that are making construction materials. Alternatively you can switch their recipes as mechanical parts only need iron which is part of the construction materials recipe anyway. Assuming you have already built maintenance depots, you don't need to be building more buildings that will consume more maintenance when you're trying to deal with a shortage of maintenence.
3. Pause non-essential facilities. Most production facilities in operation consume maintenance. Pausing them will reduce the drain on maintenance, giving you more time to get the materials for your depots to catch up.
4. Unity boost the maintenance depots or the assemblies building the ingredients for them. Unity boosts double output, and eliminate power and maintenance requirements. If the depot itself has everything it needs, this will get you back where you need to be sooner. If the depot is missing electronics or mechanical parts, boosting the assembly buildings will get those ingredients out faster.
5. Trade for the raw materials if you don't have them. If you absolutely cannot wait for iron or copper to be smelted, you can trade for it.

It's actually quite rare that a death spiral will truly be game over if you take steps to intervene early, but the road to recovery from these problems can be quite long as you slowly bring everything back online and into a steady state. Good luck!
20 Comments
Lucid  [author] 27 May @ 3:08am 
Thanks for you kind words! I've done a bit of a re-write to make that section clearer, the original wording mentioning 4 assemblies was meant to refer to the temporary setup from earlier in the guide, but I see it wasn't really adding anything here.
Hr_Ravn 27 May @ 12:21am 
First a big thank you for taking your time to make such a indepth going guide.
I've just bought the game after seeing many hours of gameplay from some of the known youtubers and felt a bit overwhelmed at first.

one thing to note, Seems like your texting isn't matching the picture in "Contruction Material II" -
The picture shows 2 manual to 1 electric, and but the text is saying 2 electric, then 2 manual and 1 electric 🙂
Feed1stBlood 28 Jul, 2024 @ 4:21pm 
Thanks for sharing. This is a good guide. I didn't think of sharing the chimney between furnace and coal maker before.
Lucid  [author] 7 Apr, 2024 @ 4:50pm 
Thanks for letting me know! I've adjusted the URL so it should point to the right tutorial once more
Rayanth 6 Apr, 2024 @ 11:46am 
the youtube video you link to in the coal mining section is "no longer available."
Lucid  [author] 22 Oct, 2023 @ 10:20pm 
I do need to complete updates reflecting the past few patches, which will likely result in some differences to recommended setups/ratios for various buildings. However slag is kind of by design something that you will have too much of in the early game as the smelting recipes are inefficient, and later too little of as your smelting operation becomes more refined. It's okay to dump slag rather than investing in more storage containers. It's a good idea to dump it somewhere specific where if you feel like digging it back up again for use later you can do so.
qwkdsm 22 Oct, 2023 @ 6:57am 
I keep on getting "stuck" producing too much slag. I setup 1 iron smelter and 1 copper and after awhile I have too much slag and I produce concrete with it and have multiple storage but It keeps on filling.
conwhitgaming 8 Oct, 2023 @ 9:08am 
cannot find "efficent concrte" in tech tree.
the_real_abradolf 18 Mar, 2023 @ 12:19am 
I like this tutorial alot!
Could you update it to include "Brick"?
Gibs 13 Feb, 2023 @ 3:33am 
sorry just skimmed before i read the whole thing, i went back re-read properly and saw you extend the coastline. thanks