Life is Strange Remastered

Life is Strange Remastered

49 ratings
๐’œ๐˜ญ๐˜ญ ๐“…๐˜ถ๐˜ป๐˜ป๐˜ญ๐˜ฆ ๐“ˆ๐˜ฐ๐˜ญ๐˜ถ๐˜ต๐˜ช๐˜ฐ๐˜ฏ๐˜ด.
By Bella โœ
This guide is kind of a shopping list of every single puzzle in the game, even separated in order, so you can follow it with ease in your walkthroughs.

ใ€€ใ€€ใ€€ใ€€ใ€€ใ€€

Well, then. For whatever and however reason you came across this guide, may it be by curiosity or some other external thingy, please, do grab yourself a comfy seat and your favorite cup of tea, and let's get to it together, shall we? Okey-dokey. It's a long grocery list, so make yourself very comfortable. Feel free to come back to it whenever you feel like you're stuck in your walkthroughs.
2
3
2
2
   
Award
Favorite
Favorited
Unfavorite
๐ŸฆŒ ๐’ž๐˜ฉ๐˜ข๐˜ฑ๐˜ต๐˜ฆ๐˜ณ 2: ๐’ช๐˜ถ๐˜ต ๐‘œ๐˜ง ๐’ฏ๐˜ช๐˜ฎ๐˜ฆ ๐Ÿฆ‹


  • The following is a written walkthrough of "Episode 2: Out of Time" for Life Is Strange. "Episode 2: Out of Time" serves as an establishment for characters and gameplay mechanics.

  • Max Caulfield tries to convince Chloe Price that she can rewind time but starts to suspect that her power may not last forever. Meanwhile, Kate Marsh tries to deal with the public shame over a viral video that was leaked and shared around the students of Blackwell.

  • The walkthrough below explains how to complete "Out of Time" in Life Is Strange. The episode focuses primarily on the memorization of certain objects in specific locations and the completion of timed puzzles.


๐˜ž๐˜ฉ๐˜ข๐˜ต'๐˜ด ๐˜ช๐˜ฏ ๐˜Š๐˜ฉ๐˜ญ๐˜ฐ๐˜ฆ'๐˜ด ๐˜ฑ๐˜ฐ๐˜ค๐˜ฌ๐˜ฆ๐˜ต๐˜ด


  • At the Two Whales Diner, Max Caulfield and Chloe Price will discuss her rewind ability. Wanting to convince Chloe about her abilities, Max states that she can guess what is in Chloe's pockets. None of the prompts initially presented to the player will be correct. When Chloe tells Max that she is wrong, she will remove her belongings from her pockets and sit them on the table.

  • The trick to convincing Chloe of Max's rewind ability is to study the quantity and detail of her belongings. It's not enough to know what they are, as merely staining the obvious ("you have a keychain") will force the player to restart the sequence because Chloe will not believe them.


Cigarettes


Chloe carries a pack of cigarettes with wherever she goes. When you click on the prompt "Cigarettes", Chloe will ask how many cigarettes she has in her pockets. Choose the prompt "Seven Cigarettes".

Parking Ticket


Chloe was given a parking ticket on September 12, 2013 for parking in a handicap reversed space. When you click the prompt "Parking Ticket", Chloe will ask what time she was given the ticket. Choose "10:34 A.M."

Spare Change


Chloe has 86ยข in her pocket. When you click the prompt "Money", Chloe will ask wow much she has exactly. Choose "86 cents".

Keychain


Naturally, Chloe carries the keys to her truck wherever she goes. When you click the prompt "Keys", Chloe will ask for the details of what her keychain looks like. Choose "Panda Keychain".

๐˜Š๐˜ฐ๐˜ฏ๐˜ท๐˜ช๐˜ฏ๐˜ค๐˜ช๐˜ฏ๐˜จ ๐˜Š๐˜ฉ๐˜ญ๐˜ฐ๐˜ฆ ๐˜ˆ๐˜จ๐˜ข๐˜ช๐˜ฏ


  • When Chloe asks to be fully convinced to Max's power, Max declares that she will predict what will happen in the diner in the next thirty seconds or so. Watch the sequence as it unfolds carefully. After a moment the player will be prompted to rewind the sequence. Like the segment passed, attention detail will allow the player to properly convince Chloe in one go.


  • Joyce waves to Max and Chloe. As she walks over to counter, the trucker in the coat knocks over a cup of coffee

    Choose the prompt โ€œTrucker Drops his Mugโ€

  • The cop gets a call, forcing him to leave his breakfast. He asks where his partner is before hearing the sirens of his police car as the cruiser drives off without him

    Choose the option โ€œโ€ฆAnd his partner leavesโ€

  • Trevor and Justin get into a fight and start calling each other a โ™ฅโ™ฅโ™ฅโ™ฅ and a โ™ฅโ™ฅโ™ฅโ™ฅโ™ฅ. Joyce intervenes and tells them to take their โ€œFight Clubโ€ outside

    Choose the option โ€œโ€ฆAnd Joyce stops themโ€

  • Jukebox malfunctions when a cockroach crawls across it

    Choose the option โ€œJukebox goes crazy as cockroach crawls on itโ€

๐˜๐˜ช๐˜ฏ๐˜ฅ๐˜ช๐˜ฏ๐˜จ ๐˜ต๐˜ฉ๐˜ฆ ๐˜‰๐˜ฐ๐˜ต๐˜ต๐˜ญ๐˜ฆ๐˜ด


  • American Rust is Arcadia Bay's junkyard located next to the train tracks. It is considered by Chloe Price as her "home away from Hell."

  • Chloe and Rachel Amber spent a lot of time here, as evident from their hideout in a wrecked outhouse which is covered in their belongings and graffiti.

  • It is an explorable area in Episode 2 and is featured again in Episode 4. The junkyard is also featured in Before the Storm, the prequel to the events of Life is Strange.

  • While in the Junkyard with Chloe, Max will be asked to find five bottles for Chloe's shooting range test. There is no specific order in which the bottles have to be found and they are relatively close to Chloe's location near the abandoned car.


Boat Bottle


The second-to-last and hardest bottle to locate is the "boat bottle" sitting on a table in the back of an old boat. To the left of Chloe there is a hill the player can run up that leads to higher ground. Just across from Max is a plank that the player can interact with. When the prompt appears, press "pick up" and Max will create a bridge that she can cross. Once you're onto the boat pick up the bottle. Optionally, the player can also sit on the chair and watch a cinematic of Max reflecting on her reunion with Chloe.

Campfire Bottle


Arguably the hardest bottle to locate on a player's first run through the level, the "campfire bottle" is secluded in the corner behind Chloe and Rachel Amber's clubhouse. After retrieving the bottle from the boat, go down the hill and walk directly under the plank Max set between the boat the higher ground above her. Ahead of her is Chloe and Rachel Amber's clubhouse. Walk to the right, directly past the clubhouse, and you will find a stack of cars that create a small space that Max can walk between. The bottle sitting right in front of the campfire.

Clubhouse Bottle


Head back around to the front of Chloe and Rachel Amber's clubhouse and enter through the front. Sitting directly across from Max on a chair next to a pizza box is the "clubhouse bottle" in question. Pick it up and head outside.

Car Bottle


The "car bottle" can be found just before you approach the yellow school bus. Move away from Chloe and Rachel Amber's clubhouse and move to your right. When you see a collection of metal stacked together like logs keep moving in that direction until you see a car with a wheel sitting on top of its hood. Right in front of the tire is the car bottle.

Fridge Bottle


The "fridge bottle" is the easiest of the five bottles to find. Following the progression of this walkthrough, after obtaining the "car bottle" head toward the yellow bus. When you approach the bus, you will find a refrigerator with no door and two tires stacked on it's top. Sitting in a red top is the "fridge bottle". If the player attempts to take the bottle, Max will knock it over and break it. Rewind time accordingly and grab the box that sitting just across from the fridge. Max will drag the box over the fridge. Once the box is properly positioned, the player can take the bottle without incident and return to Chloe.

Brick Bottle - credit to @rmsgrey


This optional bottle, located on the pile of junk outside Chloe and Rachel's den, is an alternative to the usual five, making it six bottles in total, but only possible to have five collected at a time.

๐ŸฆŒ ๐’ž๐˜ฉ๐˜ข๐˜ฑ๐˜ต๐˜ฆ๐˜ณ 3: ๐’ž๐˜ฉ๐˜ข๐˜ฐ๐˜ด ๐’ฏ๐˜ฉ๐˜ฆ๐˜ฐ๐˜ณ๐˜บ ๐Ÿฆ‹


  • Max Caulfield and her "partner in crime", Chloe Price, start an investigation into the mysteries surrounding Blackwell students Kate Marsh and Rachel Amber. As they make headway, Chloe discovers that even those close to her have secrets. A new rewind power presents itself to Max, and its use has devastating consequences.

  • Max Caulfield and Chloe Price begin to investigate the conspiracy surrounding Kate Marsh and Rachel Amber. The pieces to the mystery surrounding Rachel's disappearance leads them to answers and the consequences of Max's powers lead to a conclusion that have devastating consequences for everyone she knows.

  • Waking up from a nightmare, Episode 3: Chaos Theory has Max back in her room, still dealing with the events of Episode 2.


๐˜ž๐˜ข๐˜ณ๐˜ณ๐˜ฆ๐˜ฏ'๐˜ด ๐˜๐˜ข๐˜ฏ๐˜ฅ๐˜บ ๐˜‰๐˜ฐ๐˜ฎ๐˜ฃ


  • No matter how hard you look, the keys seem to be impossible to find, and eventually Chloe will talk to you. This triggers Max to talk with Warren, about blowing the door open. Warren tells you some ingredients to find to make a small explosive to blow open the door.


    Sugar

    Found in the science lab on the teachers desk.

    Soda Can

    Use the vending machine in the hallway to get a can.

    Duct Tape

    This is found in the back of Mr. Jefferson's classroom, by a printer.

    Sodium Chlorate

    This isn't found directly. Head into the science lab and you can find a chemistry book. After reading it, Max will comment how Sodium Chlorate is found in Weed Killer. Fortunately there is some Weed Killer on the shelf in the back of science class.

๐˜‹๐˜ข๐˜ท๐˜ช๐˜ฅ'๐˜ด ๐˜“๐˜ข๐˜ฑ๐˜ต๐˜ฐ๐˜ฑ ๐˜—๐˜ข๐˜ด๐˜ด๐˜ธ๐˜ฐ๐˜ณ๐˜ฅ


  • Joyce will ask what you want to eat, and ask you to get the ingredients. They are nearby, either in the fridge or in the shopping back by the front door of the house. While looking for them, you can also find their answering machine in the hallway. If you delete the message, you can save Chloe getting in trouble.

  • Once you have them cooking ingredients, head back to Joyce to get breakfast made. When prompted, go sit down and wait for her to bring you your plate, then eat the food. Eventually she will sit down with you and show you some pictures, before Chloe finally comes down stairs. Her and her mother will argue, and you will end up sneaking into the garage.


  • Once in the garage, you will find his computer, but it has a password. You will have to look around the garage to find a potential clue to the password.

There are several here, but the one you want is 11-27-08. This password is found in his car, under the sun visor. It is the date on a receipt from the Diner where he met Joyce.


๐˜๐˜ณ๐˜ข๐˜ฏ๐˜ฌ'๐˜ด ๐˜™๐˜ท ๐˜’๐˜ฆ๐˜บ๐˜ด


  • Back at the Diner, you and Chloe are going to try and get into Franks RV. She will tell you to try and get his keys.


  • Talk to Frank to open up conversation trees with the cop and Nathan. The police officer will talk about the Prescott family. Rewind time and bring it up to him to learn more. Head over and find Nathan who is sitting in a booth. Talk to him and bring up what the cop told you to cause Nathan to give you even more information. Again rewind time, and bring up the Blood Oath, and he will give you information on Frank.

  • Now head over and talk to Frank, and either bring up what Nathan said about the photo, or what the cop said about the dogs. This will prompt him to pull his keys and other objects from his pockets. Grab the keys, and he will get angry. Simply rewind time now, and walk away with his keys. Go to Chloe and she will open the door as you throw the bone to distract the dog. This is a major decision, as you can throw it on the road and kill the dog, or throw it in the parking lot and save the dog. Regardless of what you pick, you will enter the RV after to look for clues.

  • There are several things in here to interact with. If he took the gun earlier in the game, you can find it. What you really are looking for is a knife. Once you have it, go into the back of the RV and there are a couple air vents. The one of the floor can be pried open, and you can find a notebook with a bunch of information about Rachel. Take it to Chloe and she will get mad about it and the two of you will leave the area, arguing in the truck.

๐ŸฆŒ ๐’ž๐˜ฉ๐˜ข๐˜ฑ๐˜ต๐˜ฆ๐˜ณ 4: ๐’Ÿ๐˜ข๐˜ณ๐˜ฌ โ„›๐˜ฐ๐˜ฐ๐˜ฎ ๐Ÿฆ‹


Episode 4: Dark Room begins shortly after Episode 3: Chaos Theory. You will be with alternate reality Chloe on the beach, talking about things while Max tries to deal with the consequences of her time travel.

There are many dialogue options to select here, but non are important to your long term game, so be as thorough with the conversations as you like. Eventually you will end up back at her house, where you will continue to chat, and eventually be given a chance to walk around.

When you come back to the present, things are back to normal and you are in Chloe's room. The first Optional Photo can be grabbed here, by looking at Chloe before talking to her. When you are ready though, speak with her and eventually you will end up having to go to the garage.


๐˜‹๐˜ข๐˜ท๐˜ช๐˜ฅ'๐˜ด ๐˜—๐˜ข๐˜ฅ๐˜ญ๐˜ฐ๐˜ค๐˜ฌ


  • Depending on Joyce throwing David out of the house, David can either be in his garage working or on the way to a hotel room. Max needs to open David's locker, which contains information about his investigation on Rachel Amber. She can do so by either inputting the correct combination for the padlock (7171) or using a crowbar. The car, which prevented Max from reaching the locker earlier, is no longer present, hinting at the fact that David has finished the repairs.

  • Near the entrance to the garage is located a bird's nest. Max can move the board (and move it back after, if you do not want to disturb the nest) to take an optional photo.

๐˜•๐˜ข๐˜ต๐˜ฉ๐˜ข๐˜ฏ'๐˜ด ๐˜—๐˜ช๐˜ฏ ๐˜ข๐˜ฏ๐˜ฅ ๐˜—๐˜ถ๐˜ฌ ๐˜ค๐˜ฐ๐˜ฅ๐˜ฆ


  • Life is Strange might be one of the best time travel games ever, but the rewind power isn't necessary to find the right pin code; you need deduction skills instead. Your attention will likely be drawn to the bit of paper with multiple sets of numbers written on it. However, this is just a red herring as none of them is the right combination. In fact, the only code on the note that has any value is the 3-digit one, which helps with a puzzle later in the game.

  • The piece of evidence that you actually want to look at is the student information sheet. As the name suggests, it contains several bits of information about Nathan. The important one is his birthday, which is August 29th. Like many people, he uses this as the code for his phone. This is probably a bad idea for someone involved in as many questionable activities as Nathan.

  • Regardless, with this date of birth memorized, you can interact with the phone and type 0829 to unlock it.


  • While some of the world's hardest games strongly punish any failure, Life is Strange is a lot more lenient. If you input the incorrect code a few times, the phone will lockdown and not let you have any more guesses. This naturally creates a big problem for your investigation. But luckily, you have Nathan's Sim card nearby.

  • Interact with it to get a close look, and you'll see a PUK code (87897808).

  • Try to remember it and go back to the phone. You'll get the chance to enter the giant set of numbers to get into the device. It's perhaps the less impressive way to complete this puzzle, yet it's also the method most players are forced to use. After all, deciphering the correct code isn't simple.

๐˜•๐˜ฐ ๐˜–๐˜ฏ๐˜ฆ'๐˜ด ๐˜๐˜ฏ๐˜ซ๐˜ถ๐˜ณ๐˜ฆ๐˜ฅ ๐˜๐˜ฏ ๐˜๐˜ณ๐˜ข๐˜ฏ๐˜ฌ'๐˜ด ๐˜™๐˜ฆ๐˜ถ๐˜ฏ๐˜ช๐˜ฐ๐˜ฏ


  • The third important choice can be found in the third chapter of the episode. The choice is divided into three main parts and each of them has different ending that might have great consequences in the next episode. It's also the most expanded choice that you have faced in the game.

Chloe Killed Frank - Chloe kills Frank and his dog (if you let it happen)
Chloe wounded Frank - Chloe wounds Frank by shooting his leg
No one got hurt - You receive new ally (Frank) in your investigation


First try

  • Give Frank Chloe's debt money.
  • Tell Frank you're sorry.
  • Tell Frank you were scared or you were protecting Chloe.
  • Tell Frank about dog rescue (or if you do not have that option, that you love dogs).
  • Tell Frank that he knows Rachel ( or Rachel's photo is you got him to show you her photo ).

With your rewind power

During the conversation with Chloe:

  • Watch your mouth

During the conversation with Frank

  • Close the door
  • I'm sorry
  • You scared me
  • I love dogs
  • Knows Rachel ( or Rachel's photo, if he showed it to you )

๐˜‰๐˜ฐ๐˜ข๐˜ณ๐˜ฅ ๐˜—๐˜ถ๐˜ป๐˜ป๐˜ญ๐˜ฆ


A quick video to help you solve the investigation puzzle in Chloe's room.


Timestamps

  • Frank's clues #1 - 0:17
  • Frank's clues #2 - 0:36

  • David's clues #1 - 1:01
  • David's clues #2 - 1:25

  • Nathan's clues #1 - 1:48
  • Nathan's clues #2 - 2:13

  • Final clues - 2:32

๐˜‹๐˜ข๐˜ณ๐˜ฌ ๐˜™๐˜ฐ๐˜ฐ๐˜ฎ'๐˜ด ๐˜ค๐˜ฐ๐˜ฅ๐˜ฆ


  • After getting to the basement you will see a technologically advanced bunker. You will have to guess the numerical password that protects the access inside. Max will inform you that some of the numbers are erased and that the password must be guessed by the method of attempts and failures. If you were observant, you should remember that the number was in Nathan's school documents (marked in red). The number is 542. After entering three wrong numbers the mechanism will block and you will have to go back in time.

๐ŸฆŒ ๐’ž๐˜ฉ๐˜ข๐˜ฑ๐˜ต๐˜ฆ๐˜ณ 5: ๐’ซ๐˜ฐ๐˜ญ๐˜ข๐˜ณ๐˜ช๐˜ป๐˜ฆ๐˜ฅ ๐Ÿฆ‹


  • Max Caulfield learns that time is impossible to control and that her power carries many consequences as she moves inexorably towards the most agonizing decision of her life. Arcadia Bay, meanwhile, is preparing to weather a huge storm as Life is Strange comes to a gripping and gut-wrenching conclusion.

  • Max is held captive inside the bunker with Mark Jefferson, but by using her powers, she manages to escape into a photograph. Emerging back at the beginning in Jefferson's class, it is made possible for her to inform David Madsen of her kidnapper's identity - Jefferson is caught, Chloe Price is rescued, and Max is awarded the opportunity to go to San Francisco as the winner of the Everyday Heroes Photo Contest and see her photograph displayed in an art gallery.

  • She calls Chloe from the event, realizing that in spite of all her efforts, the storm still exists and is heading towards Arcadia Bay. Max uses her powers to go back in time to the taking of her photo entry, which eventually leads her to sojourn alternative realities as they devolve into a dreamscape nightmare. By the story's end, Max arrives at the lighthouse with Chloe. They confront the fact that Max brought the approaching super storm into existence by availing herself of the advantage of time travel abilities and saving Chloe in the bathroom from the start. Max must make a final choice: sacrifice Chloe's life in order to save Arcadia Bay or sacrifice Arcadia Bay to prevent Chloe's demise.


๐˜Œ๐˜ฏ๐˜ฅ๐˜ญ๐˜ฆ๐˜ด๐˜ด ๐˜๐˜ข๐˜ญ๐˜ญ๐˜ธ๐˜ข๐˜บ


  • Donโ€™t let these Life Is Strange puzzles in Episode 5: Polarized keep Max from concluding her weird journey.

  • Life Is Strange gets even stranger in the final episode. Using her innate power to rewind time, Max uncovers the truth behind several mysteries that plaque their pacific northwest town. Answers are coming, but only if you can solve every bizarre puzzle. While not as involved as previous episodes, there are two particular challenges unprepared players might get stuck on.


Inside the endless Girls Dormitory hallway, every door leads straight back to the beginning of the path. To escape, youโ€™ll need a key.

1. When you first arrive, speak with Kate. Sheโ€™s standing near her room. After the conversation, use any door to restart the sequence.

2. Next, look on the table near the restroom down the hallway on the right. Thereโ€™s a key here โ€” pick it up. Itโ€™s for room โ€˜218โ€™.

3. Go through door โ€˜218โ€™, then go through door โ€˜224โ€™, then โ€˜221โ€™, and finally โ€˜219โ€™ to escape the dormitory.

๐˜‰๐˜ข๐˜ต๐˜ฉ๐˜ณ๐˜ฐ๐˜ฐ๐˜ฎ ๐˜—๐˜ข๐˜ด๐˜ด๐˜ค๐˜ฐ๐˜ฅ๐˜ฆ


When Max is trapped in the strange Diner bathroom, youโ€™ll need to find a four digit passcode to escape. There are numbers covering every surface, so which one is the right code?

  • 1. Look in the mirror. Only one set of numbers is reflected in the glass. Those numbers, for us they were โ€˜0311โ€™, are all you need to escape.

  • 2. Donโ€™t forget; the numbers appear backwards in the mirror. Re-arrange the numbers when inputting into the keypad.


๐˜ˆ๐˜ญ๐˜ญ ๐˜‰๐˜ฐ๐˜ต๐˜ต๐˜ญ๐˜ฆ๐˜ด


Here's a quick little short video on all the 5 bottles for the optional picture:


  • Upon entering the bathroom, Max finds herself in a dream-like atmosphere, with floating debris and darkened backdrops. With the lighthouse in the far off distance, she lands in a maze made up of walls with photographs from the Dark Room. Jefferson patrols the scene with a flashlight, attempting to catch her. Escaping Jefferson, she makes her way to a section with the Blackwell founder statue in the centre, surrounded by gallery boards of Dark Room photos, with the voice of Ray Wells booming over loudspeakers. Max must avoid being spotted by the statue's light source, hiding behind the billboards. This leads her to a section filled with Blackwell school lockers. Warren, Principal Wells, Samuel, Nathan and David Madsen patrol the spaces between the lockers, chiding at Max, calling for her to come out, and saying negative things about her.

  • If she makes it past here, Max will end up in a nightmare version of the American Rust Junkyard. Jefferson, Nathan and Frank patrol here, looking for Max and making hurtful comments and observations. Here, Max can collect five bottles in order to line them up for an optional photo. There is also the opportunity for a moment of peace, with a "sit" option beside the hideout Chloe and Rachel inhabited. After making her way through here, Max heads towards the bench beside the lighthouse and sits.

๐Ÿ‡ ๐“’๐™ง๐™š๐™™๐™ž๐™ฉ๐™จ ๐Ÿ’’
โ €โ €

  • Any suggestions, acclaims, critiques or updates, feel free to manifest in the comments below. My sincere and heartwarming gratitude. Have fun exploring all the different possibilities in the marvelous town of Arcadia Bay!

  • If you truly felt like this guide genuinely assisted you in your games, please, do so consider dropping a rating for me. I really try my best to put passion, attention, and time into my works, especially to have everything explained nicely and well for you so no possible doubts may be had, and to make it pleasant and beautiful to read and go through so it doesn't seem tiresome. I would be very thankful if you took the time to provide your feedback. You know, these kinds of small things help passionate guides reach more people, and help them just as it did to you! I won't be the only one to be appreciative, but they will also be, too!

  • If you read it this far, I have something special to share with you, so don't go just yet! As president of the Junkyard's council, since Chloe had to retire, it's my duty to make this guide fun and exciting for you. Here's Beatriz's Golden Tip For You: Living with fear stops us taking risks, and if you don't go out on the branch, you're never going to get the best fruit. Life is strange teaches us that in a wonderful way. Thank you, and wishing you the best! Enjoy your playthrough!

โ €โ €

Also, I forgot to mention that, if curiosity struck you, no. No, you can't have Warren not be friendzoned by Max, even if you kissed him and rejected Chloe. Okay, now that's truly it! Bye, bye! I hope this guide was helpful to you!


โ €โ €
5 Comments
Bella โœ  [author] 18 Feb, 2022 @ 3:46pm 
That sounds much reasonable now that I think of it. Thank you for taking the time to do that kind of research for me.
rmsgrey 18 Feb, 2022 @ 2:35pm 
I just checked, and picked up both those bottles - but having picked up five of the bottles, the sixth (in this case, the one on the boat) stopped responding (though the physical model is still there in the world). I'm reasonably sure it's just that hitting any five bottles collected makes the last one stop responding.
Bella โœ  [author] 18 Feb, 2022 @ 7:33am 
Hi, @rmsgrey.

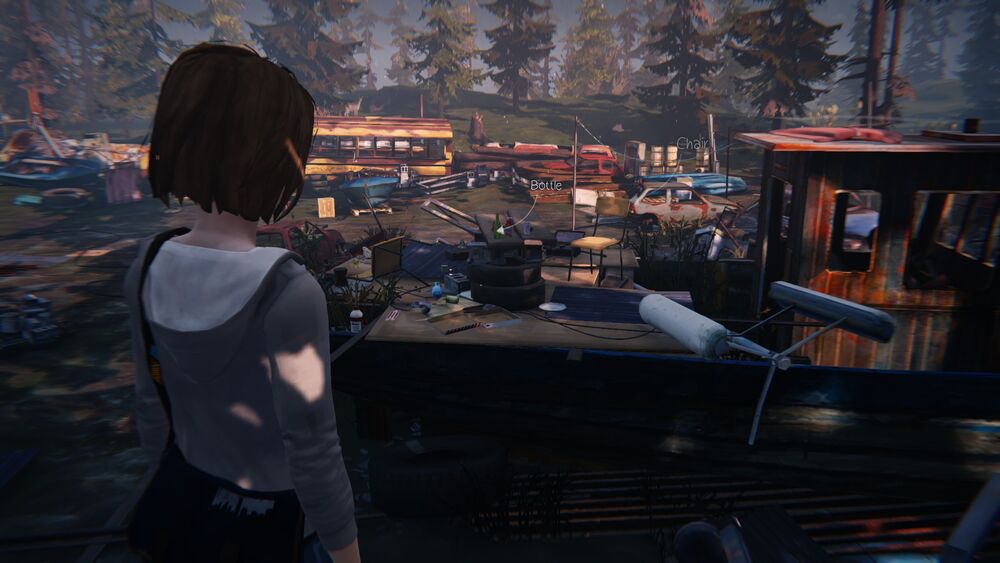
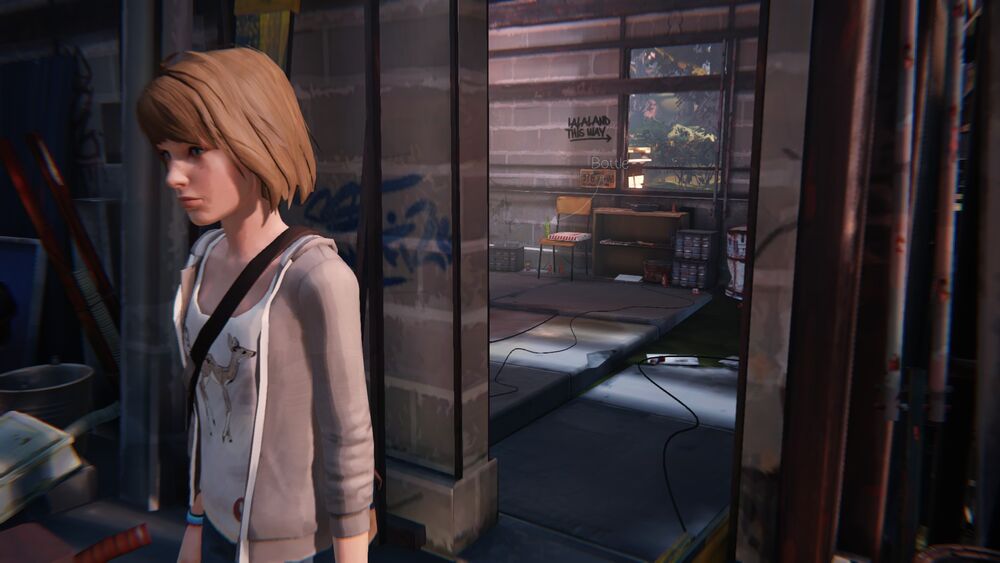
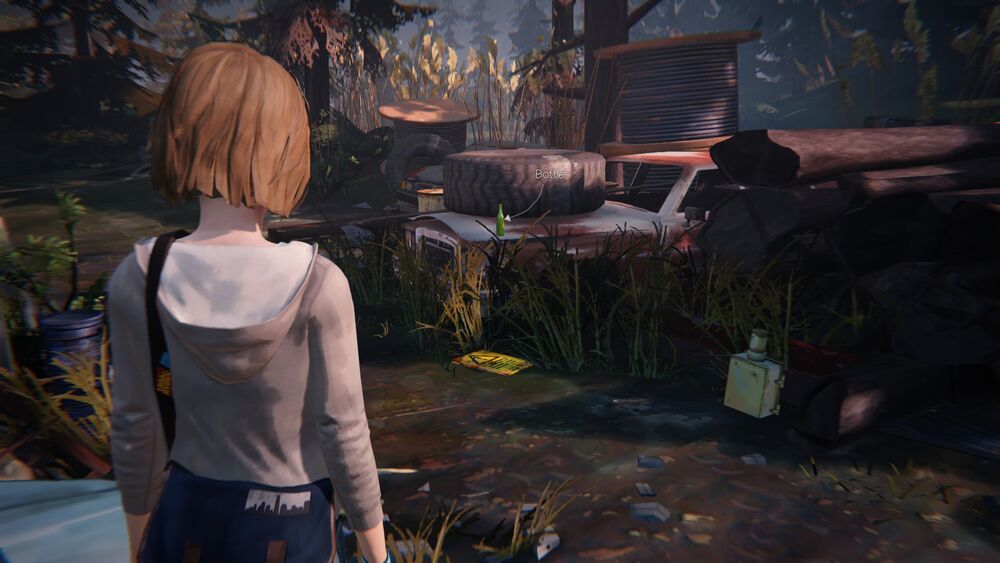
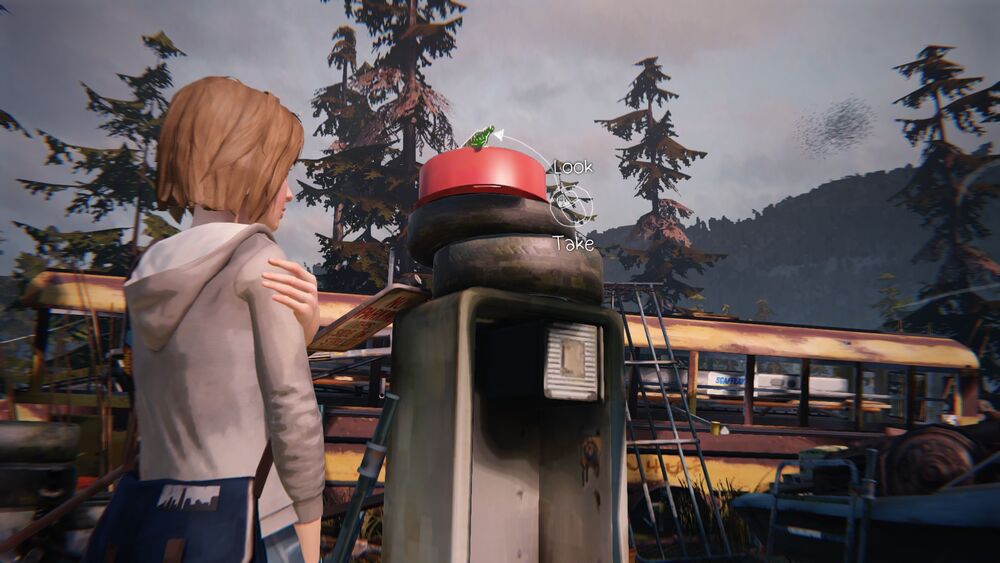
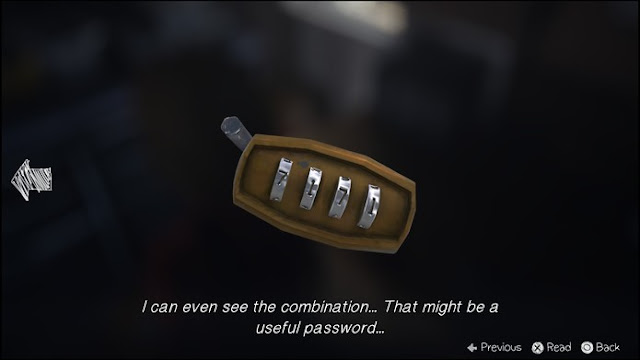
Thank you for your input. I came to notice that this optional bottle that you mentioned seems to be an alternative to the one on the fridge. As soon as you get either of them, the other disappears. If you come across and interact with the former, the latter doesn't show up, and so forth. I'll credit you as well as soon as I edit this page with the new screenshot.

Once again, thank you for the info.
rmsgrey 17 Feb, 2022 @ 8:31pm 
One note: there's a sixth bottle in episode 2's bottle hunt - around ankle-level on the pile of junk outside the front wall to Chloe and Rachel's den - if you're heading toward their den's entrance from the fridge, it's on your left. Collecting five of the six bottles ends the hunt.