Cannibal Crossing

Cannibal Crossing

34 ratings
Tips, Tricks, and Guide to beating Cannibal Crossing (UPDATED Oct 31, 2021)
By ReCustomize
Tips, Tricks, and Guide to get you through Cannibal Crossing. Relevant information for even NIGHTMARE difficulty! Goes over how to successfully run through the game, what skills to get, which weapons are good, and other useful information!
4
9
   
Award
Favorite
Favorited
Unfavorite
How to play (1)
To Death Road to Canada fans: This game is much more intense! There is a greater focus on the combat and gameplay.

GUIDE IS UPDATED: OCT 31, 2021

Starting a New Game
The first thing you should do is loot or break things for steel and scrap to make a Smelter. I recommend starting by going to the Mall(always spawns near the top center of the map) as you will get many types of resources to start as well as a good location to make a base. Also make a lockpick for one steel in the crafting menu so you can unlock things.

Goal
- Find and help the other playable characters who will then lead you to bosses. These NPCs will appear as '?' (question marks) on the map. If you are playing "Escape from Earlsbad", then a Radio can help you show where they are.
- Defeat Bosses to obtain parts to escape with the helicopter. Save all playable characters to get the Full Clear ending.
- There is no actual time limit, but the enemies get harder and the town gets more corrupted the longer the game goes on.

- You get EXP and loot for enemy kills, so it's worth it to kill as much as possible if you can.
- You get EXP for sticking your head into a location, so it's worth your time to drop by a location along the way. You'll probably find something to lockpick, too.
- You get EXP for lockpicking, so it pays to learn the lockpicking mini-game. Many rare items can be obtained this way.
- You get EXP for crafting, so you can level up just by making a bunch stuff.
- Read the Skill section if you want to learn about where to spend skill points. If you don't want to read all that, then the recommended skills to get are dodge chance and extra healing to start, then past level 10, "Double Dragon" rank 2, and increased ammo/material capcity.

Getting Comfortable
Once you have enough Steel and Scrap, you can create a home base. A base should be a safe place for you to return/teleport to so you can create ammo & heals, upgrade weapons, store items, and rest. The core of a starting base might contain:
1. Smelter - Always build this first. Turns most items into steel, anywhere on the map. The building itself can turn scrap into steel. Your main source of steel which is an important resource for building and upgrading.
2. Homing Beacon - For use with 'Teleport Device' to return home. NPCs also use this.
3. Ammo Press - Throw this down ASAP and never have ammo problems for the rest of the game.
4. Tent - To heal up and rest!
5. Advance Workshop - Needed to upgrade weapons! Upgraded version of this is needed for level 4 & 5 weapons.
6. Electronic Station - Lets you craft Teleport Device for Homing Beacons. Also can turn Steel into Batteries.
7. Distillery - Makes Whiskey to combine with Bandage to get Medkits. Or for Lola. Also reduces mucus corruption when you drink it.
8. Storage - Build these or use objects that you loot from to store things.
9. Radio - Can tell you where the NPC to save is, or another location of interest. ONLY available in "Escape from Earlsbad."

In this screenshot, this is the first day of the game and almost always where I build my base(the top right-side of the mall). I broke some of the original stuff inside for more space to build and use the stuff above as storage so I don't have to build any storage.


And then these buildings are good after you build your core stuff:
1. Bandage-O-Matic - Turn Batteries into Cloth or heals.
2. Any Generator - For base defense such as lights, turrets, and the HiTech Barrier. The Large generator can turn gas into batteries, too.
3. Light Source - For keeping corruption away.
4. Bait Station - Building and upgading this grants access to better turrets and fences.
5. Training Station - Grants Focus and Critical bonuses that work anywhere once built.

Look into upgrading the buildings or other buildings with your excess resources!

When you're ready to kill all the bosses, then you'll be able to leave the town. Doing that is as easy as picking up an Assault Rifle and having enough ammo to take out a boss, regardless of player level or day.
Beyond Day 6 is when the place really starts to get deadly. Enemies carry much stronger weapons and groups of mobs are much larger. Fights will usually last longer. This is when levels and stronger weapons help a lot. Depending on the difficulty you play on, the enemies may become stronger at a faster pace or not.
If you're able to clear the game as early as possible, that's cool! But I'm not sure what the benefit of clearing fast or staying longer is. I suppose you can get stronger weapons later on.

Your save file is this folder. C:\Users\YOURNAME\AppData\LocalLow\AwesomeLand\CannibalCrossing
Tips (4)
General Tips:
- Use buildings and chokepoints when you are overwhelmed.
- Upkeep rest with Tent. Use beds when on the go, or Sleeping Bags when you can't find a bed.
- Cook often as cooked food gives buffs and recover a large amount of hunger.
- Aim to upgrade and obtain higher level weapons.
- Upgrade tables that you create can upgrade weapons up to level 5, but tables you find only go up to level 3. The benefit is that you don't have to make a table you find. They usually appear in garages.
- Focus and Reload don't cancel out during rolls.
- Rolling around the map and holding focus alongside Zoom+ will give you the most view of the map while moving at the same time. Use this move and spot things as far as possible.
- Don't Sprint Everywhere! Getting into combat without stamina can be game over if you aren't ready. I recommend traveling without going under 50% stamina at the most. Spriting into 0 stamina then suddenly getting ambushed is almost inevitable. That's why I recommend the above technique for surveying your surroundings.
- Doing lockpicks can be great, but saving them and other loot boxes until later can yield greater rewards as items in are determined by the day count in-game. The later the date, the better the loot.
- You can use the Agility tree's level 10 skill to move faster around the map. The distance is determined by the type of weapon, so a heavier weapon will move your further if you want to use it for that purpose. Super Sledge seems to be the one weapon that goes the furthest with Rock N' Roll! It is fast enough to be able to run away from encounters(as well as kill anything that's in front of you). With infinite stamina from Spaghetti, you can get very far and very fast.

Negative Horde:
Find a building/door/choke and be ready to fight around it. For day 7 and after, you're going to need some serious firepower or it can get too overwhelming in the blink of an eye. If you're strong enough, you should be able to fight this in the open. Strong weapons help a lot!
If you've built and upgraded a Bait Station, then setting up fences and turrets would be ideal. You may need to build multiple layers of fence, so it's probably safe to at least double fence where you think the most traffic will be.
Otherwise, make use of buildings or doors and mow enemies down within the choke point. It's possible to avoid Negative Horde entirely by entering a boss fight within the timer of it.

Map Tips:
Things always spawn around certain parts of the map. For example, the 3 game objectives: The Secret Door must spawn on the top. The Bulldozer must spawn on the left. And the Helicopter can spawn anywhere on map.
As for some buildings, the Mall always spawns near the center top, then the rest of the buildings tend to be on the right side of the map(but sometimes some NPC buildings can be on the left side of the map).
Signs appear near roads and can give you clues to the direction which certain buildings are. Basically, if you clear the right side first, you will see most buildings.
Try to discover the objectives before killing all of the bosses.
Also, discovering the Gas stations near the bottom of the map can give you a southern location to Fast Travel to.

Base Defense & Building Tips:

Try to find a place where you can easily funnel enemies into choke points. Entering the construction menu will show you exactly where you can build.
Stay near a landmark building(s) so you can fast travel to it with a car. If you use only one Homing Beacon on the entire map, you can return to the same spot every time with a "Teleportation Device".
Buildings do have HP and can be destroyed, and losing an upgraded building would be a big loss of resources, so try to keep your buildings safe. Here is a list of buildings I usually end up building and some flavor text:

Smelter - You'll probably make this first.
Homing Beacon - For use with Teleport Device. NPCs also use this.
Ammo Press - Throw this down ASAP and never have ammo problems for the rest of the game.
Advance Workshop - Needed for level 4 & 5 weapons.
Electronic Station - Lets you craft an item to teleport to Homing Beacons. Can turn Scrap into Batteries.
Tent - It's possible to skip this and just use beds/sleeping bags. But level 2 Tent recovers HP faster.
Bandage-O-Matic - Turn Batteries into Cloth or heals.
Distillery - Makes Whiskey to combine with Bandage to get Medkits. Or for Lola. Or to recover from Mucus Corruption
Large Generator - For base defense such as lights, turrets, and the HiTech Barrier. Also turns gas into batteries.
Light source - Reduces corruption.
Bait Station - Building and upgading this grants access to better turrets and fences.
Training Station - Grants Focus and Critical bonuses that work anywhere once built.


But If you really want to set up the most high tech base defenses, then you'll want to build and upgrade a "Bait Station" in the Attack tab under the construction menu. It grants you access to the strongest defensive building options, such as "HiTech Barrier" and lightning bolt turret that does AoE damage and stuns.
The traps you get access to do much more damage if you can set up a choke properly.
Fences, traps, and turrets can work together to dispatch baddies and buy you as much time as possible.
Finally, remember that building can be done anywhere and anytime (besides bosses). If you're suddenly surrounded, you can always open the building menu to create things to help you even fight enemies.


Stan's Stand:
Spawns totally randomly. It can even spawn or despawn right in front of your face! He leaves if you save/load your game.
Ammo and Materials(come in 10s) and are pretty cheap(30-50 upgrade points). 100 rifle ammo or 50 of a material can help accelerate early-game or stabilize an urgent situation.
Only weapon I would get for points is a really really good one(like a Laserblade) or something you really want, but 1000 or 2000 points can be a lot if it's not an extremely overpowered weapon.
It's also worth noteing that it's not worth spending that much until you've unlocked everything. At the end of the day, it all depends on what Stan is selling at the time.
Enemy (9)
- Enemies will spawn anywhere at any time. Be prepared to fight at any moment. No where is safe unless you make it safe with turrets and fences.
- Enemies will hear your actions. There is almost always an enemy off-screen that is looking for you.
Editor's Note: I played the game with an ultra-wide screen resolution and there were many enemies I definitely wouldn't see in 1920x1080!
- Use choke points(a simple example being a door) to fight groups of enemies to your advantage.
- Most enemies just zerg you down (as in they rush straight into your face), so be ready for many close range encounters. Shotgun(!), Side arm, Melee Weapon, Throwing Knives, Roll away, do everything you can!
- Sometimes(especially in buildings), enemies don't aggro right away.
- Most Gun enemies you can strafe around and not take any damage.
- Most ranged enemies have a pattern of moving, standing still, then shooting, then repeating. So when you see them stop, they will be standing still to attack.
- Most melee enemies will get stuck once they get close. If you've learned "Ironside" from the Tenacity Skill tree, then Rolling away from an enemy that's very close will probably stun them.
- Some human melee enemies will roll through your guns, just like you can dodge roll through things. They can close in very quickly, so be wary!
Bosses (10)
General Tips
- One of the first skills on the Agility tree, "Can't Touch This" gives your roll i-frames (invincibility) for projectiles. This is super useful against most bosses, as most shoot projectile patterns that you have to dance around. With roll, you're able to go through the projectile patterns and position yourself better to attack the boss.
- The bosses get faster and harder when they're at lower health, so be careful and try not to get caught up in the end.
- Automatic weapons with high magazine sizes are the best boss killing weapons. This usually means to guns that use Rifle Ammo. Anything else can get the job done, too! Shotguns, Melee weapons, you name it! You just need the ammo for whatever it is you're going to use. This is why early Ammo Press is important!
- You can retreat from a boss by leaving the battle area for a certain amount of time. This can be a good idea if you run out of resources to fight a boss or if you don't want to risk dying.
Resources (2)
Prepare to craft many things, so we need to know the resources of the game.

All crafting uses these resources:
Steel
Scrap
Wood
Cloth

Battery
Leather
Gas
(Ammo)

Steel, Scrap, Wood, and Cloth are the primary 4, as they are used in base construction. Steel is more commonly used in weapon upgrades. Battery and Gas can be used as ammo. Leather is usually upgrades. As stated, the first 4 are the main resources, so always try to obtain these.

Steel can be turned into ammo, used for upgrades, used for buildings, almost everything! You can never have enough of this. I'll have stacks of steel and use all of it once I return to my base or if I decide to build another.
Getting 5 steel before the smelter can be tricky, so destroying metal objects like stoves, TVs, and metal drawers/safes early on can get you that quick steel in order to start smelting as soon as possible.
If you're near the mall, there's usually more than enough resources inside the top right store of the mall to make a Smelter.
By the way, if you don't know how to use the Smelter, you can press F on any metal weapon and you'll have a chance at getting steel. You can do this anywhere on the map. The % can be seen if you view the weapon on the ground. Anything over 100% means you have a chance to get 2 steel.

Scrap is commonly used in building construction alongside Steel. Once you've finished the buildings you need, you may not end up using much scrap unless you create more buildings again.
If your steel count is low, the Smelter turns scrap into steel. You can usually find Scrap by searching TVs(and the boxes near the TVs) inside houses. Some named buildings have a ton of scrap, such as "Pear" and "Plug N' Play". It's important to balance this with steel in most cases.

Wood is quite abundant, but recipes and buildings tend to use a lot of it. You can destroy tables, chairs, desks, doors, etc. with any wepaon you want. Of course, using bullets would somewhat of a waste compared to using a melee weapon to break things and conserve ammo for your guns instead. If you have a fire axe or some other slashing type of melee weapon, they will score guaranteed critical hits on trees, making wood easy to gather by knocking trees down.

Cloth can be directly crafted into heals(bandage) by hand. Those heals can be upgraded into bigger heals(medkits) with Whiskey. You can make Whiskey with 5 Wood. Anyways, a lot of important buildings use Cloth in their construction, so don't turn all of your Cloth into heals right away.
There is a building that converts Batteries in Cloth(btw this building requires 2 Cloth to create). Otherwise, you'll probably find bits of Cloth anywhere you can loot. If you're really desperate, you can destroy beds for a chance at them dropping cloth, too.

Gas can be primarily found in cars, propane tanks, and in mostly other logical places you would find gas, like the gas station. Unless you've run into those kinds of places or things, you may not find any at all. Seems like this is primarily used for fast travel or ammo as well(chainsaw), but you can also turn them into batteries with a large generator.

Leather is primarily for crafting. One of the main starting recipes is "1 Cloth + 3 Leather" to make a sleeping bag. I mostly see it in upgrade recipes. They drop a lot from Negative Hounds or Boars(50% Leather, 50% Meat). Besides that, Leather appears as loot in most cases.

Batteries are found in TVs. There's a power station location that has a ton of batteries. You can make them from Scrap with the "Electronic Station" building if you really need them. You can use it as ammo for Energy Weapons with the "Laser Charger". Otherwise, you can use buildings to turn them into other resources. The "Bandage-O-Matic" turns Batteries into Cloth. "Gas Pump" should be explain itself and "Automatic Hunter" turns the bats into Leather. Energy Weapons might use this in their upgrade recipe, so it goes without saying that you're gonna need Batteries with those.

Ammo can be obtained off of enemy weapons when you pick them up. You can also create your own ammo by opening the building menu and placing an Ammo Press down. A few recipes and upgrades will use Ammo. There's a skill that has a chance to restore ammo when you kill an enemy.
Weapons (7)
Managing Ammo
You can click on the ammo icon in your menu to drop your own ammo. You can actually hold ammo as a regular inventory slot if you drag it around menus instead of click it. This means you can hold 200 Rifle ammo by default, then hold more Rifle ammo per inventory slot!

Pistols
Beretta - The best generic pistol. Larger magazine with good damage & high fire rate for a pistol. Stable and reliable weapon for use in a variety of situations.
The Silencer - Rare version of Beretta. Seems exactly the same besides having slightly better stats across the board. It also sounds exactly the same, so I'm guessing it doesn't silence anything.
Autogun - Semi-auto weapon that uses pistol ammo. Shoots 3 bullets per shot. Other weapons can fire faster(DPS), but this is more efficient. Theoretically, it puts more bullets on the screen compared to other semi-auto hand guns.
Revolver & Handcannon - Higher pistol damage but low magazine count. Great for small fights, but the low ammo count means frequent reloading, and that makes these feel not-so-great when things get really hairy.
Nail Gun - Automatic weapon that uses pistol ammo. These deal high DPS, but burn through ammo really fast and you will be reloading more often. But it should deal with most situations if you have the ammo!
Uzi - Essentially a stronger version of the Nail Gun. Great!

Semi-Auto Rifles
Hunting Rifle & Sniper Rifle - They all have similar use. Single shot, low fire rate with high range, piercing and damage. With a higher level rifle alongside other character or skill tree bonuses, the weapon should be able to land 1 shot kills on most targets.
Using Zoom+ camera from options in conjunction with Focus (right click hold) is crucial to maximizing your range with these weapons. Aim to take advantage of the extended sight that you have in order to attack targets from as far as you can possibly see.
You probably want a sidearm alongside this weapon just in-case there are too many enemies and/or they get too close.
These weapons have 1 or more piercing, which means their bullets will go through targets and hit another target behind. Thus, it is ideal to line up targets to optimize bullet usage. This can be applied to destructible terrain, too. For example, you can shoot through doors, tables, or trees and hit enemies behind them.
Super Scoper - Rare version of the Sniper Rifle. Holds 10 bullets instead of 5 alongside even higher damage. Having to reload less is a big deal for this kind of weapon. The only downside I see is that the fire rate is a bit slower compared to the other semi-auto Rifles. This means it performs worse in close range situations.

Assault Rifles
Assault Rifle - The Bread-and-Butter of every gun game. Fantastic boss killer weapon. But it mostly handles any situation with high power, fire rate, and with just enough bullets and accuracy. The high performance across the board is what it truly means to be an Assault Rifle.
I usually plop down a Rifle Ammo Press after a Smelter in the beginning of the game so that I'm always ready to fight with an AR if I have to.
S.W.A.T.T.E.R. - 60 bullet magazine with a much higher fire rate than a standard AR. Also makes the screen shake like crazy.
Per bullet, the damage is only a tiny bit lower than a standard AR (A level 4 SWATTER dmg per bullet is as much as a level 3 AR) and the reload is a tiny bit longer in comparison, but also features higher precision.
Anyways, say good bye to the boss and your rifle ammo. Besides deleting bosses, it can still handle any situation just fine as long as you aim to not waste bullets on it.

Tactical Rifle - Burst fire weapons have more efficiency, but their DPS is a little lower in comparison to others. They're good now, but the Automatic weapons in comparison are stronger I feel.

Minigun - Has a great amount of start up before the first bullet comes out. It's strong, but it might be too slow in practical situations that require you to keep rolling and repositioning.
Minishark - Rare version of Minigun. A Terraria reference; even down to the 25% chance to not consume bullets!

Shotguns
Close Range weapon type. The projectiles don't go far, but they spread out wide and can stun/ stagger enemies when used close up. This makes it great for crowd control. I recommend having one of these at all times. There's tons of close range combat in this game, and that's what this weapon type excels at. Most shotguns seem to be able to do the job, that is, until you have to reload.
Sawed Off Shotgun - This seems like the most reliable shotgun. It uses 2 bullets per shot, but the spread is enormous because 16 pellets are fired at a single time.
The quick reload speed of this weapon makes it reliable for scramble situations where getting caught reloading a slower weapon can spell death. You're able to constantly fire and reload at a fast enough pace to keep most(if not all) situations under control, especially if you have fast reload or piercing bonuses.
Quad Barrel Shotgun - Extremely powerful weapon that uses even more ammo. Same thing as Sawed Off Shotgun but uses 4 shotgun rounds at a time instead of 2. That's 32 projectiles in one button press. At level 5, that would be 22 damage per pellet which is 704 damage if everything somehow hits.
Unless it's an extreme cluster situation, this weapon is probably too much firepower if you point blank a light single enemy. The reload is longer than a Sawed Off Shotgun so there is good reason between these two Shotguns. Highly recommended to get this thing and/or the Sawed Off Shotgun to level 5 if you can as they will serve you well for the rest of the game.
Boomstick - Performs similar to Sawed Off Shotgun, but you can shoot one shot instead of two if you want. The damage is slightly lower.

Explosive Guns
Bazooka - Seems like a straight forward Rocket Launcher. The projectile keeps going until it hits something, unlike the Bomb Lobber. There are benefits to both projectile types, but the Bazooka does more damage. It usually takes less thinking to use a rocket launcher compared to a grenade launcher, too.
What else is there to say about this weapon? On some bosses, I've seen it deal damage twice on one rocket. I landed a 1500 damage critical hit with it one time. Might be the best use of your explosive ammo if you can get it. Only 2 ammo magazine though, so maybe you prefer the Bomb Lobber that holds more?
The Missy - This seems like the rare version of the Bazooka. The damage is higher but longer reload speed.
The Dragon - Slower projectile speed, but holds a whopping 10 rounds per load! Leaves behind a fire trail from it's path. The damage is a little higher compared to the Bazooka, but the AoE explosion didn't seem to catch as many enemies as other explosive weapons.
Lighting Lobber - Rare version of Bomb Lobber. I can't tell the difference besides it dealing higher damage.
Rambow - A Bow that uses Explosive Ammo. At first glimpse, it's one of the weaker Explosive weapons per Explosive bullet damage. Explosive weapons are known to have long reload times(no matter what game you're playing), but the Rambow can let loose quickly with no reload times at all
in comparison to other Explosive weapons since it's a Bow! With that said, Explosive Ammo isn't exactly all over the place unless you make it yourself.

Energy Weapons
Laser Gun - Very short range for a gun, but kind of reliable for self defense because of the stun property.
Melee (7.5)
General Melee Usage
- "Rock N' Roll!" on the Agility Tree which is available at level 10 is the best special melee move, so aim to learn and use this for most situations. I recommend this even on non-melee character builds, so it goes without saying that a melee character should have this skill.
- During Combat, always hold down the the "Parry" button. This button is shared with "Focus" when using a gun. This allows you to block incoming attacks. With certain skills learned, you can block projectiles and gain buffs from successfully blocking. Basically, you can stop incoming damage by holding down a button.
The block seems to occur even if you hold the "Parry" button during attacks, so keep this in mind and just keep holding it down during combat while using rolls to reposition yourself. Make sure to face where the attacks are coming from to successfully block!
- For bosses, you'll want to space yourself so that your attacks hit the boss without bumping into them. At first, this can seem tricky since melee attacks move you forward, but you can influence your movement during melee attacks by holding a direction down at the same time. So whether it's enemies or bosses, attacking forward and holding backwards is a way you can retreat and attack while enemies run into it.


Large Weapons
- There are two big melee weapons that come to mind: Hammers (SuperSlege, Warhammer) , and any large Axe (Battle/Super Axe). They are particularly overpowered when used in conjunction with the roll attack on the level 10 Agility tree, "Rock N' Roll". Together, they can wipe out any group of mobs in one or two hits!
Also, the roll attack with a SuperSledge goes the furthest and can be used to move more quickly around the map compared to anything else(You can totally outrun Boars). Axes have more Cleave so you can expect less enemies to be standing when there is a big group to fight. The roll attack is easier to control on Axe, as it doesn't go as far as a SuperSledge.
They're also quick at breaking things because of some sort of heavy weapon damage bonus against objects as well as wide attack range. They will quickly knock out entire rooms, but be careful about breaking lootables(breaking them has a chance to break what's inside) or anything else you still want to use, like beds or cooking stoves.


Laserblade
- Uses practically no stamina, swings very fast (0.095), 2 Cleave, very high damage (70 at level 1, 140 at level 5), and has infinite durability. Also doubles as a flashlight! Easily one of the best weapons in the game.
The only downside is that it's hard to find. Rare weapons have to be harder to get, right? You can buy it from Stan's Stand for 3000 purple point things. Probably one of the only weapons that's worth buying. Bosses die in less than 10 seconds. If you think about it that way... this may be ultimate weapon right now...

Chainsaw
- The classic. The DPS is high enough to cut down anything in front of you(including trees) and you can guard simultaneously without using any stamina at all! Block mobs while calmly mowing them down, at any of the day of the game!
The range isn't great, but it constantly deals damage which makes it extremely potent against the groups of melee enemies that constantly rush you down. The game says it has 0 Cleave but I'm positive it has infinite Cleave! Hold it at a choke point and watch hordes of enemies run straight into their quick and easy deaths.
It uses gas as its ammo; 60 chainsaw usage per tank of gas and it drains quick! You'll certainly find more than one around town or as a drop after a few in-game days.
On the other hand, you won't be able to close in on enemies that are far away as easy as another melee weapon would. The Roll attack from the Agility tree doesn't seem to work properly with this weapon and the charge attack doesn't function at all either. And unlike other melee weapons, your character doesn't move forward when attacking with a Chainsaw.
Because of these reasons, it's best used as a close-range defensive weapon. This weapon by itself can provide you with one of the most simple methods of defending yourself from Negative Hoards regardless of your build, location, or any situation, as Negative Hordes mostly consist of zerging you down.
For the sake of clearing rooms and houses, it does a good job of not killing destructable boxes when compared to some of the higher tier weapons that might end up having a lot of collateral damage that destroys all the loot in a room. Also seems to handle bosses well.
Important Locations (5)
Locations you'll find Signs of. They appear in every game. These also appear in Fast Travel options.

The Mall: This always spawns near the top center of the map. It provides a lot of materials, food, and weapons for one spot. You can always rely on this location. There's always cars out in front, too, so you can be sure to have a car for fast traveling. Highly recommend going here first at the start of a new game. I personally use this location for my building location, too.

Auto-Cinema: Hitting the fences with melee can get steel or scrap. If you have "Rock N' Roll!", you can clap rows of fences easily for Steel & Scrap farm.

Scummy: Inside is a bunch of boxes and a vending machine. If you have trouble getting around to the middle boxes, try breaking one or two on the side(but not before looting the box that you'll break). As for the fences, you can knock them all out for steel & scrap farm.

The Lord of the Rinse:
Tons of Cloth! This is a REALLY good place to seek out at the start since it can provide you with Cloth required for your base and you can get a lot of Heals right away. There also might be a soda machine.

Pear: Tons of scrap here. Great place to hunt down. This is where you meet Ronin if he spawns. If he's not here, then he didn't spawn that time!

Nuts & Bolts: Lots of Wood, Steel, and Shovels. You'll find a dash of other resources lying around, too. Great place to pick up Steel if you just spawned without Smelting.

Casino: Black Jack is always around here. He starts here if you play as him. It's his boss if he's an NPC(the totem boss). He obviously has a gambling addiction. Inside, you'll find slot machines with mostly Scrap and Steel. This is a building that is totally locked unless Black Jack is in the current game. You can still get inside and loot the place if he isn't, but not through normal means.

California: It's a Song. It's a Hotel[California]. There's usually a vending machine, a safe, some beds, and a few other lootables. Maybe you'll find drugs, since I think that's what the song implies.

Devil's Nest: Cash Register and a Fridge. Tons of tables and chairs to break.

Pharmacy: There's 3 beds, sometimes a soda machine, and a loot cabinet. There may be a ton of heals here, maybe not.

Big F****** Guns: 4 shelves with usually guns and ammo in them.

Piggy Bank: 5 safes for lockpicking, 2 boxes, 2 metal cabinets

Firefighters: 3-4 metal cabinets to lockpick.

Comic Sans: Some shelves to loot.

Gas Stations: Mostly food inside. And of course, gas on the outside. Since these always spawn south, they're good to discover for the purpose of having Fast Travel Locations. There's usually cars nearby, but it's not guaranteed.

Green Grocer Samurai: Inside might look like just a cash register and a bunch of stuff to knock over. However, the green shelves both inside and outside have a lot of food, so be sure to loot these and cook yourself some stuff.

Falcon Pawn: Captain Falcon's pawn store... probably. Tons of lootables. 6 cash registers and 8 shelves worth of loot. There's probably enemies hanging around here.

Not even close to all the buildings in the game but... soon...

Postal Office: The items you put in the Postal Box is shared between all active games. For example, a level 73 Otis can put a level 5 weapon and a ton of ammo in the Postal Box, then quit. Then I can continue my save on another character, go to the Postal Box, and then I can pick up the level 5 weapon that Otis put there and use it as my other character. If you end the game with the Helicopter, you can fly to the Postal Office, place your items in the Postal Box, then finish the game. That way, you can transfer items over to your next run or another character right before finishing a run.
If a speedrun category existed, there would certainly be a difference between a run with and without using the Postal Box, right? Giving a new character all of the resources from another character is similar to what would be called "New Game Plus". But playing without the Postal Box would be similar to a pure "New Game". At least that's what it seems like.
Anyways, If you're going to use this, it's probably a good idea to set up your base close to or nearby the Postal Office. In the most recent beta patch, the mailbox has become indestructable.
NPC meetings (6)
You have to find these Locations to obtain NPCs and progress the game. If you see this Location, you'll be able to see an NPC icon on your radar to confirm their spawn. They usually will spawn near other buildings on the right side of the map, but that won't stop them from spawning all the way to the left side of the map in the middle of the woods! Signs near roads will point in the exact direction of a Location, so if a sign is pointing far left, then something funny might be up...

Ronin - Pear: Tons of scrap.

Lola - Devil's Nest: Not much inside. Just a fridge and a cash register.

Liam - Pharmacy: This usually spawns near the bottom right side of the map. There's 3 beds and a loot cabinet. Seems like fast travel works here more successfully than other locations.
Boss - Nail Biter (drops Power Supply?)

Otis - House: It will be a house and he will tell you to go inside and close the door. If the door is broken, you must repair it then close it afterwards.
Boss - Deathstare (drops Rotor?)

Shots - Big F****** Guns: There might be enemies inside and they may be attacking the loot. If they spawn, try to kill them fast without destorying the loot. This can be tricky if the enemies are active during the cutscene with Shots.

Black jack - Piggy Bank: You won't see an NPC symbol on the map. You must go near the building to activate the cutscene. If there's no cutscene when you move right in front of the door, then he didn't spawn in that game. Anyways, there's tons of safes for lockpicking.

Ash - Firefighters: Metal Cabinets to lockpick.

Items (8)
Any usable item can be equipped in one of the four active item slots. This includes food, so you can use it as a cheeky way to get extra inventory space. It's important to know that items cannot be activated during many animations, like during an attack. You can, however, use items during reloads. Use attack items to cover yourself while you reload.

Bandage (costs 1 Cloth)
Medkit (costs 2 Bandage, 1 Whiskey)
Your generic heal items. Setting up base structures to make [Whiskey]Medkits can be well worth the effort unless you're a god gamer who lives by the "don't get hit" meme... or if you're speedrunning or doing a challenge run. As said before, try not to use all of your Cloth for Bandages unless you're desperate for HP.

Teleport Device (costs 1 Steel, 1 Scrap, 3 Battery)
Teleport back to the closest Homing Beacon. Becomes available after creating "Electronics Workshop." It's faster than running to a car, especially if you don't know where one is.

Throwing Knife
It's an offensive item that doesn't explode. There's a few skills that buff Throwing Knives. The damage can be quite high. They're pretty good!

Grenades
These do good against groups of enemies. I guess if you want to explode a single enemy for fun, I won't stop you!

Door Mine
Throw these on a door, and it'll latch onto it. It will blow when enemies get to it. You can actually just throw it at enemies directly and it will blow up if it hits them. If you miss, it will fall on the floor and you can pick it up again.

Traps
You'll get access to craft these after building a Bait Station. Or maybe you'll find some around town. These are actually pretty easy to use since enemies usually run straight down your line, especially if you use a choke point. A simple example being a door of a house. Just lay these down and get through the door. If you do place one out in the open, just run through to them to lure enemies into it.

Food
These are the foods that I will always see myself using:

Spaghetti
Infinite stamina! Spam rolls and/or "Rock N' Roll!" from the Agility skill tree until it runs out. Useful for moving around the map faster and especially during boss fights.

Cheesecake
Grants +20% Gun damage. Maximize your damage to kill bosses(or anything else) faster. Because things die faster, it reduces your ammo usage, too.

Sin Special
Increases movement speed. Applies to all movements, including "Rock n' Roll." Useful for moving around the map faster and especially during boss fights.

Beefy Burger
Reduces damage by 25%. Useful in sticky situations or boss fights.

Carnage Asada Taco
Grants 5HP per enemy kill. Very good alternative for recovering HP. Pop this when low HP and when getting into a fight and watch your HP max out. Particularly useful against "Nail Biter" boss as it spawns many little extra enemies during the battle.

Cake
Food that grants HP for a short amount of time. It's not that much, but it's rare for food to give you HP recovery.
Skills (3)
TL;DR on what to get(as recommended by the Dev and myself): Dodge chance and extra healing to start, then past level 10, "Double Dragon" rank 2, and increased ammo/material capcity.

There's 5 Skill trees. You get one skill point per level up. You can learn everything at Level 71. The trees consist of:

Wisdom for Guns
Agility for Dexterity
Strength for Melee
Tenacity for Defense
Endurance for Utility

Big long explanations if you like reading. I'll even rate them out of 10! I would be more likely to max out a skill with a higher rating first. Your character might influence what you want, but every character can use any weapon well as long as you build your skills for it.

Wisdom
- The Skill tree that focuses on bonuses for Guns and Critical Chance.

Careful Aim 8/10 - Up to +20% Critical Chance when Full Focus. Great for guns and characters that have innate focus bonuses.
In The Zone 8/10 - Focus faster after killing an enemy. Useful buff in most situations. Don't be afraid to max this out on gun characters.
(L10)Full Focus 9/10 - Great for guns and characters that... yea you get it already. Adds 1 piercing and makes your aimming line turn yellow under Full Focus. It's really good!
Power Play 6/10 - Flashlight recharges now. Useful one point skill and leads to Energy Weapons build with 25% Energy Weapon damage and double Energy Weapon durability.
Critical Thinking 9/10 - Innate 5% or 10% Critical Chance and 3x Critical damage up. Works for all attack types, even for melee! A critical strike should kill most enemies in one hit. With how often you fight, 10% and even 5% comes up a lot! If your critical hits weren't one shotting, the 3x Critical damage outta do it. If you want to see the biggest numbers fly in the air, this is skill will do it for you.
(L20)Focus Fire 8/10 - 20% damage bonus is usually enough to reduce the amount of bullets it takes to kill an enemy by 1. It's strong but takes a while to get, especially if you're prioritizing survival skills first.

Agility
- This skill tree provides various benefits across the board. The first half of this tree focuses on defensive mechanics, while the other half that's available after level 10 grants many different offensive upgrades. Overall, It feels like one of the most useful skill trees for any character.

Parry and Riposte 7/10 - CQC benefits! The melee boost after a parry adds a bit of extra damage, so it's an early damage option if you get a block off. Stunning enemies under 33% can be very useful for melee characters, too!
Can't Touch This 10/10 - Extremely useful defensive additions. Being able to roll through ranged attacks and enemies means you can get through waves of projectiles and mobs with ease.
Also grants 15% dodge chance; an insane freebie! Just totally ignore damage on a dice roll! Like I would totally put an Editor's Note here to say that this is really strong defensively to get, especially before level 10.
(L10)Rock N' Roll! 11/10 - The strongest and fastest special melee attack. Clear waves of enemies while doing boosted damage with this triple dash attack. Roll and press the attack button 3 times with a melee weapon quickly(You can go for only 1 or 2 strikes if you want to), and your character will thrust forward with the weapon in the direction your cursor is pointing.
This is the move you want regardless if you're playing melee or not. This is because this move is even useful for moving around the map, as the roll attack movement allows you to traverse the map more quickly than usual(A heavy weapon can outrun boars).
The direction you hold(WASD or stick) during the attack can influence the movement in accordance with where you are aiming. Just watch your stamina bar because you can spam pretty fast.
Ninja Assassin 7/10 - Guaranteed Stealth Criticals! The rest is just throwing blade perks. 100% more damage is a lot! Great additional extra attack to add to your arsenal.
Gunslinger 8/10 - 10% Pistol damage, 25% Pistol realod speed, 1 Piercing for Handguns. If you're really into handguns, this is it right here. The piercing means a lot since most handguns don't get that. You'll suddenly be able to deal with groups of mobs more easily than without piercing. Makes handguns more suitable for later in the game.
(L20)Trigger Happy 10/10 - Global 25% faster reload speed. Fantastic! And 25% Pistol damage when rapid firing. Anyways, reloading actually affects DPS, and reducing the amount of time it takes to reload is invaluable in the heat of battle. Considering both the practicality and how much the skill helps on paper says a lot about how strong this is for anyone using guns.

Editor's Note: The first half of this tree is super good. I usually get all of "Can't Touch This" and "Rock N' Roll" at level 10. Doing 1 point all across the second half the of tree is a great choice if you use guns a lot.

Strength
- The melee skill tree. And bows. That's it.

Swingers Club 6/10 - Melee Damage up! You don't really need the "More Durability" that much, but it can be helpful anyways.
Close Quarters 7/10 - Cool abilities! Dodge roll is invul against melee against which is nice. Rank 2 lets Block have a chance to disarm enemies. Rank 3 lets you Block with any weapon, including guns.
(L10)Stun Stomp! 8/10 - Execute an AoE stun when you press Focus or Block during a Roll. The range of this is much bigger than it seems. Very useful for getting a mob off your back in a pinch. Deals a tiny bit of damage, too.
Barbarian ??/10 - 1 point is 20% melee damage, great for you know who. The rest is for Bows: 25% bow damage and lets 3 arrows shoot in spread with one in the middle. Each arrow can hit one target, and it still only costs 1 arrow to shoot.
Great addition for any higher level character who's gathered up a lot of arrows from going around the town for a few days... or if you actually want to use bows of course! A level 5 Crossbow does 120 damage. It's 120 x 3 if you land all three arrows! I'm not sure where to rank this yet because I need to test a build that rushes this skill. But when playing around with a level 5 Crossbow and this skill, it seems very strong. It doesn't work with Rambow, by the way.
Massive Cleave 10/10 - Extra 1 to 2 melee Cleave and 20% melee damage! That's it! This is fantastic if you're a melee character! You probably want this!
(L20)Berserk Barrage 9/10 - 50% melee damage when under 50% HP. Risky, but not so risky when you have Tenacity's level 20 skill that keeps regenerating your HP when under 50% HP. Or if you're a bad enough dude to manage it that low. That can be easier with higher level characters that have a lot of HP. At the end of the day, it does provide the largest Melee damage bonus.

Editor's Note: Make sure you get "Rock N Roll!" under the level 10 Agility tree before getting any of this. They work well together!
Skills part 2 (3)
Tenacity
- The defensive skill tree. Wow this tree is broken.

First Blood 8/10 - The 50% extra healing from items and double from sleeping is nice, especially since it's available early on. I'd say this is more important in higher difficulties.
Ironside 10/10 - Dodge roll stuns enemies which is very useful in a pinch. You can stun enemies even rolling backwards and retreating. When combined with the Agility Tree's "Can't Touch This", you're able to roll through enemies that are blocking an escape route and stun them at the same time, allowing you to escape from any situation and buy yourself time. The other part of the Skill is 10% to 15% flat damage reduction which is fantastic. Both of these components make for an insanely strong (and early) skill, but any amount of points is fine.
(L10)Spin to Win! 5/10 - Grants access to a Spin-and-Stab special melee attack, performed by holding down the attack button with a melee weapon for 1 second, then letting go. Not as good as the Agility tree's "Rock N' Roll" but still deals boosted damage. It doesn't feel as safe and the movement doesn't go very far. Because it is a charge move, it is not exactly a spammable attack, either. Sometimes I can get this move to come out without charging it. I wonder if there is actual charge paritioning like in fighting games? The rating is harsh but there's almost no reason to use this over Rock N' Roll.
Call Me Snake 9/10 - Environmental resist skills. Take -50% elemental damage, recover twice as fast from negative effects, and immunity to poison damage and mucus corruption for the last point. The last skill point is very useful when you are far into the days and mucus corruption is all over the place. Overall, this is a really strong defensive skill.
Double Dragon 11/10 - This is one of the key survival skills. Gain i-frames for 1 second after taking damage. Since this doesn't normally exist, it's very easy to get comboed and insta-killed in this game without this skill. This should be enough to keep you alive even in the worst of situations. The reduced 33% stamina usage with melee and gain stamina on melee kill are useful, too! You most definitely want Rank 3 if you're a melee character.
(L20)Not Dead Yet 8/10 - This is another key survival skill. Regenerate HP when under 50% health. The regen speed is not so fast anymore, but still useful in a pinch!

Editor's Note: Max everything in this tree except First Blood. Order wise, Get level 2 "Double Dragon" and "Not Dead Yet" as soon as you can if you want the highest chance of suvival the game can offer. A lot of damage in the game is tied to weapons, but only defensive mechanics are within the skill tree since there is no "armor" equipment. Basically, you can always deal damage but the survival skills are unique which makes this skill tree very special.
You could save 4 skill points and get Double Dragon Rank 2 right when it becomes available at level 10. Seems like a wise choice overall.

Endurance
- Utility Tree consisting of stamina, hunger, and ammo buffs. This is extremely useful stuff.

Health Nut 8/10 - Not sure if 3 points means +60 stamina but boy this helps a lot. You'll get an extra roll or two... or even three!
Rationing 4/10 - Reduce Hunger. 1 point is nice but you don't really need anything more.
(L10)Back At Ya! 8/10- Bullets bounce off your melee weapon block. Super useful, but don't rely on it that much...
Just Breathe 9/10 - Recover stamina faster, up to 30%. Useful on any character, but even more useful on melee characters. Makes spamming rolls and melee more gracious on the stamina bar. It's especially nice with "Rock N Roll!" as it allows you to traverse the map much faster by being able to use the roll attack more often. Maxing this essentially gives you more movement.
All Outta Gum 9/10 - Up to double your default ammo cap and more ammo chance on kill. This is wonderful if you're using guns a lot. Many guns blow through ammo so fast that it might feel like you'll run out of ammo too fast unless you have this skill maxed(weapons like SWATTER, Minigun, Uzi and Quad Barrel Shotgun come to mind). I'd say this skill is really useful, but depending on the guns you're using(or not), it may be less or more important.
(L20)Second Wind 8/10 - It keeps your stamina bar regnerating 70% faster when you're under 50%. Really strong skill when it's active. It's fine to use in conjunction with Tenacity's level 20 skill.

Skills Overall
Well, that's what I think about all of the skills. If I'm honest, I build the skill tree the same way on every character. Works out really well every time.

There are many powerful skills locked behind level 10. But it is something to think about if you want to change up your build. Getting powerful skills really early such as 3x Critical Hit damage or Double Dragon at level 10 gets the fun started faster!
Guide Updates
Last updated 10/31/2021
10/31/2020 - Added pictures and edited text.
11/1/2020 - Added and edited text.
11/26/2020 - Grammer check and edited text. I need to play the new patch.
10/31/2021 - Updates to match new patches

Most of the information I wrote from when I last updated the guide last year still stays true to this day, so I'm glad to know the guide has lasted. There was only some things I needed to modify according to the new patches as well as new information I found out. But there's always more I'd like to add! I'm just afraid of the guide being too big because no one wants to read a lot these days. Thus, I've changed the structure of the guide and put the most straightforward tips at the top of the guide and my big paragraph o' texts on the bottom for anyone who is more invested.

I've been able to beat the new hardest difficulty, "Nightmare" so I feel quite confident in the guide! Even the devs themselves Congratulated me and watched the video. Thank you for the community awards, too!

Thanks for reading and I hope this helps you enjoy the game!

7 Comments
FallOnMyBlade 26 Sep, 2021 @ 7:56pm 
For food, build a distillery, grab some wood, and get drunk. Seriously. Whiskey is a 30 food item that can also be combined to make first aid kits. It's a no brainer once you learn it.
Quadeyes 27 Mar, 2021 @ 1:46pm 
Thanks for the teachings, Senpai.
Anachronomalous 29 Dec, 2020 @ 8:31pm 
On a separate note: smelting dropped weapons from the ground now yields metal.
Anachronomalous 29 Dec, 2020 @ 8:29pm 
OK, yeah, I found the build tab. Game's still whipping me like I paid it for the privilege but I'm learning.

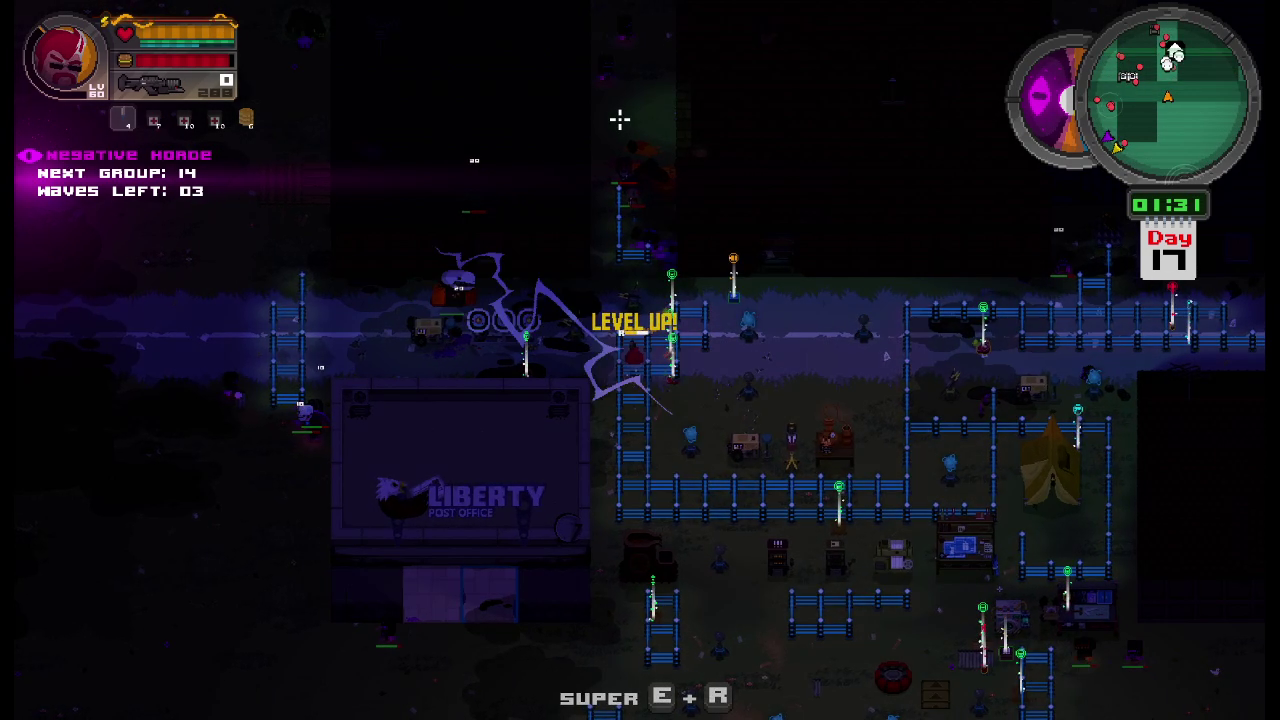
Still haven't made it to a boss yet because leaving the comfort of my base seems to result in Zerg rushes...
matthew_cassette 25 Dec, 2020 @ 6:19pm 
@Rook Yes, you have to open the building option by hold TAB. It requires 5 metal. So try to get that build asap during your game.

@Isomastagator For food, I'd say look for the mall it tends to be in the same general location at the top of the map. ENDURANCE has Rationing level max level that out and you'll survive a lot longer.

Anachronomalous 25 Dec, 2020 @ 2:14pm 
Grazie for the hints and tips.

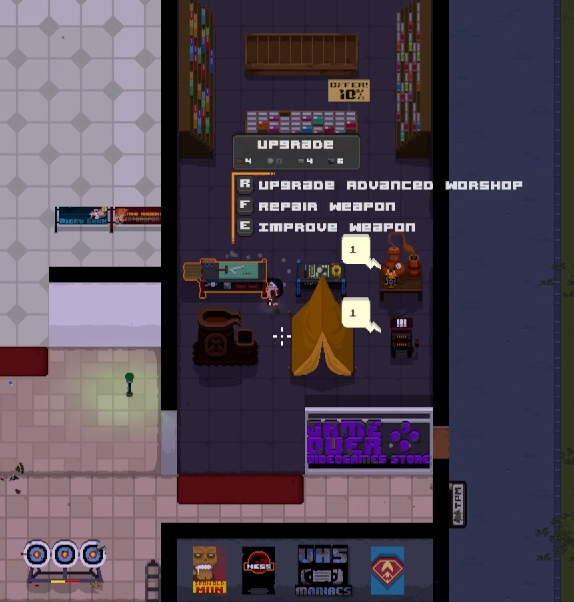
Is the smelter something you have to unlock? I'm getting my ass handed to me on Radio Silence and it doesn't seem to come up from the crafting menu.
Momogators 20 Nov, 2020 @ 1:57pm 
Thank you for this guide! Very Helpful! I am having a tough time finding food, any tips on how to have sustainable food? It seems with the newest update it got a lot tougher to not be starving.

Thanks again!