RIDE 3
41 ratings
Improve Ride 3 Visuals
By Meatsac
   
Award
Favorite
Favorited
Unfavorite
­
Greetings everyone,
The wonderful thing about Ride 3 using the UE4 engine is it allows us to change a variety of features and customize Ride 3 to our liking. Whether your looking to increase performance or improve the visuals, the new engine offers a large variety of modifiable parameters. This guide focuses on improving the visual aspects of the game.

Editing Engine.ini Notes:


Other Notes:

(1). You must always completely exit Ride 3 before making changes to the engine.ini

(2). If for any reason you don't like the results, re-open the engine.ini, delete the variables you've added, save, and re-launch Ride 3.

Adjust Gamma Only
[/script/engine.renderersettings]
r.TonemapperGamma=1.9


Adjustment Notes:

Typical values range from 1.5 - 2.8 (lower=darker / higher=brighter).

Adjust Gamma & Disable Eye Adaptation
[/script/engine.renderersettings]
r.TonemapperGamma=1.9
r.ExposureOffset=2
r.SceneColorFringeQuality=0
r.EyeAdaptationQuality=0

Custom Render Scaling
You can set render scale to values not listed in Ride 3 video options. Values represent percentage of scaling applied (Example: 100=100%).

[/script/engine.renderersettings]
r.ScreenPercentage=120

Sharpening Without Reshade
These are two ways to increase sharpness of visuals. Use first option If you run TAA, it's a variable which tweaks sharpness of TAA algorithm, and provides a really nice image... If you prefer a different AA method (FXAA) use the second option. It uses post process tonemapper sharpen filter. Note: You don't need to use both.

[/script/engine.renderersettings]
r.MipMapLODBias=-0.5
r.TemporalAASharpen=0.4

or

[/script/engine.renderersettings]
r.MipMapLODBias=-0.5
r.Tonemapper.Sharpen=1.7


Adjustment Notes:

To change the level of sharpening for "r.TemporalAASharpen=", (0.1 , 0.2 , 0.3 , 0.4 = Lower to Higher TAA Sharpening).

To change the level of sharpening for "r.Tonemapper.Sharpen="... 0.5 is subtle, 1.5 is good, and 2.0 is sharper (if you use High or Ultra AA)... Typical Ranges: 0.5 - 2.0 (more then 2.0 will start to look pixelated).

Better Motion Blur

Improved Motion Blur (Normal).

[/script/engine.renderersettings]
r.Tonemapper.Quality=5
r.MotionBlurQuality=4
r.MotionBlurSeparable=1
r.MotionBlur.Max=2
r.MotionBlur.Amount=0.16


Improved Motion Blur (Even More).

[/script/engine.renderersettings]
r.Tonemapper.Quality=5
r.MotionBlurQuality=4
r.MotionBlurSeparable=1
r.MotionBlur.Max=3
r.MotionBlur.Amount=0.20


Improved Motion Blur (Heavy).

[/script/engine.renderersettings]
r.Tonemapper.Quality=5
r.MotionBlurQuality=4
r.MotionBlurSeparable=1
r.MotionBlur.Max=4
r.MotionBlur.Amount=0.45


Improved Motion Blur (More extreme - Good for special FX - Will have Ghosting in 3rd Person).

[/script/engine.renderersettings]
r.Tonemapper.Quality=5
r.MotionBlurQuality=4
r.MotionBlurSeparable=1
r.MotionBlur.Max=10
r.MotionBlur.Amount=0.95


Adjustment Notes:

"r.MotionBlurQuality" Controls Motion Blur quality (Vaules: 1 2 3 4 - Low to High).

"r.MotionBlurSeparable" Adds a second motion blur pass smoothing noise for a higher quality (0=Disable 1=Enable).

"r.MotionBlur.Max" Controls the length of the blur (Value Range: 2 - 98). To much applied can cause ghosting.

"r.MotionBlur.Amount" Controls the amount of motion blur fx applied. (Value Range: 0.2 - 0.98).

Increase Shadow Resolution
[/script/engine.renderersettings]
r.ShadowQuality=5
r.Shadow.CSM.TransitionScale=2
r.Shadow.MaxCSMResolution=4096
r.Shadow.MaxResolution=4096
r.Shadow.RadiusThreshold=0.01
r.Shadow.FadeResolution=0.001


Adjustment Notes:

If shadow resolution settings are to high and reduce performance, lower the
"r.Shadow.MaxCSMResolution=4096" and "r.Shadow.MaxResolution=4096" to 2048

Common values: 256 / 512 / 1024 / 2048 / 4096 / 6144

Note: Increasing the "r.Shadow.MaxCSMResolution=" beyond 4096 results in culling issues, so it's not recommended.

Dynamic shadow draw distance seems to be locked via it's blueprint. However, we can increase it's resolution to add sharper shadow details.

Adding Relection Roughness
[/script/engine.renderersettings]
r.SSR.MaxRoughness=0.5


Adjustment Notes:

Reflection roughness adds relief to surfaces based on the textures applied to them. It adds a little more realism although the effect is very subtle.

To adjust the amount of reflection roughness (relief) change the value of "r.SSR.MaxRoughness=". Values are from 0.2 - 1.0 (0.5 being a nice touch).

How To Edit The Engine.ini
Exit Ride 3 First

(1). Go to this directory:

**C:\Users \ Your-UserName \AppData\Local\WW3\Saved\Config\WindowsNoEditor**

Get there by hitting the "Windows Key" + "R" and copy paste this in the run box (then click OK).

%LOCALAPPDATA%\Ride3\Saved\Config\WindowsNoEditor

(2). Open "Engine.ini" in Windows Notepad (Or "Engine" if you don't see the extension ini).

(3). Copy & Paste the variables into engine.ini.

(4). Save and relaunch game.

Example:


How To Install Reshade & CC LUT
I've created a Reshade Color Correction LUT which address a few issues with the certain colors (Reds, Blues, and overall color balance). The combination of added Engine.ini variables and the Reshade LUT produces a very nice visual in game.

Note: You may have to re-adjust the gamma (overall brightness) via the in-game settings to compensate for the changes below (Ride 3 Options / Image Configuration).

INSTALL Reshade

(1). Download & Run Reshade Installer.

Reshade Official Website[reshade.me]

(2). Direct installer to the "ride3-Win64-Shipping.exe" (Not the Ride3.exe)

Example of where it's located:

"C:\Steam\steamapps\common\RIDE 3\ride3\Binaries\Win64"


(3). After it installs, click on the DX10+ and it'll ask you if you want to download Shaders.

(4). Click YES.

(5). Select the Shaders you want, but make sure to check the "LUTS" shader (You'll need that one). I recommend the following shaders

Levels
Lumasharpen
LUTS
Clarity


(6). Once It's done, download the LUT file below (It's a Lookup Table png image file). Make sure to click the download button (top right), not "save image as"... Some browsers color correct images and we don't want that.

My Color Correction LUT File Download[drive.google.com]

(7). Copy the downloaded LUT file (lut.png) into the Reshade texture directory (overwrite the one that's there, you can make a backup if you want first).

Example of where the directory is located:

"C:\Steam\steamapps\common\RIDE 3\ride3\Binaries\Win64\reshade-shaders\Textures".


LAUNCH Ride 3:

(1). After you get into main menu, hit the "Home" key to open Reshade (again to close it).

(2). Click the "+" on the top right of menu to create new config file and give it a name (example: ride3reshade).

(3). Click continue.

(4). Click the next continue button to exit tutorial and enter editing mode.

(5). Check the box next to the "LUT" shader, now it's enabled and It'll use the new LUT to color correct Ride 3.

(6). You can check the boxes next to other shaders you want to use.

Final Note: Once you've made any changes within Reshade, make sure to click on the "Performance" button. To get back to editing, click it again and so on.

Comparisons:

Without Mod.

With Reshade CC LUT.

Without Mod.

With Reshade CC LUT.


Improving Ride 3 Performance
Ride 3 In-game settings

If you're getting inconsistent frame rates or drops, I recommend you lock the frame rate to 60FPS in the Ride 3 settings. This locks the renderer to 60 FPS and reduces the load on the GPU (thus improving FPS consistency & stutter issues).

If you lock the frame rate and get screen tearing, enable Nvidia's Vsync or AMD's equivalent to eliminate the tearing. The vsync option in game settings usually does a poor job or might create issues (as in many other titles). If you choose to use Vsync, it's best to use the one in the Nvidia Control Panel or AMD equivalent, and keep it off in the game setting options.

A note on the in-game "Dynamic" FPS settings: I hate this option in any game because it usually does a poor job at it. It'll often act schizophrenic and throttle the FPS and induce stuttering, hitching, or micro stutter. It's best to set it manually to 60 or whatever your system / monitor can handle.

Configure Windows For Performance:

Set Windows Power Options to "High Performance"


Disable Windows Game Bar


Disable Windows Game DVR. Use OBS or other software to capture games, they are much better.


Disable Windows TruePlay.


Disable Fullscreen Optimizations for Ride 3

Exit Game First:

(1). Open Steam

(2). Right Click on Ride 3, select "Properties"

(3). Click "Local Files" Tab.

(4). Click "Browse Local Files".

Example Dir Location: ***:\Steam\steamapps\common\RIDE 3\ride3\Binaries\Win64

(5). Right Click "ride3-Win64-Shipping.exe"

(6). Click "Properties".

(7). Click "Campatability".

(8). Check the box "Disable Fullscreen Optimizations" then click apply.


Steam Launch Options

-fullscreen
-log
-NOTEXTURESTREAMING
-USEALLAVAILABLECORES


Example:


My Game & Engine.ini Settings


Note: Scaling is actually set at 120% using the engine.ini variable (not the 150% shown in Ride 3 video options above). Custom settings added to the engine.ini are not reflected in the in-game options display.

My system specs: i7-8700k (4.7 ghz oc) - 32gd ddr4 (3ghz) - GTX 1080. If you have similar system or better, you shouldn't have an issue with my engine.ini settings. If your GPU has less then 8gb of ram, lower the value for "r.Streaming.PoolSize=4000" or it could crash your game. Typical values are 1000 / 2000 / 3000 / 4000 (represents vram in GB - 4000=4gb).

[/script/engine.renderersettings]
r.ScreenPercentage=120
r.Streaming.PoolSize=4000
r.Tonemapper.Quality=5
r.TonemapperGamma=1.9
r.TonemapperFilm=1
r.ExposureOffset=2
r.MaxAnisotropy=16
r.PostProcessAAQuality=6
r.TemporalAASharpen=0.4
r.BloomQuality=0
r.DepthOfField.FarBlur=0
r.HalfResReflections=1
r.SceneColorFringeQuality=0
r.EyeAdaptationQuality=0
r.StaticMeshLODDistanceScale=0.03
r.SkeletalMeshLODBias=-0.5
r.SSS.HalfRes=1
r.MotionBlurQuality=4
r.MotionBlurSeparable=1
r.MotionBlur.Max=2
r.MotionBlur.Amount=0.18

Unreal Engine 4 Related Resource Links

Please Note: Some options & variables in resource material are not applicable within Ride 3.

Unreal Engine 4 Console Variables and Commands[digilander.libero.it]

Command-Line Arguments[docs.unrealengine.com]

Texture Streaming Configuration[docs.unrealengine.com]

UE4 Settings[api.unrealengine.com]

Scalability Reference[docs.unrealengine.com]

FPostProcessSettings[api.unrealengine.com]

Epic Wiki (Unreal Engine)[wiki.unrealengine.com]

Wikipedia (Unreal Engine)[en.wikipedia.org]

Unreal Engine 4 Documentation[docs.unrealengine.com]

Unreal Engine API Reference[http//htthttps]

Free Software Tools & Resources List[forums.unrealengine.com]

24 Comments
On Met La patate 23 Feb, 2021 @ 6:58am 
does this work on any milestone game?
Mert " 𝚁𝚃𝙹 30 Dec, 2020 @ 2:58pm 
such a lifesaver you are, know that?
Meatsac  [author] 25 Jul, 2020 @ 9:24pm 
If you mean crank everything up, it may effect performance (will depend on your rig)...

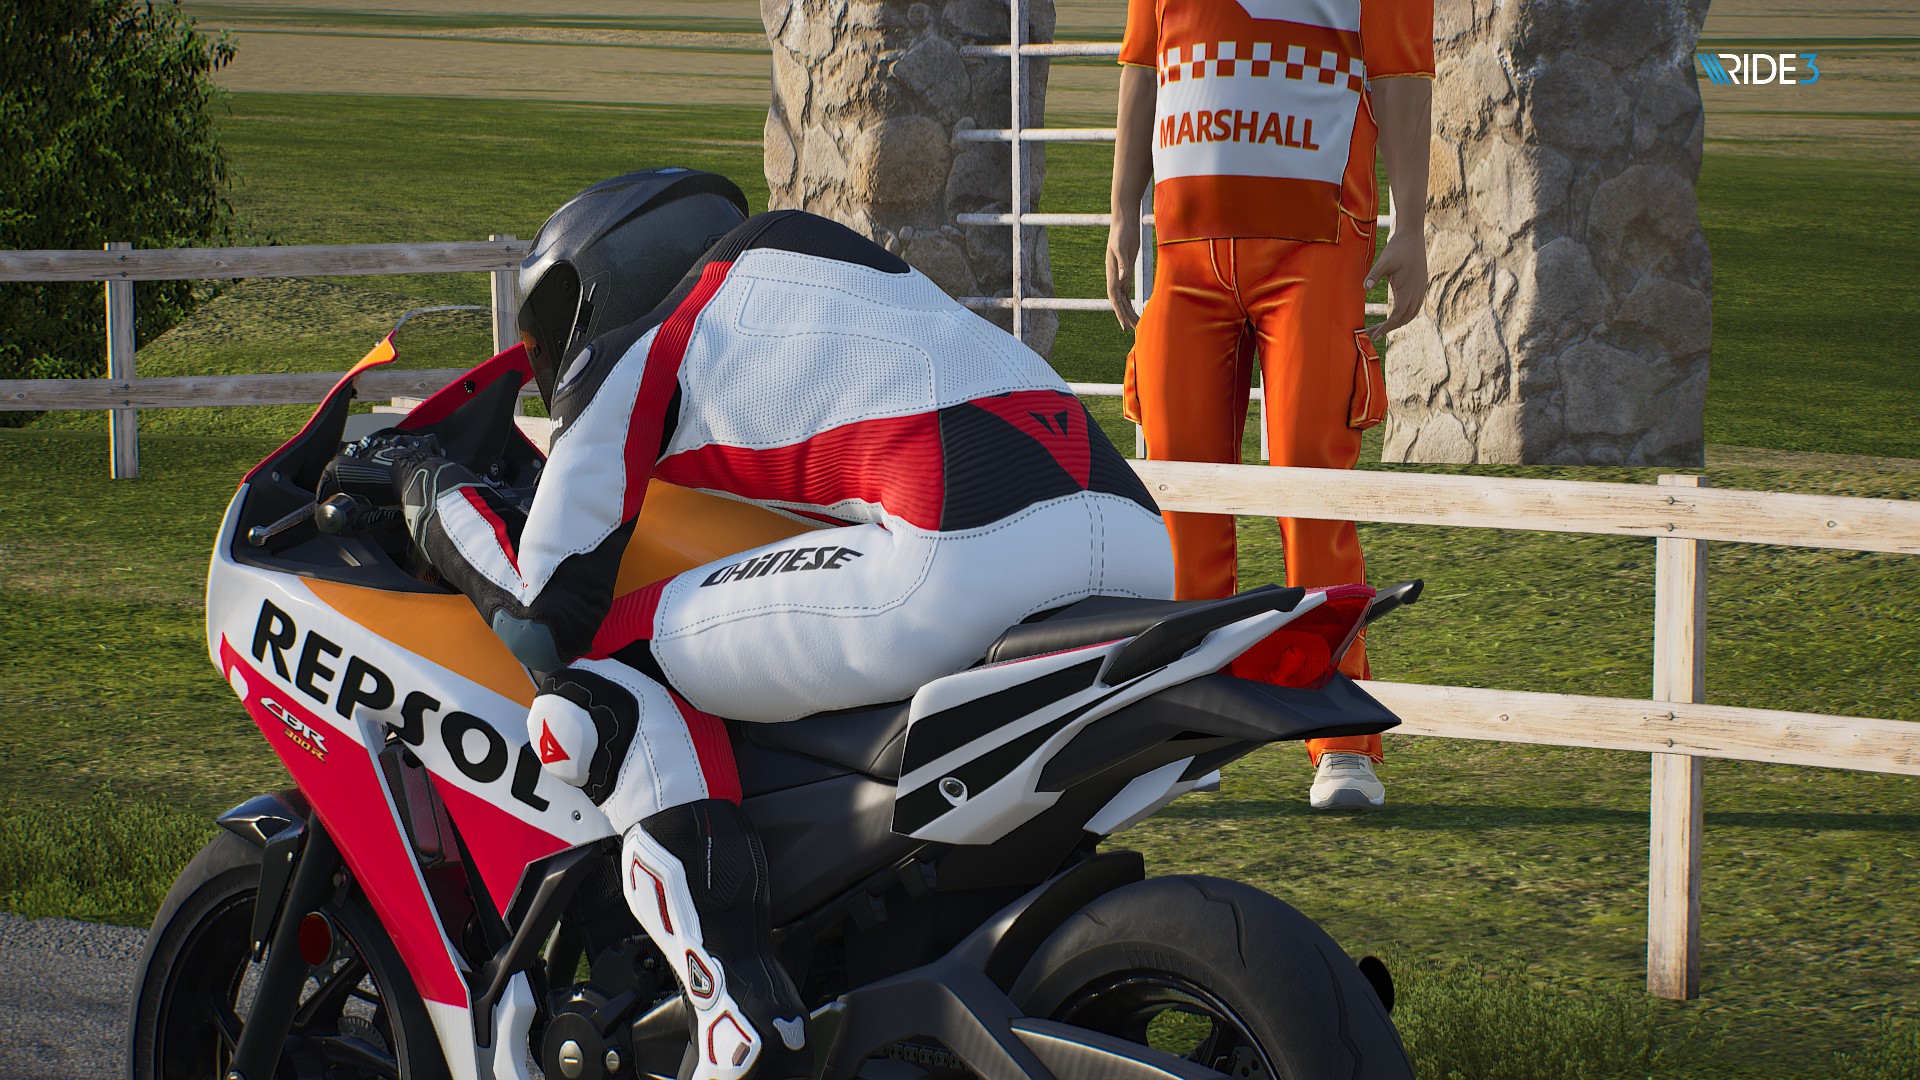
Highthorn: Yea, the exposure settings I use are for my monitors, but your right - It might be a little to bright for other setups... So, I suggest people experiment and dial it in for their monitors and personal preference.
Sukuna 25 Jul, 2020 @ 10:24am 
What happens if you add all of the Visual Settings to the engine
StormTrooperAim 14 Apr, 2020 @ 10:25am 
@Highthorn

Did you even read my comment? o.O
Meatsac  [author] 13 Apr, 2020 @ 8:24pm 
Yea, the exposure is a personal thing and how your monitor is displaying the image.
Highthorn 13 Apr, 2020 @ 1:03pm 
Thank you as well for the great guide Meatsac.
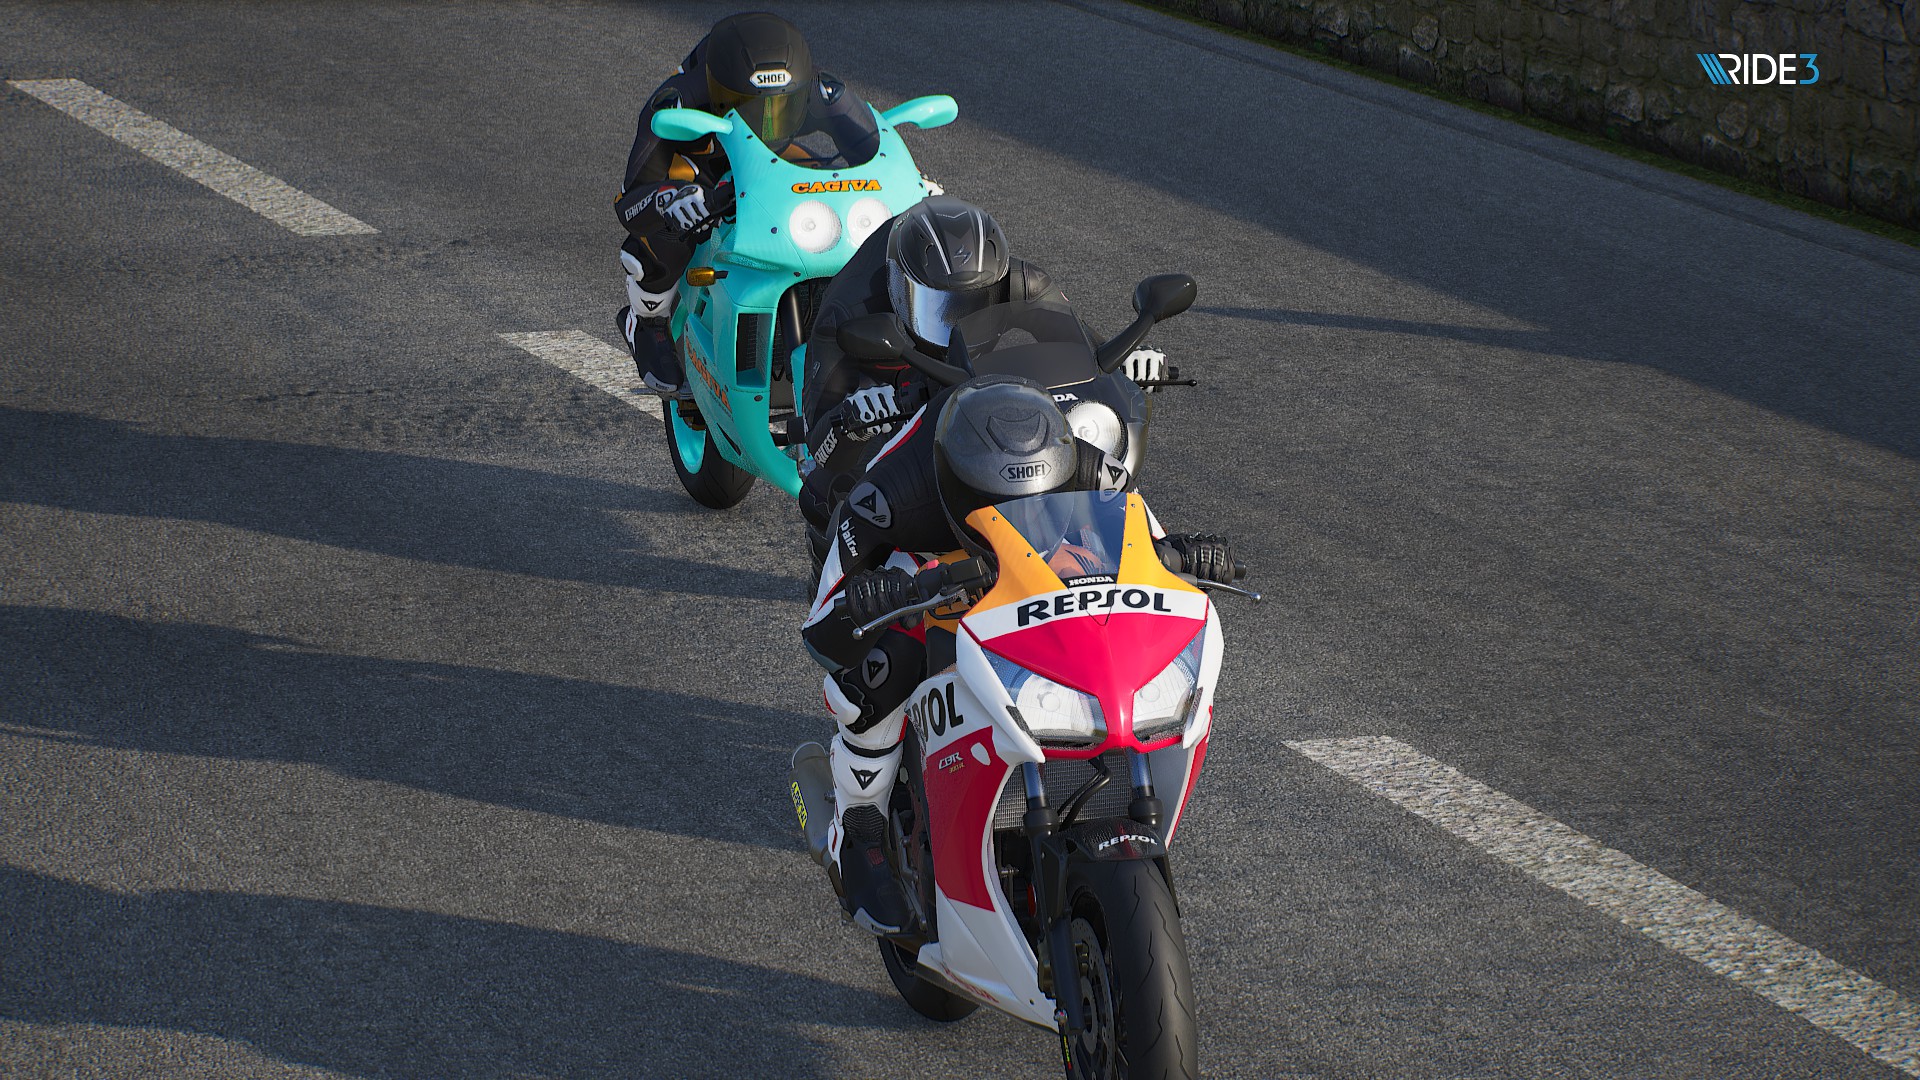
Made my game look much better.
Although I personally wouldn't add:

r.ExposureOffset=2
r.EyeAdaptationQuality=0

For me the exposure offset makes the game way too bright and a lack of contrast and the eye adaption is actually needed for night/rain races otherwise I can't see a thing :)
Highthorn 13 Apr, 2020 @ 1:00pm 
@StormTrooperAim.

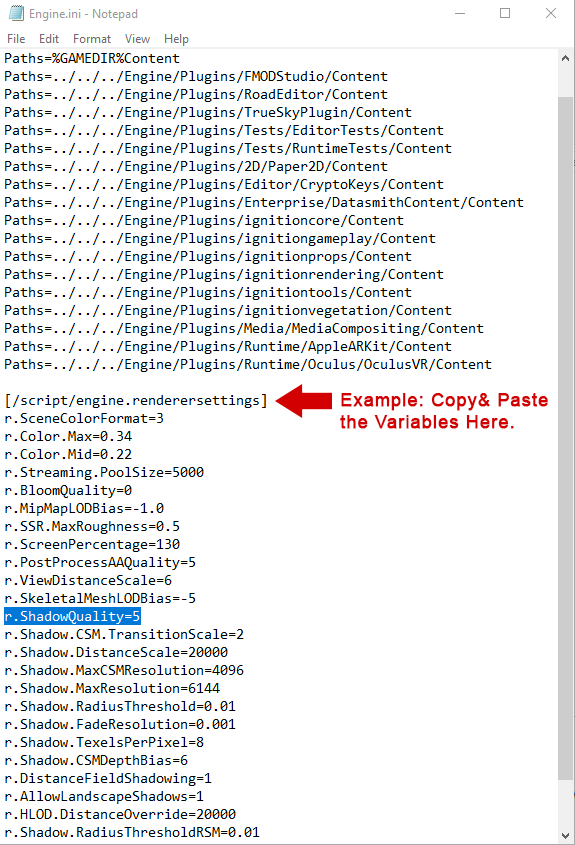
Just add the following to the "engine.ini" file (make sure to add a clear line after the standard text that is in the file):

[/script/engine.renderersettings]
r.SceneColorFringeQuality=0

[SystemSettings]
r.Tonemapper.Sharpen=0.5
StormTrooperAim 2 Jan, 2020 @ 8:34pm 
Can sb tell me, why my cfg commands aren't working at all? I opned the correct "engine.ini" file and pasted all the commands I needed. None of them works. Still chromatic abberation and the fking sharpening are in my game. :/
i_NeedNos 2 Jan, 2020 @ 7:11am 
Thanks Sarasota, I was able to remove shadows. GPU usage is still high though in main menu. I will try reflections next. Btw do you happen to know why this game use so much gpu but barely any cpu?