Neon Chrome

Neon Chrome

59 ratings
100% Achievements: A Comprehensive Guide
By ErickaUnlimited
An accurate, detailed and complete guide on how to unlock every achievement in Neon Chrome.


Award
Favorite
Favorited
Unfavorite
Boss Achievements
"Spiderbot"
Defeat the spiderbot.
On level 5 you'll encounter the first boss, Spiderbot, AkA "Shelob 75A1". It has three attack patterns as you wittle its health down, as well as a spin attack (short range) prior to changing each attack form.

Make sure to eleminate all four spider spawners on the walls to give you some breathing room, which you can do before engaging the boss if you run south of the healer bot and around the boss without it detecting you.

You can clean up the spawner on the east wall before the healer, the two on the west by going around the boss and the one on the north wall if you come up behind the boss.

Once you provoke the boss, keep your distance (unless packing a shotgun), utilize your energy special and use the walls as temporary protection as needed; try not to destory them with your own fire.


"Centipede"
Defeat the centipede.
On level 10 you'll encounter the second boss, the Centipede, AKA "RM-232 Moldworm". It has a variety of attacks and individual shielding for each part of its body. To defeat it, you need to focus on a section at a time and damage the shield enough to remove it, allowing you to hit the centipede directly.


As you destory portions of its body, the boss will gain speed and deliver several different attacks. It drops mines, spawns small enemies to help defend it and eventually fires heat-seeking missles.

If possible, it is advised to equip the "Crashware Friend of Mine" enhancement so you won't trigger mines anymore. It'll help give you some breathing room and be one less thing to dodge as you fight the boss. Don't forget to run around the outskirts of the level for needed health packs and weapon upgrades during the fight.


"Hovertank"
Defeat the hovertank.
On level 15 you'll encounter the third boss, the Hovertank, AKA "Icarus T-17". Seemingly the easiest of the three bosses, you'll be sealed off from the main lobby on some railings that circle the outside of the map. On each side of the map rests a machine gun turret that you can trigger to help dispatch the Hovertank.

Turrets aside, it's also recommended that you shoot the exploding containers prior to engaging the tank in the area, as it tends to hit them and cause them to explode when you least expect it. On higher difficulties they can take a significant chunk of your health away.


"Overseer"
Stop the Overseer 1.0.
Complete the game for the first time to unlock this achievement.
Combat Achievements
"Hard Work"
Kill 1000 enemies.
This achievement is cumulative, so over the course of any number of playthroughs, kill 1,000 enemies of any kind to unlock this achievement.


"Explosive"
Kill 8 enemies with a single explosive.
Harder than it sounds; I recommend doing this on level 10 against the centipede boss. During the fight, it'll spawn drones to help protect it. Let them spawn until there's at least eight of them. Now, you'll need the following in your build:
  • Energy Attack - "Antioch Grenade"
  • Enhancement - "Armocore myGrenade"
    A hand grenade interface that cuts all fuse times in half and increases the explosive radius 40%.

When enough enemies spawn, toss a grenade and watch'em explode. Easy, no?


"You've Just Been Erased"
Kill 3 enemies with a single railgun bullet.
While using a railgun, line up any three enemies and fire a single shot, killing at least three of them. Killing them isn't terribly difficult, but finding a railgun can take some time, so I recommend buying it before starting level one from the gun vendor to make things easier.
Level Achievements
"Grit"
Play 20 levels without dying.
Recommended that you adjust the difficulty to 1.0 for this one if you have not already done so (you can adjust the difficulty on the terminal to the left of the spawning pods), as it will make surviving much easier. You'll need to complete 20 normal levels without dying; bonus levels do not count towards this goal.


"Pacifist"
Finish a normal level without using abilities, weapons or melee.
You'll probably get this in conjunction with "Runner", which is to finish a level in under 20 seconds. The goal here is to blaze through a mission by just running past everything. I recommend doing this on the lowest difficulty and in the beginning. This will ensure two things: no locked doors and less enemies.


"Sneaky"
Finish a normal level without being seen.
As with "Pacifist" and "Runner", this is best done on a lower level on the easiest difficulty. Using an assassin class and the enhancement "Nanoedge Chameleon Skin" (undetectable while stationary), slowly make your way towards the exit the best you can. It'll take some work and some luck, but you'll get it eventually with some practice. I'd recommend doing this with a weapon that can one-shot enemies, such as the rail gun, or explosions. Boosting your damage output also helps to dispatch enemies before they see you.


"Runner"
Finish a normal level in under 20 seconds.
You'll need to use the hacker class for the speed boost, as well as the enhancements:
  • NanoEdge Musclevital - 33% speed boost
  • NanoEdge Symbiote - 10% speed boost


If you've run across the enhancements at least once, you can buy them from the vending machine prior to entering the level. They cost a total of 1,800 credits for the two, so make sure you have the money leftover prior to trying it. Now spawn in the level and clear it all the way to the elevator. DO NOT GO IN THE ELEVATOR If this is a level you think you can beat in under 20 seconds, pause it and hit "save and exit". You'll reload level one and it will stay the same. Now that you know the layout, conduct your speedrun. If you fail, repeat and try again.


"You're Special"
Complete all special levels.
Complete the above 53 special levels for this achievement to unlock. You can access the special levels via the purple elevators on the floor prior to the special room. You'll know there is a special level elevator in the level you're on by seeing a small square between your current level and the next one in progression as shown below.

You can track your progress on the neutral billboard to the right of the pod before you start a level. If you die during the special level, it will not count towards the total. It displays how many secret levels have been completed and also which floors still have unfinished secret levels. Research Labs is first floor, Office is the second floor, Warehouse is the third floor, etc.


Ability & Stat Achievements
"Stat Master"
Upgrade a stat to level 100.
A little grindy, but fairly easy to obtain. Invest enough money into any one stat and raise it to level 100 to unlock this achievement.


"Unlocker"
Unlock all unlockables.
These are found in special gold chests scattered around special levels (accessed via purple elevators). Since the game randomly generates the levels on the way to the Overseer, you'll most likely have to play through the game multiple times, or farm specific floors until you get them. You'll know you have the right floor based on the name that comes up right away when the level loads. The following names and floor locations are what you want to look out for:

  • Fireworks (1st floor) (Laser Pistol)
  • Locked Out (2nd floor) (Baeder GG-212 Coiler Gauss Gun)
  • Triple Towers (2nd or 3rd floor) (Piercing Pulse)
  • Exordium Imports Inc. (3rd floor) (Antioch Grenade)
  • Hovertank boss fight (3rd floor) (Baeder CL-1 Plasma Torch)
  • Welcome Back? (4th floor) (SR-224 Heavy Rifle)
  • Commuter District (4th floor) (Duramax Wall Smasher)
  • Emergency Accomodation (5th floor) (C4 Explosives)

Note: For Fireworks, you will need a rocket or missile ability (or rocket launcher) and for Exordium Imports Inc. you will need an explosive ability or weapon.

For the visual hunters, you'll be looking for rooms that have a specific title (pops up at the beginning of each stage), which contain one of these gold chests:
Simply locate the gold chest to unlock each hidden item.
⠀⠀⠀⠀⠀⠀⠀⠀⠀⠀⠀
For more of my guides, check out the link below:

https://sp.zhabite.com/sharedfiles/filedetails/?id=1304735272
13 Comments
Gness Erquint 21 Jul, 2022 @ 3:41pm 
Okay, just gotten the Runner achievement on a yellow level "Crime Against Humanity" playing an Assassin asset.
So, apparently, the stipulation "normal level" in the achievement descriptions only excludes skippable side-ward set piece levels but includes yellow named set-piece levels that can't be skipped.
Gness Erquint 21 Jul, 2022 @ 3:06pm 
I'm pretty sure I've done levels under 20 seconds multiple times but Runner isn't triggering.
peremptor 12 May, 2022 @ 12:38am 
Excellent job on the guide. Great layout. Thanks!
Ruthlessguy21 22 Mar, 2022 @ 4:39am 
How do I get and throw grenades?
ErickaUnlimited  [author] 4 May, 2021 @ 9:15am 
Awesome. Well done! :D
Zattmann 4 May, 2021 @ 9:00am 
Great guide. With your help I 100% another game. :steamthumbsup:
ErickaUnlimited  [author] 16 Apr, 2021 @ 6:06am 
Thanks for letting me know. It has been corrected.
Zattmann 15 Apr, 2021 @ 10:03pm 
For those of you who don't know, the Antioch Grenades are a reference to Monty Python and the Holy Grail. And @ErickaUnlimited under "Explosive" Antioch is misspelled. Don't know if you care or not. I just thought I would point it out.
JimDeadlock 28 Oct, 2018 @ 10:13am 
@OtterDoom be sure to pick Assassin, and get them from behind. You'll get the cheevo easily.
ErickaUnlimited  [author] 28 Oct, 2018 @ 9:58am 
@ OtterDoom - You'll see a white "!" above their head when they spot you. Oddly enough, sometimes you can be shot at and still not receive the detection notice, which means they didn't "see" you and I suppose the game counts that as a reactionary shot as opposed to physically being seen.

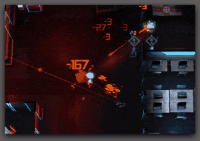
Guards running around after you kill one of them doesn't count as being seen unless you see the "!" above one of the other enemies, or you're being shot at by multiple targets, then there's a strong chance you'll need to restart.