Scavenger SV-4

Scavenger SV-4

103 ratings
Scavenger's rulebook
By Clatronix
Anything you'd want to know about the game, find it here!
3
4
7
   
Award
Favorite
Favorited
Unfavorite
> Introduction
Welcome aboard! So, you want to get into the scavanger bussiness, eh? Then you came to the right place my friend.


When do I leave?
How much should I use the Medbay?
What items are valuable?
What does this module do?
Am I going crazy?


All of these and more will be explained in this guide.
Whether you are a seasoned scavanger or a first time explorer, you'll find something useful here.

I also strongly recommend reading the Game Manual, which can be opened from the main menu or the game's folder. It explains a lot of things, gives some tips and tells a bit of lore as well.

Before you read
This game is all about exploration and experimentation. Most of the fun comes from the player learning everything for himself by making mistakes and using that experience to triumph in their future expeditions. You won't understand half the guide if you haven't played at least a couple runs anyway.
So, before you do anything, go and set out on a few expeditions. See what you can find and learn. Otherwise, go ahead and read what you want.
Configuration
Aka the options menu of the game.You can reach it by either clicking "Launch Configuration Tool" when starting the game from your library or by clicking the "Options" button in the menu.
Adjust your settings, your Rover modules, your key bindings or turn on Gamepad controls, then click "Save Changes and Exit" to save the settings.

Game Options tab
Most of the options are straight forward, so I'll only explain a couple.
LOD Distance - Sets the viewdistance on the planet. If set to minimum, you won't be able to see into adjacent rooms on your ship, so I would recommend setting it to at least short.
Texture Detail - Just a small tip for this one. Setting it to high or insane won't impact your FPS in a big way, even if you have a crappy computer. Load times will be slightly longer, but everything will look 10 times better. I would recommend setting it to high at the very least.
Reduce Lights - Lamps on your ship are expensive to render, so if this option is turned on, the game will turn off any light in rooms not adjecent to yours. This is a recommended setting as the game's performance will be improved when it's on.
Selecting Objects Assistance - You can set indicators that show up when looking at usable objects such as door buttons. "Glow" will make the object glow and "Crosshair" will change the red crosshair to green once you are in range and looking at the object.
Auto-align View to Terminals - Recommended to turn it on. This will line you up perfectly with a terminal's screen when you click on it to use it.
Zero G while on your ship - Recommended for easier navigation aboard the ship. It also makes it easier to dodge some hairy situations. When turned on, you can float around your ship with ease. Holding Shift will make you ascend vertically, while hodling Ctrl will make you descend.
Color - Default starting color for the menus, terminals and screens. Can be changed in the character creation screen, but it will always go back to that original color.
Easy Mode - When turned on, you will recieve 50% less radiation, but you'll have a 33% score multiplier. Basically less score, but you can stay longer and not use the medbay as often.

Starting Equipment tab
You can move the Rover's default modules around. If you put something into the "In ship storage" tab, it will be stored on your ship, but not installed on the Rover. Anything put into the "Not brought" tab won't show up in your game, giving you more free cargo space to work with. The "Installed on rover" tab shows what modules your Rover will start with.

Keybindings tab
Bind your keys (duh). I wouldn't mess around with the settings much.
"Rover Power Hotkeys On" will make your numbers 1 to 9 correspond to the Rover's first 9 systems. This is useful for turning on and off modules without having to click them individually.

Joysticks or Gamepads tab
If you want to play with a controller, this tab will take you through setting one up to work with the game, step-by-step.
Gameplay & Story
To get a better understanding of the events leading up to your expedition, read the personal logs on your bedside terminal. The backstory changes every game.

The basic premise of the game is you found a planet in an uncharted sector. You don't know what might be on the surface, so you try your best to explore it and scavenge what you can.
The planet emits a huge amount of radiation, which means you can't go down there yourself. You need to use the remote controller Rover to scout the surface instead.
However, you are not completely safe from the radiation even aboard the ship. As time goes by, radiation will start affecting you in many unhealthy ways. Radiation poisoning will be the least of your concerns after you've been orbiting the planet for a while.
Get what you can, do some research and get out with your salvage before something bad happens. And trust me, many things can go wrong in a few seconds.

The planet and the things you find on the surface change between each playthrough. How you make use of what you have and the decisions you make along the way will affect the ending. There are over a 100 possible outcomes, depending on the items you've collected, your health and what you did on the expedition.
Staying too long will negatively impact your score, since the overall score is multiplied by your health percentage. This means that getting more valuable items with poor health is usually worse than getting less valuable items with decent health. Don't be afraid to leave early.

The game has a moderate learning curve. You'll need to make a few expeditions before you know how things work. The first few expeditions should be a learning experience. The more mistakes you make, the more you'll learn. The game is not very forgiving so don't give up right away.
An expedition won't take 8 hours to complete. The game is designed to make you use your knowledge from previous expeditions in order to make more efficient runs in the future.
My expeditions usually take over 2 hours to complete, but at that point the radiation really starts hindering the score.

After clicking on "New Game", you'll get a chance to customize your ship and character a little.
There are many names included in the game by default for both your ship and your captain, but you can come up with your own. The gender of your captain won't have any substantial effects during gameplay.
You can change the ships colors, which also changes the colorschemes of terminals, the Autodoc and EVA suit. There are multiple patterns you can choose from as well.
Clicking the "Generate Again" button will randomize the names, the gender and the color.
Basic survival & Tips
Radiation
Since the planet emits strong radiation, you can't stay in orbit forever.
8,000 mSv is deadly, but anything above 2,500 mSv will most likely have either deadly consequences or severe impact on your final score. Visit the Autodoc every 5 or 10 minutes and keep yourself in check. If things start to go south, get your Rover and end the expedition.

Air
If you leave Air valves on "Normal", you won't run out of oxygen before radiation kills you. Be careful when operating airlocks. It depletes the air supply quick if you don't use the strict airlock procedures and if you are not careful, you might find yourself out in the cold vacuum of space without an EVA suit (you'll suffocate obviously).

The surface
Don't put your Rover into impossible situations. If you can't win a fight, run away or recall the Rover (then reset the landing zone unless you wan't to land on top of the enemy). Know your limits, high risk high reward in this case is not worth it.
Drive carefully around cliffs and narrow pathways. You can slide into a cravase if you drive recklessly, which would mean the end of the expedition. If rough terrain gets you stuck, recall the Rover and either launch it again or reset the landing zone if it continues stuck.


Tips & Tricks
Now, a list of useful tips. Some of them will require you to read other parts of the guide or play the game for a bit in order to understand them. I also included some other cool facts.
  • left click a terminal to use it, right click to exit out of it
  • you can launch the Rover from the Garage, Cargo bay and the Bridge terminal
  • left clicking the center screen while driving the Rover will activate the turret (same as pressing the "Turret" button)
  • right clicking will exit out of turret mode
  • don't leave too many doors open on the ship (you'll thank me)
  • you can rename all items to anything by clicking on their nametag
  • the Autodoc can't scan you while wearing an EVA suit
  • you can play music from your Quarters terminal
  • stowaways can be removed from the Rover by discarding them
  • you can pass time by playing Dungeon Road on your Quarters terminal
  • your ship's name will show up on the Cargo airlock door and the side of the Rover
  • research can be started right after you dragged all items into the Lab's storage (no need to wait for the cargo to arrive physically)
The Ship
The ship is divided into 9 sections and 11 rooms in total. All rooms are separated by doors, which can be operated by the buttons on the side.

Here's a complete map of the ship. If you don't know what room I'm referring to or where it's located, check this handy map.


Bridge
You'll be spending most of your time here, sitting at the main console. You have a spectacular view of the planet and the cosmos surrounding you from here. You can do a few things at the center console:
  • establish link with the Rover (aka take control of it)
  • operate the Rover
  • recall the Rover
  • reset the Landing zone (the Rover will land where it originally did on the first landing)
  • examine the map of the explored surface area
  • end the expedition
Viewing the Rover's survey data will show a map of the already explored surface area. Your current/last position before recall will show as a dot.

Medical
If you want to assure your long term survival, you better check in with the Autodoc on a regular basis. It's as simple as accessing the terminal, and clicking on the "Activate Autodoc" button. It will scan you first and give you an evaluation, which tells you how much radiation you suffered, how your body reacted to that and how much radiation will be left in you once it applied the treatment. If you suffered other injuries, it can treat those too.
Next click the "Apply treatment" button and it will do it's best to minimize the radiation and any other damage. The more damage you suffered, the longer it'll take to heal you.
It's advised that you check in every 5 or 10 minutes. Periods longer than that could leave you with more severe, lasting damage.

Science lab
Once you send some new samples over from the Cargo bay, you can start researcing them here.
Every sample has a "code" assigned to it, which is a short string of letters and numbers after or before the actual name of the sample. This helps differentiate between similar modules/artifacts.
The speed of the research in general will depend on the number of samples being researched at once (ex. 1 sample = 100% speed ; 2 samples = 50/50 % for each). Click the "Research all" button to start research on all samples.
Clicking on a specific sample will start "Active research", which gives a 20% speed boost to that sample as long as you have it selected AND you are using the console (exiting out will remove the bonus).

Research speed depends on a few factors:
  • Complexity - more valuable/rarer things take longer.
  • Damage - depending on the amount of damage, it will take longer. You can damage samples by shooting them, damaging whatever holds them (Sentries, Vaults, etc).
    Yellow - slightly damaged
    Orange - modaretaly damaged
    Red - severely damaged
  • Previous research - if you have researched similar samples before (same category/subcategory), the system will recognize the items.
    This will let you skip stages, sometimes almost completely skipping research.
Research has 3 stages:
Stage 1 - Complete unknown
The samples name will only have a bunch of question marks. At this stage, you know nothing about it. This is the shortest stage.
Stage 2 - Category
The sample will have a generic category assigned such as "Optical" or "Mechanical" with 2 questionmarks on either side. The description will now hint more towards what the sample could be. This takes a bit longer than the 1st stage.
Stage 3 - Subcategory
Now you know the subcategory of the item. "Laser" or "Launcher" will mean a weapon, while "Camera" or "Power Storage" will mean other utility. Takes a while to finish.

After Stage 3, the research is complete. Now you get every bit of info from the description. It will tell you the value, energy consumption rate, heat production rate, effects and efficiency of the module or attributes of the artifact.
Fully researched items will function more efficiently in the Rover.
Items not fully researched will still sell for their full value at the end of the expedition. Mounting these unresearched items on the Rover will result in abstract and undecipherable displays on the screen they are assigned to.

Cargo bay
Consists of 2 rooms: one where you operate the terminal and one where the airlock is.
You can move items to the Lab, the Storage, the Garage and unload the Rover from the terminal by:
- dragging an item to any empty slot
- clicking an item, then clicking an empty slot
- dragging an item onto a room's label

Dragging an item onto another one will swap the two.
You can also organize your stuff, send the Rover to the Garage or launch it from here. To discard an item, click on it, then click the "Discard" button. This will get rid of the item permanently.
Clicking "Bulk Unload Rover" will transfer all items to available storage space. This is useful when you don't feel like dragging 7 items by hand. While the Rover is transfering items, it can't be moved from the bay or launched.

Garage
You can install/uninstall modules on the Rover, repair items, transfer the Rover around or launch it and read item descriptions from the terminal.
The success of repairing an item depends on how many similar items you've researched before. The more you know anout these types of items, the higher chance of succesful repair you'll have. Catastrophic failure will destroy the item. Depending on how damaged an item is, it could take multiple repairs to get it into the green.
Repairing the default Rover equipment is always 100% succesful.

Engineering
There are many submenus on the terminal:
System overview - a general evaluation of the ships status
User terminals - reboot crashed terminals from here
Door override - open / close any door on the ship (even airlocks)
Cargo system - an overview of the cargo network
Consumables - your supplies aboard the ship
Engines - displays the status of the engines

The ship's terminals will crash from time to time due to the radiation emitting from the planet. If you are looking at a terminal while it happens, it will display a message like "Cargo operations terminal offline. Reboot via Engineering".

Life support
You can check your air supply, change the air valves and control doors from here. If you wear an EVA suit, you can refill its air supply at the terminal.

Air valves:
  • Closed - rooms won't get filled with air when it's depleted from them. Could cause drafts when opening doors.
  • Normal - rooms get filled with air at a steady rate. Recommended setting.
  • Emergency refill - rooms get filled super fast. Only for certain situations.

Storage
You can admire check out your items, view remaining cargo space or put on the EVA suit from the terminal. You can sort items by value and the total value of your stored items is also displayed.
If you wish, you can also get out of the ship using the airlock. I would advise using the "Airlock protocol", unless you trying to do something crazy.


Quarters
On the terminal above the bed you can read your logs, turn music on or play Dungeon Road. The game has it's own section if you want to find out more.
There are also randomized little things around the room that are different on each playthrough: a guitar, framed pictures, a dino figure and much more. These are some of the cool things you can look at around the room. Sadly, you can't use the toilet.
The Rover

Equipment
Starting equipment on the first, second time you launch the Rover shouldn't be anything special. You need the space for items you pick up. I personally prefer this setup:
- Reserve battery
- Video camera
- Manipulator arms
- Survey map (optional)
- Radio reciever / Microphone (both optinal)

I ususally leave the Aux generator and the Reciever / Microphone (whichever I don't have installed on the Rover) in the ship's storage for later use. I don't bring / discard the Power controller, Compass and Status display. They take up space and you can get by without them.
This way you'll have 7 to 9 free slots on the Rover to pick up items. After your 1st / 2nd recall, you can start outfitting your Rover with equipment you found and researched.

The video feed will have constant static and interference due to the high levels of radiation on the surface. This is by design and can't really be changed.

Handling
The Rover by default is a bit slow and doesn't turn well. It's not very capable "off-road", so small hills and rough terrain should be avoided, since it can get you stuck.
If you are stuck, recall the Rover and launch it again. If it's still stuck, recall again and click on "Reset Landing Zone" in the terminal menu. The Rover will now land on it's original landing position (when it first landed on the planet).
Driving into cravasses will destroy the Rover, so be careful when driving near cliffs and steep edges.
Having a lot of modules installed will impact the Rover's speed and turning. It's not a huge decrease, but it is noticable.

Power management & Heat
The Rover generates a small amount of power by itself, but thats usually only enough to power the most basic of modules.
Remaining power can be displayed when a power source / power storage is assigned to a screen.
If the Rover doesn't have some sort of power source, modules will lose power quickly and eventually stop working. The more output power the generator has, the more modules you can power. You only need to power modules you currently want to use.
While driving the Rover, clicking the green square next to a module or pressing the corresponding number key will turn that module on / off. Disabling modules with high power demands will decrease power use, re-enable them when you actually need them.
Actively manage your powered modules and you'll be able to get around with a less reliable power source.

The internal temperature of the Rover is shown in the upper left corner of the terminal.
Modules will procude heat when they are turned on (sometimes even when turned off) or when actively being used. You can counter this by only powering them when necessary or installing heatsinks on the Rover.
When the Rover is entering the planets atmosphere after launch, its temperature will rise, but drop back down shortly after passing the clouds.
If the temperature reaches critical levels, modules will start taking damage and eventually the Rover will be destroyed. Keep an eye on your temperature when using reactors and weapons.
If the Rover is already hot, reentry might destroy it.

Screens
The layout of the uplink screens is displayed below on the terminal.


The Rover uplink has a total of 6 screens and you can assign most installed modules to them (a single module can't be assigned to multiple screens). If a module can't be assigned to screens, the icon on their right side will have red marks on it.
The middle screen is the largest, followed by the one on the right.

To assign a module to a screen, either:
  • clicking on a module, then clicking on a screen
  • pressing the button on the right of the Module, then clicking on a screen
  • dragging the module onto a screen
  • dragging a screen onto a module

You can swap displays around by dragging a screen onto another.
To unassign a module from a screen, click the icon on the right of the module twice.

To expand the center screen temporarily, click on the small rectangle in the bottom left of it. The screen will now fill the whole terminal screen whenever you enter turret mode.

Combat
Once you have weapons, armor and maybe a targeting computer installed, you can try taking on enemies. Sentries and Fliers are fair game, but avoid Guardians if you can. You don't get any rewards for combat efficiency, so stay away from trouble when possible. It's easy to lose your Rover if you get overzealus, a few well palced shots will damage your Rover beyond belief, destroy modules or even blow it up completely. If that happens, the expedition is over. No replacement Rovers, can't land on the surface either, so you better just take whatever you have in your cargo and get out.
Modules
Modules are alien technology found on the planet's surface. Type, purpose and complexity varies greatly. Their primary use is to be installed on the Rover, enhancing it's capabilities.
Most of them can be linked to a screen on the Rover for better usability.
All modules are stored in standardized container boxes for easy storage and transport.

There are many types of modules: reactors, transmitters, armor plating and weapons just to name a few. All categories contain a great number of modules with varying efficiency, purpose and value.
Most modules can have extra attributes such as: acting as a heat sink, increasing / decreasing detectability (stealth), efficient power use, low heat generation, increased damage.
There's a total of 12 slots on the Rover where modules can be installed.


Utility
Camera - transmits a video signal of varying quality and zoom
Sensors - audio sensors, signal detectors, etc.
Manipulators - arms and other tools
Power plant - produces power at a steady rate, usually at the cost of some input power
Power storage - stores electrical power
Surface plating - acts as protection from certain damage types
Heat sink - reduces the Rover's temperature by insulating excess heat
EM-Field - signal transmitters, recievers, radars
Propulsion - alters the Rovers driving capabilities

Weapons
Launcher - rocket / mortar launcher, ranged effectiveness varies
Laser - accurate beam weapon, damage decreases with distance
Arc projector - launches electricity at close range, usually inaccurate
Flame projector - close range flamethrowers, does damage over time

There are many weapon subtypes, but those are rarer than their standard counter parts. These special weapons are valuable and have unique attributes.

Weapons can be either:
  • Spinal mounted - can't be aimed manually. Always aims straight in front of the Rover, static.
  • Turret mounted - aimed with the camera. A maximum of 3 weapons can be mounted on the Rovers turret: 2 on the sides and 1 below the camera.

Miscellanious
There are special modules that can't really be put into other generic categories. Their purpose is extremely specific, but proves very useful. Their value is usually high.


The value of a module depends on rarity, stats and current condition. Common weapons with low damage are worth less than rare, special artifacts. Damaged modules can be repaired in the Garage, which increases their value if done successfully.
It's advised to discard modules that are damaged or have low value, so that you have more space for fresh new ones. So don't hang on to that crappy beam weapon you found in the starting area that's only worth 1,000. You have a good chance of finding something worth at least twice or twenty times it's value if you venture on just a bit.
The surface
All planet surfaces that you explore are procedurally generated. There's always some sort of natural barrier around the edge of the map. That could be water, cliffs or steep hills. Going beyond these limits is impossible and results in the destruction of the Rover.

There are a few planet types and each feel different to navigate. Depending on the type you might come across large crevasses, ridges, ponds, valleys or just huge flat plateaues. Some types will be more unified, others will be divided by obstacles.


While driving around the surface, you can encounter several points of interest with a huge catalog of items.

Derelicts
Scattered around the map, they can be small buildings, ruins, downed ships or even artillery guns. However, they are all very similar in function. They contain a single item, which you can get by driving up to them until you see the "Pick up" prompt on the right. The type and rarity of the items found here range from weapons and other utilities to alien artifacts and records.

Vaults
Huge buildings that contain 3 to 5 items inside. They have multiple entrances which can be opened by firing at the doors or using certain transmiter modules. Opening the doors with brute force (aka shooting) will damage the items inside. An electric discharge effect on the door will indicate if you are shooting it in the right spot. Depending on your weapon damage it can take quite a few shots to open them.
Contained items are more valuable and unique than those found on Derelicts.

The City
A very important location. It's hard to get to it, but if you haven't found one yet, don't spoil it for yourself. The best way to spot one is to check around while the Rover is descending onto the planet. You may spot the spikey building tops in the distance.
Information is detailed below for those who want to read it anyway.

!! SPOILERS !!
They are guarded by Sentinels and Guardians that have powerful weapons. Once you get in the city, go to the middle of it. You'll find a single collectible item, which is the history records of the city.
It takes a while to research, but it's worth 45,000 points, so it's highly valuable. It also tells you the lore behind the planets defunct civilization.
There are 4 possible stories. Each of them corresponds to what you can find on the planet (ex. artifacts, creatures).


Items
You can find many items on the surface. They'll be contained in Derelicts, Vaults and Cities.
There are many types of artifacts including: cryptic image files, surface map fragments, periodic tables, historical records and much more. They also have an insane amount of variations.
These artifacts help put together the lore, but due to their alien origin, we can't understand them completely. What you can find also varies between each expedition.
Item value depends on how damaged it is. Repairing an item will increase it's value.

Modules can be found in Derelicts, Vaults or on enemies. The type and rarity of these depends on the explored area.
Enemies & Hazards

Sentinels
Robots standing on 3 legs with a turret on top. They are inactive until you get close, at which point they'll activate in most cases and start attacking. If the player goes out of sight/range, they'll try chasing after them, but their slow movement and turn speed makes them easy to outrun.
Very common enemy, seen often around the map.

Sentries
Alien aicrafts, usually resting on the ground until they notice the player. At that point they'll start flying around and over the Rover. They are weak and a few well targeted Laser shots will take them down quickly. When they die, they'll start smoking and crash into the ground.
Common enemy, but not as common as Sentinels.

Guardians
A four legged robot, slightly bigger than the Sentinel. They also start inactive, but they'll usually spot you from a distance. Due to their strong weaponry and huge amount of health, it's advised to only fight them once your Rover is armed subsantially. They also move faster than the Sentinels.
There are fewer of them around the map, usually in areas with valuable items.


These 3 drone type enemies have a common goal: destroy any intruders. They can have any type of weapon on them (same as the player). Once destroyed, you can loot their weapons, although it might be damaged. You can find them all around the map, sometimes they are already destroyed. These destroyed drones still contain weapons you can take.
Once they are alerted to your presence, they will call for reinforcements. This sends out a signal to any nearby drones, bringing them to your location.

They have several modules that you can damage:
Legs - shooting their legs will stop them from chasing after you, but they'll still be able to turn around
Communications - if you shoot the pod on their back, they will stop calling for reinforcements
Sensors - you can blind them by shooting their sensors, usually located around their front
Turret - shooting the turret on top will interfere with their aiming. They'll have to turn their whole body to aim at you.
Weapon - damaging their weapon will prevent them from firing

Crystal coils
The planet surface usually has at least a few of these crystal trees scattered around. By themselves, they are harmless.
Sometimes they'll be grouped together, populating a small area. If the player gets close to this small forest, some of the trees will launch arcs of electricity in the Rover's direction. Their range is small, so keep a 15 meter distance.

Stowaways
Small critters roaming the planet surface or just ilding around. They don't attack the Rover and are extremely weak. One shot of any weapon will usually kill them. However, they have a sort of "event" that could happen. This is a very cool scenario and I advise you experience it yourself.
If you are having difficulties or just want to spoil it for yourself, read below.

!! SPOILERS !!
They can latch onto the Rover, occupying a free slot (disguising themselves as artifacts). You can get rid of them by simply discarding that sample, but they'll try to get back on the Rover.
If you recall the Rover with one still on it, it will make it's way aboard your ship. It can get around using the cargo transfer ducts, so any room that has one is potentially dangerous to go into. They can't open doors. If they see the player, they'll try to latch onto him. It will kill in 1 or 2 hits, depending on your HP. If you wear the EVA suit, you can take an extra hit, but it will puncture the visor. That makes the suit useless (you'll suffocate in vacuum).
You can lead them around the ship by going up to doors and they'll latch onto the other side of them. Then you can open routes for it using the Engineering or Life support terminal and manipulating all the doors on the ship.

Step by step of getting rid of them:
1. Lure it into a room without a cargo duct
2. Click the "Emergency refill" in Life support
3. Open a straight route through the ship sarting from the Airlock door up to their door
4. Open the Airlock. The air will start rushing out
5. Open their door

This basically creates a funnel for them. The emergency refill will make the air push them out of the ship super fast. Once they are out in the vacuum of space, they can't harm you. Now close all doors and set air valves back to normal. You'll get a 5,000 points bonus for getting rid of one succesfully.


That artifact
This is one of the greatest things in the entire game and I would strongly recommend you find it and experience it yourself before reading up on it. You'll know you found one when weird things start happening on the ship.
It's detailed below.

!! SPOILERS !!
The artifact will give you hallucinations and make you go insane after a while. It has numerous effects you can experience.

Hallucinations:
- spooky skull jumping at the player out of nowhere
- empty gas reservess in Life support
- flatline sound in the Autodoc
- 4 additional seats on the Bridge
- occupied toilet in the Quarters
- handprints all over every window
- whispering
- posters / paintings / desk pictures in the Quarters displaying disturbing images
- new log entry suggesting some disturbing things happening
- chains all over the Engineering room
- black motes floating around in the air
- asteroids coming at the ship
- bloody hatchet in the Quarters
- insane asylum hospital bed in Quarters
- blood trail leading from the Autodoc to the Airlock
- someone in an EVA suit floating outside the helm, then smashing their head against the glass
- the ship appearing to have landed on the planet's surface
- the sun going supernova

Eventually, the player's health will start changing depending on the proximity to the artifact (the closer you are the lower your health is). Your vision will tilt in crazy angles if you look in the direction of the artifact and your view will slowly turn towards it (you can still turn your head away though).

At this point it is strongly advised to eject the sample out the airlock (unless you want to go insane of course). Research can be taken as far as stage 3, but never completed. Ending the expedition with the artifact still on your ship will trigger a unique ending, but your score will be impacted (-50,000 points for having the artifact). Getting rid of it will grant you an extra 10,000 points though.


System infection
There is a malicous and intelligent computer virus that can infect your ships terminals and eventually take over your ship.

!! SPOILERS !!
There is a chance you'll find a certain item on the surface that once brought back to the ship and researched, will start infecting the systems. It infects systems that read it's description.
It starts out with small pixelated graphical glitches all over the terminal screens, intensifying over time. The virus will take control of these systems:
Messages - it will try to communicate with the player using ominous log entries, status messages and Dungeon Road text. It can also mess with the music player in Quarters.
Doors - opens and closes doors at random. Eventually it will attempt to open enough doors to suck the player out the airlock.
Cargo system - it'll start randomly reorganizing the cargo storage.
Dungeon Road - pixelated glitching enemies will appear in great numbers and start chasing you. They do random damage between ??-?? and have ?? health.
Rover - it can launch or recall it a random.
Autodoc - the medical scanner will flash with bright colors while scanning. If you authorize a treatment, it'll instead kill you.
Dungeon Road


A small turn-based roguelike you can play from the Quarters terminal.

The gender of your Dungeon Road character will match the chosen gender of the player.


You start out with no weapon, no armor and no gold. Items are collected by standing on them. You have 50 starting health.
The game is turn based. Each turn you can: walk into a direction, attack in a direction (walk into an enemy to attack them) or wait (press the middle "P" button on the side). Enemies will only move or attack after you did.
You can control the game with your movement keys: WASD or Arrow keys to move and right Shift to wait a turn.

Armor
Helmet
1 armor point
Great helmet
2 armor points
Leather jerkin
2 armor points. Can be worn under a Breastplate.
Chainmail hauberk
3 armor points. Can be worn under a Breastplate.
Breastplate
4 armor points
Wooden shield
3 armor points (?)
Metal kite
4 armor points

Weapons
'
Items
Fists
3-5 dmg
Health potion
Heals 10 HP
Dagger
4-7 dmg
Chest
Contains 10-35 gold.
Sword
7-13 dmg
Axe
11-18 dmg


Enemies
All enemies have 10 health
Giant rat
1-7 dmg
Spider
1-8 dmg
Goblin
5-10 dmg
Skeleton
3-13 dmg, 2 armor
Demon
10-20 dmg, 8 armor

You swap your weapons and armor automatically for a better one when collected. You can't downgrade items you already have (ex. can't pick up a dagger when you have a sword).
Armor and shields will decrease enemy damage: if the enemy does 10 damage, but you have 6 armor points, then you'll only take 4 damage. You take no damage if you have more armor points than the damage the enemy did to you.
Enemy armor works the same way. Their armor value is subtracted from the damage you do.

When fighting: a bloodsplatter will mean that either you or the enemy took damage (depending on who attacked). Metallic sparks mean the armor blocked the damage.
To get enemies off your tail, go around walls. They'll lose line of sight and will eventually stop following you.
The maximum HP you can gain from drinking Health potions is 100. You won't be able to pick them up until your health drops below 100 again.

Every action performed in the game can be seen written out on the right: your movement, picking up things, enemies damaging you, damage blocking.
There are certain tiles on every map that have special text assigned to them. Standing on these tiles will provide you with some flavourtext. They all look like regular floor tiles.

The game's map is randomly generated on a 100x100 tile sized grid. Your character has a field of vision, so you can't see through walls. Anything behind a wall will be greyed out.
Unexplored tiles will be pitch black.

The end goal of the game is to kill the Overlord, who banished you to the dungeon in the first place. If you do, you'll be rewarded (with some special items in DR) and at the end of your expedition, the epilogue will mention it. To summon him, you must first prove that his feeble minions stand no chance against you.

There are also special glitch NPCs related to an event that can occur on the ship.

This game is good to pass the time while you wait for research to finish or the Rover to return.
Easter eggs
There's tons of nods, references and hidden messages in the game. I haven't found many myself, but here's a few confirmed ones.

Dinosaur figure
A small orange dinosaur figure will sometimes spawn on your desk in the Quarters.
It's a reference to a scene from Firefly - Serenity, where Wash is playing with 2 dinosaur figures.

Bookshelf
Sometimes the shelves in the Quarters will have a collection of classic sci-fi books. These books are some of the creators personal favourites.

Apollo mission
Some computer screens on the Bridge will show original assembly code from the Apollo DSKY computer used in the moon landings.
In the Quarters, there's a clipboard that can appear with a re-entry checklist from the mission.

Rush
A sector map on the Bridge is a reference to the "Signals" album by Canadian rock band "Rush" (seen on the right).

One of the default ship names is "Rocinante", which is the name of the spaceship in their song Cygnus X-1 from the "A Farewell to Kings" album.

SpectaKoo
When you name your character "spectakoo", a unique item will appear in the Quarters.
This is a reference to a youtuber called SpectaKoo, who made a video montage of the game, which the developer really enjoyed.
The item itself is a reference to the video mentioned above.
> Conclusion

  • If you still have some questions, ask away.
  • If you notice a mistake or innacuracy in the guide, feel free to correct me.
  • If you have tips or observations of your own, write a comment and I'll add it to the guide.
    I'll credit you of course.
  • If you found any new easter eggs, tell me about them.
    I'll credit you obviously.


Special thanks to Khallis aka Deric for:
  • creating this awesome game
  • helping people out on the forums
  • rolling out updates fast
  • answering my numerous questions
  • helping me out with writing this guide
  • giving me some exclusive artwork and renders for the guide
23 Comments
Reprehensible Troglodyte Jones 3 Nov, 2024 @ 9:20am 
@arnold

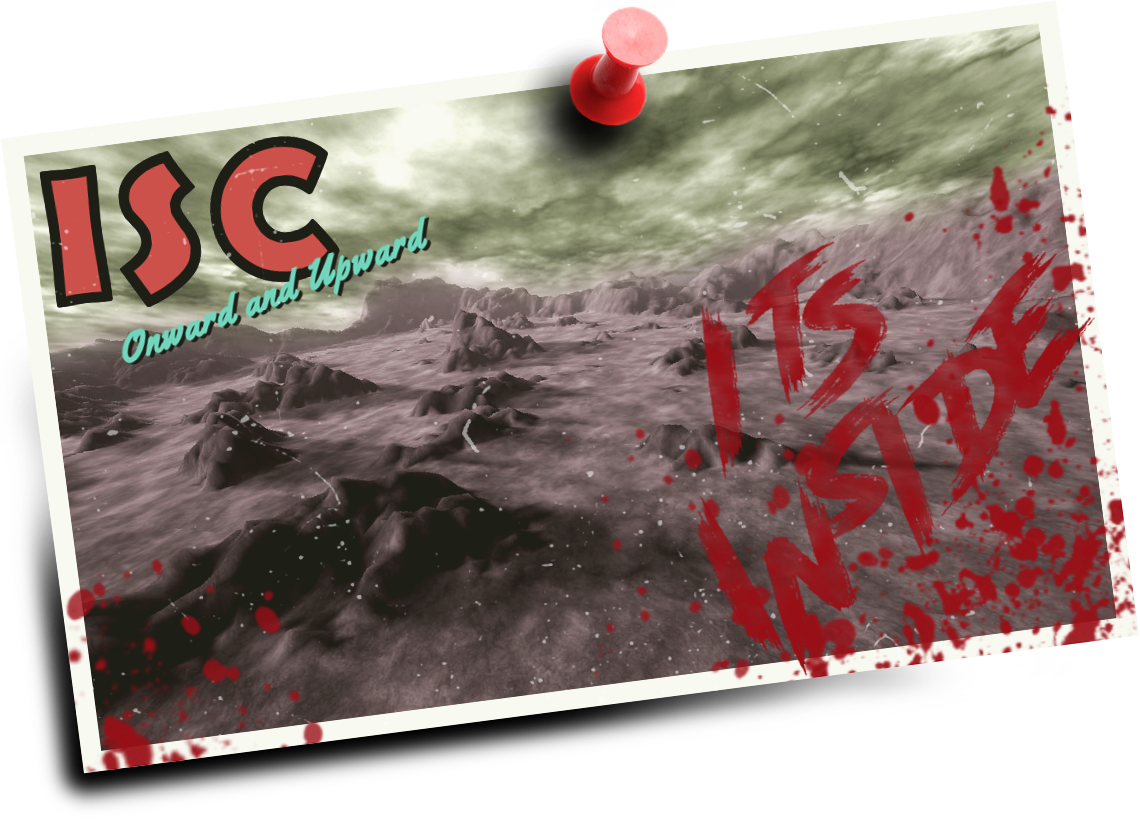
Oh and certainly not a reference to Wernher Von Braun, one of the leading pioneers in rocket technology? No no it must be referencing some media I consumed.
zidj 3 Sep, 2024 @ 1:26am 
Re: SYSTEM INFECTION


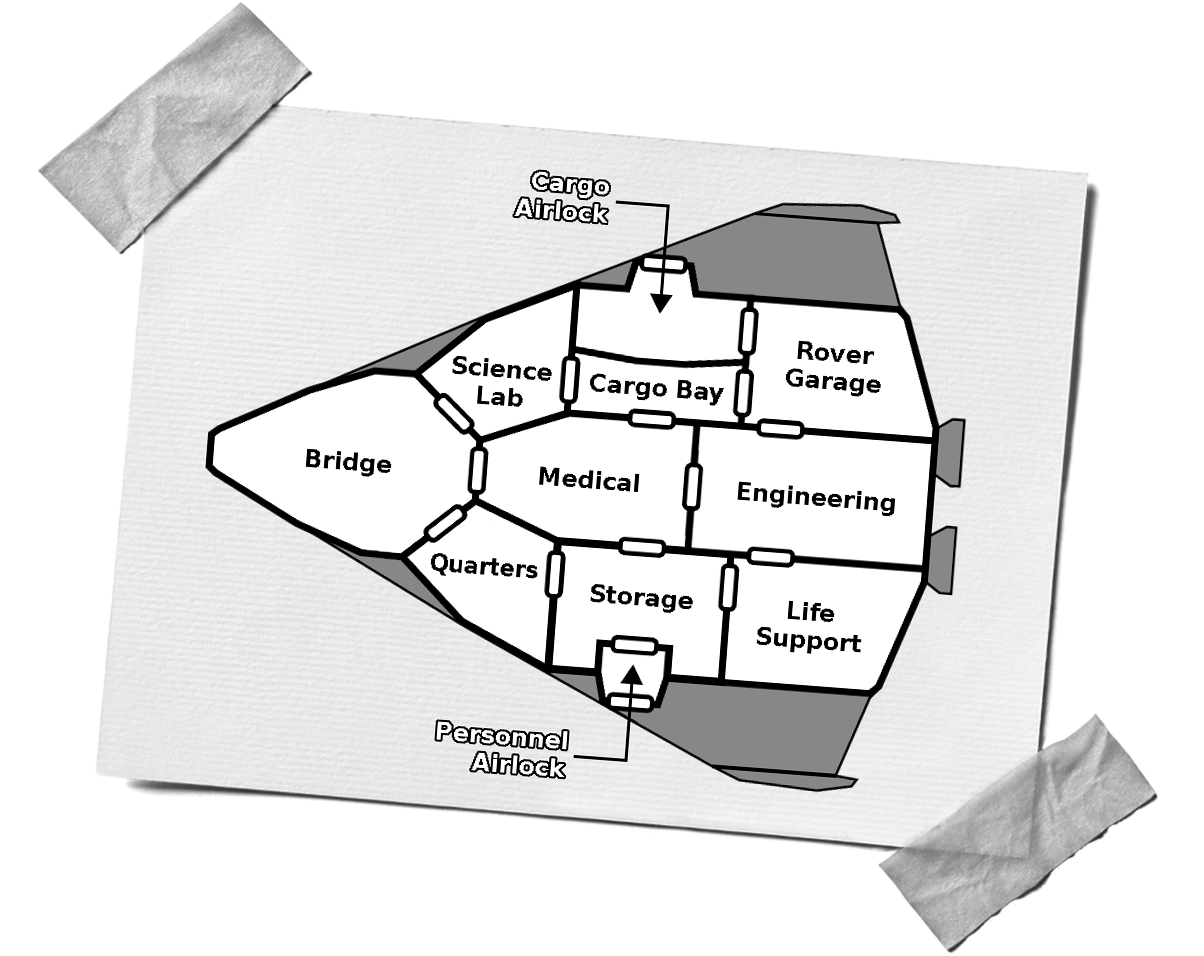
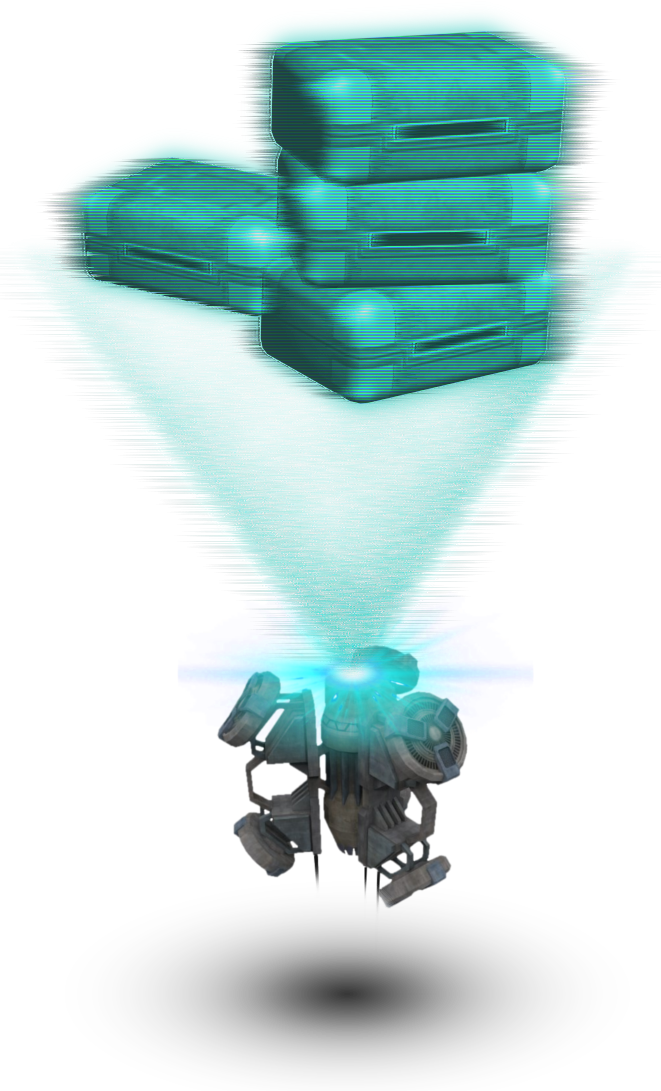
I see people generally dumping this hazard. But you also get full points for "besting it" By putting it in storage and rebooting all the terminals.


Re: STOWAWAYS


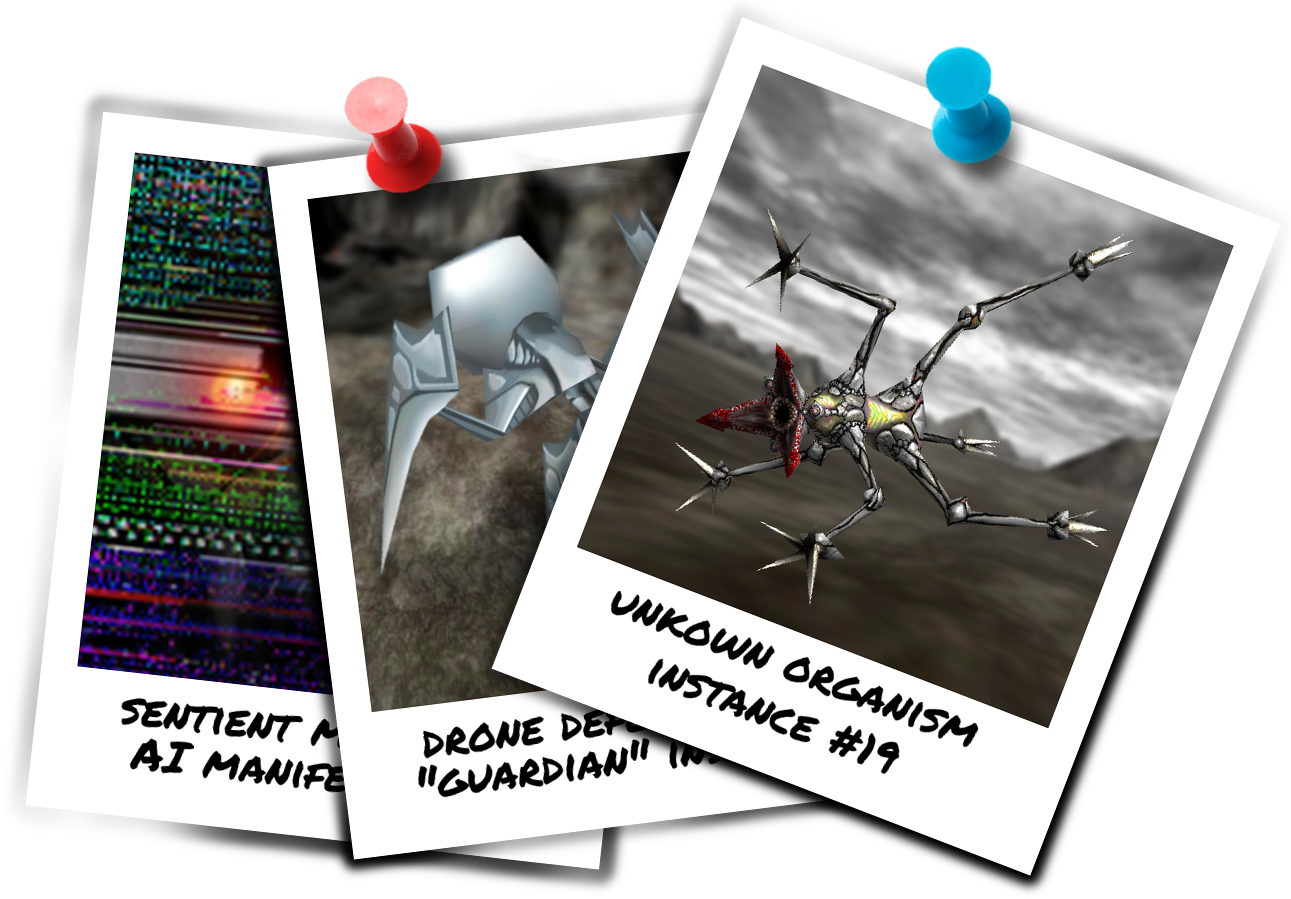
I almost always see the recommendation being to jettison the creature. But I had a couple ideas for alternate ways to defeat the creature:

1) Trap it in Garage and blast it with turret mounted weapon on rover. Will most likely kill myself in the process, low hopes for this one.

2) Trap in Garage, use a Flash Module to blind the creature. Then try flying home
TheUnnamedStranger 9 Jul, 2024 @ 11:01am 
also you don't need to do that whole complicated procedure to get the alien out. just locking it in a room with an airlock and opening the airlock from engineering will work if you're quick enough (especially if it's hanging off the door and hissing at you)
TheUnnamedStranger 9 Jul, 2024 @ 10:15am 
was very pleased to find there was a "disable jump scare" config option
Th3Espr3ss0 7 Jul, 2024 @ 2:53am 
Von Braun is a reference to system shock and the starting ship will sometimes default to that name.
IZIPIZI 6 Jul, 2024 @ 8:19pm 
Does the EVA suit reduce the amount of radiotion or its only to get out of the ship?
BeefChunks 25 Apr, 2024 @ 2:11pm 
Nevermind I just had to reboot it in engineering
BeefChunks 25 Apr, 2024 @ 2:08pm 
randomly my cargo screen became a blue screen after I recalled the rover how do I use it again? It's preventing me from transferring items at all
Wacko Mode 6 Feb, 2023 @ 3:19am 
Yo! Anything I could do to curb the system infection? it happened to me and I got shit on.
mentibee 16 Aug, 2022 @ 11:37am 
well technically your ship IS alien to the scanner