STAR OCEAN™ - THE LAST HOPE™ - 4K & Full HD Remaster

STAR OCEAN™ - THE LAST HOPE™ - 4K & Full HD Remaster

96 ratings
Tips, Tricks & Helpful Hints
By ⧹ͲsꀎKΣM☯几o⧸
Here are some tips that may help you
2
   
Award
Favorite
Favorited
Unfavorite
How to get 100% info on any boss
To get all info for bosses (since you only fight them once), simply save your game before you fight them. After you beat them, save your game in a diffrent slot then reload the save before you fought the boss. The info you got for beating them is still unlocked!
Post game Levels Fast XP
Once you clear the main game, there are a few secret dungeons for some post-game fun. However, you will need some serious leveling up tips in order to do so.
Immediatly after the game ends, you should probably be between levels 50-65. At this moment, your best bet for leveling up will be in the Palace of Creation. Return to Area 8, where you first fought the Forsaken Beast. You will see a lone Forsaken Beast roaming around the room. With bonus board full of exp bonus, each time you fight this monster will give you upward of 100,000 exp.

Party Building

Star Ocean's party system has a key difference from most other RPGs: Inactive characters can be swapped into battle at any time, even after all the active characters have fallen. Unfortunately, inactive and fallen characters do not gain experience points from battle, so rotating and leveling characters requires some real effort.
In more challenging boss battles, having a solid second string provides a real advantage, as this change is always instant and sometimes easier than having to revive fallen allies. Because of this, you'll want to rotate characters in general. However, the extent to which it's practical to level up every single character is debatable. Most players will probably want to make a conscious decision to abandon certain characters, and these decisions should be strategic.
For example, Edge, Meracle, and Arumat are all characters that favor a player control over AI, and as such they are weak support characters. Maintaining all three is a wasted effort. Others may choose to abandon Lymle whose offensive skills are eclipsed by Myuria and whose healing skills are weaker than Sarah. The decision is ultimately yours. The game can be beaten comfortably with only four characters at an adequate level, and each extra character over that should be considered a helpful bonus, not a requirement
Character Building

Each character has certain natural strengths that can be enhanced and weakness that need to be compensated for, and keeping this in mind is one of the keys to succeeding in battle. The Characters section in this guide has more detailed tips on successful ways to use and build each character, but there's some individual preference, and you should familiarize yourself with the different ways you can enhance your characters.

Skill Books are means of adding a new ability to a character. Some of these are passive skills that will work on the map and are irrelevant to battle (for example, the Treasure Sense skill, which allows you to see chests on the map). Others have implications in combat, and these need to be equipped in order to function. Most of these skills are status boosts that will increase thinks like ATK, INT, or HP, but others may have more specialized effects. You can only have two of these skills per character, so choosing them wisely is important. They can, however, be swapped in and out between battles, so don't loose too much sleep over it.

Once a skill is learned, it can be leveled up using SP. SP is gained through building levels, and there's also a pool of shared Party SP that can be allocated to any character. This is earned through finding treasure and completing quests. Different skills benefit more or less from leveling up. The HP Boost and ATK Boost skills for example offer truly massive incentives to max out, while others may only see a 1% increase from one level to the next.
Battle, Chain Combos, SP Points

One of the signature elements of the Star Ocean series is it's real-time action-based combat system. If you're familiar with Namco's Tales series, this is very similar, but it's fully 3D and a bit more hands-on with regard to party management.

In this latest game the boss battles are longer and more difficult than in the past, so learning to fight well is important. The battle simulator on the Calnus allows you to practice your skills in a controlled environment, and we recommend this even for those who have experience with the series.

The two biggest additions to this latest game in the series are Blindsides and Rush Mode. By holding the jump button, to face the enemy you're targeting, you can then dodge as your foe attacks to slip around them and attack.
Different characters are more adept at this than others. Edge, for example, takes a very wide arc around his opponents which leaves him vulnerable to attacks, and also requires a good deal of space to maneuver.

No strategy is universal. Throughout the course of the game, you're going to find enemies like Golems and Rock Hermits that require constant use of blindsides, while others (like Phantom Soldiers) that are very difficult to even get close enough to blindside. A balanced, flexible team is a must, and learning to recognize which strategies work against which enemies will serve you far better than button mashing

Skill Points (SP)
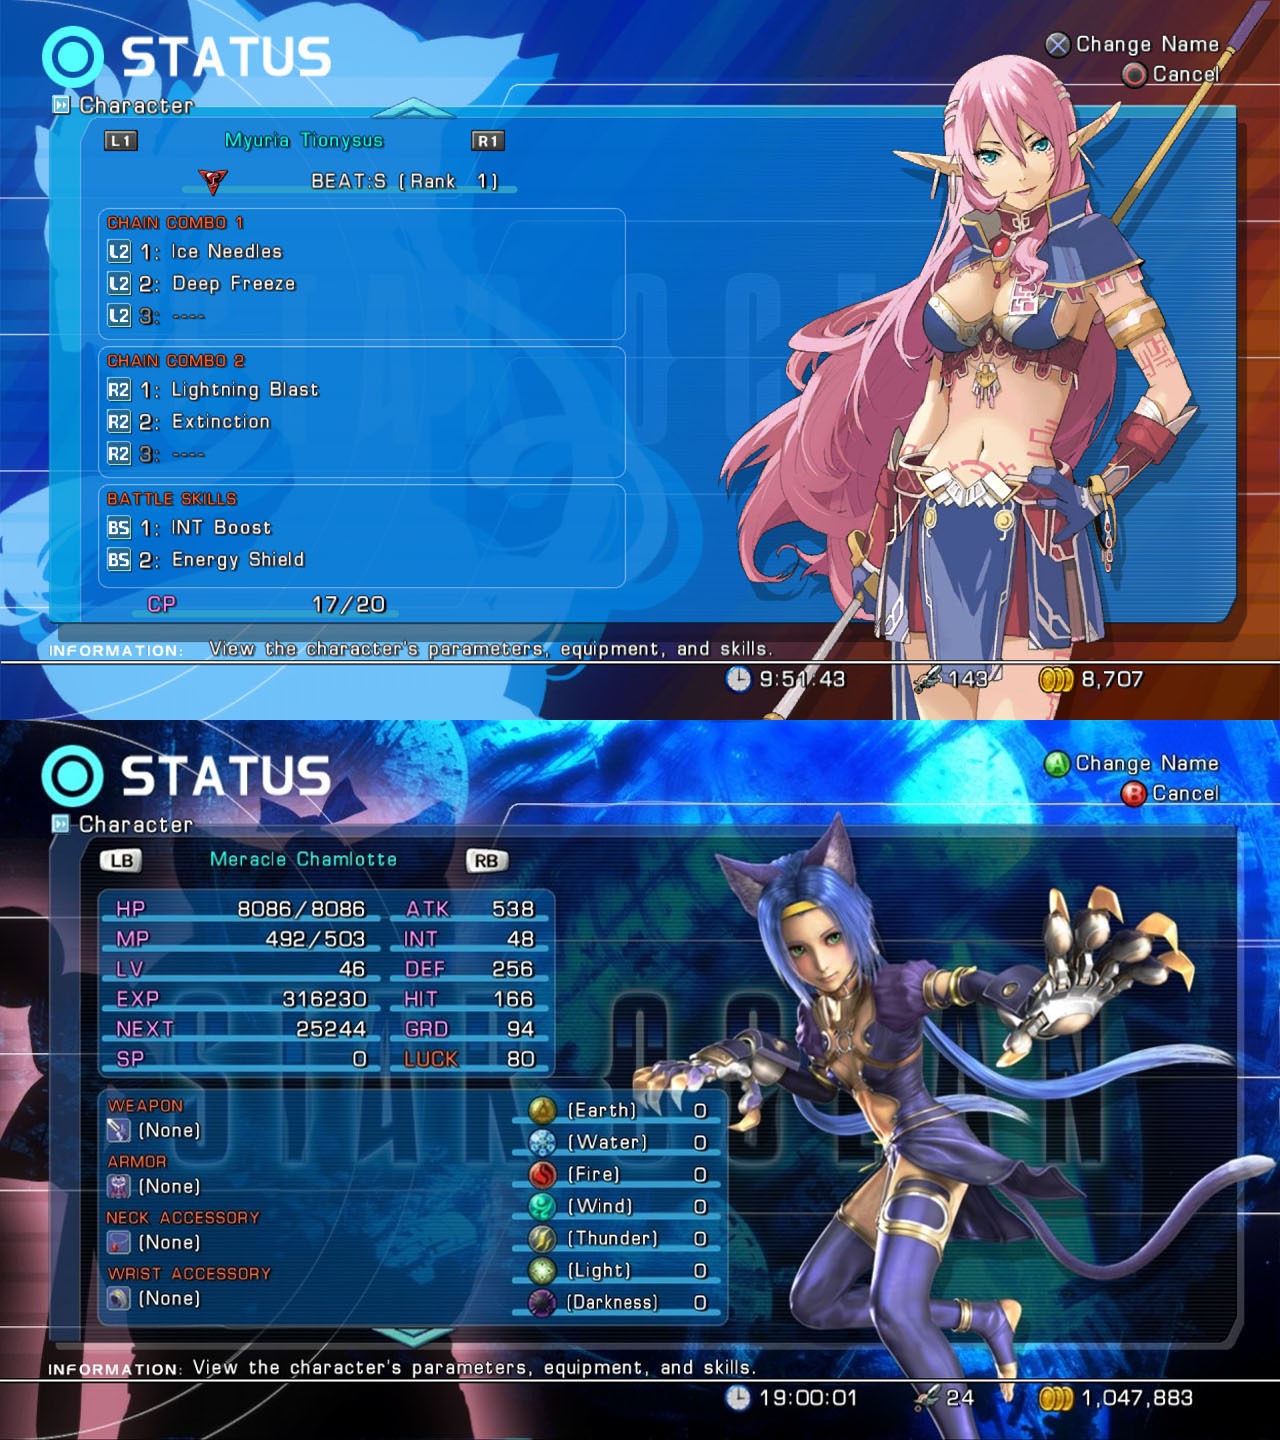
The Skill Points are the points you spend to increase the level (and strength) of the Skills. There are two types of Skill Points. The Individual SP are related to a specific character only, and each character acquires some SP by leveling up. Leveling up is the only way to accumulate Individual SP.
The Party SP are much more easily found. They are obtained by looting Harvesting/Mining Points (you'll learn what these are as you play), opening chests, removing some "elemental" barriers with the Disintegration Rings (another thing you'll know as you play), and also by completing Quests. The other way is by getting the Green Bonus Tiles in battle, but this method becomes less and less effective as you continue. The Party SP are shared among all the characters, so they are a common reserve of SP. They also have the function of being the "fuel" used to invent new recipes at the Item Creation terminal (more info in the Item Creation page).
The maximum amount of Individual SP/Party SP you can have is 9,999 (of each).

Chain Combos
The Chain Combo passive skill allows you to chain the special attacks of your controlled character. The higher the level of Chain Combo, the higher the damage dealt with the combos. Without spending too many words on how it works (it's intuitive when you see it), just beware that there is a thing called "Combo Exceed Limit". It happens when you set multiple combos of the same special attack (for instance, 6/6 Galvanic Shock) and instead of stopping at the sixth hit of the combo you continue to press LT/RT (the button associated with the special attacks). What happens is basically a sort of "overheat attack" which deals minimum damage. It's not a big deal, but it's better to avoid it of course (simply wait a second or two after your sixth chained attack, then start a new chain of attacks) since you are just wasting time and energy attacking with "exceeding" combos.
Other Random Tips/Info
Bonus Board
Bonus Board
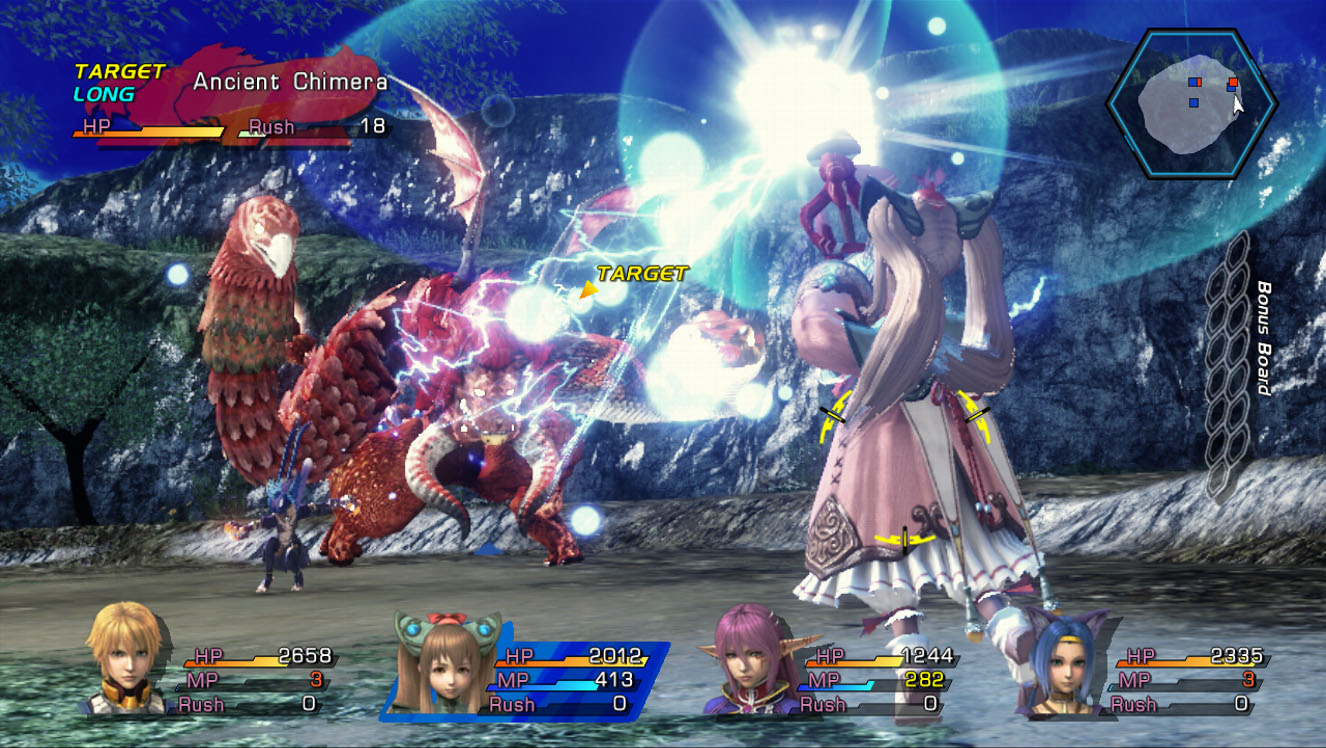
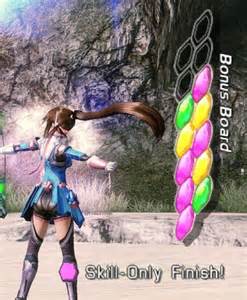
On the right side of the battle screen you can see the 14-tile "Bonus Board". By defeating the enemies in particular conditions you will gain the "Bonus Tiles", which will give you different bonuses according to the one you have collected. The Bonus Board is carried over to the next battle, so it's a good idea to fill up the Bonus Board with bonus tiles in order to benefit from bonuses all the time. You lose the entire Bonus Board if you either run away from a battle or your Leader takes a Critical Hit/dies. However, if you accumulate multiple Bonus Tiles of the same type (color) in a row, this will "strengthen" them, and therefore you will only lose half of them instead of the whole lot. Saving the game doesn't save the Bonus Tiles either: if you save and then immediately reload the same save your tiles will be reset. Let's see the four bonuses now:

Turquoise Bonus Tiles: acquired when an enemy is defeated with a Critical Hit. This is easily done by killing an enemy with a Blindside attack (Blindside attacks have 100% Critical Hit rate). You gain +10% EXP at the end of the battle for each Blue Tile you have

Yellow Bonus Tiles: acquired when two enemies are defeated with a single attack. You gain +10% Fol at the end of the battle for each Yellow Tile you have

Pink Bonus Tiles: acquired when an enemy has been damaged and defeated only with Arts/Symbols (no regular attacks with A allowed; the hits of the AI count too). You'll recover +1% HP/MP at the end of the battle for every Pink Tile you have. This one is important to endure without consuming too many items

Green Bonus Tiles: acquired when you Ambush two enemy groups on the field (an Ambush is when you engage more than one enemy group at once, and this is possible if they are close enough). You gain +1 Party SP at the end of the battle for each Green Tile you have
Skill Points (SP)
Secret Moves
Meracle's Secret Move

To get Meracle's secret move, Max Shockwave, you must 1st get the Darkness Ring from the Undying Dragon and use it to get to the bottom floor of the Cave Of The Seven Stars on Roak. The Skill Book is in a chest behind the platform where you fight Gabriel Celeste. Walk around the platform and get this move before fighting Gabriel so you can use it during the fight.

Reimi's Secret Move

To get Reimi's secret move, Savage Sparrows, you must first get the Darkness Ring from the Undying Dragon. Use the Ring on the Holy Chest on the bottom floor of the Purgatorium in the same room where you fought Tamriel to get the Skill Book.

Collection - Spaceship Data

Introduction
The Spaceship Data entries are the quickest of all the four main "Collections" of the game. With only 22 entries, they are the easiest to collect despite quite a few missables among them (see red entries). The ID's of the missable spaceship data are: 001, 002, 004, 006, 007, 008, 012, 016, 021.
I will list them in chronological order instead of the in-game "ID order", but I will also add the corresponding Spaceship Data nearby. If you want to know which spaceship data you are missing and you can see (in-game) that it's the seventh one, look for the "SID # 007"-tagged entry.
Spaceship Datas

SID # 001 - SRF-003 Calnus
Examine the monitors on the West side of the Flight Deck, in the Calnus, as early in the game as possible.

SID # 004 - SRF-001 Aquila
Examine the monitors on the West side of the Flight Deck, in the Calnus, as early in the game as possible.

SID # 012 - Zagzagel (Eldarian Cruiser)
Examine the monitors in the Southern hallway of the Exploration Base on Aeos.

SID # 015 - Rednuht (Eldarian Battleship)
Examine the monitors in the Southern hallway of the Exploration Base on Aeos.
This Spaceship Data is also available in Monitor Room B on En II.

SID # 016 - Sol (Eldarian Shuttlecraft)
Examine the monitors in the Southern hallway of the Exploration Base on Aeos.
SID # 006 - SRF-002 Balena
Examine the monitors in the North-most room of the Exploration Base on Aeos.

SID # 007 - SRF-004 Dentdelion
Examine the monitors in the North-most room of the Exploration Base on Aeos.

SID # 008 - SRF-005 Eremia
Examine the monitors in the North-most room of the Exploration Base on Aeos.

SID # 002 - Calnus-II (w/Eldarian Upgrades)
After being able to travel through space, examine the monitors in the North-most room of the Exploration Base on Aeos.

SID # 020 - Cardianon Landing Ship
Examine the monitor in the small room with a Healing Point in the 1F - North area of the Celestial Ship, on Lemuris.

SID # 021 - Cardianon Mothership
Examine a monitor on the West side of the large central room of Cardianon Mothership - B1.

SID # 017 - Morphus Battleship
Examine the discs in Monitor Room B, on En II.

SID # 018 - Morphus Exploration Craft
Examine the discs in Monitor Room B, on En II.

SID # 019 - Morphus Escape Pod
Examine the discs in Monitor Room B, on En II.

SID # 022 - Cardianon Battlecraft
Examine the discs in Monitor Room B, on En II.

SID # 013 - Zamzagiel (Eldarian Destroyer)
After landing on Nox Obscurus, examine the discs in Monitor Room B, on En II.

SID # 014 - Dominion (Eldarian Colony Ship)
After landing on Nox Obscurus, examine the discs in Monitor Room B, on En II.

SID # 003 - Calnus-III (w/Enhanced Armaments)
After landing on Nox Obscurus, examine the discs in Monitor Room B, on En II.

SID # 005 - Aquila-B (High-Speed Cruiser)
After landing on Nox Obscurus, examine the discs in Monitor Room B, on En II.

SID # 009 - Phantom Craft (SRF-Style)
After landing on Nox Obscurus, examine the discs in Monitor Room B, on En II.

SID # 010 - USTA Warpship
After landing on Nox Obscurus, examine the discs in Monitor Room B, on En II.

SID # 011 - Calnus (USTA Transport)
Examine the discs in Monitor Room B, on En II, with a Game Clear Data saved on your profile.
Other things you may want to know
Universal Weapons

There are two weapons which can be equipped by any character and are very useful.

The Scumbag Slayer is obtained through the Symbol Of Bravery quest on Roak or through Item Creation. Though it drops the wielder's attack power it has the ability to instantly kill any enemy that has Scumbag in its name.
The Laser Weapon is obtained from the Orb Of Might's challenge on En II and is incredibly powerful with no strings attached

The Wandering Dungeon

Defeat Gabriel Celeste in the Cave of the Seven Stars to unlock The Wandering Dungeon. Find Barago at the Old Road to Sanctuary and he'll show you the entrance. This dungeon is randomly generated and has no save / restoration points. The boss, the Ethereal Queen, is on the 20th floor, but the dungeon continues infinitely.
Secret Dungeon

After beating the game, return to your final save and go up the stairs and into the door on the left. Here you'll fight the Undying Dragon -- beat it and you'll receive the Darkness Ring. In the Colosseum in Tatroi, head to the glyph on the wall in the left hallway on the first floor. Use the Darkness Ring to expose the entrance to a secret dungeon.

Difficulties

There are two additional difficulty settings for the game:
Universe Mode - Complete the game on Galaxy mode
Chaos Mode - Complete the game on Universe mode
Difficulty Multipliers
There are four difficulties available in the game: Earth ("Easy"), Galaxy ("Normal"), Universe ("Hard"; unlocked after completing the game on Galaxy) and Chaos ("Very Hard"; unlocked affter completing the game on Universe). Enemies have different stats (HP, ATK, INT, GRD) and a different "Rush Gauge" speed (you'll learn what it is as you play). If we consider the standard values of Galaxy as reference, then the multipliers for the stats are:
- Earth: 0.7x (an enemy that has 100 HP on Galaxy has 70 HP on Earth)
- Universe: 1.3x (an enemy that has 100 HP on Galaxy has 130 HP on Universe)
- Chaos: 1.7x (an enemy that has 100 HP on Galaxy has 170 HP on Chaos)
Moreover, on Universe the Rush Gauge of the enemies goes up 1.5x times faster, and on Chaos the Rush Gauge of the enemies goes up 2x times faster.
Other Random Tips/Info
Only the alive characters deployed at the end of the battle will receive the EXP at the end of the fight.
After being able to access the Item Synthesis feature (midway through, when the eighth character joins) you can create equipment imbued with EXP and Fol-bonus attributes. If possible, try to avoid farming/leveling up at least until you get your hands on said "bonus equipment". You will most certainly notice this when you backtrack in the first areas of the game in the post-game, without the nuisance of triggering useless fights. On the other hand this is also a bad thing when you actually want the enemies to come at you. The enemies of the last areas of the game and the post-game dungeons will chase after you even at level 255 (max level).
The maximum level is level 255, but only if that character has 50% or more of his Battle Trophies. If a character doesn't have 50% or more Battle Trophies, then his level cap will be 200 until he gets enough of them.

To respawn (regenerate) the Harvesting/Mining Points you must step on the Calnus. There is no other way to respawn them.

Don't - ever - sell anything that you can't buy or obtain again easily. Selling items is a poor way of making Fol, and you should never do so. Never. With all the Item Creation to make, the more you keep, the better.

The "Seeds" items (such as Attack Seeds or Potent Health Seeds)
can boost your stats by small amounts, but they are very rare and too precious to be wasted for a mere increment of parameters. Do not use them, since they will be very useful in the latest phases of the game for item creation, item synthesis and also some quests.

Discarding Items
Discarding items is important, if not really fundamental, to open all the chests of the game. There's an unfortunate limit of 20x items that can be carried at the same time, and this means that if you open a chest that contains 2x Blueberries but you already have 19x or 20x Blueberries you won't be able to pick it up. To go around this problem, open the main menu with Y and select the item you want to discard from your inventory. Then press Back on the item that you want to discard, and confirm the discarding operation. You will discard only one item at the time. Do so whenever you can't loot a chest due to too many items in your inventory. Do it smartly of course: if your characters need healing and you need to remove a few Blueberries (HP recovery items) from your inventory, the best thing to do is use the Blueberries instead of throwing them away.

Vocabulary
Let's see some commonly used words, just in case you happen to read them and don't know what they mean:
- Grigori = a special "race" of monsters. They are the main bosses (defeating them earns a story-related achievement), but they can also be found in unlimited quantities in the post-game dungeons
- EQ = Ethereal Queen, one of the post-game bosses of the optional dungeons
- IC = Item Creation
- WD = Wandering Dungeon, one of the post-game dungeons
- CP = Capacity Points. They are discussed in more detail on the Characters and Skills page
- SP = Skill Points. They are used to increase the level of your Skills. There are individual SP and Party SP, as discussed below
- PA = Private Actions. They are related to the affinity of your characters (and, therefore, with the secret ending achievements)
- AI = Artificial Intelligence. An "AI-controlled character" (or just "AI character") is typically one of the characters that you're not controlling manually
- Leader = referred to the context of the battle, it's the character that you control manually. You can only control one character manually (out of the four that can be on the battlefield at once), while the others (up to three) are AI-controlled (unless you set their settings on "Manual", in which case the AI won't move them)
- NPC = non-playable-character. Any of the many "random" characters found typically in the city areas of the game

Affinity and Secret Endings

There are nine secret endings in the game, and they trigger only if the characters have enough "affinity" with each other (the affinity towards Edge is usually the most important). The Private Actions (short optional scenes that you can trigger by speaking with your party members in a specific moment and location) available during the game, especially (but not only) during the travels towards the new planets, are meant to increase the affinity of your characters. Most of the Private Actions have a positive effect on the affinity, although a few of them have a negative effect (which is usually minimal or compensated by something else later). It's important to stick with a guide to trigger all the possible Private Actions.
The Private Actions are not the only way to modify the affinity of your characters. There are also three more ways of affecting the affinity negatively: Pickpocketing (Pickpocketing is a skill that lets you steal [shabby] items from the NPC), using the Super Aphrodisiac item, putting an Ominous Metal in the room of a character in the Calnus. Viceversa there are also two more things that help the affinity: using a Love Potion No. 256 and putting the Aroma of Love in the room of a character in the Calnus.
The affinity of the characters also affects whether they can share a room or not. For example, at the beginning of the game you won't be able to put a male and a female in the same room, but by the end of the game you will probably be able to mix things up as you wish. Sharing a room is another thing that gradually increases the affinity of the characters, although its effect is not very strong.
11 Comments
pitapati 21 May, 2023 @ 12:57am 
:^)
ghall128 29 Jan, 2018 @ 5:52pm 
were is the ice ring to open flame treasure chests
Lusca 24 Jan, 2018 @ 8:50pm 
To 100% info boss trick in this version:
1 - Save before battle;
2 - Kill the boss;
3 - After battle, change settings (any settings), back to last menu and system file will be updated;
4 - Load the game and kill the boss again;
5 - repeat till 100%
duhdaviduh 24 Dec, 2017 @ 7:20am 
sweet thanks
DarkWeebDuck 11 Dec, 2017 @ 1:45pm 
Nice simple guide
Ronixis 1 Dec, 2017 @ 1:37am 
It seems like 100% info boss trick is not working in this version... (
They separate save files and system file.
cowbell 29 Nov, 2017 @ 7:33pm 
The bonus board only breaks if the PC is hit. You can switch to another character before getting hit and then switch back.
⧹ͲsꀎKΣM☯几o⧸  [author] 29 Nov, 2017 @ 11:17am 
Also Thanks again *CowBell* I will add the bouns board now
⧹ͲsꀎKΣM☯几o⧸  [author] 29 Nov, 2017 @ 7:49am 
Thank you both for the comments. If there is anything you or anyone else wants or would like me to add leave me a comment and ill add it and give you props :D, Like this bouns board for example :)
cowbell 28 Nov, 2017 @ 6:31pm 
You should add that the bonus board at the beginning of the game should be filled with SP boosts and farmed so you can max out early skills quickly.