Counter-Strike 2

Counter-Strike 2

415 ratings
How to import and test your skins ingame
By Bob
A detailed guide with images, on how to import skins from the workshop to test in-game.
   
Award
Favorite
Favorited
Unfavorite
Introduction
This guide will show you how to import your skins from the Workshop to test the textures in-game.

WARNING! - You should NOT play with custom skins on online servers, as many servers wont allow you to join with a customized root folder. I recommend using this guide for offline or private servers only.
WARNING! - The skins you see ingame from this guide can't replace the ones you buy. You are the only one who'll be able to see the skins. Using them online is up to you, but you might risk your Steam account getting banned.

Required software

GCFScape[nemesis.thewavelength.net]: A free software that will allow you to see and change the original weapon models.

NotePad++[notepad-plus-plus.org]: A free source code editor.

Featured skin in the guide:
http://sp.zhabite.com/sharedfiles/filedetails/?id=226601960

New skins!
http://sp.zhabite.com/sharedfiles/filedetails/?id=293681892
http://sp.zhabite.com/sharedfiles/filedetails/?id=293683221
http://sp.zhabite.com/sharedfiles/filedetails/?id=303244298
Importing skins
This guide wont go through how to make skins, there are several other great guides for that. This guide is for you who have created your own skins for CS:GO in the workshop, and now would like to see how it looks in-game.

1. Finding the right folder

You should have installed GCFScape and Notepad++ (Links in Introduction).
So, first of, we need to find the right directory: C:\Program Files\Steam\SteamApps\common\Counter-Strike Global Offensive\csgo

You should see some different folders here, also one named "materials". Rename this materials_BAK or something like that. (This is just to keep a backup of the original files.)

Now go further down and find the file called "pak01_dir"


Open this with GCFScape and copy the whole folder called "materials". (Just copy it to your desktop or somewhere you can find it.)


Now put the copied folder "materials" into the root-folder: C:\Program Files\Steam\SteamApps\common\Counter-Strike Global Offensive\csgo


Now go to C:\Programs Files\Steam\SteamApps\common\Counter-Strike Global Offensive\csgo\materials\models\weapons
Make sure to get this right. It's not \models\weapons but materials\models\weapons!

In here you will see the 2 folders: v_models and w_models.
The v_model is a 2048x2048 size of your weapon texture.
The w_model is a 512x512 size of your weapon texture.


2. Importing the files

The v_model is the VTF-file you add when sending in your skin from the workshop. To create the 512x512 file, you need to import your .TGA-file to VTFEdit (I assume you have this software, if you know how to make skins), and check Clamp with the settings: Maximum Width and Height 512.


Now save this. (Name doesn't matter, we'll change it later anyway.)

Now open the v_models-folder and find you desired weapon. Ex. the AK-47 folder is called "rif_ak47" (Rifle_AK47).
Here you will see 3 files. Copy your v_model (2048x2048) texture to this folder.


Now change the name on your file, to a new name with the same number of characters as the original. Ex. the original here is called ak47. a-k-4-7 thats 4 characters, so the new name must also have 4 characters. I'm gonna call my texture "ak48".


Now do the same thing for the w_model.

- Open the w_models-folder
- Find your desired weapon folder
- Copy your w_model-texture (512x512)
- Change the name to something with the same number of characters characters as the original. (It will benefit you later if it's the same as the v_model, ex. "ak48")


3. Make the game load your files

Next we're gonna make CS:GO read your textures instead of the original.

To do this, go back to the directory: C:\Program Files\Steam\SteamApps\common\Counter-Strike Global Offensive\csgo
IMPORTANT: Now copy the file "pak01_dir" and paste it into the same folder with a name like "pak01_dir_BAK". This is important because your files can easily be corrupted when you're editing them, meaning you wont be able to play the game. Therefor always keep a backup of your files. If you should get an error, just go to the directory and deltede the "pak01_dir" and change the name from "pak01_dir_BAK" back to "pak01_dir" again, and the game should now load the original files and work fine.

Next go edit the pak01_dir with NotePad++.
Click Ctrl+f to use the "find"-tool. Type and search for the folder-name of your desired weapon. Ex. I wish to test my AK-47, so I'll search for the foldername it was in: "rif_ak47".


First we'll find the BaseTexture of the w_model. Change the name of the original texture, to the new name of your w_model-texture. Ex. change the part I marked with red (ak47) to "ak48".


Click "Find next" a couple of time in the finding tool, until you find the BaseTexture for the v-model.
Do the same here as before. Change the name of the original texture to the name of your v-model-texture.


Click save and you're done! :-)
Testing your skin in-game
Now that we've made the game reading your files instead of the originals, you can open the game.

Usefull commands

Here's a list of commands that can help you getting some cool pictures of your skin. Type them in the console once you have created a game.

sv_cheats 1 - Enables cheats which you'll need to make the other commands work.
Impulse 101 - Will give you some instant cash allowing you to buy your desired weapon.
mp_buytime 999 - Will extend the buytime.
cl_drawhud 0 - Will hide the HUD allowing you to take better screenshots.
host_timescale 0.1 or less - Will slow down time. Very usefull for taking pictures of bots or when inspecting your weapon.


Take screenshots of your skin in First-person view

Create a new offline server without bots - They'll just get in your way. ;-)
Use the commands I listed above, and use either Steam or Fraps to capture a screenshot.


Take screenshots of your skin in Third-person view

Create a new offline server with bots, and join spectator. Use Free-fly mode and find a bot with your weapon. Use the commands I listed above, and use either Steam or Fraps to capture a screenshot.


Take screenshots of your skin in the menu

Your texture is also enabled in the menu. Just go to your inventory and inspect your weapon.


If you want, you can edit the screenshots in Photoshop, to blur out the background and change the contrast to make them crispy. :-)
Final
I hope you liked my guide and it helped you. If you have any questions, feel free to post them in the comments. :-)

- Crille

Vote which skin I should make next![www.poll-maker.com]


Subscribe to my workshop
162 Comments
cam 7 Jun, 2022 @ 5:57pm 
Thanks! I love you
👾 9 Sep, 2021 @ 2:10am 
the links doesnt work
Bob  [author] 5 Jul, 2019 @ 4:36am 
Thank you for your comments everyone! :-) I haven't worked with this for a long time, so I'm affraid I can't help you very much anymore. Hopefully the community can. :-)

Best of luck to all of you!
Kai 29 Jun, 2019 @ 1:22am 
@NiCº Did you really make sure that the weapon name is the same length as the original?
Kai 29 Jun, 2019 @ 1:21am 
Thank you a lot for this guide!
It worked for me!

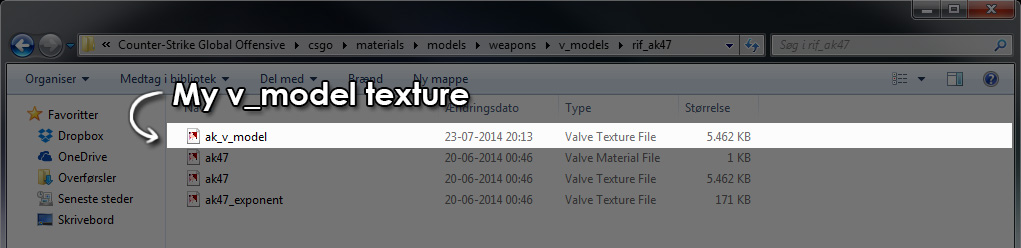
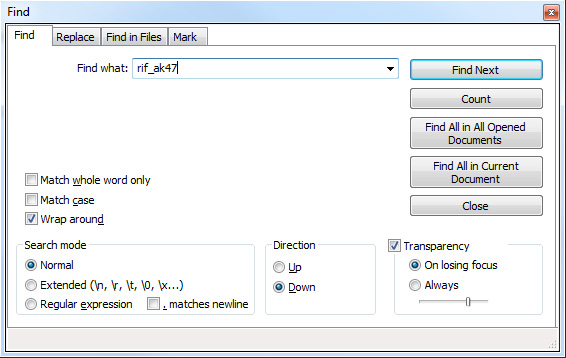
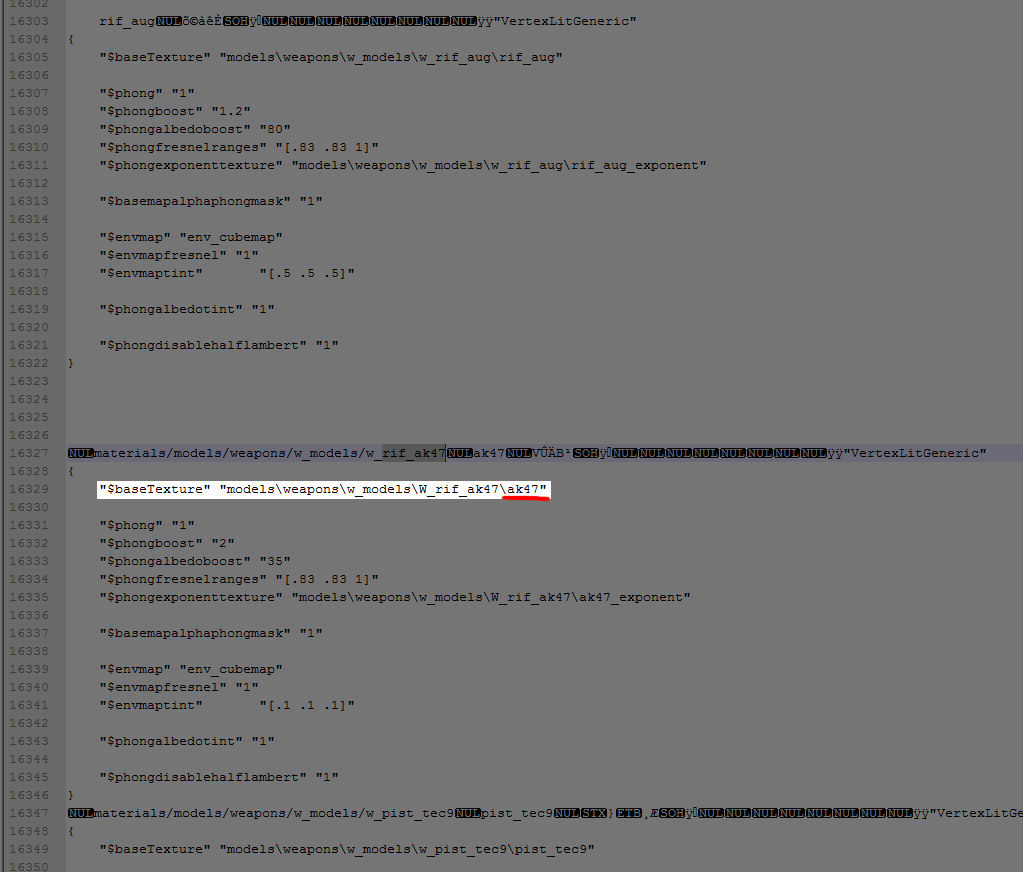
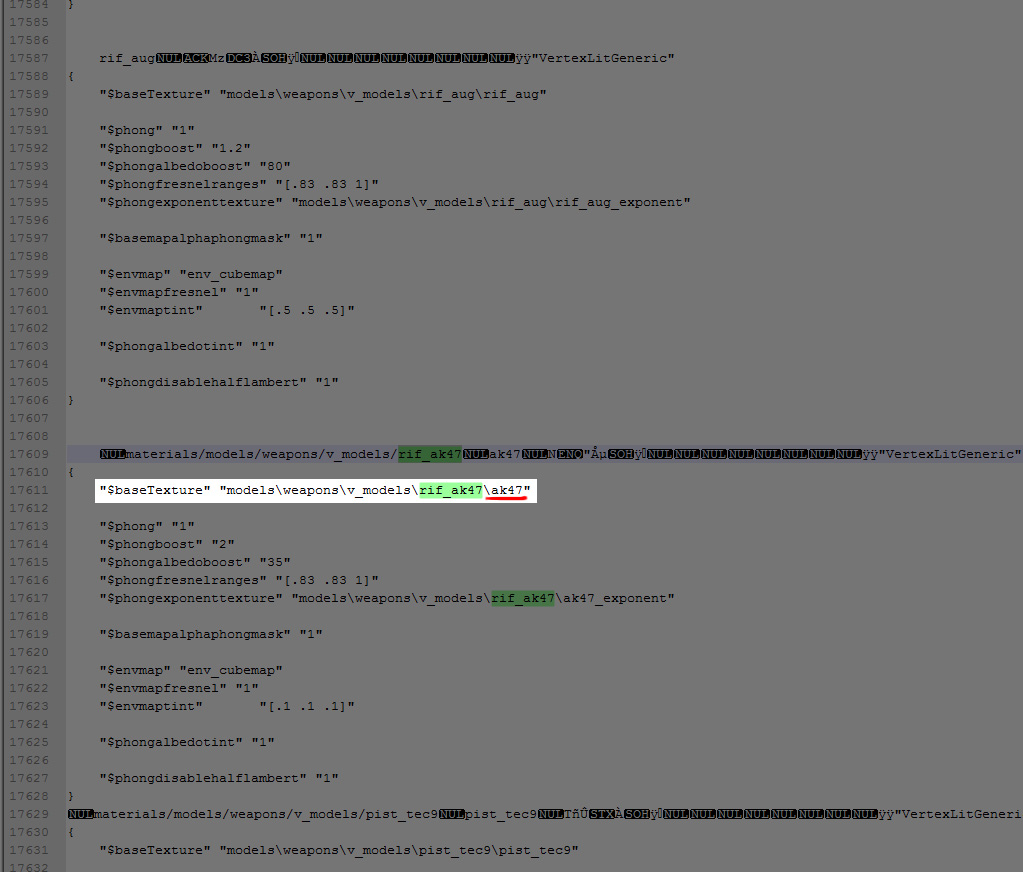
But do you have an idea on how to apply a normal map this way?
I've tried to replace the $phongexponenttexture line with $normalmap (if that's even the correct name) and also made sure that the overall character count for that line is the same as before.
But that didn't seem to work...

So, do you have any experience with this?
Thank you in advance!
scooty 25 May, 2019 @ 4:46am 
Helpful: If your skin looks really dull in-game, make sure shader detail is maxed.
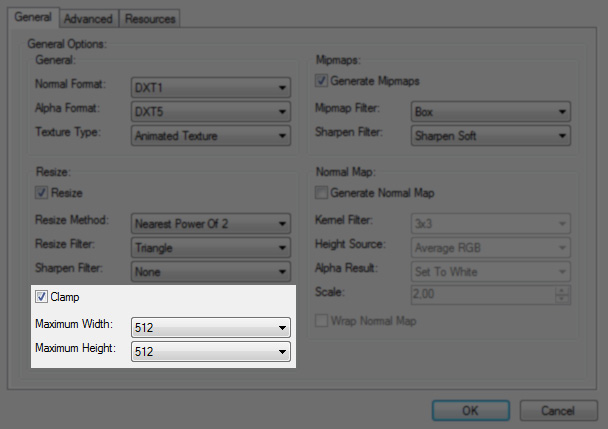
If your skin looks too shiny then set them to minimum.
scooty 25 May, 2019 @ 3:37am 
Is there any way to make the game read the .txt file from the workbench?
phdelimao 4 Feb, 2019 @ 5:36pm 
Very Thank you, you are amazing perso, god bless
Sailor Marnie 28 Jan, 2019 @ 4:49am 
how do i get the file to read the txt preset i have for the gun i made in the workshop
Sailor Marnie 28 Jan, 2019 @ 4:32am 
I do not understand the v model and w model part
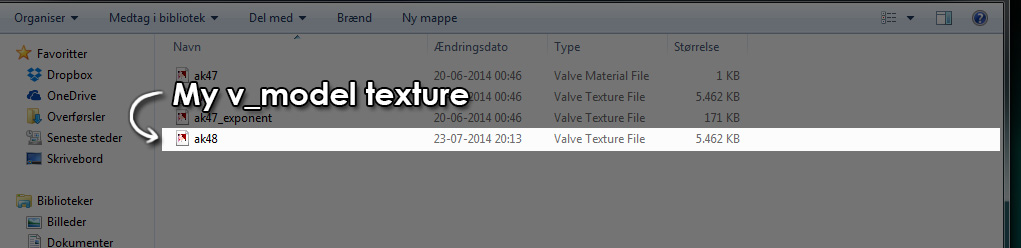
i turned an image into a vtf file and used it to make a workshop thing using workshop_workbench
what do i do after that