Borderlands 2

Borderlands 2

150 ratings
"The Gruesome Twosome" - A Mechro Build
By Maddie Gaming
Back on the day before the first Cap Raise was released, I submitted a build guide on here. When I took that build into UVHM for the first time, it turned out to be rather – to put it one way – insufficient. So over the course of going through about 16 hours’ worth of the biggest grind I’ve ever had the displeasure of experiencing, I started putting together what would eventually become this thing.

In honor of my Gaige getting back to 61, I present you with this thing.
   
Award
Favorite
Favorited
Unfavorite
Introduction

Oh, how I've missed you...

So… hi guys. Been a while, hasn’t it?

If you’re one of those 2 people who’ve been following me for some reason, you may/may not be wondering why it’s been so long since I posted a guide on here. You see, I had this accident in August when I was doing some sort of save management, and – to put it shortly – I accidently saved a copy of my Siren over my Gaige.

That said, always be sure that you don’t just have backups, but be sure they WORK. Nothing’s worse then knowing you have a backup that can’t work.

Of course, there’s a reason why they say when life gives you lemons, you make lemonade. In this case, I made the Siren copy I accidently created into a storage mule before starting up a new Gaige. Several weeks later, I finally managed to get back to 61 (You can see the moment this happened above).

Anyways, story time’s over. This has pretty much been my go-to UVHM build for both of my Gaiges, and has been proven by:

  • Two runs of the main campaign at Level 61,
  • Three runs of Pirate's Booty and Campaign of Carnage,
  • Two runs of Dragon Keep,
  • Killing Pete and Terra solo,
  • And dozens of runs through The Fridge, Bloodshot Stronghold, Opportunity, Hero’s Pass, Caustic Caverns, and various other places.

Moving on...
Main Gear
Having gear that works with your build is half the battle when it comes to being effective. This is what I like working with, but adjust with what you want. Note that the weapons shown are just what I happened to get; your versions will likely be different. Ideal parts are also listed, if you're looking for the absolute best version.

SLOT ONE: Fire/Acid Hail

Mission Reward For “Bandit Slaughter: Round 5”
Preferred Prefixes: Rabid (+Damage/Fire Rate, -Accuracy), Ferocious (+Damage), Hot/Corrosive (No Attachment)
Ideal Parts: Vladof grip, Vladof/Bandit stock, no scopes.
“What playthings can you offer me today?” – Shots are fired in an arc, at the peak of which it will split in two. Always spawns with an element. 3% of all damage dealt while this weapon is out will regenerate the wielder’s health.
Most of the unique ARs available for use have a quality range going from "Mostly OK" to "Barely Usable" to "Madhaus!". Hail may appear to be like this at first glance, with its firing pattern requiring a bit of getting used to (And looking at the floor). But if you stick with it, the Hail becomes a thing of beauty; combining massive crit damage, high fire rate, and the health return effect seen on all Moxxi weapons into one powerful gun.

And if that weren’t enough, it also doesn’t seem to lose accuracy to Anarchy stacks (Or not as much as other weapons, anyways).


SLOT TWO: Conference Call

Drops from The Warrior in Vault of the Warrior/Handsome Sorcerer in Dragon Keep
Preferred Prefixes: Practicible (+Pellet Count), Critical (+Crit Damage)
Ideal Parts: Hyperion stock and grip.
"Let's just ping everyone at once." - Lower-than-average pellet count. Shot generate more pellets as they travel.
Remember this one? This used to be really popular back when the Bee was absolutely broken, but has largely fallen out of the spotlight since then in favor of the Sandhawk. However, it's still one of the best shotguns in the game, and arguably the best for general use on Gaige since the special effect can make up for the accuracy loss from Anarchy (Also, it cuts through Buzzards like mincemeat).

A Practicible prefix is highly reccomended for this one, due to the low pellet count.

SLOT THREE: Slagga

Drops from Jimbo and Tector Hodunk in The Dust
Preferred Prefixes: Agresive (+Reload), Muduring (+Damage), Akurate (+Accuracy)
Ideal Parts: Bandit grip, Dahl stock.
“blagga” – Always spawns in Slag. Fires three bullets at once with no extra cost, though with reduced damage per projectile. Increased chance to slag.
One of the finest slagging tools I know of. Assuming all three bullets hit, one shot has a total slag chance of around 70-80%. Even if they don't hit, expect the bullets to bounce off something and hit someone anyways!


SLOT FOUR: Fire/Acid Norfleet

Drops from Vermivorus/Hyperius the Invincible
Preferred Prefixes: Plenteous (+Mag Size), Prudential (+Reload), Puissant (+Damage)
Ideal Parts: Tediore scope, Maliwan grip, Torgue exhaust.
“Blows Up Everything!” – Fires three energy balls similar to those found on other E-Tech Launchers. Each projectile moves slowly and erratically, dealing massive damage on hitting anything. Consumes three ammo per shot.
If Badaboom worked great with Anarchy, Norfleet works near-perfectly - you don't even have to aim it! Just point it in the general direction of your enemies and watch it demolish them!


SHIELD: Hide of Terra

Drops from Terramorphous the Invincible in Terramorphous Peak
Possible Resistances: Grounded, Inflammable, Akaline, Blast-Proof
“His hide turned the mightiest tame…” – Combines the Roid, Spike, and Nova features into one shield. Extremely high Roid damage.
Why have one shield type when you can have them all at once? DT benefits from the massive Roid damage (Highest in the game, actually), while you benefit from the nova and spike components. Unfortunately, the element of the spikes and novae will always be fire, but that’s probably the price of mixing three kinds of shields into one.


GRENADE: Storm Front

Drops from the Splinter Group in Bloodshot Stronghold
Preferred Deliveries: Longbow, Homing
“Sometimes lightning DOES strike twice.” – Deploys like a Tesla grenade, then releases several child Teslas. The children will stick to walls and other surfaces.
While it can still deal some good damage on enemies, the UVHM health buffs have made the Fire Bee and Pandemic grenades more powerful than the Storm front in terms of straight damage. However, in terms of range (Which is massive, thanks to its children), versatility (Very few enemies are resistant to shock damage), and ease of farming (Fire Bee has no set drop source), the Storm Front remains the king.


CLASS MOD: Legendary Mechro

Drops from Vermivorus/Hyperius the Invincible, Washburne Refinery/Voracidous the Invincible, Candlerakk's Crag
“I am such a B.A.” – Provides boosts for six skills, compared to the usual three. Also boosts cooldown rate. (Note that the red text shown comes from its card in the Loot Chests. Why it isn't shown in-game is anyone's guess.)
One of Gaige's best COMs for general use. Some COMs do a better job at certain things, but seeing how we're going to do lots of things instead of a few, focusing on general-ness (That's a word now) is a good way to go.


RELIC: Fire/Acid Bone of the Ancients

Drops from Loot Midgets (UVHM Only)
Boosts both cooldown rate and elemental damage. Both are desirable in this build's case.
Backpack Gear
These are the things I don't usually wear. I keep them around, however, because they either have their uses or are just good fun to use.


Logan's Gun

Drops from Wilhelm in End of the Line
Preferred Prefix: Irrelevant
Ideal Parts: Also irrelevant.
“Gun, Gunner!” – Always spawns in fire. Shots explode on contact, then continue traveling if possible. Explosions are counted as rocket explosions by Absorb Shields.
Mainly for replenishing rockets with the Sham. A low level version is highly reccomended, as it will be very unlikely to kill you.


The Sham

Drops from BNK-3R in The Bunker
Possible Resistances: None
“Wow, I really CAN do this all day.” – Very high absorb chance. Lowered capacity.
Mainly for replenishing rockets with Logan's Gun. Also useful for safely traveling through areas where most enemies use guns, or for Shamfleeting for when you don't feel like giving a f**k.


The Bee

Drops from Hunter Hellquist in Arid Nexus Boneyard
Possible Resistances: Grounded (Pictured), Inflammable, Alkaline
“Float Like a Butterfly…” – Increased amp damage, no shield drain. Decreased capacity and increased recharge delay.
Quite possibly one of the most divisive items I know of in the game. Plenty love it, plenty hate it, plenty use it, plenty avoid it, blah blah blah. I personally don’t use it 24/7, since it pretty much requires a shield tank to be effective. But it’s useful for farming certain enemies, so find one and keep it around.

It also seems to affect damage dealt by car turrets, so there’s also that.


Shock Sandhawk

Mission Reward for "Whoops"
Preferred Prefixes: Stopping (+Damage), Flying (+Bullet Speed)
Ideal Parts: Dahl grip and stock.
“In. Not unlike Errol.” – Consumes 3 ammo per shot. Fires 8 slow-moving projectiles in a bird-shaped spread. None of the extra bullets are listed.
The Sandhawk is an… odd weapon, to put it one way. It’s not so much an SMG as it is a pseudo-shotgun, given the amount of bullets pumped out by a single shot and the slowness of said bullets.

HOWEVER, you might remember that amp shields were changed a while back to divide their bonus among any listed bullets. Any unlisted bullets earn the full bonus, instead of the divided one. The Sandhawk fires 8 bullets, but only lists one of them… which means that all the bullets earn The Bee’s bonus.

Needless to say, it's a popular combo for raidbosses.


Slag Crossfire

Bought from the Torgue Seraph Vendor for 120 Crystals
Preferred Delivery: Longbow
“Find, fix, flank, finish!” – Drops child grenades with every bounce. Increased blast radius and damage.
For mass slagging when dealing with mobs. Also useful for keeping enemies that refused to be slagged purple (Like Terra). Low level versions are highly recommended, to prevent you from killing yourself.


Fire Interfacer

Drops from Voracidous the Invincible
Preferred Prefixes: Practicable (+Pellet Count), Social (General Boost)
Ideal Parts: Hyperion grip, Torgue stock.
“Because it enters your face. GET IT? IT ENTERS YOUR FACE!” – Shots produce extra projectiles that shoot out to the side, then return to the main bullets. Consumes 2 ammo per shot. +60% crit modifier.
Interfacer’s kinda similar, in some ways, to the Flakker. Mainly in that it’s best used at a particular range. The main difference is where the Flakker has a small range of where it can deal damage, the Interfacer’s bullets will keep going after they merge back together. But if you can get the bullets to hit just after they split or just before they merge back together…

To put it another way, imagine a Flakker without the ridiculously steep learning curve. It’d probably be something like this.


Butcher

Drops from Loot Midgets, UVHM Only
Preferred Prefix: Practicable (+Pellet Count)
Ideal Parts: Hyperion grip, Torgue stock.
“Fresh Meat!” – Very high fire rate, low pellet count. Has the “5 Shots or 6 Effect”, in that each shot fired has a chance to add a random amount of ammo back into the mag.
A shotgun whose effect is NOT to be underestimated. Unfortunately, the pellet count is low enough that a vertical grip accessory is pretty much mandatory for maximum DPS. I’m still looking for one with that, so I’ll likely update the picture at some point.


Stockpile Relic

Drops from Anywhere
Sometimes, you’ll be in a fight that goes on for a while and only hands you so much ammo. For those cases, you can put this on so you can go longer without worrying about ammo. Just what ammo types you want boosted depends on what types you like using (The one pictured was just something I used while leveling through UVHM).
Optional Gear List
Because it pays to be flexible when it comes to gear. Not every piece of gear I go with is easy to obtain and/or use, so here’s some other options to try out. (Note that items without a location listed next to them have no set drop locations.)

ASSAULT RIFLES - Hail has the ridiculous crit damage, healing, and loses little accuracy to Anarchy. The firing pattern is odd, however. If you can’t get used to it, try the following:
  • Kitten ("Everyone Wants to be Wanted")
  • Ogre (King of Orc, Murderlin's Temple)
  • Vladof Blasters
  • Shredifier (Hyperius the Invincible, Washburne Refinery)
  • Veruc (Mobely, The Dust)
  • Seraphim (Oasis Seraph Vendor)


SHOTGUNS - I tend to alternate between two types of shotguns: stuff with many barrels and high power (Like the Quad), and stuff with one barrel that fires fast (Like the Butcher). The former can go without any element due to the sheer amount of pellet involved, but I’d suggest having a vertical grip accessory on single barreled shotguns. Anyways, here’s the overall list:
  • Ravagers
  • Sledge's Shotty (Smash Head, The Fridge)
  • Twister (Ohmd-Ohmd-Ohk, Scylla's Grove)
  • Conference Call, (The Warrior, Vault of the Warrior/Handsome Sorcerer, Dragon Keep)
  • Splashter Bashters
  • Slow Hand (Badassasaurus Rex, Torgue Arena)
  • SWORDSPLOSION!!! ("The Sword in the Stoner")


SMGS - While I’d suggest you think twice about not wanting a Slagga, there’s a few good options should you go through with it:
  • Chulainn ("Clan War: Zafords Vs. Hodunks" - Kill the Hodunks)
  • Good/Bad Touch (Tipping Moxxi)
  • B*tch (BNK-3R, The Bunker)
  • Orc ("Magic Slaughter: Round 5")
  • Plasma Casters
  • Florentine (Flamerock Seraph Vendor)
  • Avenger (Loot Midgets, UVHM Only)


PISTOLS - Salvador may be the resident pistolero, but that doesn’t mean we can’t use them:
  • Unkepmt Harold (Savage Lee, Three Horns Divide/Torgue Vendors)
  • Stalker (Loot Midgets, UVHM Only)
  • Thunderball Fists (Cptn. Flynt, Southern Shelf)
  • Lady Fist ("Uncle Teddy" - Turn in to Una Baha)
  • Rubi ("Rakkoholics Anonymous" - Turn in to Moxxi)
  • Anarchists
  • Fibber, Spliter Variant ("A Real Boy: Human")


ROCKET LAUNCHERS - Norfleet’s powerful, but it’s also a b*tch to get and eats rocket ammo as if it were an infinite resource. If you don’t think that’s worth the damage, consider the following:
  • Badaboom (King Mong, Eridium Blight)
  • Nukem (Black Queen, The Dust/Torgue Vendors)
  • Creamer ("Creature Slaughter: Round 5")
  • Topneaas


SNIPER RIFLES - Snipers are surprisingly viable with Anarchy, or at least more viable than you’d expect. The idea is to basically stop worrying about crits as you gain stacks and just focus on hitting hard. If you wanna go sniping, consider the following:
  • Lyuda/White Death (Gettle, The Dust)
  • Pimpernel ("Don't Copy That Floppy")
  • Buffalo ("Demon Hunter")
  • Tresspasser ("Animal Rights")
  • Hawkeye (Voracidous the Invincible, Candlerakk's Crag)
  • Muckamucks


SHIELDS - Hide’s pretty much the best overall for DT, but it’s difficult as hell to get. So try using these in the meantime:
  • Love Thumper ("Best Mother's Day Ever")
  • Flame of the Firehawk ("Cult Following: The Enkindling")
  • Antagonist (Flamerock Seraph Vendor)
  • Black Hole (Foreman Jasper, Oppurtunity)
  • Tediore Shields


GRENADES - Witty description goes here:
  • Meteor Shower (Torgue Seraph Vendor)
  • Bonus Package (Boom-Bewm, Southern Shelf)
  • Magic Missle (Badass Wizards)
  • Chain Lightning (Badass Sorcerers)


CLASS MODS - These are all good options for if you don’t want a Legendary COM, so do try them out:
  • Superior Punk (+5 Better Half, +4 Annoyed Android, +4 Smaller Lighter Faster)
  • Improved Jill of All Trades (+6 Better Half, +5 Smaller Lighter Faster)
  • Paitent Prodigy (+6 Cooking Up Trouble, +5 Better Half)


RELICS: In case you don't want to use the Bone, you have a few alternitives to choose from:
  • Shadow of the Seraphs (Flamerock Seraph Vendor)
  • Elemental
  • Proficency
  • Deputy's Badge ("The Showdown")
Skill Tree
Having a build that works with your gear is the other half of the battle when it comes to being effective. Skills listed are all present in the Level 61 version. Skills in bold are considered to be cornerstones.

Level 50 Version (Basic Frame)


Level 61 Version


In Best Friends Forever:
  • Close Enough – When Anarchy is getting near the cap, you can expect bullets to go all over the place. This should help them hit something about half the time.
  • Cooking Up Trouble – This is how we’ll regenerate health outside combat. Thanks to our COM, we can get a full bonus without having to spend as many points.
  • Fancy Mathematics - For when you don't have any opportunities to trigger BSS, this can help you get by until you can.
  • Better Half – Gives a major boost to DPS. Also works well with Anarchy, since you can empty out spare bullets faster.
  • Potent as a Pony – DT’s going to be without shields pretty often, which boosts his melee damage but reduces survivability. With this, you and him can last a little bit longer. Can be substituted with Unstoppable Force.
  • Upshot Robot – Once the party starts, why bother stopping it?
  • Explosive Clap – BOOM!
  • 20% Cooler – Unfortunately, DT is going to have to go away at some point (Either by death or getting tired). This skill can help you through that time when it happens. But between maxing this out, the bonus points from the COM, its own bonus, and our relic, the cooldown can be reduced from a minute to 20 SECONDS.
  • Sharing is Caring – In terms of usefulness for DT, it’s kinda hard to beat. Note that any special effects on your shield will be transferred to DT, to varying degrees of success. Roid tends to be the best overall, for reasons that are probably clear, though plenty of other stuff works too.


In Ordered Chaos:
  • Anarchy – Our main way of boosting our damage! Aside from being a great skill, it's technically required to move any further down OC.
  • Smaller, Lighter, Faster – Also required.
  • Preshrunk Cyberpunk – Since our main weapon, the Hail, doesn’t seem to be affected by accuracy loss as much, we can have more stacks without too much trouble. We’ll stop at 200 since our other weapons don’t have such a benefit .
  • Robot Rampage – Arguably one of DT’s most powerful abilities. Watching DT slice marauders into strips never gets old.
  • Blood Soaked Shields – Every time someone dies because of you, your shields get completely refilled. May not sound impressive at first, but think about how many people/robots/creatures you’ll be killing. Also think about how this means a complete, instantaneous refill of your Hide when the nova kills something. It's impressive.
  • Annoyed Android – It’s not that great of a skill. Considering that the main alternative (Death From Above) is both glitchy and weak, thought, this would be the better choice for your own sake.
  • Discord – Under normal circumstances, you’ll only need this to prevent losing your stacks when you DO reload, while the Hail will take care of healing. Should you get into a situation where Hail isn’t enough, however, you can reload to get some bonus regen.
  • Typecast Iconoclast – For the sake of getting more stacks in a shorter time.
  • Rational Anarchist – Did I mention I like freebies? Because I do. Great for jumpstarting stack accumulation.
  • Nth Degree – OC’s take on Close Enough. You only need just the one point since you get less of a return with more points. (The first gives 11%, the next 1.5%, the next 3%, etc.)
  • With Claws – Another means of healing ourselves, but take note of how you can do two melee attacks with one button press with this skill. You could now, if you wanted, deal two roid-boosted attacks in one go, with even more power depending on how many stacks you have!
Leveling Guide (And Advice)
Thanks in part to the afore-mentioned loss of my original Gaige, I can safely say that this is probably the best way to level up. This is still just a guideline, so adjust where you feel is needed. Also, some tips and gear to look out for while leveling.


LEVELING GUIDE
Normal Mode and TVHM - In these two modes, you can get by pretty reasonably by just matching the right elements against the right surfaces (Like fire against flesh, acid against armor, shock against shields, etc.). In TVHM, you'll want to have a decent slag solution on hand for dealing with the Badasses that appear in this mode.
  • Level 5 - Deathtrap. If you somehow find something else to invest in, do say what it was.
  • Levels 6-11 - 1 point in Cooking Up Trouble, 4 in Smaller Light Faster, Anarchy
  • Levels 12-16 - Robot Rampage, 4 points in Blood-Soaked Shields
  • Levels 17-19 - Discord, 1 point in Peshrunk Cyberpunk, 1 in BSS
  • Levels 20-26 - 2 points in Typecast Iconoclast, Rational Anarchist, 4 in Close Enough
  • Levels 27-32 - 5 points in Better Half, Upshot Robot
  • Levels 33-38 - 5 points in Potent as a Pony, Explosive Clap
  • Levels 39-46 - 3 points in Fancy Mathematics, 5 in 20% Cooler
  • Levels 47-50 - Sharing is Caring, 2 points in Fancy Mathematics

UVHM - Half the reason this build even exists is because of my first experience with this playthrough. Just a word of advice I'd like to share with you all - no matter how many enemies you slag, no matter how many Moxxi weapons you have out, no matter how prepared you think you are for UVHM, be prepared to die.

A LOT *.

This is something I cannot stress enough. You'll be taking a serious beating while leveling through this mode, regardless of how much preperation you've made beforehand. I still had a hard time in UVHM on my second Gaige, even after 4 levelings through it. You'll be in a good spot once you hit the cap, but in the meantime, take these paragraphs as a warning of what's ahead.
  • Levels 51-55 - 5 points in Annoyed Android
  • Levels 56-61 - 3 points in Typecast Iconoclast, 1 in Nth Degree, With Claws. The last point is up to you (I just dump it into Nth Degree)


GEAR TO LOOK OUT FOR
This is some gear I've personally found great while leveling up. They're all either commonly found weapons or mission rewards. They may not be the oranges common to most people at the cap, but hell if they don't offer good performance while you wait for that time.

WEAPONS
  • Heartbreaker (“Safe and Sound” – Turn in to Moxxi)
  • Good/Bad Touch (Tipping Moxxi)
  • Vladof ARs
  • Law (“Won’t Get Fooled Again”)
  • Order (“BFFs”)
  • Roksalt (“Splinter Group”)
  • Vladof Pistols
  • Torgue/Jakobs Shotguns
  • Roaster ("Note To Self-Person")

SHIELDS AND ITEMS
  • Deadly Bloom (“The Overlooked: This Is Just A Test.” Though it’s possible –but VERY unlikely – you could get it as a random drop.)
  • Aequitas ("Clan War: Wakey Wakey")
  • Order ("BFFs")
  • Prodigy Class Mods
  • Sweetheart Class Mods
  • Punk Class Mods

GRENADES
  • Fuster Cluck ("The Pretty Good Train Robbery")
  • Kiss of Death ("Hell Hath No Fury")
  • Singularity Grenades
  • Bouncing Betties
  • Transfusion Grenades

* This also applies to almost any class with any spec, really (The only exceptions to this are, to my knowledge, any Krieg who entered UVHM with Release the Beast and a Rampage/Gunlust Salvador with a Harold and Rubi).
Q&A
Title says everything. Will be updated as your questions come in.

  • Q: Our COM boosts two other skills, yet we don't invest in either of them. Why?
    A: I'll address each individually:

    More Pep: This skill doesn’t work as you’d think it would. Instead of increasing the chances by the number shown, it takes the listed percentage of your gun’s elemental chances and adds that. In other words, suppose you have a gun with a 10% chance of causing a status effect. At 5/5 MP, you wouldn’t get a 20% chance, you would get an 11% chance. And that’s if the weapon in question wasn’t shock, in which case it would get a 12%.

    It’s basically a worse version of Maya’s Flicker, and that’s a skill I already think that skill is one of Maya's worst. It’s not even worth the one point for the bonus.

    Strength of Five Gorillas: I have used this skill in a previous version of this build (One that used the extra 11 points to go to Shock and AAAUUUGH! instead of With Claws), and I can say it's a decent skill. We just don't have the points to go here.


  • Q: Will you make a Level 72 Version at some point?
    A: Short Version: NO.
    Long Version: Maybe it's because of how much difficulty I've had with going through UVHM from 61, but I have no plans to do so. Along with that, I really don't have any real idea on how I could get better in terms of build structure with 11 more points (IMO, 61 seems o be the sweet spot in build variety).

    Though if you want my opinion on what a Lvl 72 might look like, my guess is that it would have the extra points in Myelin, Strength of 5 Gorillas, and Shock and AUUUUUGH!.
Raid Guide
Yes, this build has some raid compatibility. It’s kinda limited to both Terra and Pete, though. Not that it’s a bad thing to me, since most of the others tend to be too annoying to be bothered with (Vora) or require their own build (Hyperius). The tatics seen here have been proven and used before this guide's posting by other people, and should work OK with you guys.

Remember, though - these are Raid Bosses we're dealing with. If you can't run with the dogs, don't get off the porch.


VS. TERRAMORPHOUS
The golden rule of Terra is “Always keep your back to the wall.” It’s not a pleasant feeling to have him down to less than 10% of his health then die because you went out and get bumped off the cliff. Recommended equipment includes a Hail, a fire Interfacer, and a slag Crossfire, along with 200 Anarchy stacks. Any shield with a low delay and high recharge rate is also suggested.
  • If you haven't already, get some practice with your Interfacer. You'll want to be as good as possible at getting it's sweet spot (Just after the shots split or just before they merge back together).
  • When Terra comes up from underneath the ground, there will be some dust clouds around where he’ll come up. Toss a few Crossfires where they appear.
  • If you did it right, Terra should be slagged for as long he’s above ground. Use your Interfacer to hit his crit spots while he is.
  • If Terra damages you, shoot your Hail to restore your health.
  • Occasionally, Terra will become covered in flames. While he is, all damage done to him is greatly reduced. Any attack he deals will also be fire-based, so be careful.
  • Terra has a black hole attack that will be used after about 6 minutes into the fight. While it can be avoided by hiding behind a section of the exit ramp (Or if you’re lucky, strafing around him), It’s best to have him dead before then.
  • Rinse and repeat until he’s dead.


VS. PYRO PETE
Pete is, at least compared to the other raid bosses, a pretty easy fight. He can still be pretty difficult if you aren’t careful. Recommended gear includes a shock Sandhawk, a Bee, and a DP Harold. Stacks are optional, but suggested.
  • Before starting the fight, you’ll want to summon DT to distract Pete. When you do summon him, DON’T SHOOT HIM. If you do, he’ll chase you instead.
  • While he’s distracted, slag him and use your Sandhawk to tear out his shields. It should go rather quickly if done right.
  • Around the point you have half his shields gone, Pete will start doing novas. These will inflict DOTs on you. This may not seem that bad, but these won’t stop. And they'll get stronger as the fight goes on. Paying attention to what he’s doing gets increasingly important as it goes on.
  • There is a way to stop it, though. Those valves can turned to pour out water you can use to wash out. They also spit out rats or spiderants, depending on which you turn (The Spiderant valve is almost always better).
  • Once his shields are down, switch to your DP Harold and start spamming it. Still be wary of his nova animation.
  • Spam until he spills the goods.
Ultimately, the key to beating Pete is to have a watchful eye. It may take you a few tries before you know which animation preceeds which attack, but once you do, you should have Pete beaten down.
Credits, Resources, and Advertising
Thanks for reading this whatever-it-is; feel free to comment if you’ve got a suggestion, or give it a thumb if you thought this was somehow OK. Now for the obligatory linkage:

Resources


Thank-You Section
  • To Phroz, for helping me out with some of the gear seen in this guide (If you're reading this, thanks again!)
  • To GBX, for making a game great enough to keep me playing this long (Over 1100 hours now!)


Credits
  • All Screenshots taken by Edo the 309th
  • Gear Info format belongs to CTDRim
  • Guide Thumbnail Belongs to Gianenci of DA[gianenci.deviantart.com]
  • Gaige and Borderlands 2 belong to Gearbox Software
  • Steam Guides belong to Valve


Self-Advertising
http://sp.zhabite.com/sharedfiles/filedetails/?id=136317058
The first guide I ever published on here. I don't use it very much nowadays, thanks to scaling issues, but maybe you might like it?

http://sp.zhabite.com/sharedfiles/filedetails/?id=218173282#-1
My Psycho build, about ausing as many explosions as possible - from such sources as grenades, explosive guns, exploding guns, grenades, shield novas, enemies, dynamite, YOURSELF, etc.

http://sp.zhabite.com/sharedfiles/filedetails/?id=261970629&tscn=1400675534
Why did it take this long to make a guide about Grog-Harold? Seriously...

http://sp.zhabite.com/sharedfiles/filedetails/?id=289326572
Erm... ninjas. Yeah.

http://sp.zhabite.com/sharedfiles/filedetails/?id=309364928
*Kitty Noises*

http://sp.zhabite.com/sharedfiles/filedetails/?id=314985568
KEEP ROLLIN ROLLIN ROLLIN ROLLIN ROLLIN...


This build is dedicated to my original Gaige, Nov. 10, 2012-August 25, 2013. She will be missed...
18 Comments
Shin Malphur 5 Aug, 2019 @ 7:46pm 
yo so what do i spend the lvl 50 skill point on
DripDrap 2 Sep, 2016 @ 8:00am 
@Edo the 309th - My thoguhts exactly , my friend also have a pretty badass machro build maining on shcoking your enemies and doing helluva lots of electro damage and so on.
Maddie Gaming  [author] 2 Sep, 2016 @ 7:40am 
@Gremlin - Personally, I'd suggest you go down LBT for Myelin, Five Gorillas, and Shock and AAAGGH.
DripDrap 2 Sep, 2016 @ 5:50am 
Do you have any skills that you can suggest getting then when you are on your way to reach level 72?
DripDrap 26 Aug, 2016 @ 4:07am 
@TinselTown Nope yer not. I'm one of those kind of persons too. I hate it when people dosen't make a build on someone who is max level. That is why i mostly go with Korny & So Korny's builds on gaige cause atleast they have it on max level.
TinselTown 24 Jan, 2016 @ 11:56pm 
am i the only person thats bothered when people make guides to characters that arnt max level?
Albinosaurus 21 Jun, 2014 @ 2:35pm 
This guide is a variation of the "Bitch and the Beast" build: http://forums.gearboxsoftware.com/showthread.php?t=240556
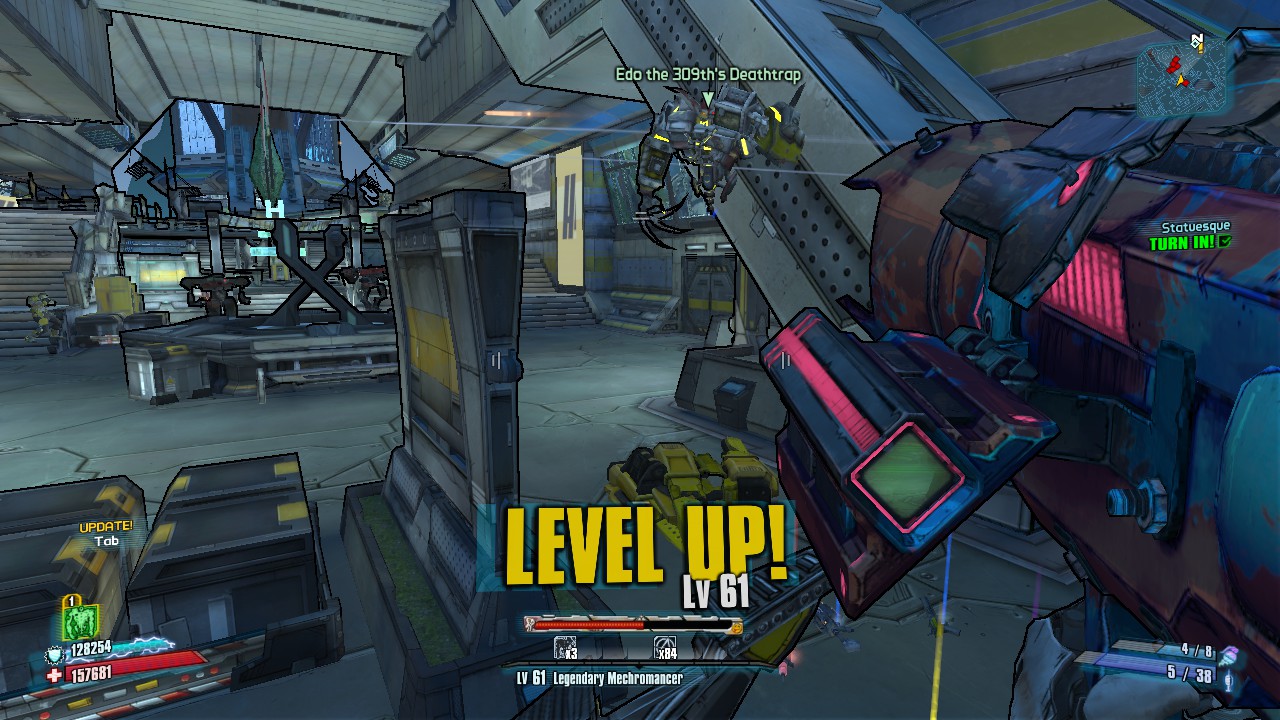
I used it to level my first Mechro through UVHM, and it works great.

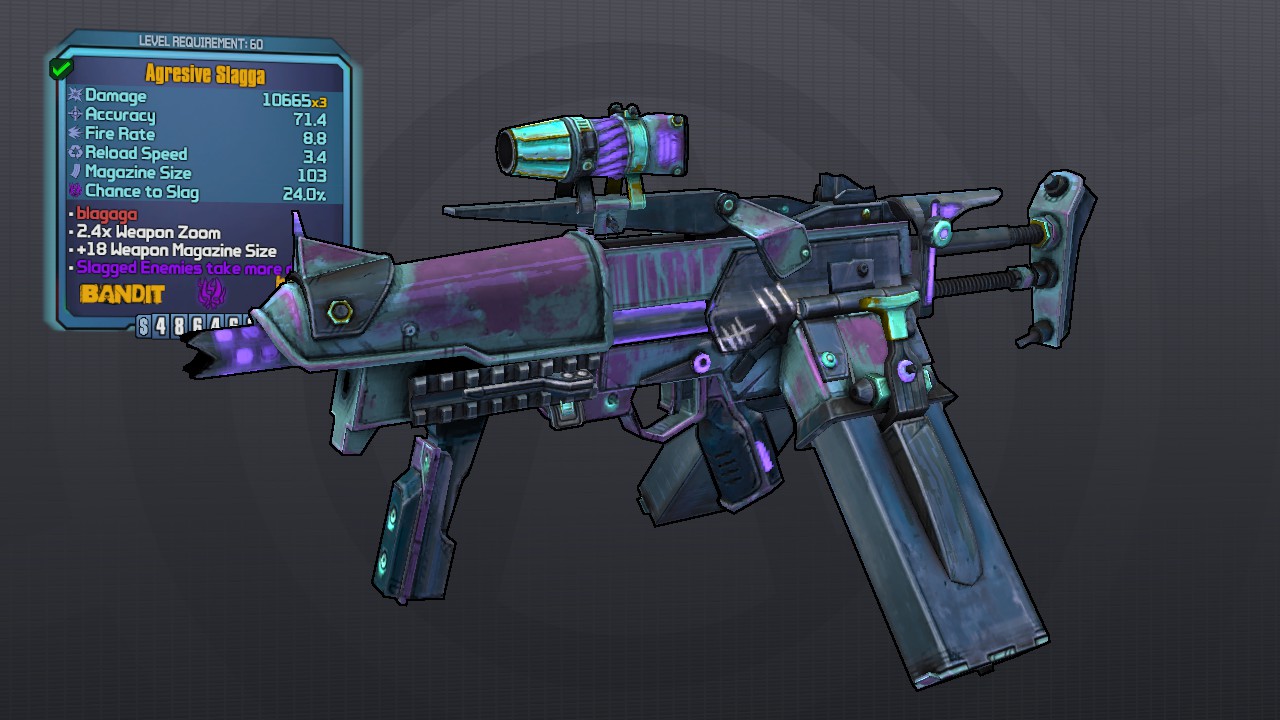
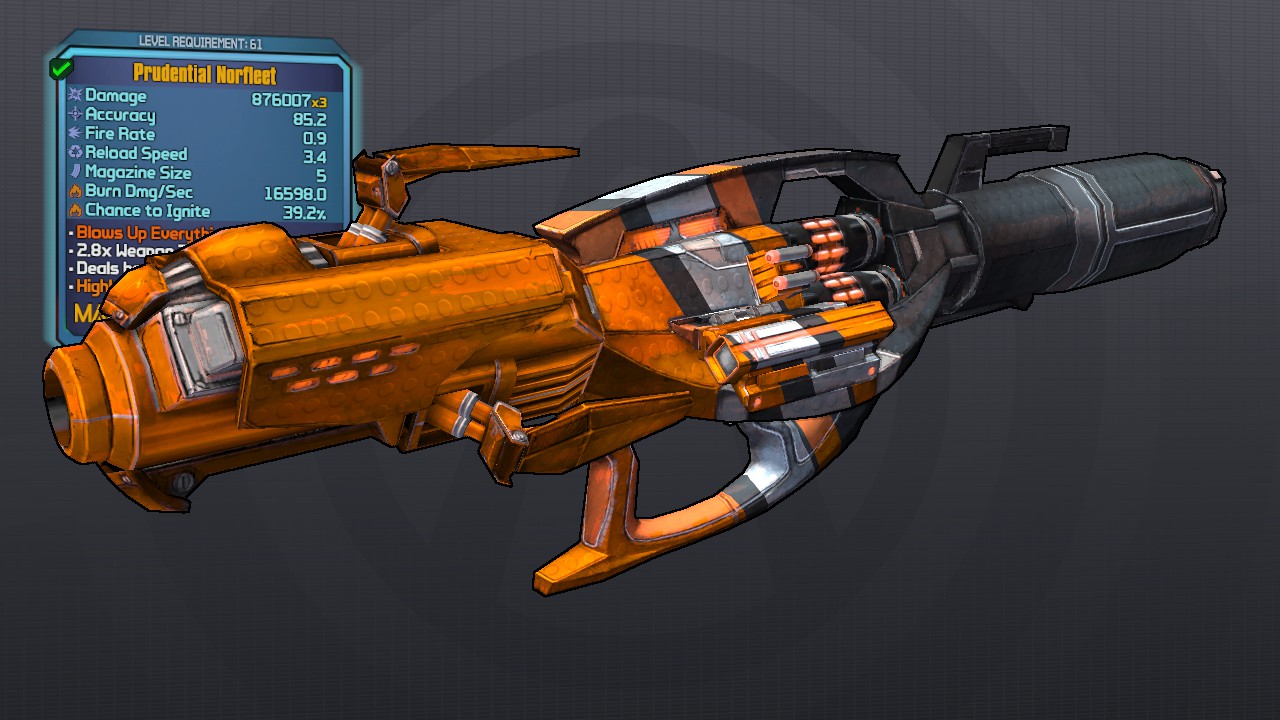
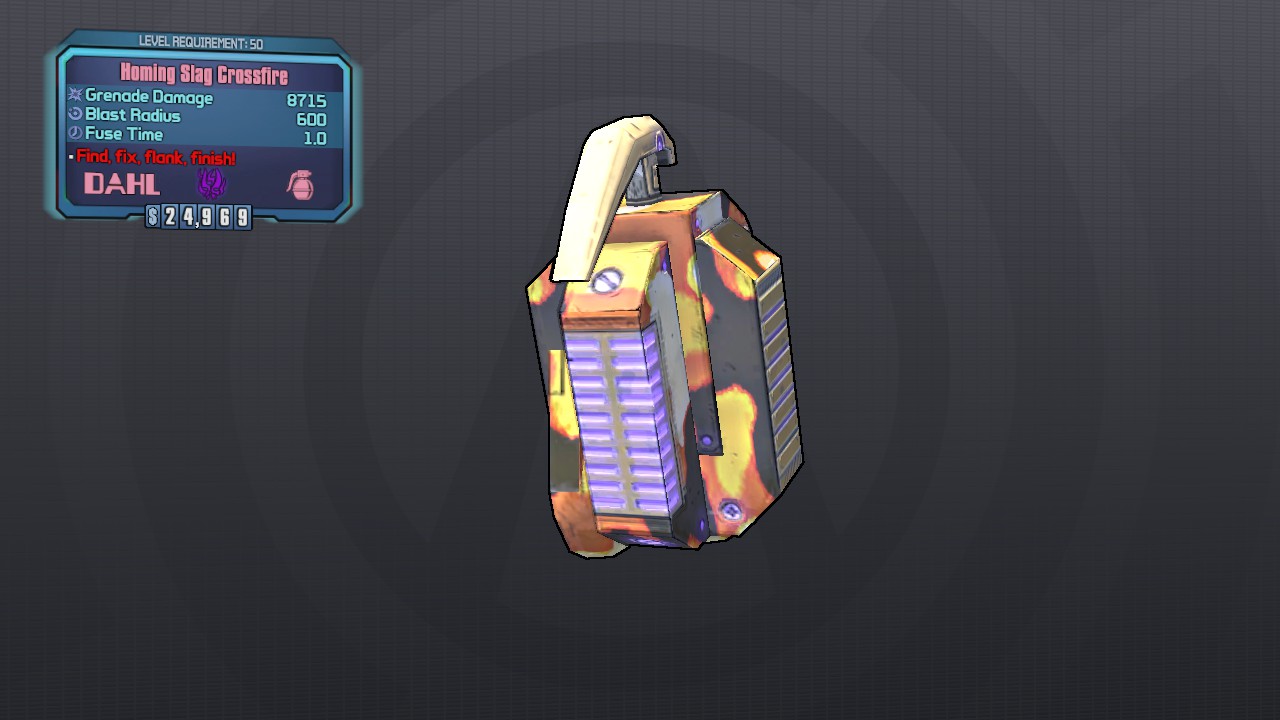
As for the gear, this is all pretty generic "get the best stuff" that you find all over the web. I guess that's okay, since it's common knowledge by now.

This is a very fun build and I highly recommend it.
LORD JEEEF 15 Mar, 2014 @ 6:07am 
Edo, this must have taken a long time to make. Nice job putting all this together!
Brooke 27 Feb, 2014 @ 12:52pm 
@Edo the 309th that was a joke, having DT get to enemies quicker is definetly going to hurt them.
The Mojo Flow 27 Feb, 2014 @ 4:21am 
Thanks! I'll take a look into it.