Counter-Strike 2

Counter-Strike 2

477 ratings
A Comprensive Guide to Weapon Finishes
By Alien
This guide will dwell into the adventure that is learning to create your own finish for the weapons workshop of Counter Strike: Global Offensive.

Here you can my weapons collection, where I list all my finishes. You can see with your eyes they're of really high quality and in this guide you'll learn how I do my skins. Click on the image to visit the full collection.


I hope you're going to be great at making weapon finishes. Good Luck!


THE GUIDE IS STILL WORK IN PROGRESS, I STILL NEED TO ADD SOME STYLES AND OTHER LITTLE THINGS.
   
Award
Favorite
Favorited
Unfavorite
1. Introduction
So there you are, trying to learn how to make weapon finishes, in this introduction I list some things you need. I want to point out that this guide is going to be made based upon the tools I personally use.

Programs needed
  • Patience and Time;
  • Counter-Strike: Global Offensive;
  • CS: GO SDK;
  • Photoshop and Illustrator;
  • VTFEdit

I'll assume you already have a bit of knowledge of Photoshop and Illustrator so I'm not going to deepen that part too much, or the guide is going to be reaaaally long.

Before going on I suggest you read the weapon finishes guide made by Valve, it's a light read, it'll take 10 minutes at maximum. You may not understand everything but it's fine, you're going to have that knowledge in your head and you'll get it out when needed. Trust me on this one.


Here's the Valve guide.
2. Setting up the environment
Before starting we need to set up some things.

We start with VTFEdit.
1. We start by downloading it. Click this link[nemesis.thewavelength.net] and then download the installer version.

2. And here it is. Double click it and start the installation. Just press next, accept the agreements and choose your path to install.

3. This is what it looks like, I'll teach you later how to use it.


Now we set up Counter-Strike.

1. Open the game and to go Game Options.

2. Search for the Enable console developer option and put it to Yes.

3. Go to Keyboard/Mouse Setting.

4. Search for Toggle Console and choose your key to open the console, mine is the numpad's asterisk (*).

5. Now let's see if it works. Go to the Play tab and press the button you have choosen.
This is what should appear.

6. Write "workshop_workbench" and press enter.

7. You just opened the Workbench! You can enlarge the workbench window by dragging the borders if you want, and feel free to close the console by clicking on the little gray X on top right.


Another thing I suggest to do is setting all the graphic option to max, so you're going to see the weapons and the textures at their best.

You do it like this.

1. Go to Video Settings in the Option Tab.

2. Set your game resolution to the native resolution of your monitor, 1440x900 in my case. After this click on Advanced.

3. Set everything like this. You can leave Motion Blur disabled since you're not going to move that much in the workbench.


Another essential thing is CS: GO SDK. You install it like this.

1. Open Steam and go to Lybrary > Tools.
2. Search for CS: GO SDK, right click it and select Install Game... All you have to do now is wait for the installation to end.


Good, we set everything up so we can go learn making finishes!
2.1 Understanding the Workbench
I bet now you're a bit overwhelmed by the Workbench but don't panic and grab your towel, everything is going to be fine when we finish here.

Click on the image to enlarge it.

Everything seems hard? Don't worry, when you'll hop in the bench by yourself everything is going to be easy like stealing a lollipop from a baby.

Disclaimer: I'm not responsible for any stolen lollipop.
3. Color Zones
Before starting to make a finish we have understand a fundamental thing, Color Zones.
Every weapon is divided in zones and, depending on the style of the finish, they are covered with solid color or a pattern.
Here we're going to have an image for every gun color zone. Click the pictures to watch them in detail.

You may notice that some guns have zones without a number, those zones in some style are not going to receive a color.
The best way to visualize the paint by number areas on a weapon is to load it up in the Workbench and assign some colors.

AK-47

AUG

AWP

Desert Eagle

Dual Berettas

FAMAS

Five-SeveN

G3SG1

Galil AR

Glock 18

M249

M4A1-S

M4A4

MAC-10

MAG-7

MP7

MP9

Negev

Nova

P2000

P250

P90

PP-Bizon

SCAR-20

SG 553

SSG 08

Sawed-Off

Tec-9

UMP-45

USP-S

XM1014
4. Your first Solid Color finish
You may not have realized it but you have enough knowledge to create your first skin.
It's going to be a simple solid color finish but even giant started as cockroaches.
Remember this finish style works with color zones that we covered earlier.

This style of finish wears directly to the metal of the weapon.

We start by chosing the gun we want to work on, I choose the FAMAS.

Let's switch to Workbench view so we get a more global look of it.

When you switch to Workbench the camera starts to move, showing the whole gun, you can stop the camera with the pause button and adjust it with the slider.

We now choose the finish style, Solid Color in our case. You'll notice the gun changes color, it's normal.

Time to choose our first color by clicking the Color0 button. This is the color I choose. Notice I choose a "pure" color, like pure black or red, because it renders really bad with in-game lightning.

Second color. Notice I've moved the camera to get a better view, remember to use the camera to check out your gun under different light.

Third color, as you notice I switched view to Hold and clicked the Inspect button to see how the gun feels in-game. It may be too bright but we'll fix that later.

Fourth color! Now time to adjust the brightness.

To adjust brightness we need to tamper with phongexponent and phongintensity. Phong is a complicated topic so I suggest you to play with the numbers to get the hang of it, just don't make a gun too bright or too dark or it's going to look bad.
I set both to 150 and this is what I obtained, looks good, right?

Time to choose the wearing on the weapon. I set the minimum to 0.05 and the maximum to 0.64 so we can still se a bit of color. Seems good to me.

Time to save the finish, click Save As... and a window will open, just choose the path you want your finish to be saved and click save. I saved it on my desktop.


And here it is, notice it's a txt and we can open it. It looks like this and you can modify it, I suggest you don't do it.

Congratulation! You just created your first finish and saved it!

Here you can see similar finishes to the one we've just done.
http://sp.zhabite.com/sharedfiles/filedetails/?id=196855337
http://sp.zhabite.com/sharedfiles/filedetails/?id=196855526

If you want to learn more about publishing your finish you can check the Appendices.
5. Patterns
Patterns are really important to make finishes. First of all we need to understand what it is, a pattern is a discernible regularity in a design. As such, the elements of a pattern repeat in a predictable manner. You need an example? The tilings in your bathroom or your kitchen, a wall of bricks, a grate.

Notice how there's always a motif? That's what we want to achieve, something that repeats itself over and over, so we can cover our weapon.
There's a pattern there to follow.


To create a pattern for CS: GO we need to use only four colors: red, green, blue and black. You may think that this way the weapon will look like ♥♥♥♥, but this method let us choose our prefered colors in a second time. How? Let me explain.

Most finishes to be done needs to be created with 4 layers of paint, black is the first applied and then red, green and last blue. But you don't want a finish with colors, right? That's why, in the workbench, we "assign" them other colors.

Here you can see an example of a pattern with different colors, the first is the original pattern, the other two are possible variants of how it may look in game.


It's really simple, you just have to assign different colors to different layers of paint. Color0 is assigned to black, color1 to red, color2 to green and color3 to blue.

Color3
Color2
Color1
Color0

A most important thing is that every pattern needs to be a square and their dimensions a power of two.


Another useful thing to know about patterns is the way they are applied to a weapon.

The first method applies the pattern directly on top of the gun's existing UVs. If we want to relate that to a real-world application, imagine disassembling the weapon in parts and applying the finish.
This application method is used for Hydrographic, Anodized Multicolored, Patina and Custom Paint Job Styles.


The second method uses triplanar mapping. Think of it as spray painting though a stencil onto the sides, top, bottom, back and front of the weapon.
This application method is used for Spray-Paint and Anodized Airbrushed Styles.


Now you know everything you need to know about patterns to go on and make a good finish.
Onwards to another great lesson!
6. Your first Spray-Paint finish
Now that you know what a pattern is and how it works you can start to make your first Spray-Paint finish, a serious paint job!

A Spray-Paint finish is applied all over the weapon, it doesn't account for color zones so forget them for now.

In this style each layer of paint wears successively to the layer below it before revealing the metal of the weapon.

Let's start!

1. Open Photoshop and make a 1024 X 1024 pixels document.

2. Fill the background with black.

3. Create a new layer and fill it with red.

4. Apply Filters > Rendering > Clouds to the new layer, you may get red/white or red/black clouds depending on your background color, remember to check it.

5. Go to Filters > Filters Gallery... and search for the Stamp filter under the Sketch folder, select your prefered setting and press Ok.

6. Repeat step 3-5 with other two layers, but this time fill the first with green and the second with blue.

7. Now we need to see what's beneath those layers, so pick your Magic Wand and select the black area of each layer and delete it by pressing Canc on keyboard. To deselect the are you select simply right click and click Deselect.

8. Time to save our work! Go to File > Save As and save it as a Targa.

9. Open VTFEdit go to File > Import and select the file we just saved.

10. Go to File > Save As and save the pattern in VTF File with this settings.

11. Open the Workbench in CS: GO, like we did in a previous paragraph.
12. Choose Spray-Paint as the style and choose your weapon, I choose the SG 553.
13. Load the pattern we created, be careful and select the VTF File.
14. Choose Color0, this is going to be our background color. Remember the Pattern paragraph.
15. Color1.
16. Color2.
17. Color3. Looks good!
18. Time to play with Phong settings, this are my settings.
19. Offset and rotation are fine like this so we're not going to touch them, but we're going to change the wear_remap_min to 0.05 and wear_remap_max to 0.56.
20. Our last step is to save it. Voilà, you just finished your second finish. Feels good!


Here you can see similar finishes to the one we've just done.
http://sp.zhabite.com/sharedfiles/filedetails/?id=196749085
http://sp.zhabite.com/sharedfiles/filedetails/?id=196751358

If you want to learn more about publishing your finish you can check the Appendices.
7. Alpha Channel

The Alpha Channel is a really useful way to choose how your finish wears, for example if you have a part of your design that should never wear you can use an Alpha Channel.
It can be used for Hydrographic and Custom Paint Styles.

But what exactly is an Alpha Channel? It's a black and white channel that is applied over the pattern.

Let me explain how to create one in Photoshop.

1. Open Photoshop and your pattern of choice.
2. Go to channels and create a new one by clicking the Create New Chanel button.
3. Now we draw on the Alpha Channel depending how we want the little monster to wear.
For example I decided that the eyes should wear last and the tongue should never wear.

4. Save the pattern as you have learned but this time at 32 bit/pixel.


And that's how you do it, the finish I used as an example looks like this in Workbench.


Now some technical talking, when drawing you Alpha Channel remember this:
Values around 196 in the alpha channel subtract from the refinishable areas of the weapon.
Values in the 128-255 interval have no effect, so the finish wears as usual.
Values below 128 increase the durability of the finish.


I advice to cover the channel with a 130 value and then continue drawing the rest, or you may get really bad results.
8. Your first Hydrographic finish
Time to start making your first Hydrographic finish, it's much similar to Spray-Paint style but with some slight diffrence.

An Hydrographic finish is applied on ColorZone 0 and 1, ColorZone 2 and 3 use Color 2 and 3 respectively.

In this style the finish wears directly to the metal surface of the weapon.

Let's start!

1. Open Illustrator and create 256 X 256 pixels document, the color method has to be RGB.

2. Create a blue square that cover the whole document and lock it so it doesn't move.

3. Create an green hexagon with the Poligon Tool by clicking on the canvas, then copy and paste it some times the way you want.

4. Select all the hexagons, Right click and Group them, then lock them.

5. Create other two hexagons, one black and one red and copy them around again.

6. Unlock all the hexagons and select them, press Enter and copy them orizontally for 256 pixels.

7. Group them as we did with the green hexagons. Now select every shape again and copy them vertically for 256 pixels.

8. Select all of them again and move them in front of the canvas in a way you like. Why we do this? In this case it might be kinda stupid but in some patterns if a part of it touches some edge it's going to be cut, so we copy it like this to avoid getting a cut.

9. Save the pattern as .AI.

10. Open the pattern in Photoshop at 1024 X 1024 pixels. We open the pattern in Photoshop for two reasons: we want to save a Targa but we can't in Illustrator and if we want to add an Alpha Channel.

11. Since I wanted that part of the design to be stronger I made an Alpha Channel, you can jump this part if you want.

12. Save the pattern as Targa. 32 bit/pixel if you used an Alpha Channel, 24 if you didn't.

13. Convert the Targa in VTF with VTFEdit as we did other times.

14. Open the pattern in game and choose your gun, my weapon of choice this time is the Galil AR.

15. I changed the pattern_scale to 5.00 since it's really big.

16. Time to choose the colors. Color 0.

17. Color 1.

18. Color 2, that is also going to cover Color Zone 2.

19. Color 3, this one also covers Color Zone 3.

20. I adjusted the Phong settings a bit.

21. I raised wear_remap_min and lowered wear_remap_max.

22. Check how your pattern looks in different variations by clicking the Variant button.

23. Save it. And you finished your third finish! You're becoming a pro!

Here you can see some similar finishes to the one we've just done.

http://sp.zhabite.com/sharedfiles/filedetails/?id=190274940

http://sp.zhabite.com/sharedfiles/filedetails/?id=193477441

If you want to learn more about publishing your finish you can check the Appendices.
9. Your first Anodized finish
This type of finish is the easist of all, you just need to choose one color.

The color is applied on various parts of the gun, depending on the gun it covers different color zones.

The finish wears first to the chrome base coat and then it reveals the metal of the weapon.


1. Open the Workbench, choose the Anodized style and your weapon, my choice is the MAG-7.

2. Choose your color, in this case only Color 0.

3. Adjust the Phong settings, in this style it's really important.

4. Adjust the wear settings.

5. Save it and it's over. Fourth finish made, keep up the work, you're doing great!

Yes, it's that easy to make an Anodized finish.


Here you can see similar finishes to the one we've just done.
http://sp.zhabite.com/sharedfiles/filedetails/?id=193479172

http://sp.zhabite.com/sharedfiles/filedetails/?id=198526783

If you want to learn more about publishing your finish you can check the Appendices.
Appendix 1. How to publish Finishes
In this appendix I'll teach how to publish your finishes. Before starting make sure you have the CS: GO SDK installed.


1. Open the Workbench and load the finish you want to publish.
2. Press Submit, this window should open.
3. Click Browse... to assign your submission an image.
4. Fill Title and Description.
5. Load your finish .txt, Targa and VTF. Check the two boxes and click Publish.
6. Finalize your revenue share and it's all set, you published your finish!

Here's the finish I published in this guide.

http://sp.zhabite.com/sharedfiles/filedetails/?id=196749085
Appendix 2. How to make your own preview image
Since many asked for this I decided to make a little appendix about it.

This time I'll teach you how to make a preview image for your Workshop submission.

First we create our pattern.

1. Open the pattern you used for you gun.
2. We need to assign to every layer the color we used in Workbench. Double click on the blue layer, check Overlap Color and use Color 3.
3. Do the same with the other colors.
4. Go to Modify > Define Pattern and create the pattern. This part is done.
Then we put things together.

1. Load in the Workbench the finish you created earlier, and go in Green Screen view.
2. Choose the setting you want to display in your preview, I put the wear amount at min and the rest it's random. Now take a screenshot, if you haven't changed the key it should be F12.
3. You can now leave CS:GO, you will see a window with your screenshot, we don't need those because they are low quality, you can close it. Go to your CS:GO installation folder, default is \Steam\SteamApps\common\Counter-Strike Global Offensive\csgo\screenshots, and open your screenshot of choice with Photoshop.

4. There's you weapon, double click on the only layer and press Ok to unlock it.

5. Cut the image with the Cutter, we need to stay inside the green. Press Enter to finalize it or Esc to cancel.

6. Select the Magic Wand with a Tollerance of 150 and Anti-alias ON, click on the green and delete it with Canc. You can deselect it with Right Click > Deselect.

7. Create a new layer behind the existing one and fill it with the pattern we defined earlier.

8. Select the gun layer and press Control + T to move it around. If you want to scale it press Shift so you won't lose proportions. Press Enter to finalize it or Esc to cancel.

9. Double click the gun layer and check Drop Shadow and use the setting you prefer, I like it this way.

10. Pick the Text Tool and write the names of the weapon and finish.

11. Double click one of the text layers and apply effect to make it stand out. This are the ones I used.


12. Right click on the text layer with Effects and Copy Layer Style, right click on the other and Paste Layer Style.

13. Done, now save it and use it for your submission.


Remember the size can be anything you want and you can't change the preview after you created your submission.
130 Comments
MaL1te pvpro.com 11 Feb, 2020 @ 11:32am 
OMG, man! You are great! Thank you so much!
PertinaxCL 22 Jan, 2020 @ 6:05pm 
Dead post!
PertinaxCL 16 Jan, 2020 @ 10:04am 
Ive made a P250 and AWP so far, and both are tagged as M4A4 weapon on the community workshop, any fix? I need to tag them respectively
[UA/SK] Divine Lotus 1 Jul, 2019 @ 10:08am 
I meant to say GIMP 2.8.0
[UA/SK] Divine Lotus 1 Jul, 2019 @ 5:34am 
For anyone that use GIMP (pasting my info to relative guides):

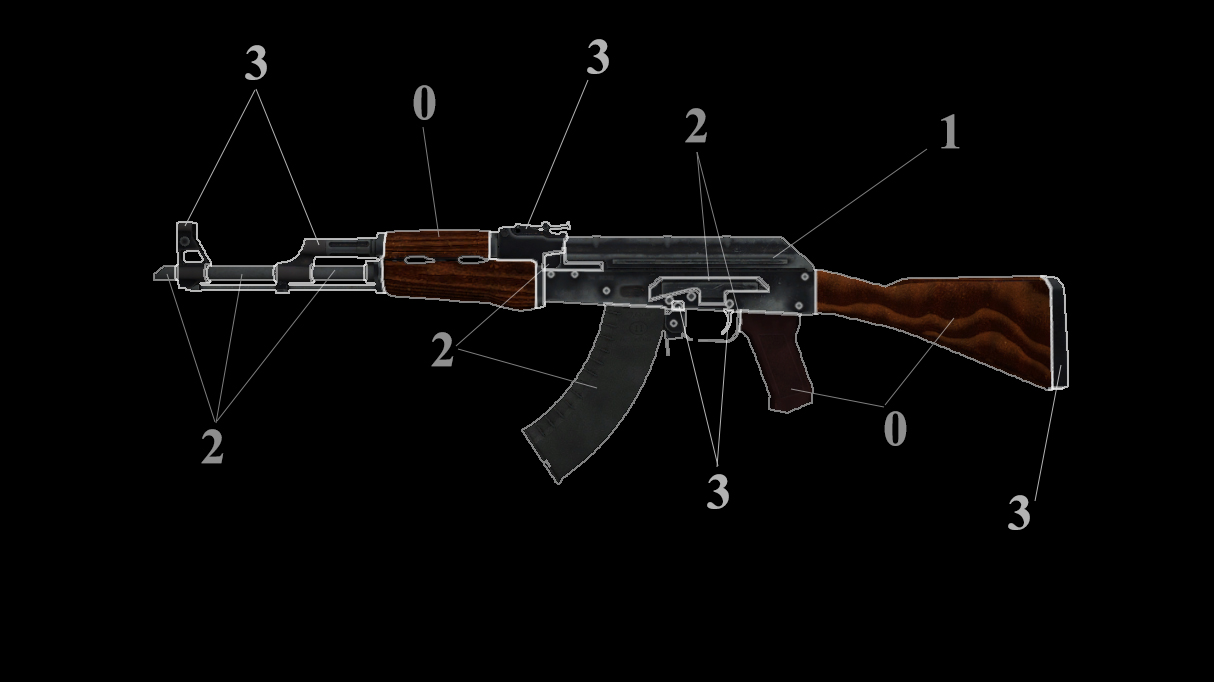
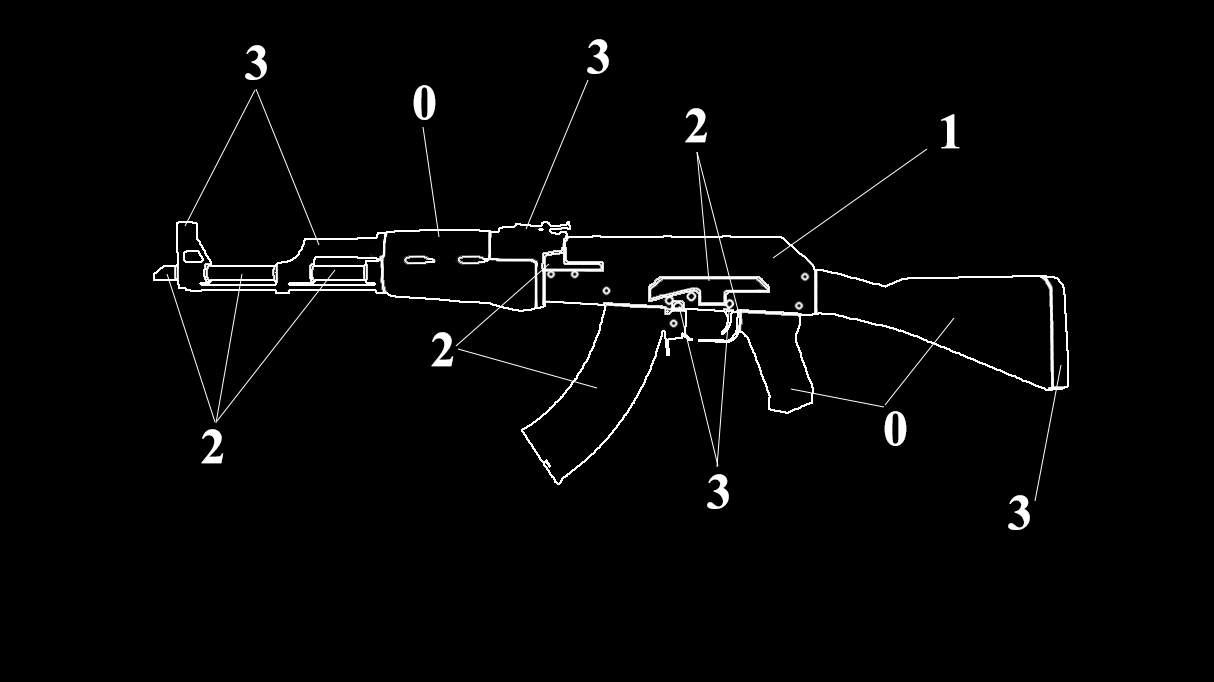
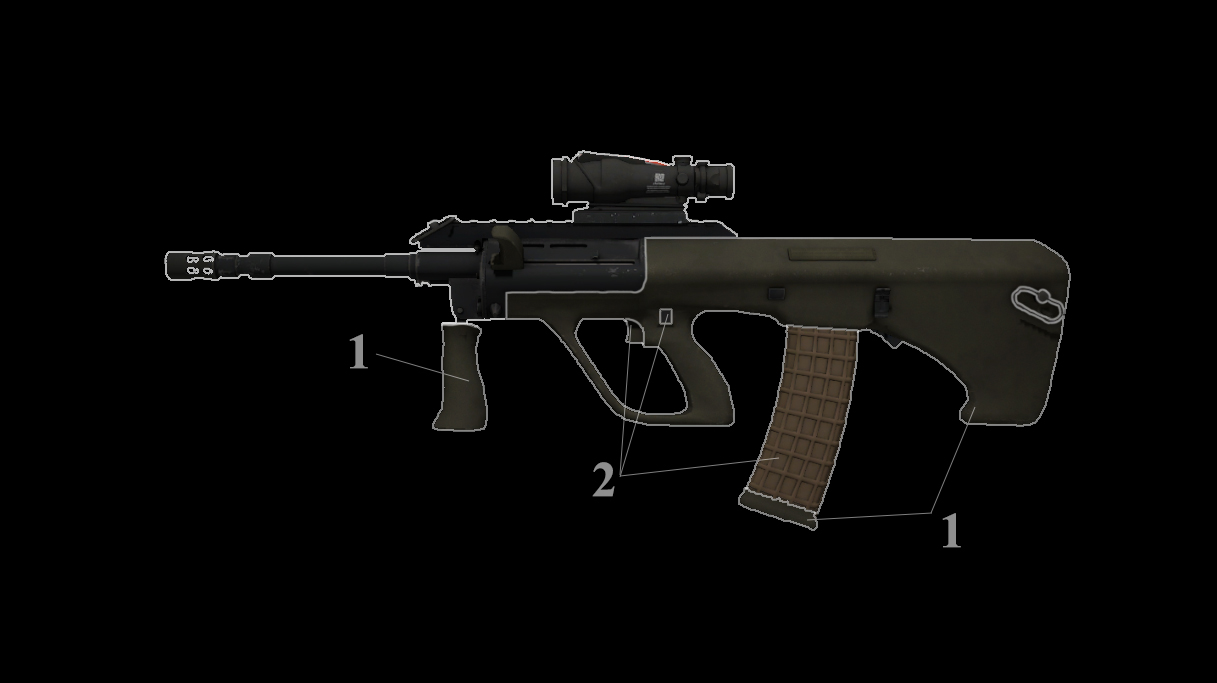
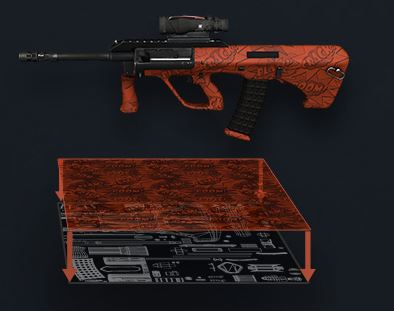
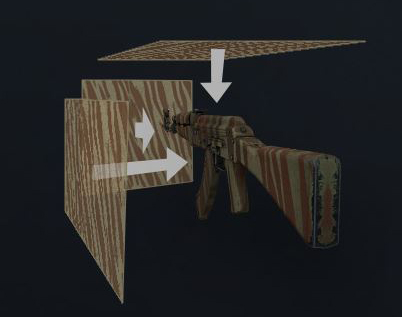
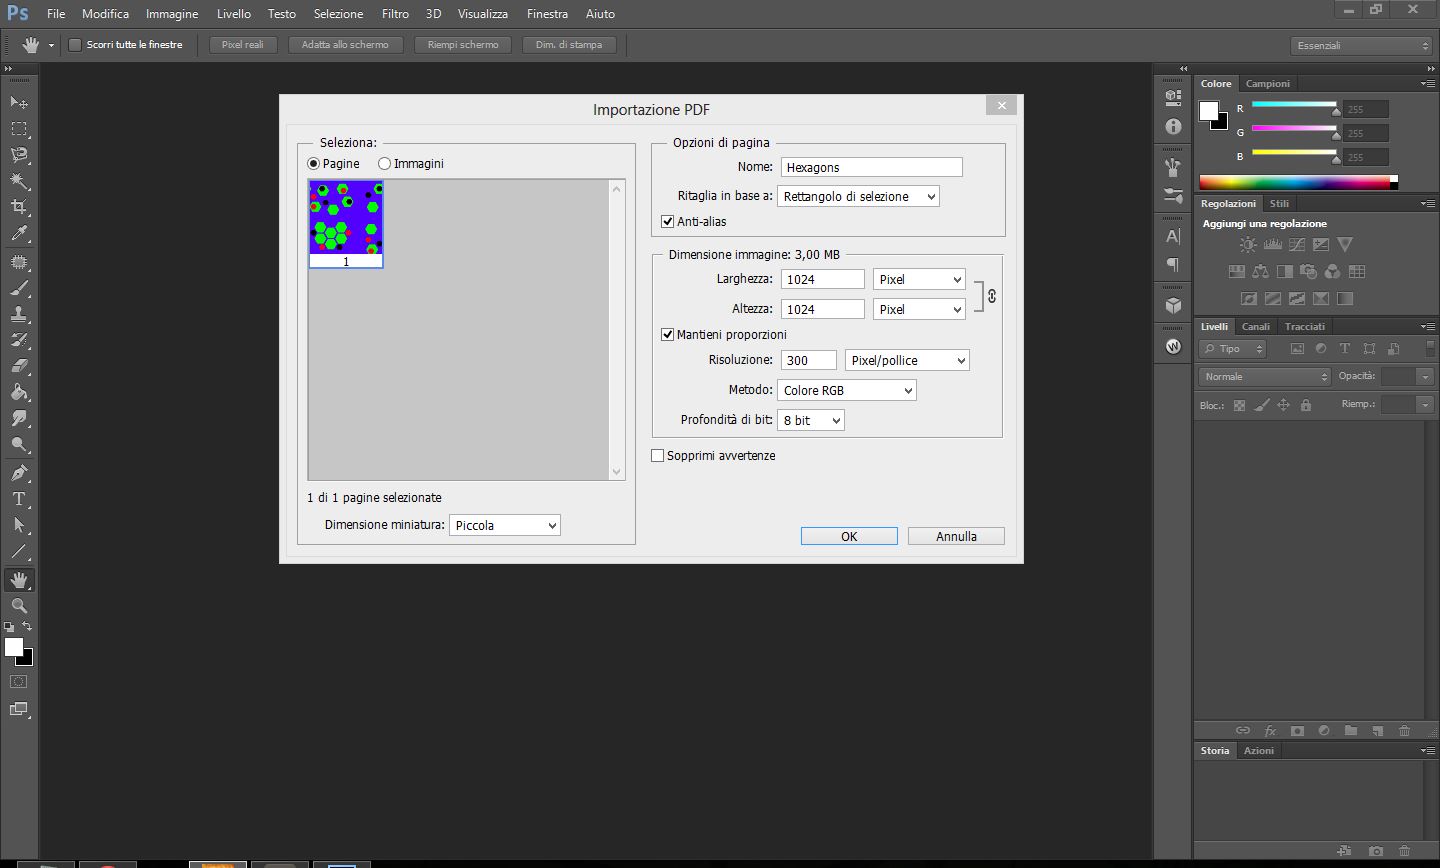
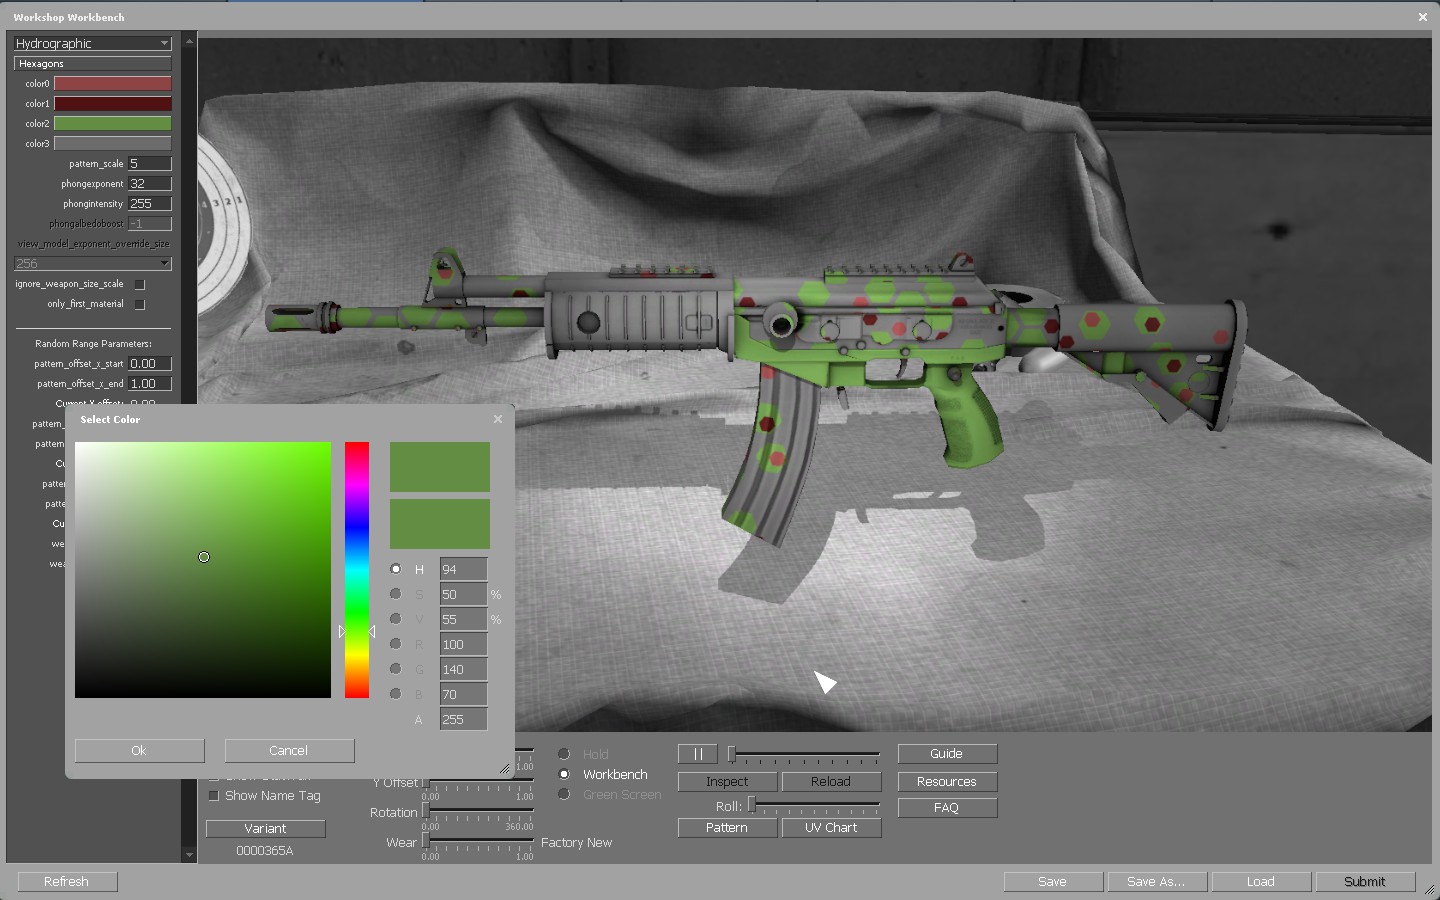
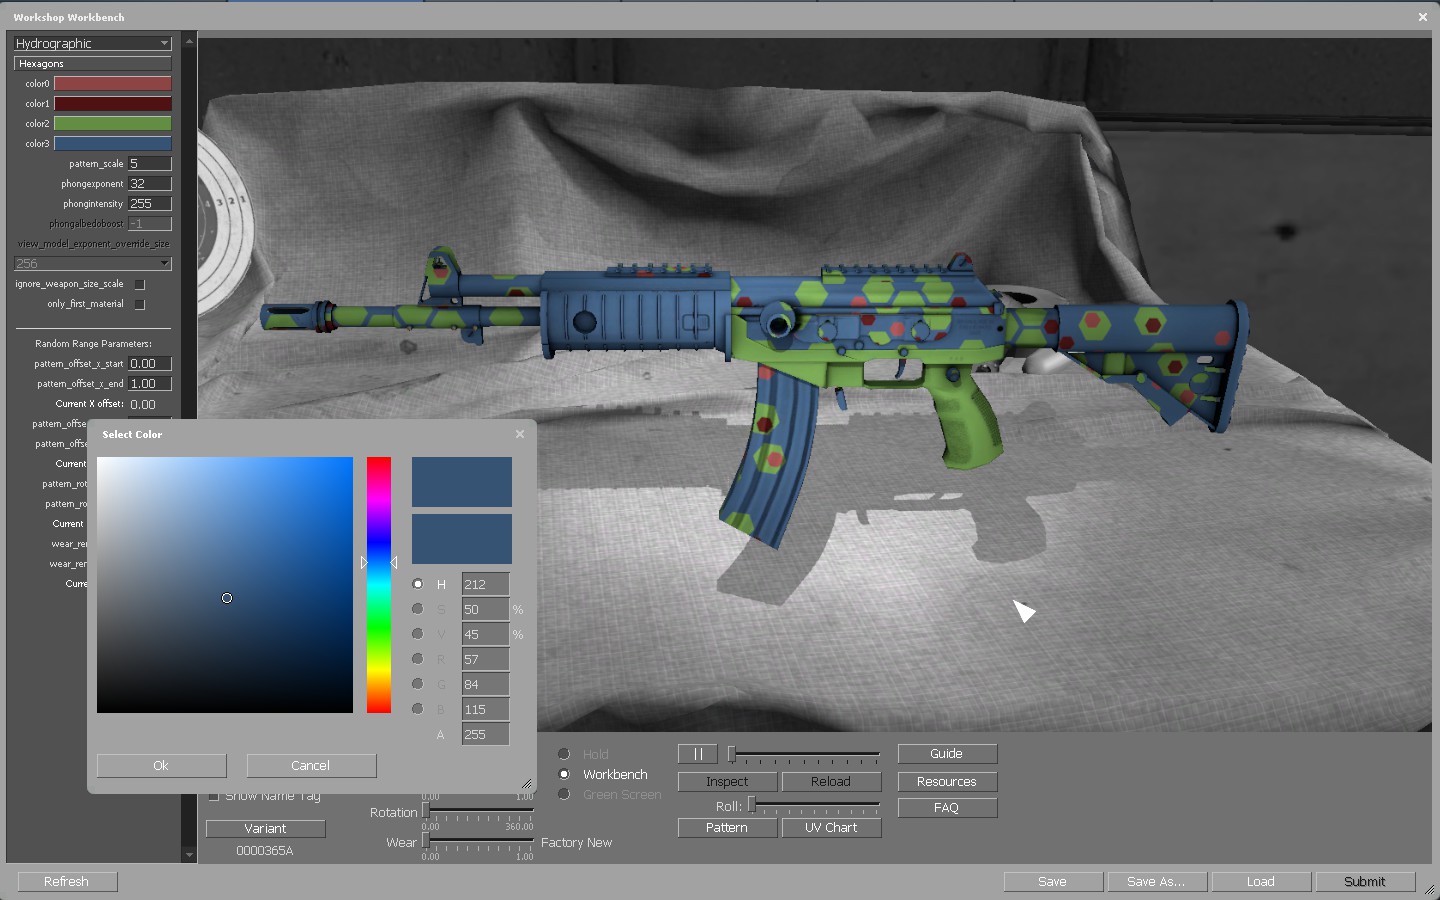
I recommend looking into the official Valve SDK Documentation for insight on how materials work in CSGO's Source engine, linked below:
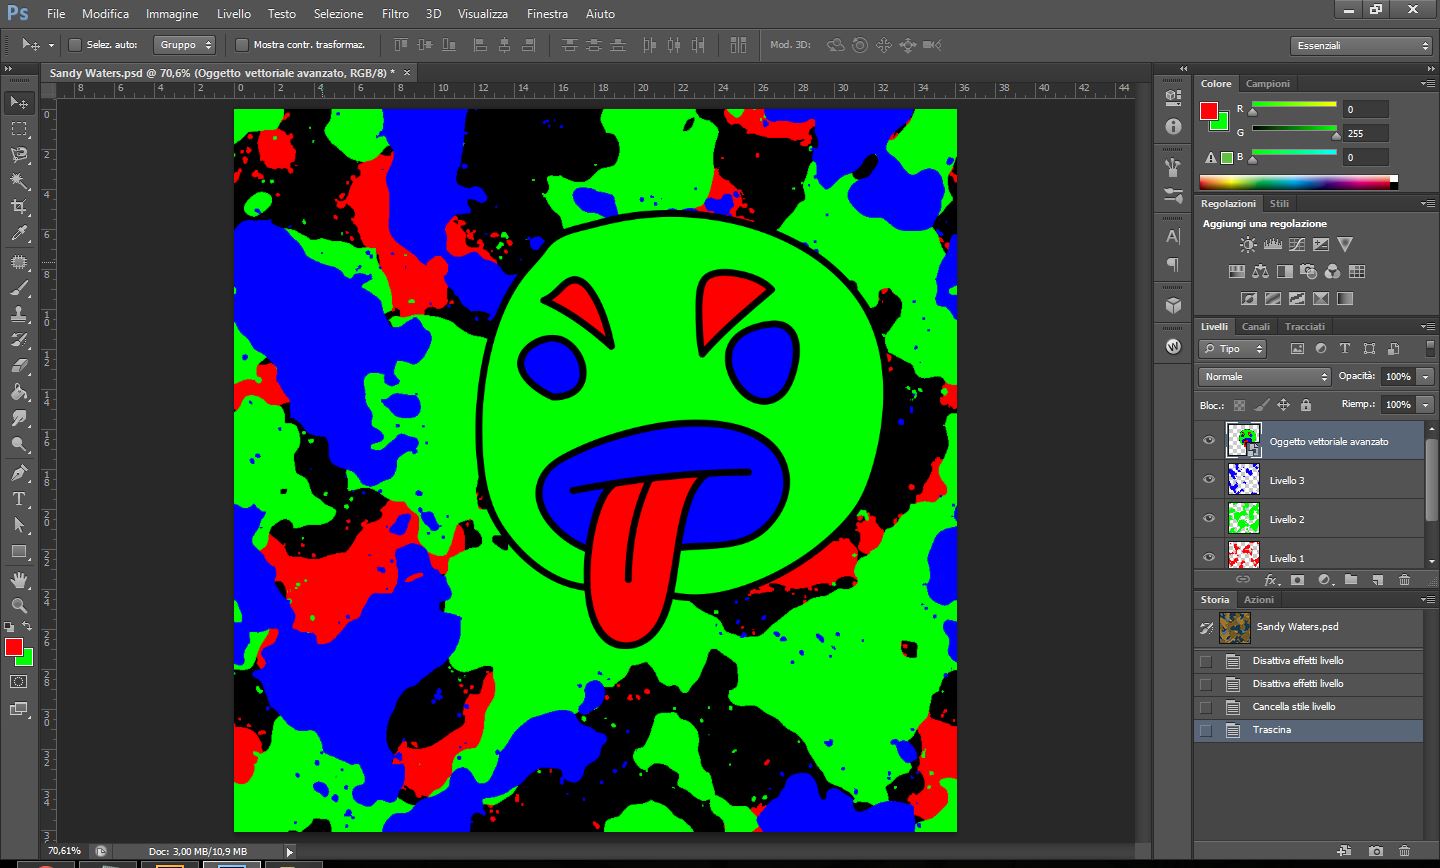
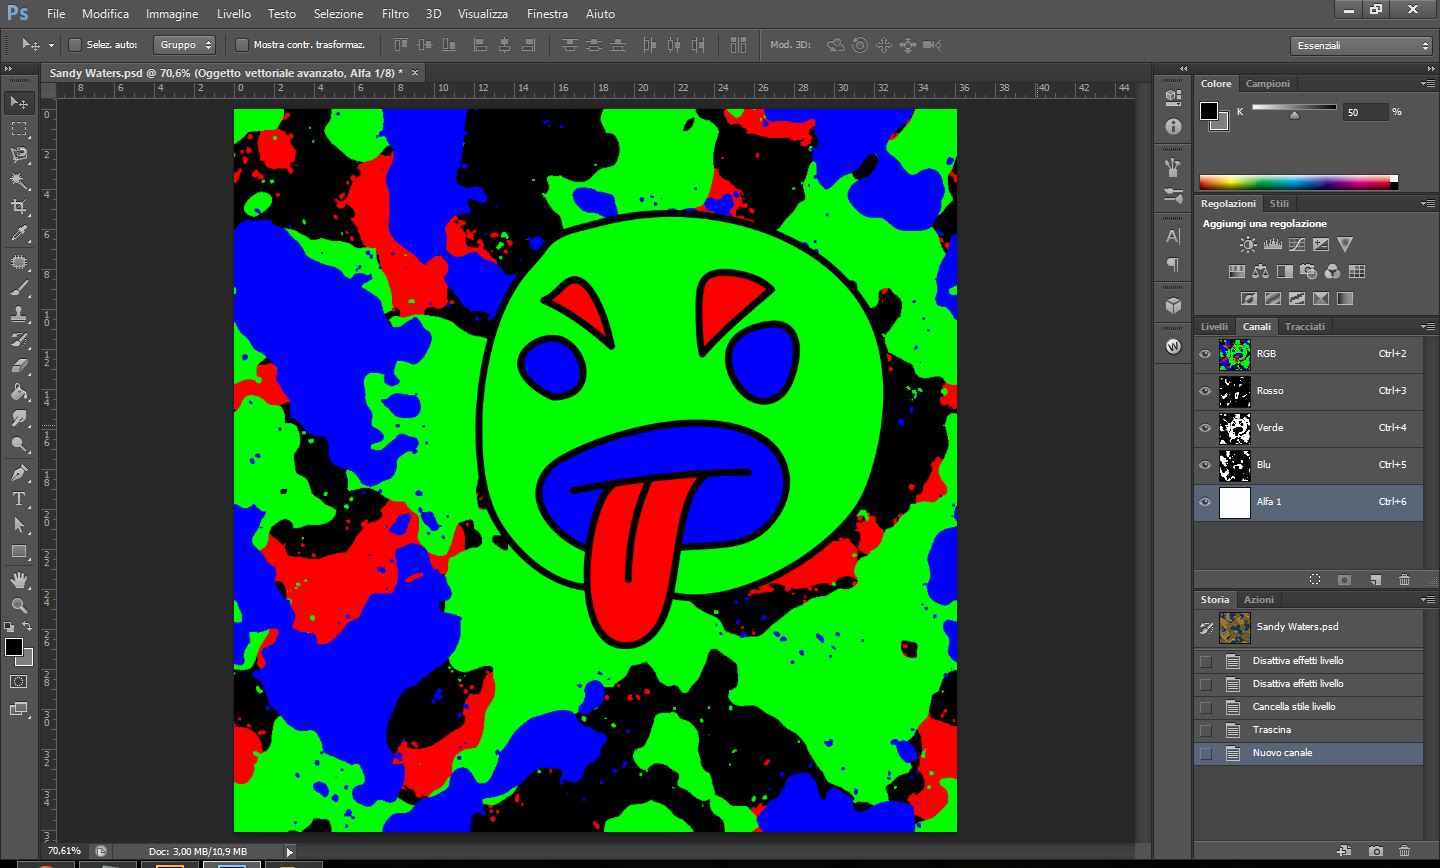
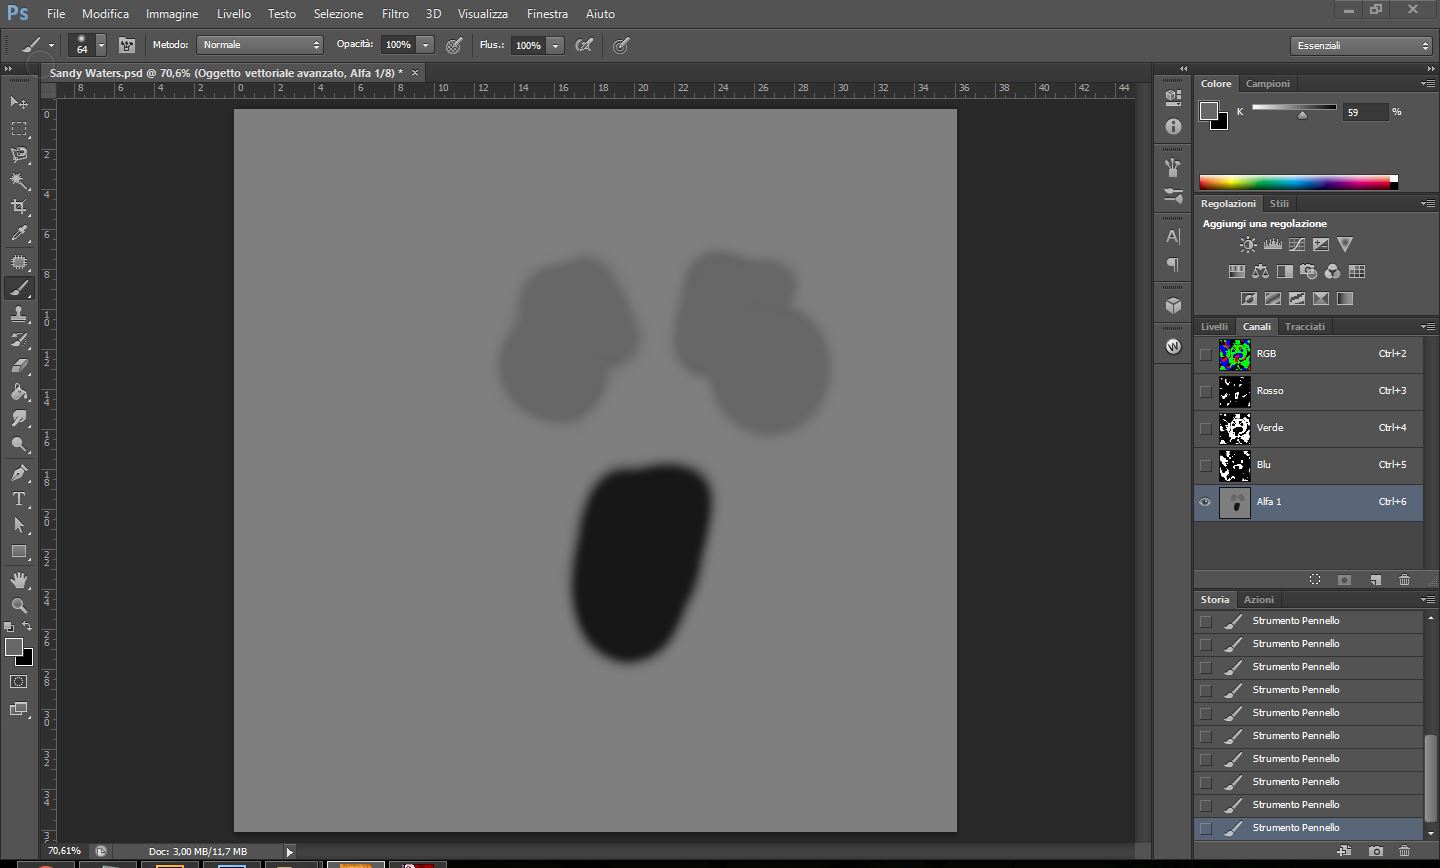
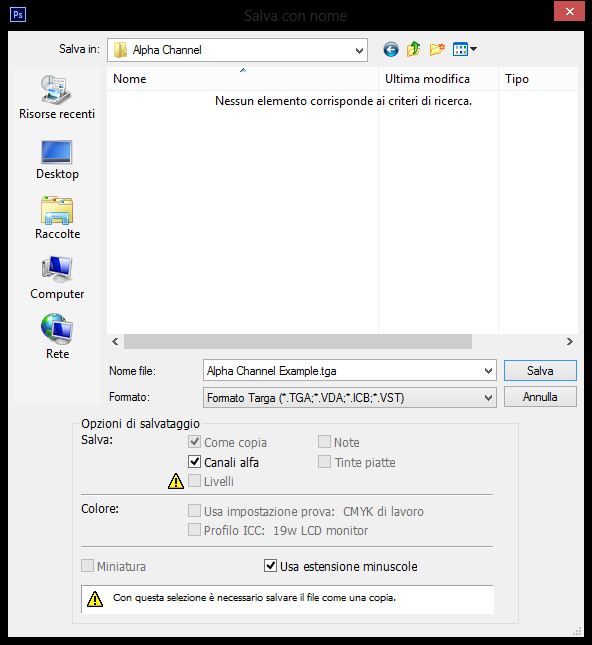
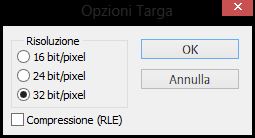
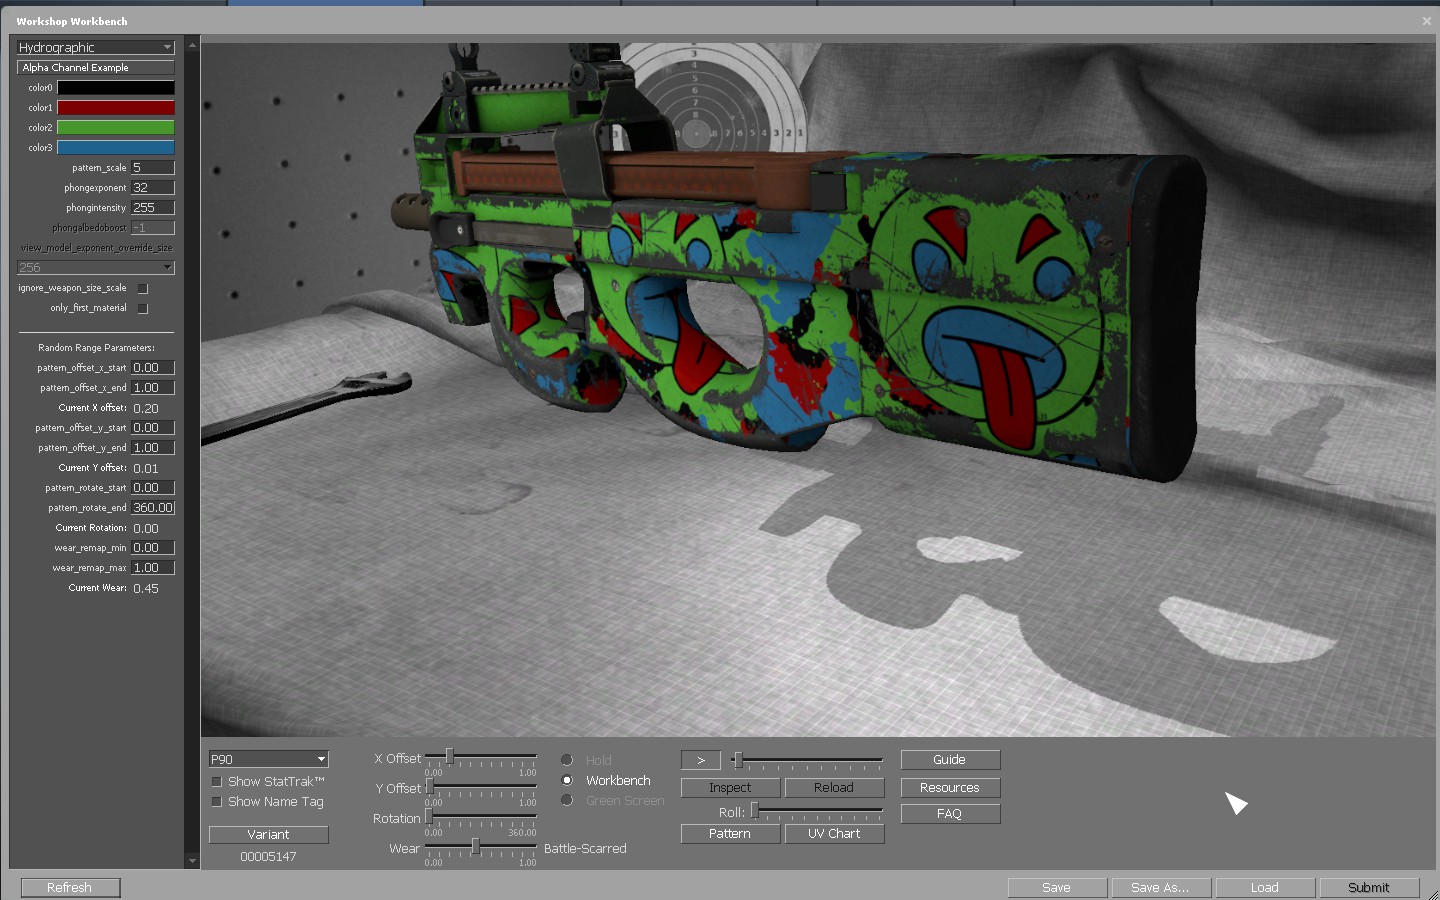
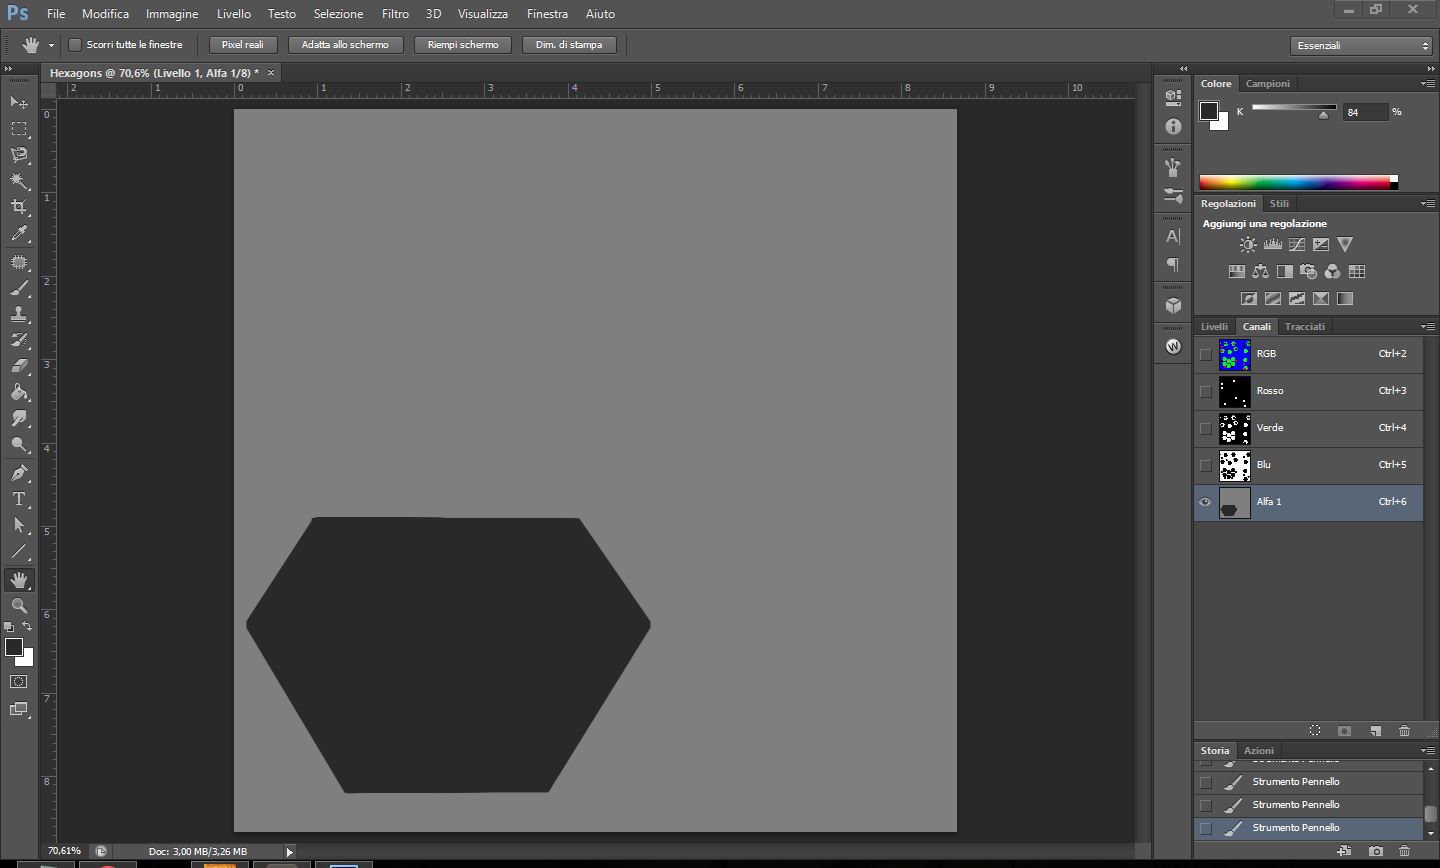
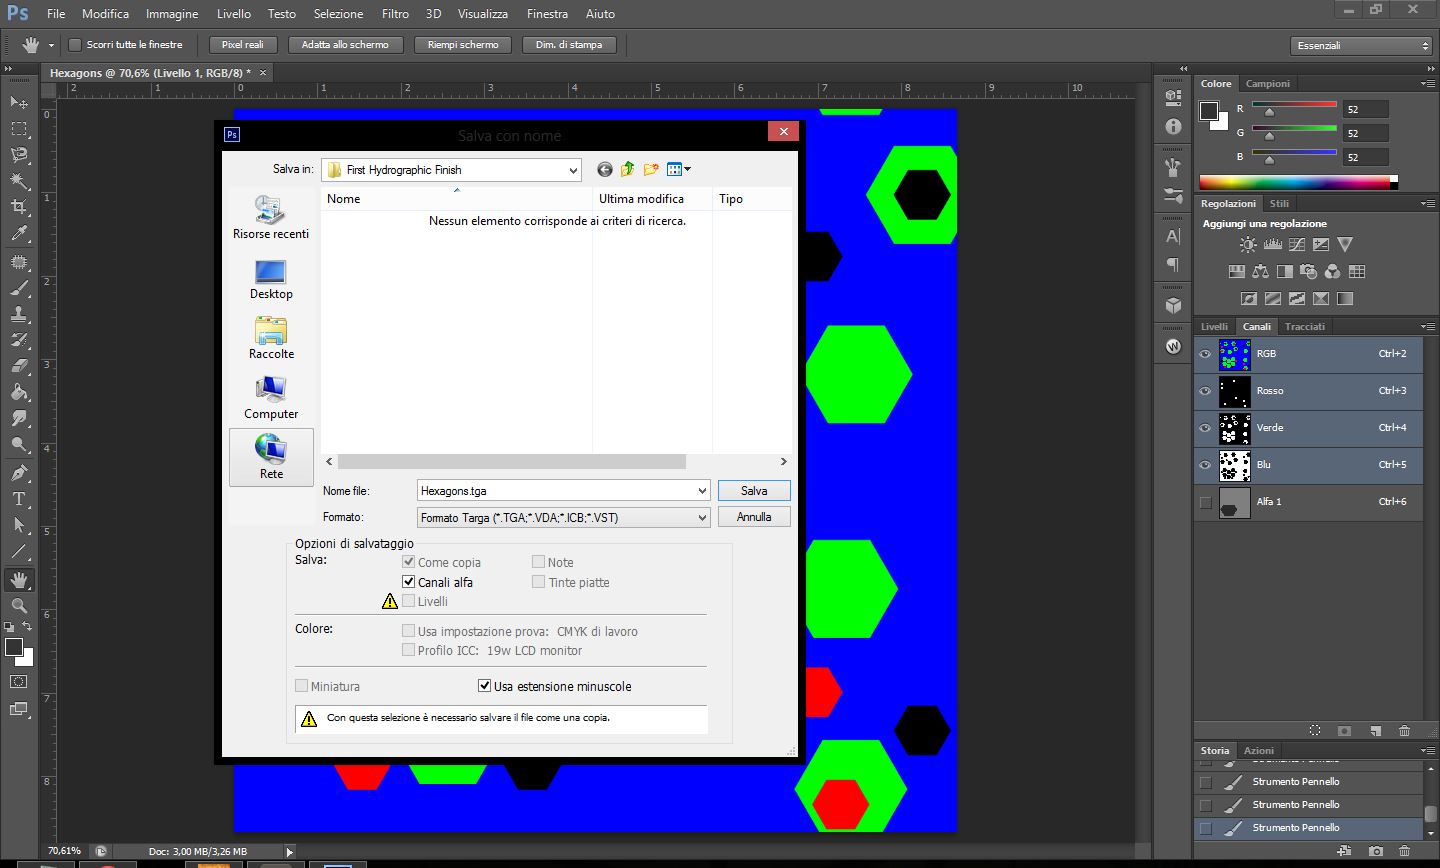
GIMP alpha channel
https://developer.valvesoftware.com/wiki/GIMP

GIMP Alpha channel: https://m.youtube.com/watch?v=LQCziSTNJgQ
https://www.youtube.com/watch?v=A9aZdPqs17M

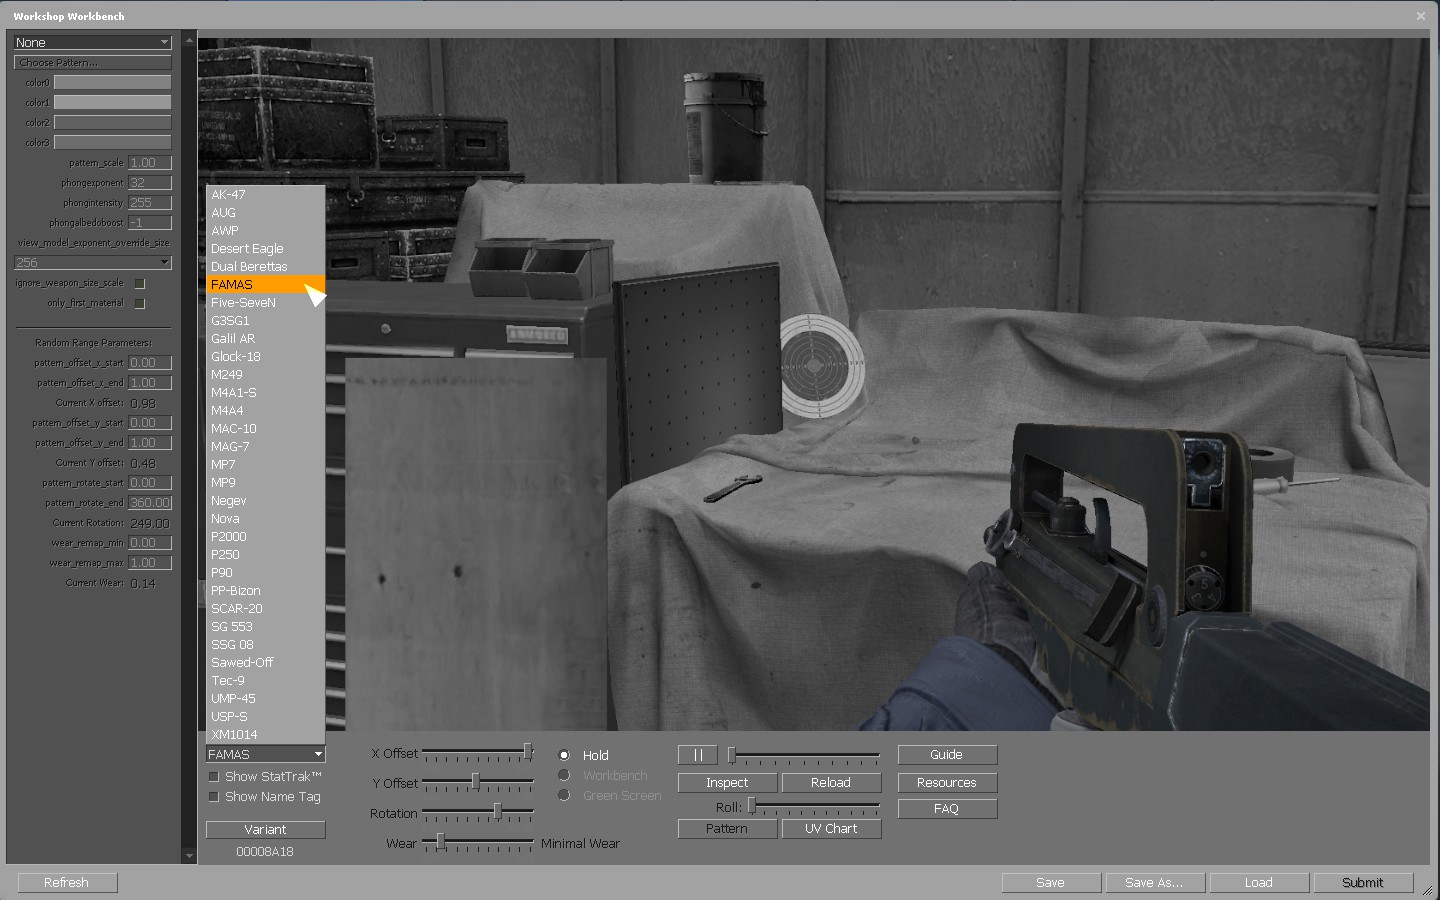
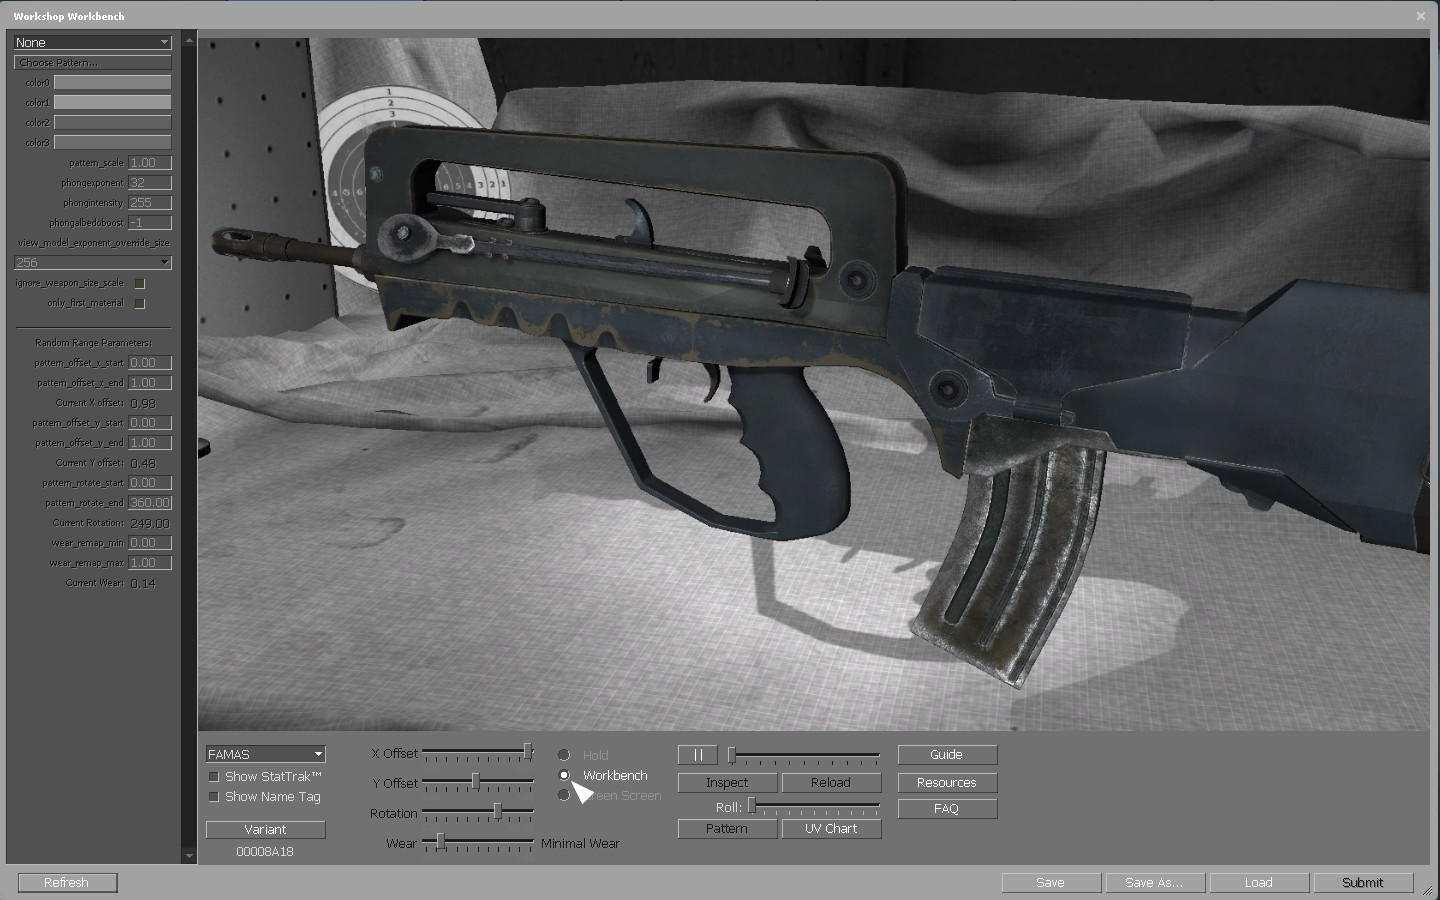
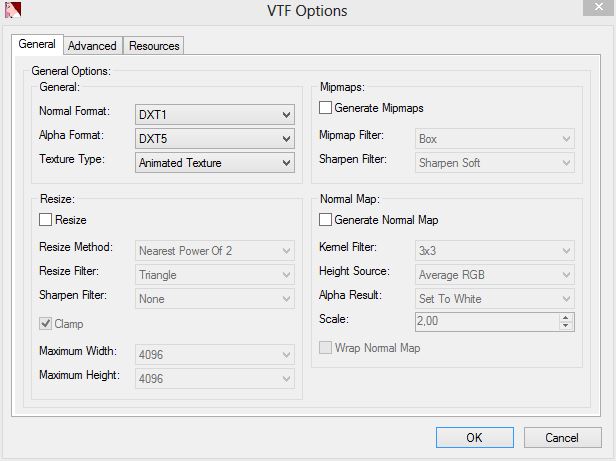
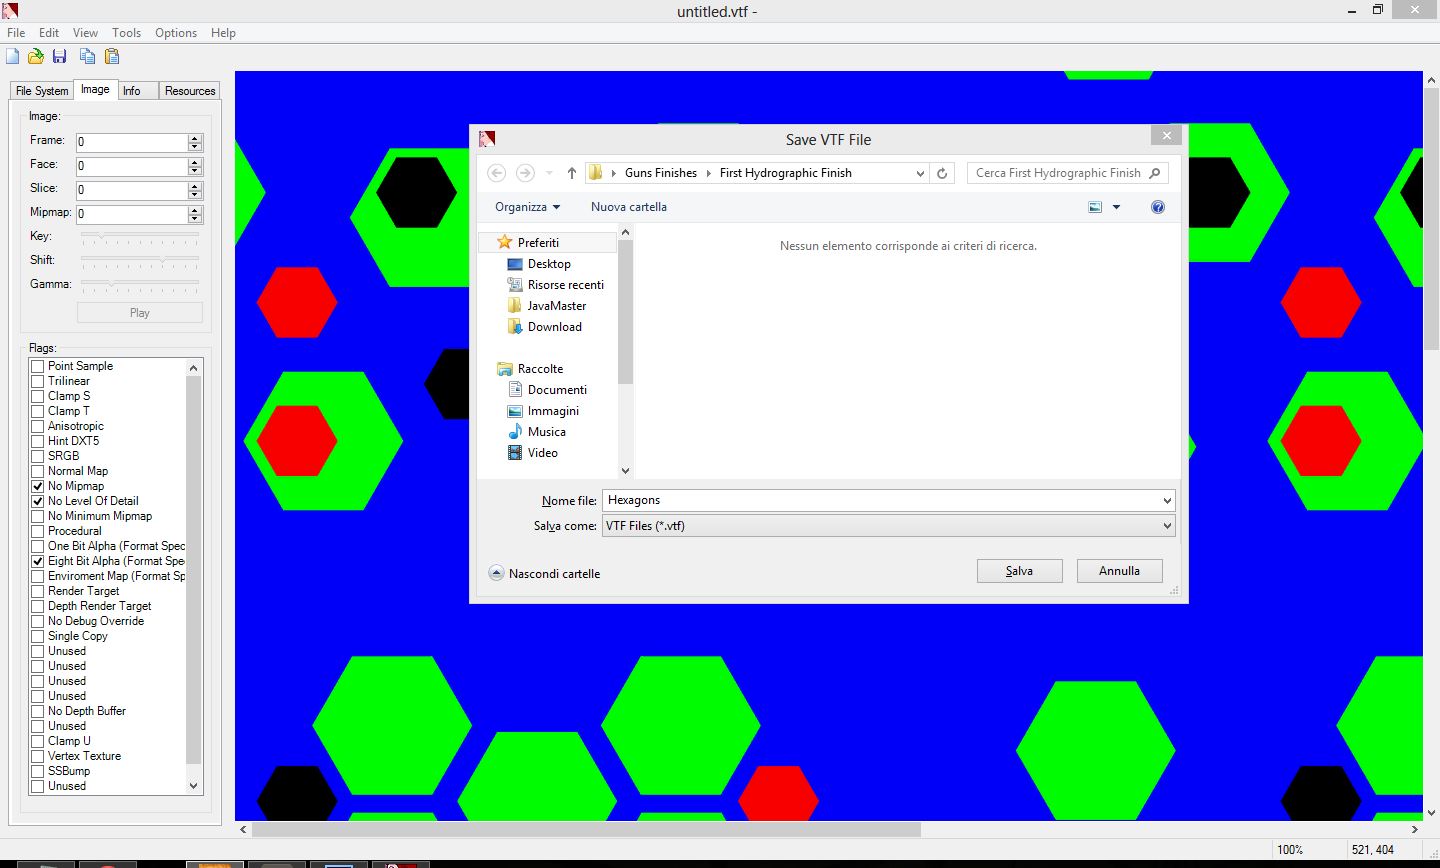
Using GIMP VTF plugin?
Be sure you're using GIMP 2.80

Not using it for GIMP? Follow this: https://developer.valvesoftware.com/wiki/Creating_a_Material

I have a wiki going on here that relates to the process of making skins / modding: https://sp.zhabite.com/sharedfiles/filedetails/?id=1501754039&searchtext=Wiki

Always try to read the manuals in anything, because they often give you insight and the proper foundation of how to handle things which most people don't care to look. They miss the good stuff.

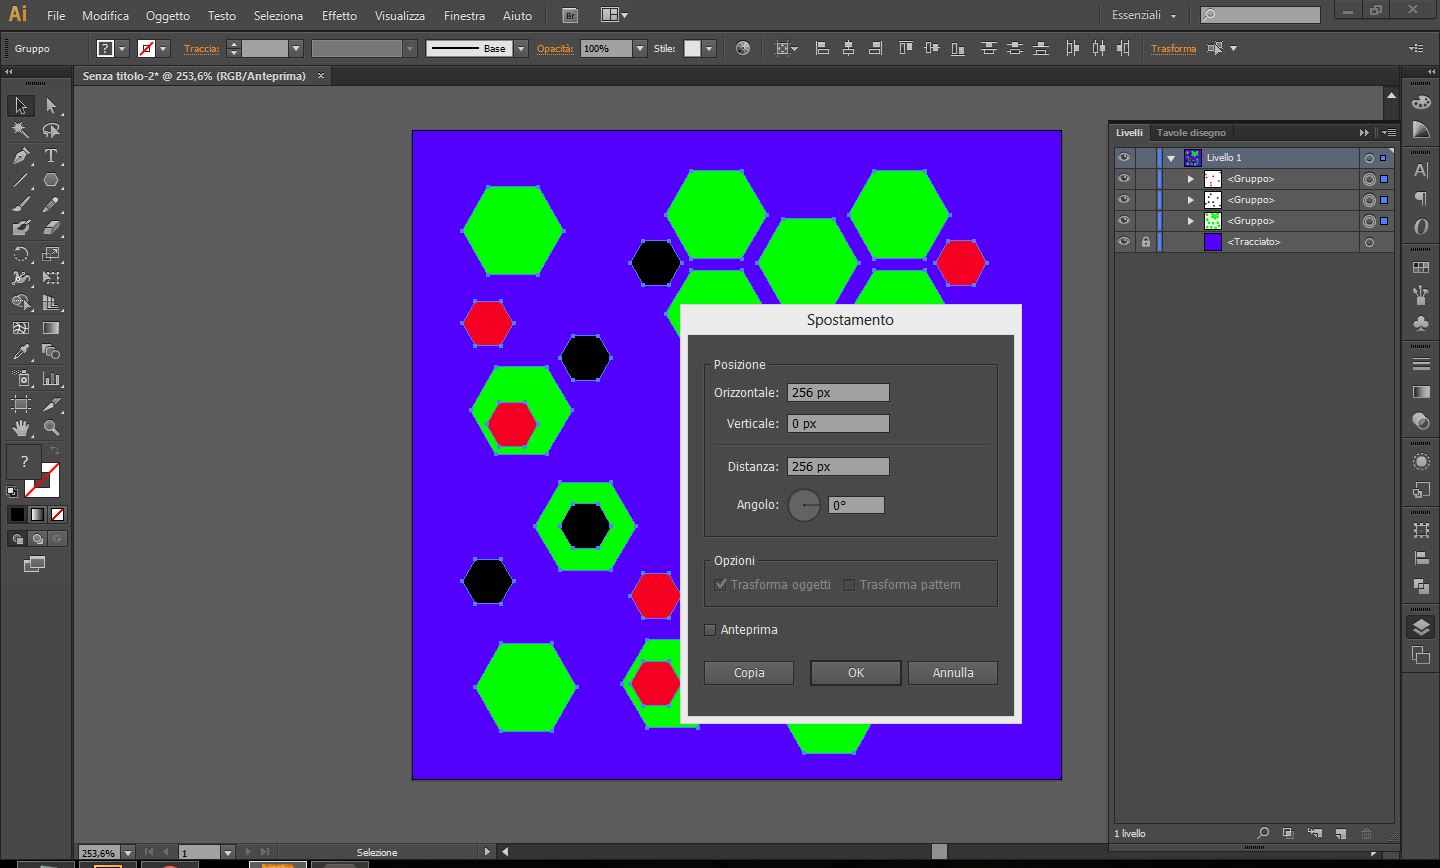
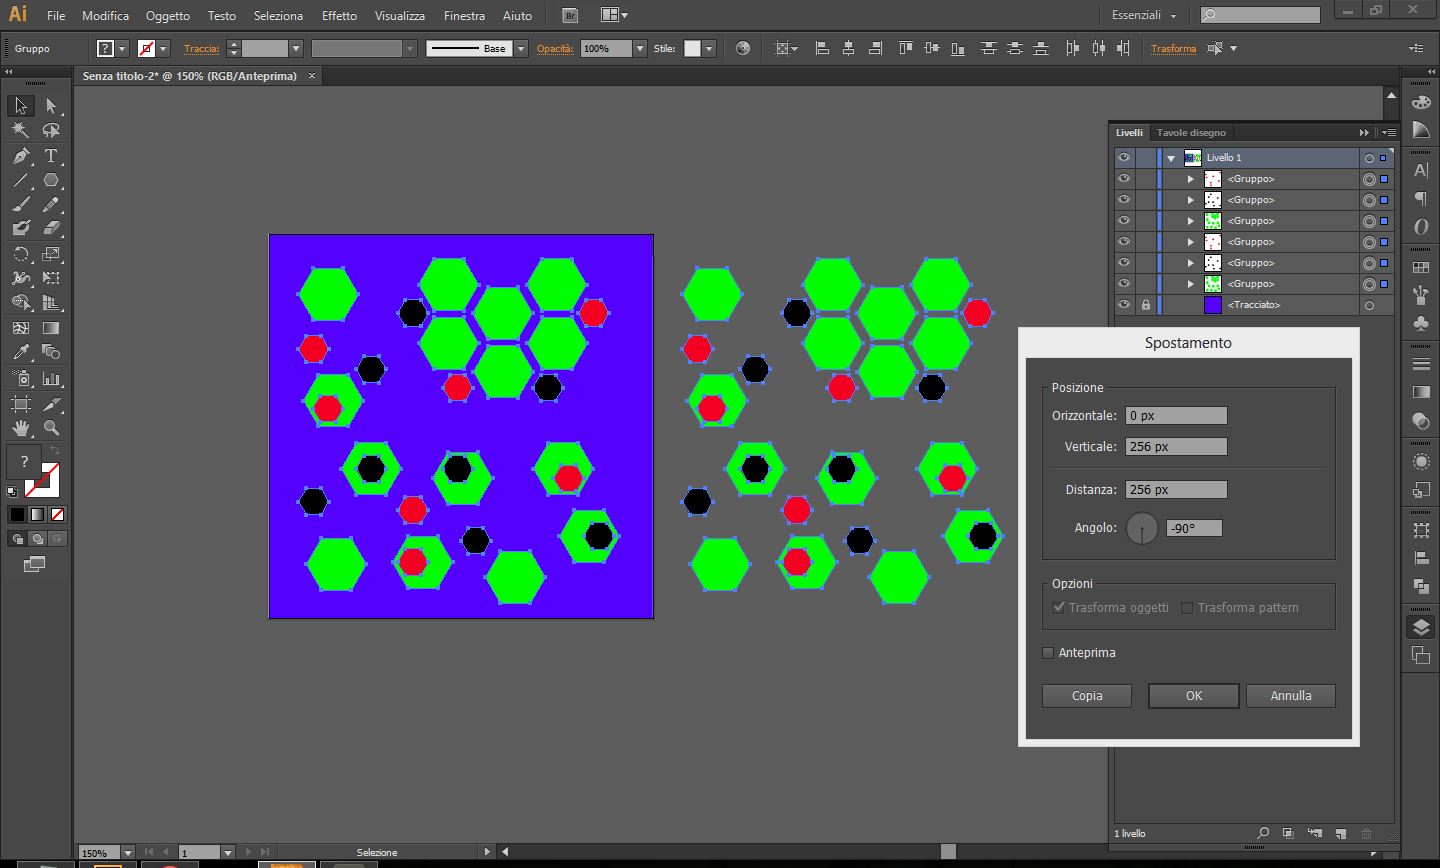
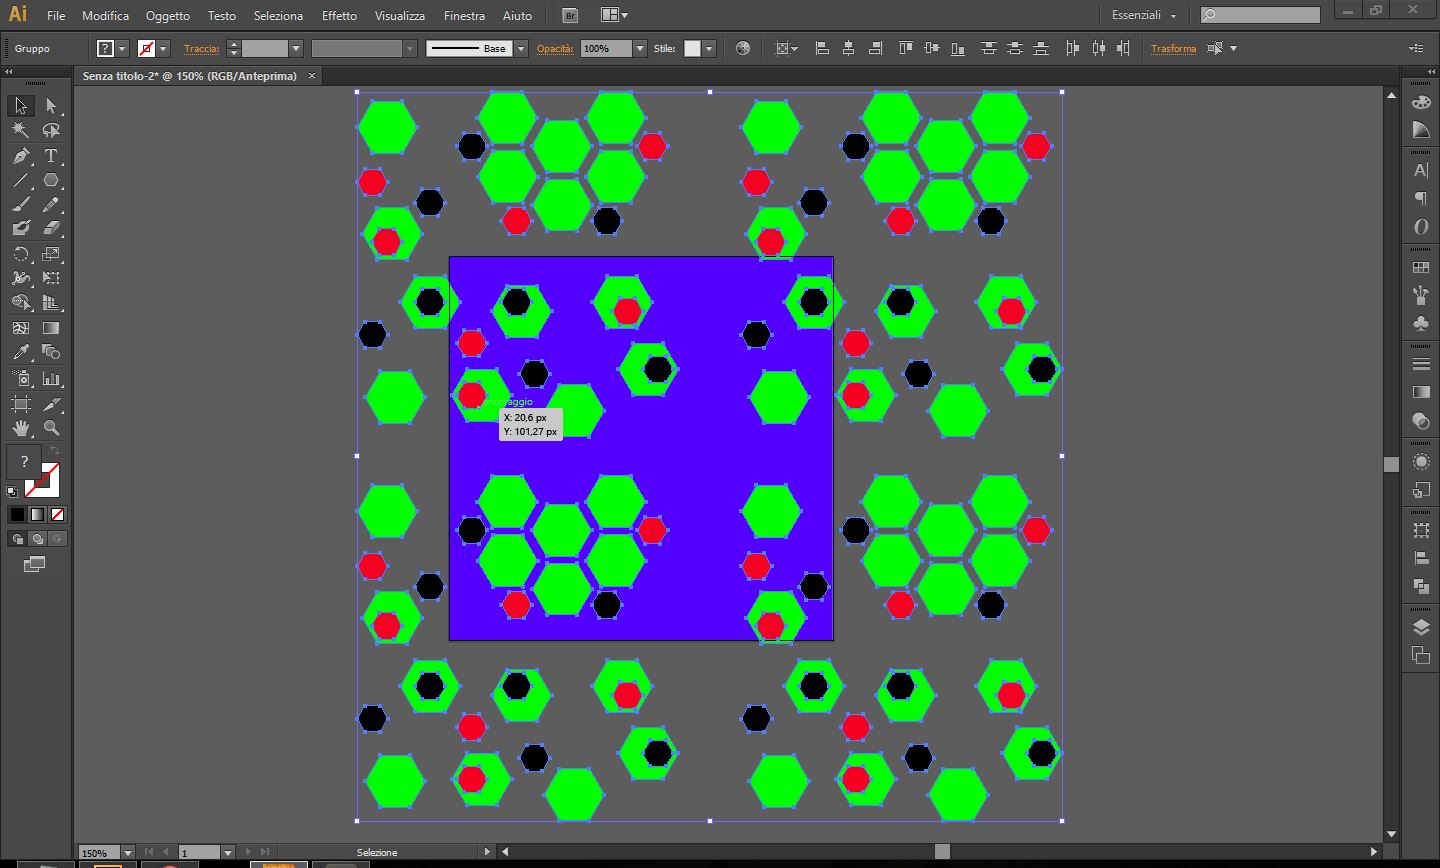
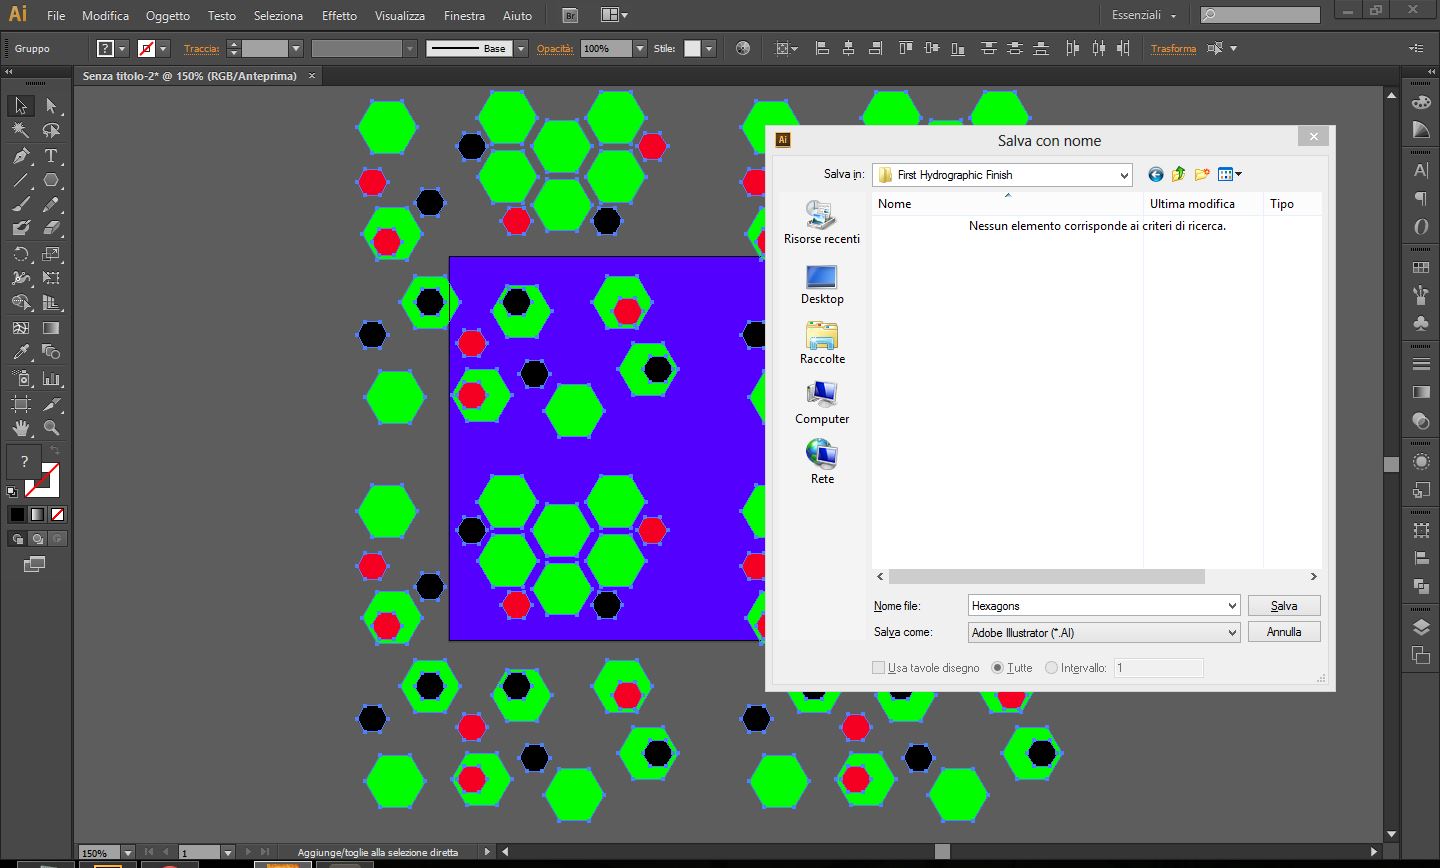
Illustrator free alternative = Inkscape
JungleFett 18 Jul, 2017 @ 7:09pm 
can you update this and have the patina, gunsmith and custom paint job styles? would be very helpful :2017stickyorange:
Banjo 3 Jul, 2017 @ 4:00am 
hey im new to the csgo skin making is there any one out there willing to help a friend


~purple~
Microsoft Excel 22 Jun, 2017 @ 3:01am 
bel tutorial, ho una domanda però, c'è un modo per fare che una skin cambi colore col cambiare del wear?
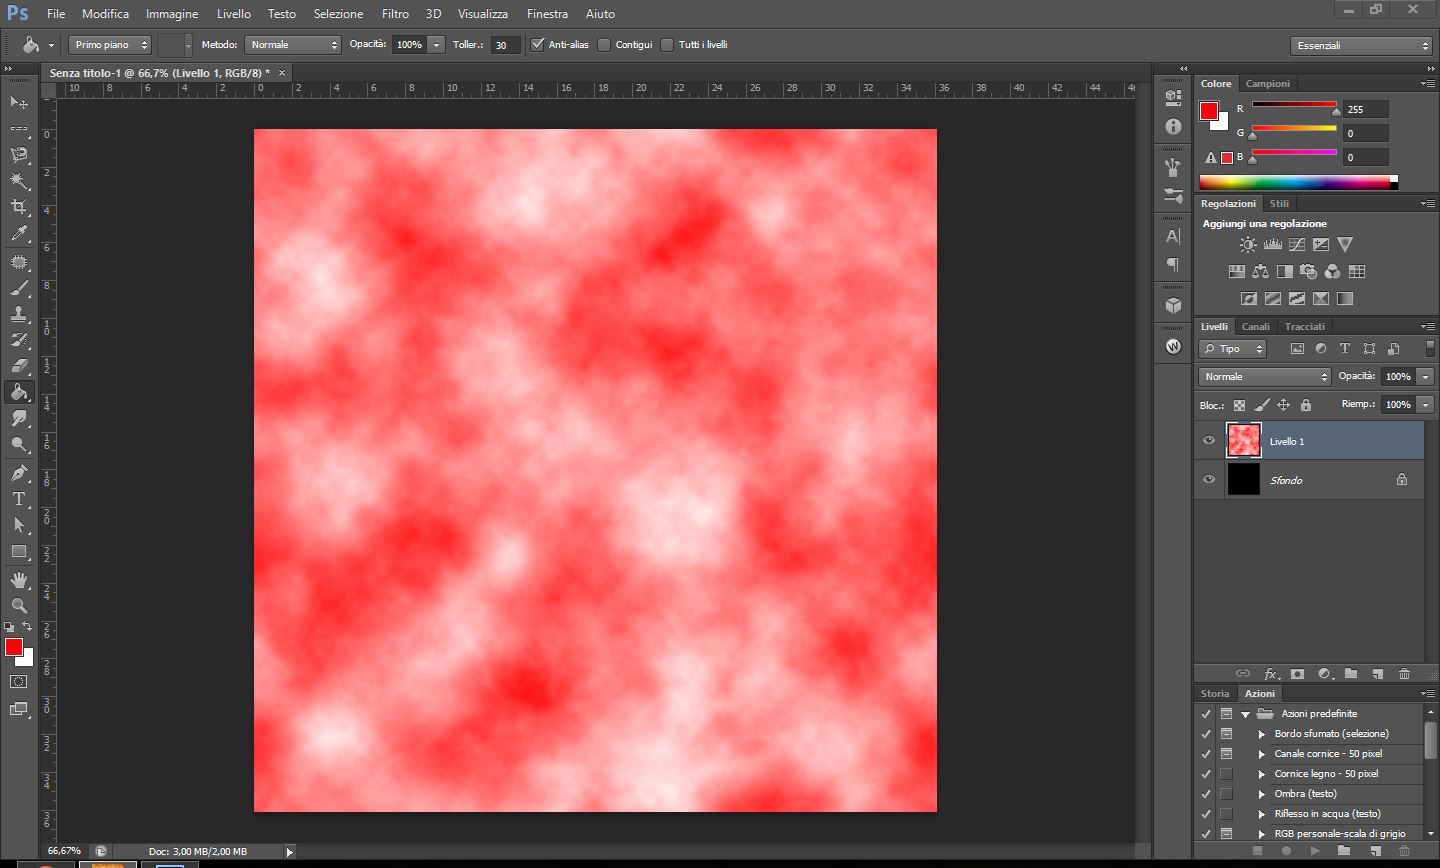
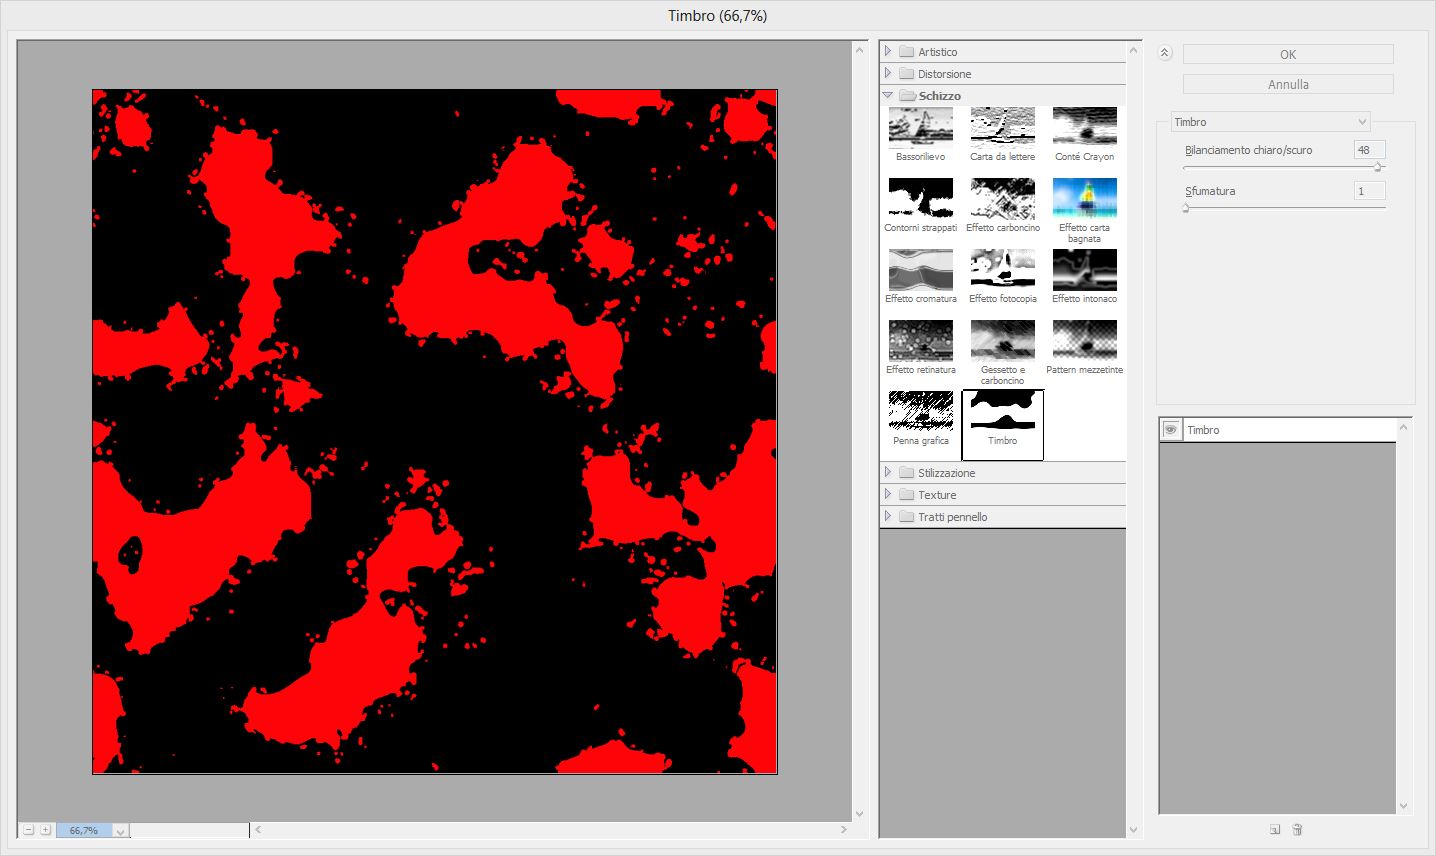
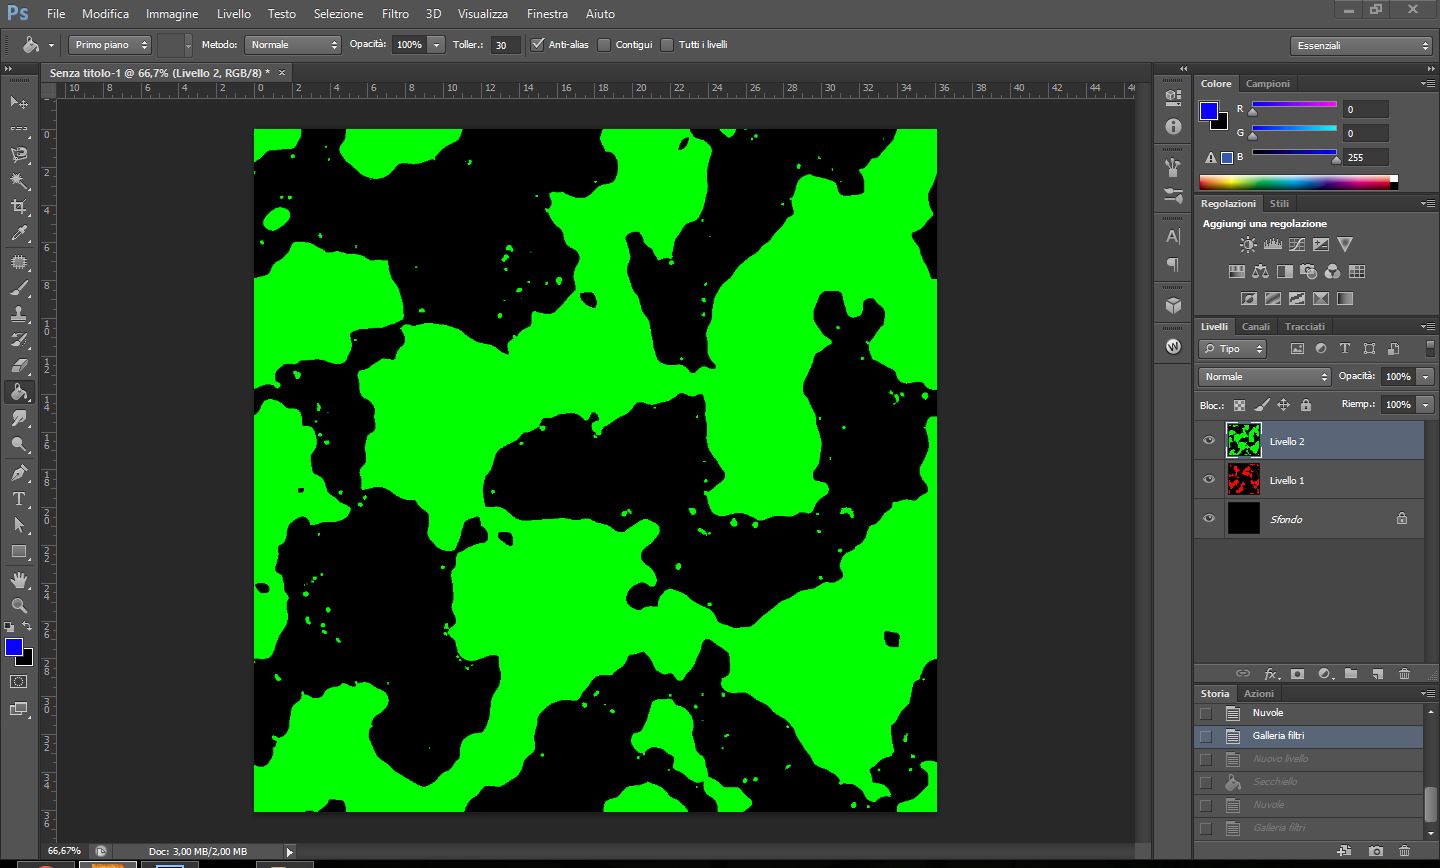
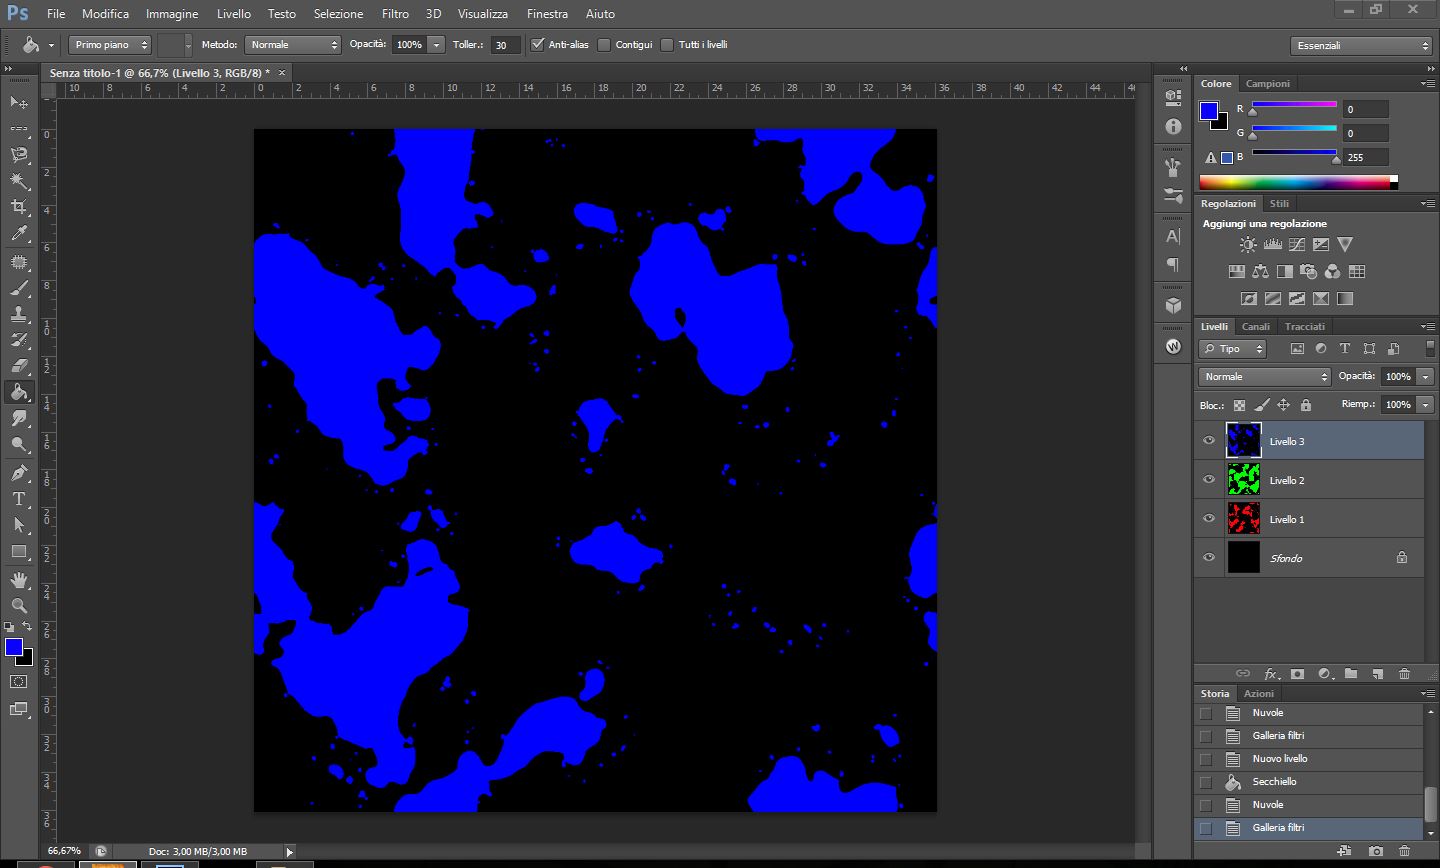
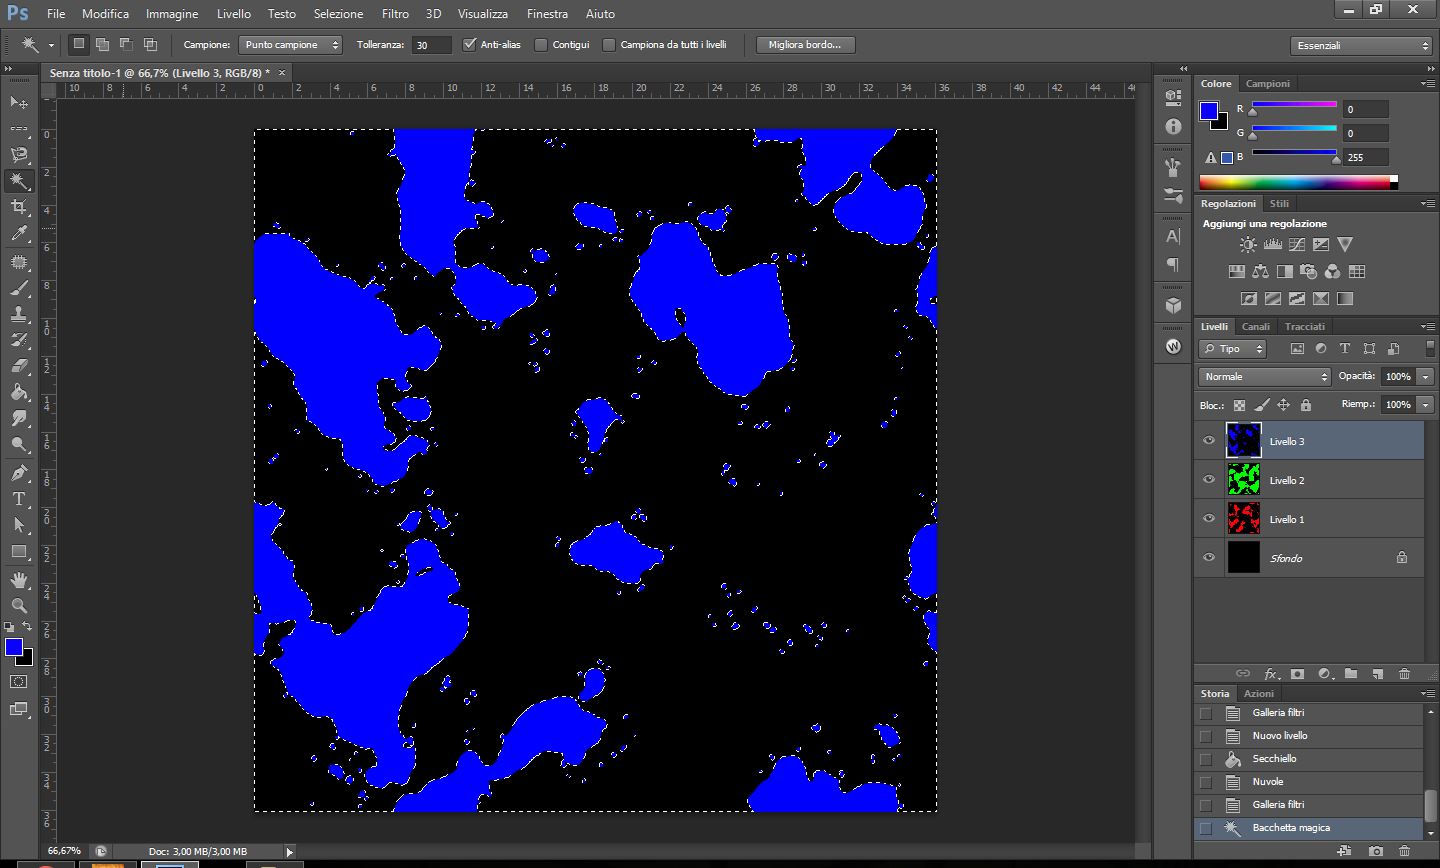
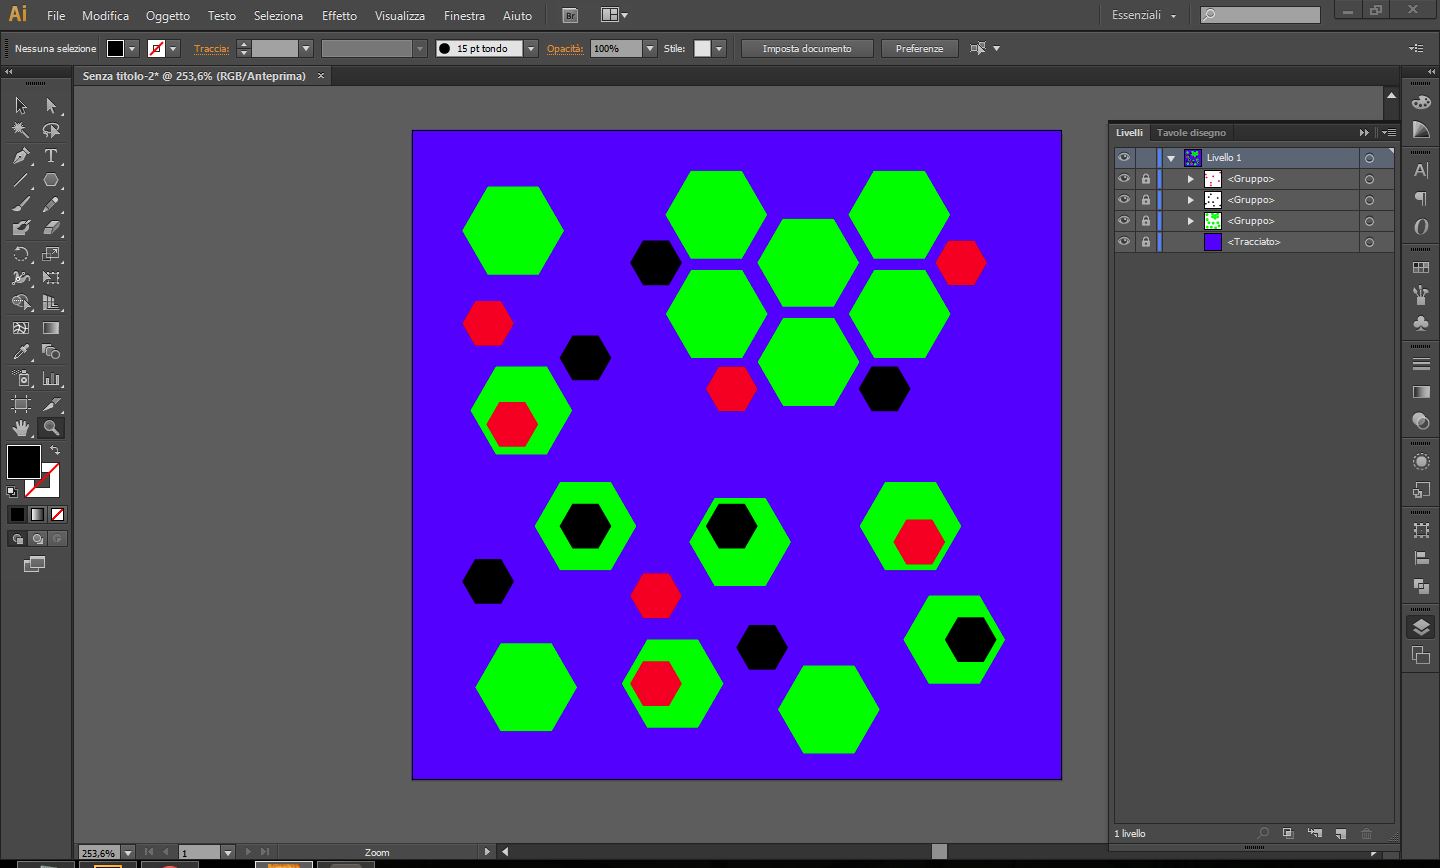
Per esempio, una nova con un cerchio nero in mezzo con un glow effect rosso, vorrei che quel glow cambiasse in blu, poi verde e così via ogni volta che cambia wear, c'è un modo per farlo o?
ArbréMajique54 8 Apr, 2017 @ 1:06am 
Solo adesso mi sono accorto che sei italiano!! Ne approfitto per ringraziarti in madrelingua... ora so fare le skin :)
swine 1 Mar, 2017 @ 10:43am 
This was the first guide that allowed me to use all the different types of finish in one, and it turned out fantastic: http://sp.zhabite.com/sharedfiles/filedetails/?id=874883571